Posted on

Drystane dyke repair

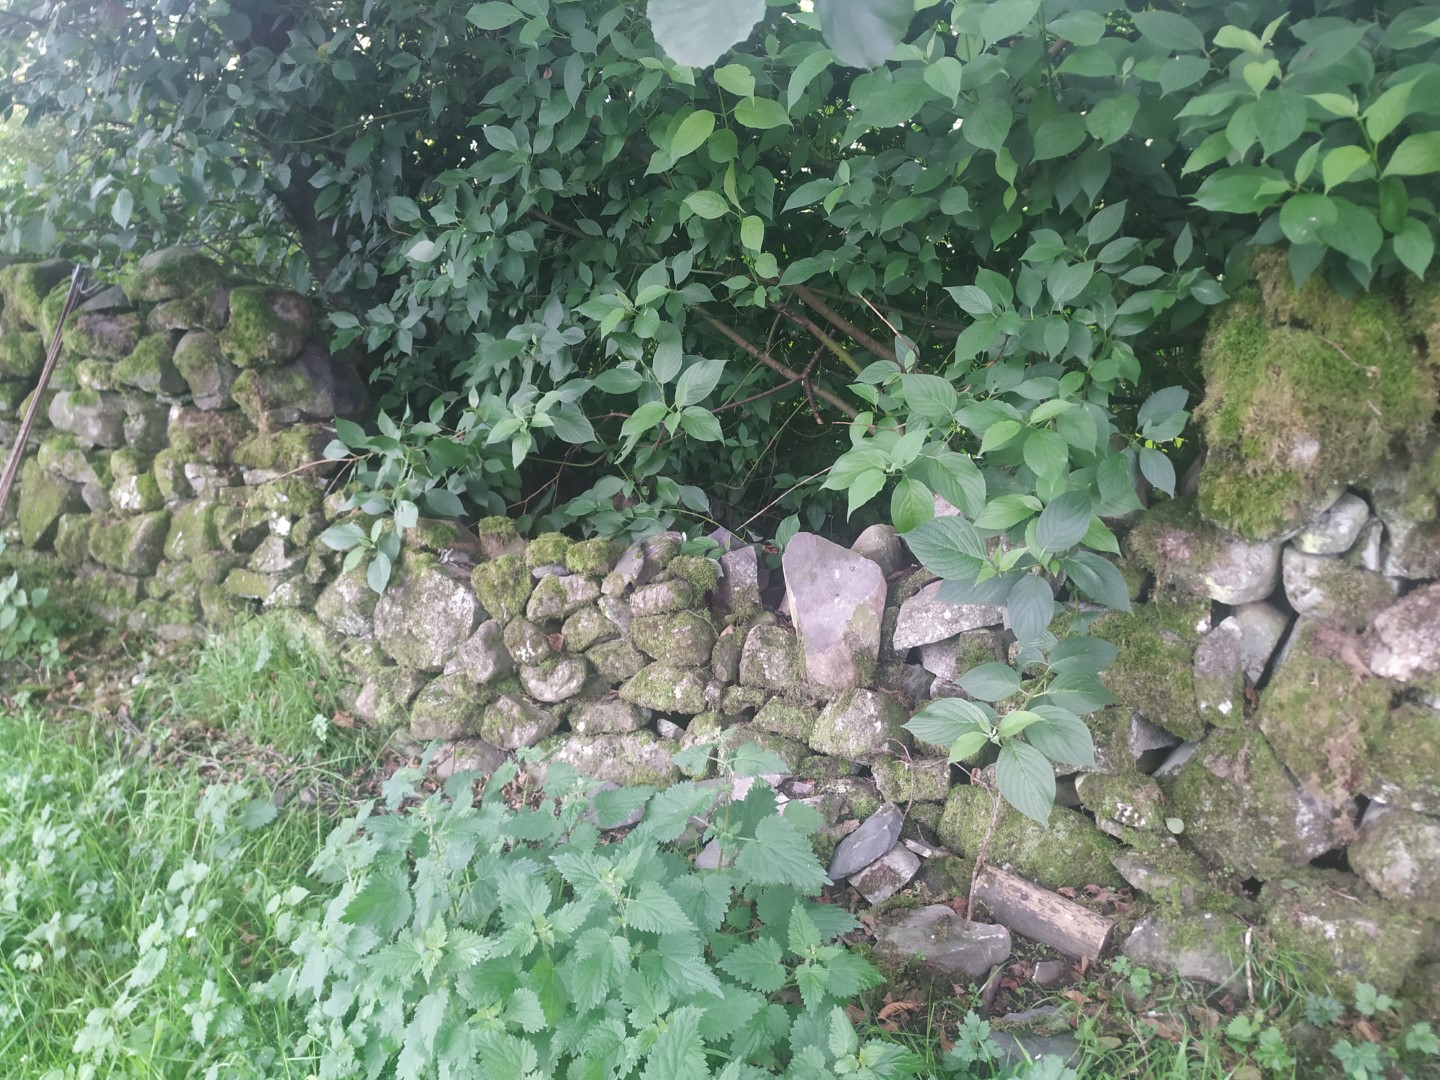
This is not the the first story about drystane dykes and probably won’t be the last. Most of the ground here is soft and so, over time, the dykes subside. Given a dry stone dyke is essentially two walls leaning against each other, if one side sinks faster than the other, then all those stones that started out level start to tip. Over time, it becomes more unstable until the merest puff of wind can blow it over.

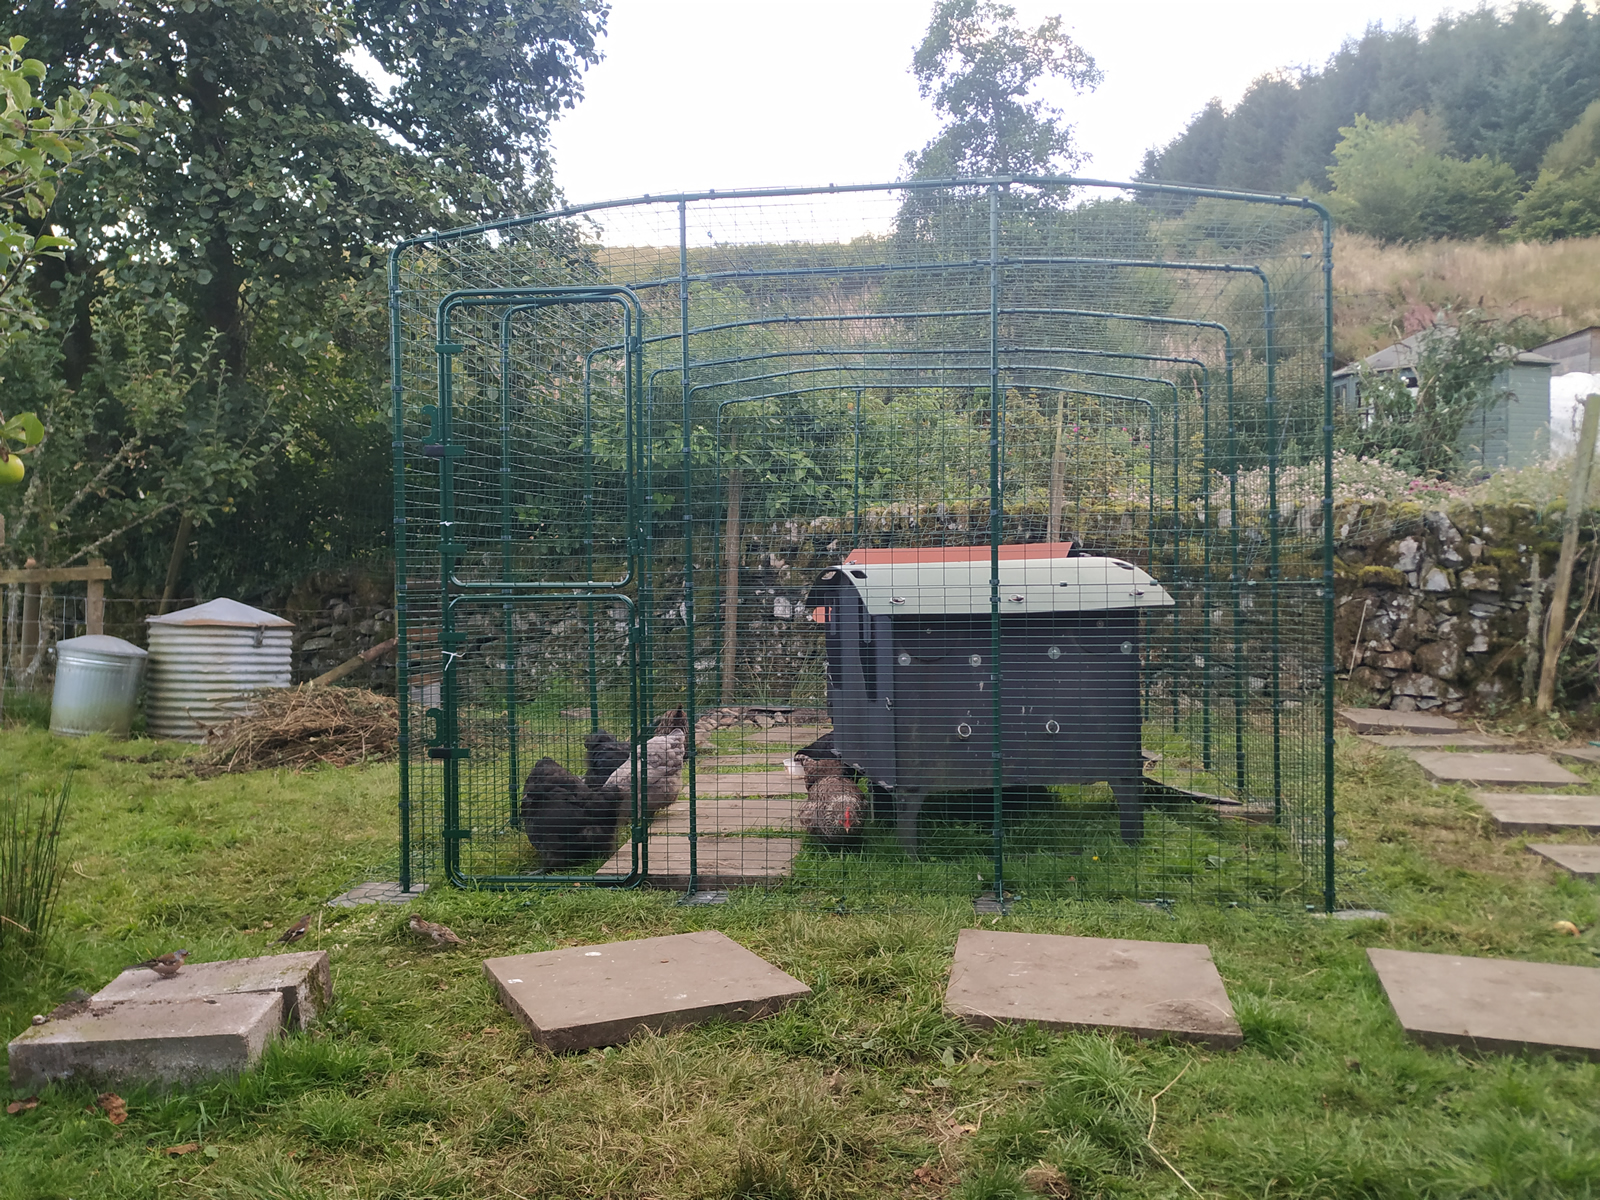
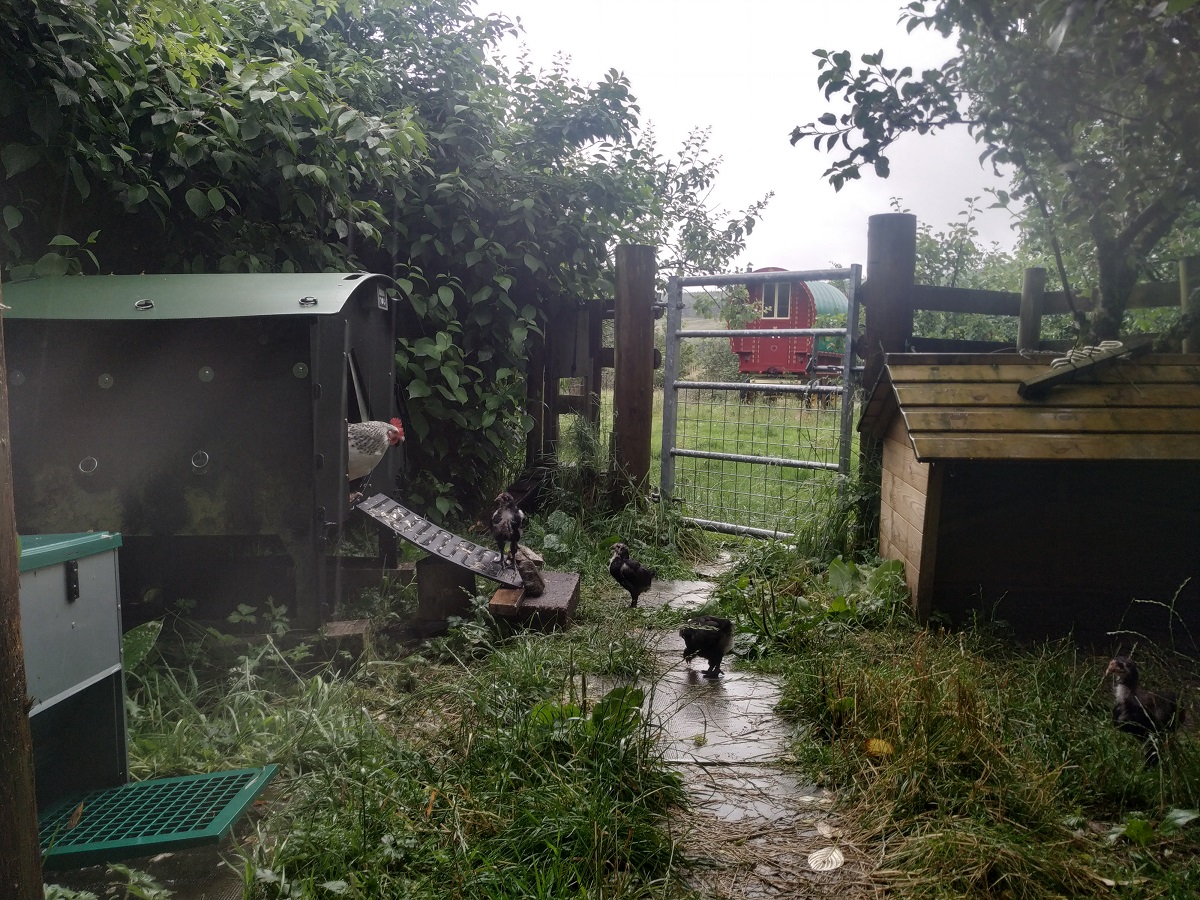
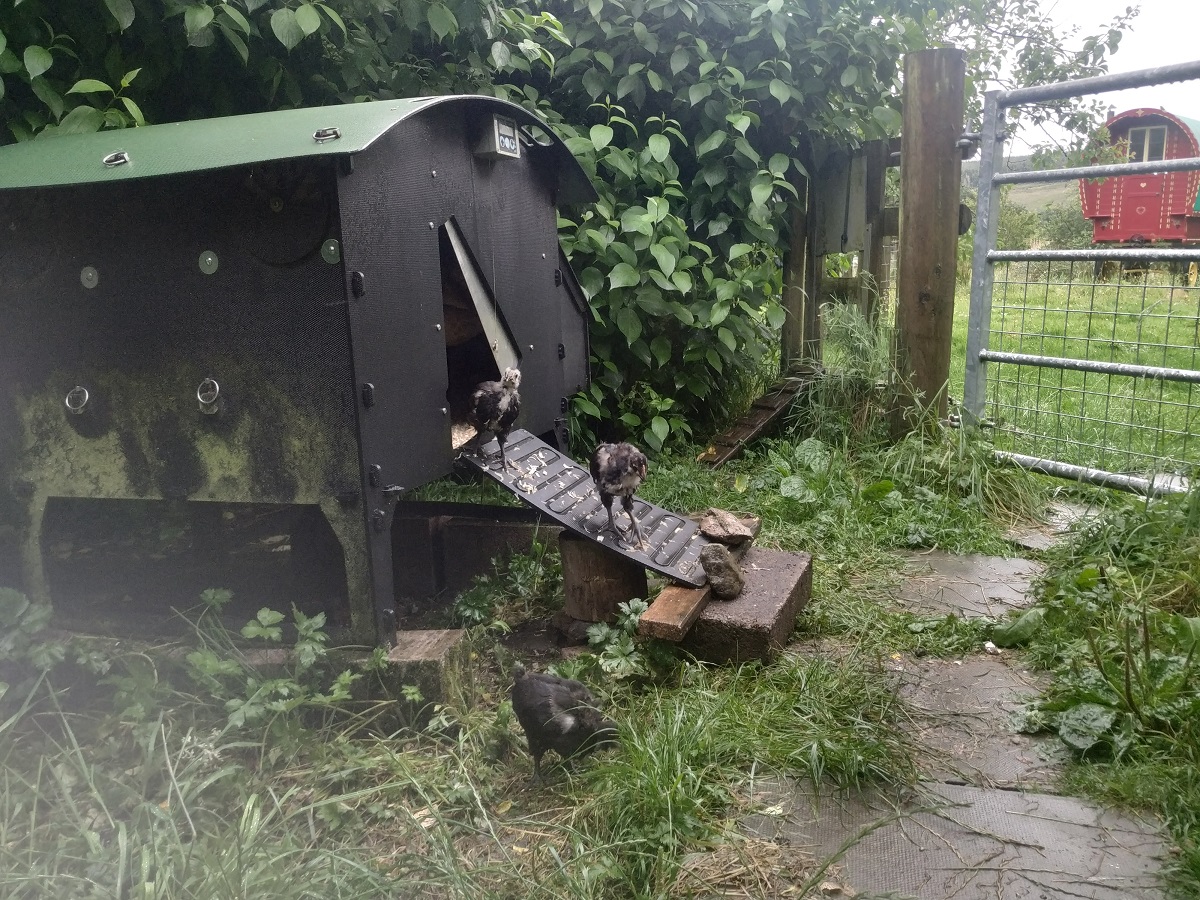
In this case, though, I have only myself to blame. In an effort to keep the hens out of the garden, we erected some netting to stop them flying onto the wall. It was held up by long stobs. All fine, you might have thought, but the wind caused the net and stobs to sway and tap, tap, tap they went on the wall. Eventually, it was one tap too many and down it went. Strangely, although in plain view, the only animal to take advantage was Elliot who trundled through to check out the paddocks for intruders.

drystane dyke repair
sorting the stones

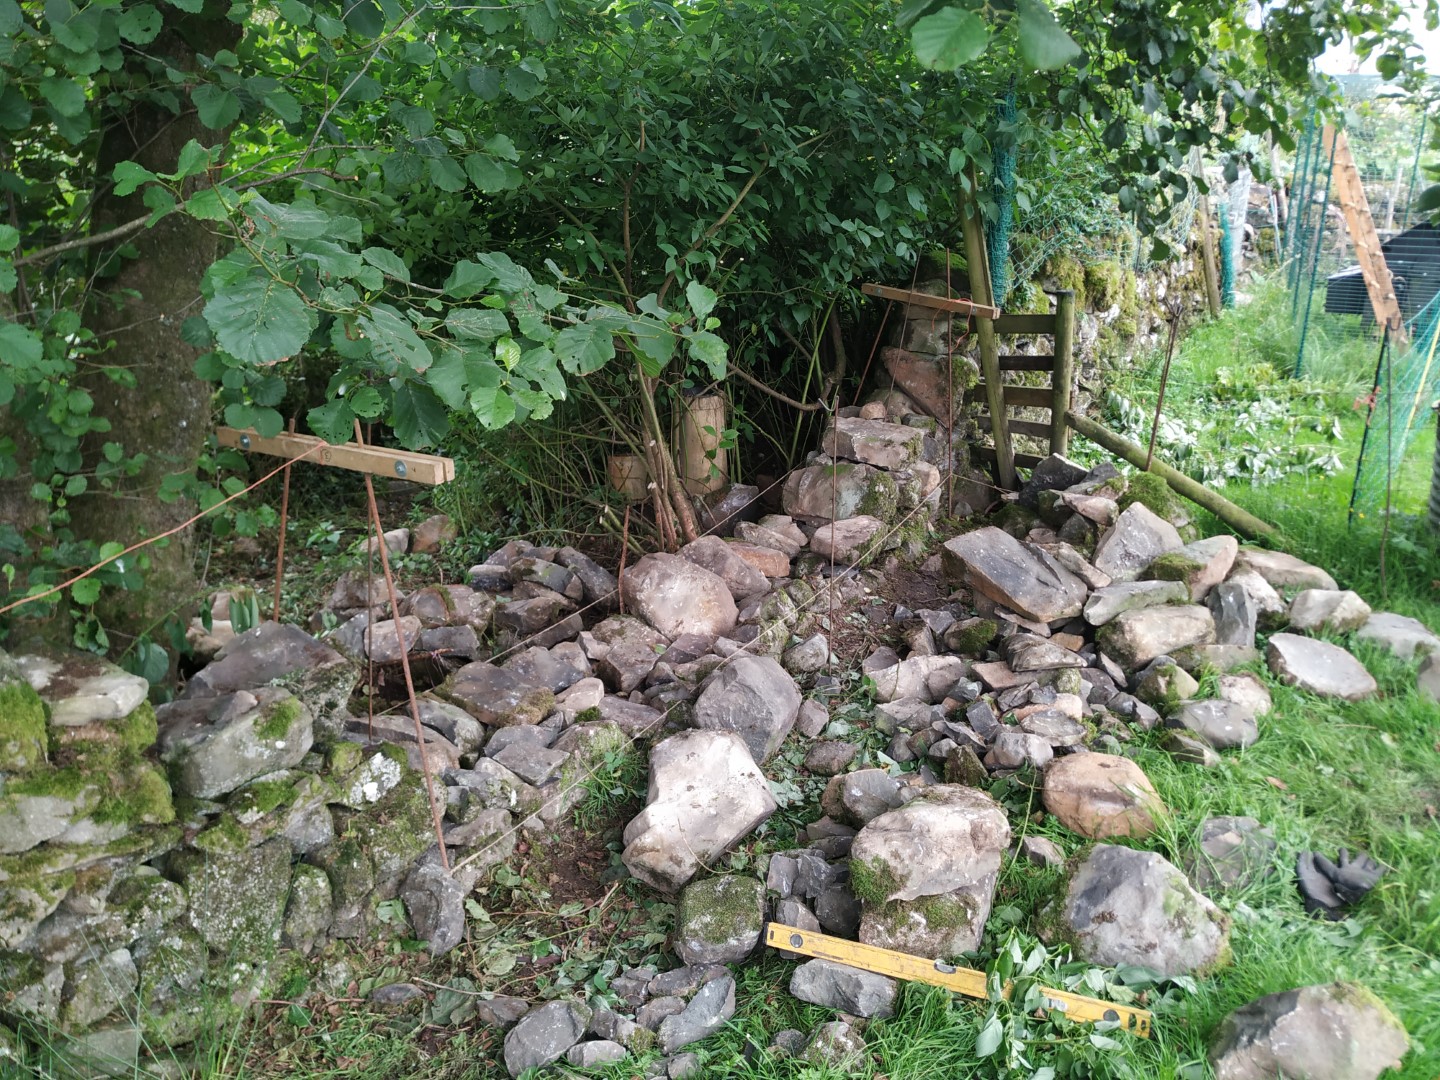
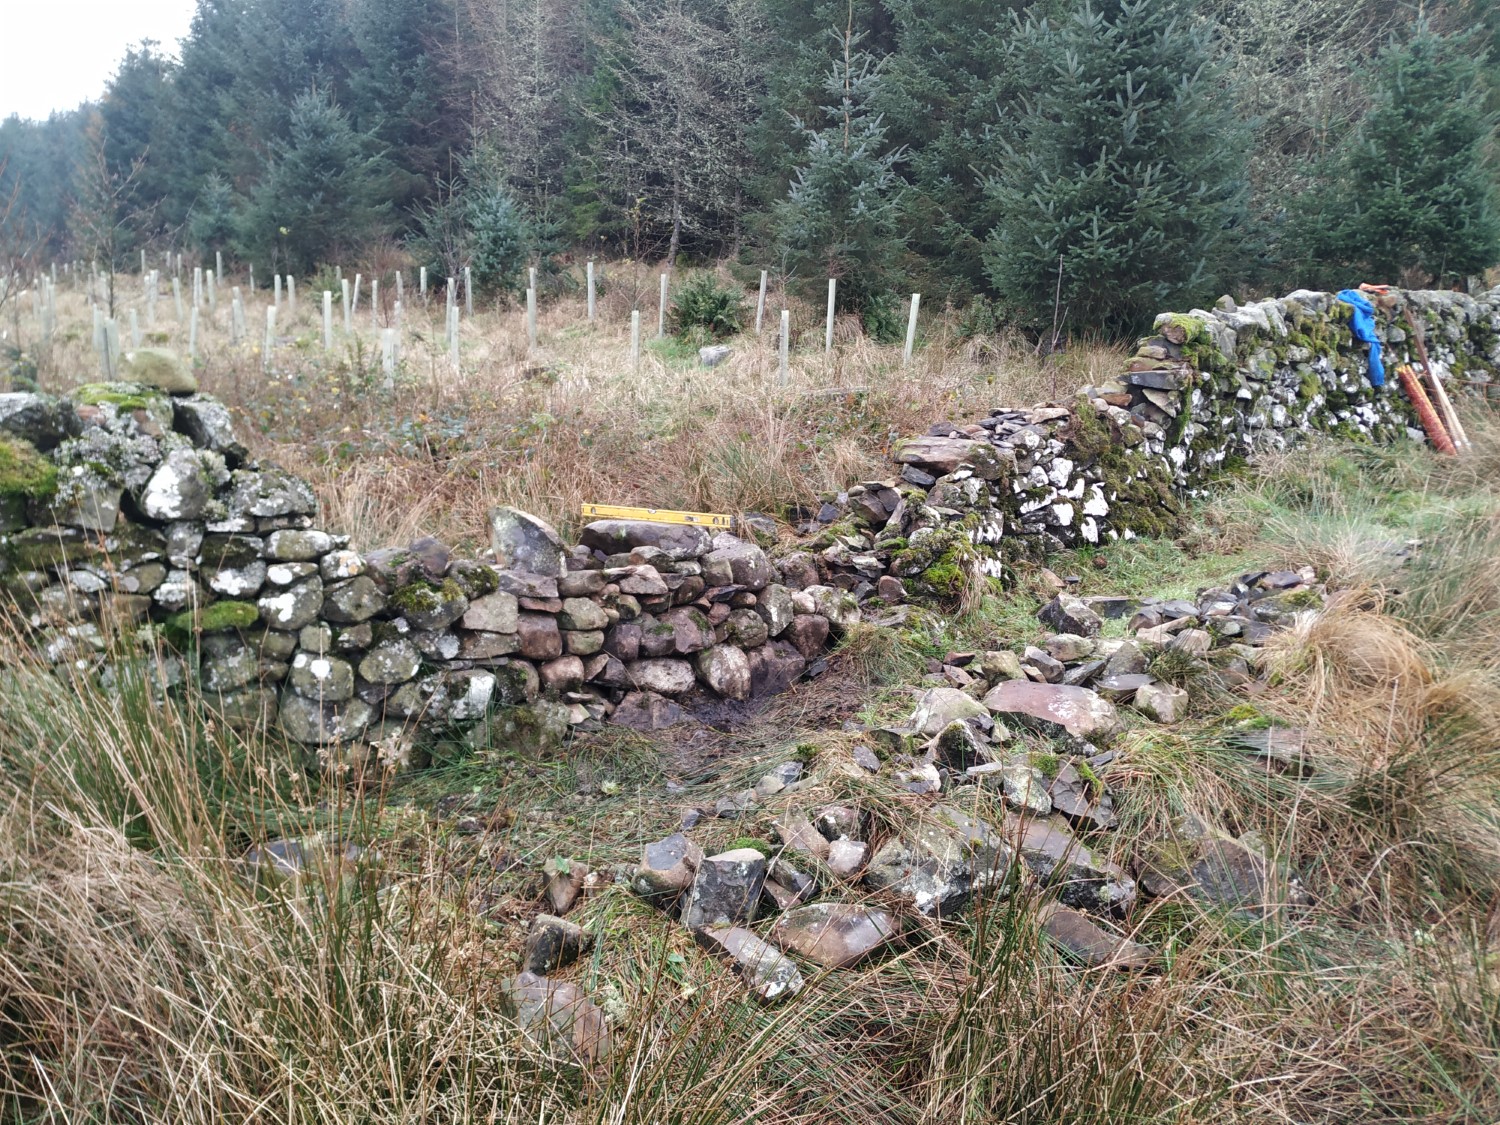
Working full time now, I had only the weekends to repair this. As ever, first thing was to sort out the mess of stones. It’s always a good idea to keep the top stones (coping stones) and through stones to one side. The coping stones that were there before the collapse can be identified by the way the moss has grown on them. It’s also a good idea to keep a passage clear either side of the dyke, though I have to admit I tend to leave some of the heavier beasties (my terminology for big stones) close by. Of course, these badly placed stones did try to catch me out and I nearly went flying a couple of times. Nearly!

drystane dyke repair
foundations

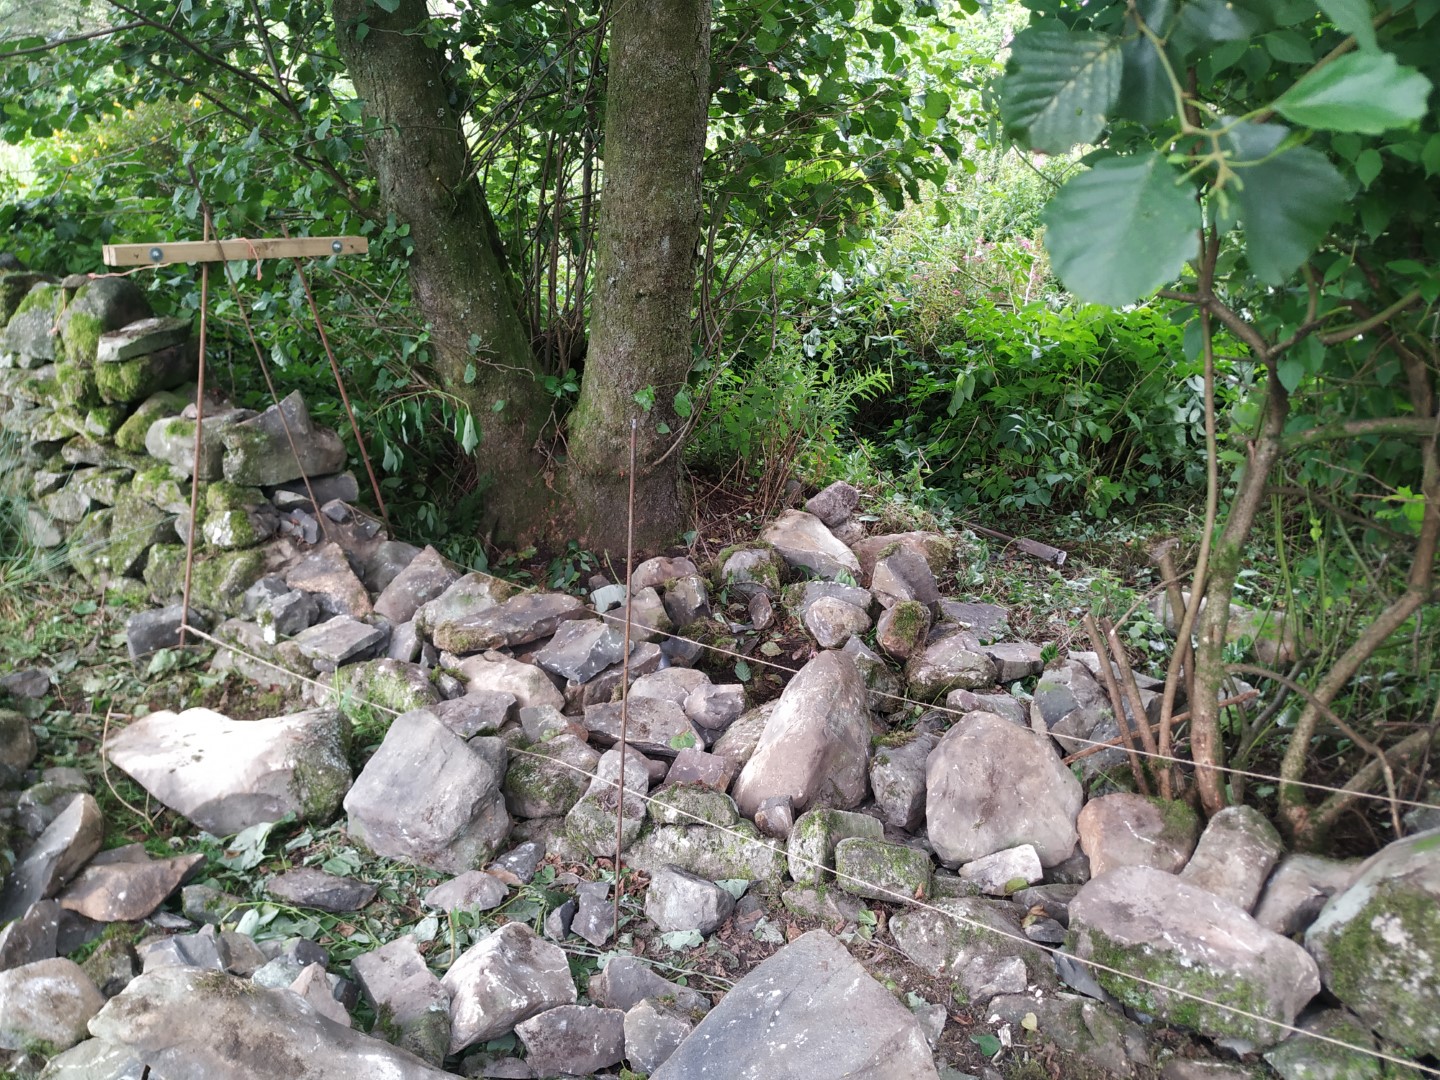
Stones sorted, next step is to sort out the foundations. The original wall was not really high enough so I took the opportunity to build wider foundations. These should be half the height of the wall. These were tapered as one end was 4 feet high and the other 4 feet 6 inches. Hard to use metric measures with walls, given their age.

Of course, wider and taller meant more stones, lots more stones. Fortunately, there were some lying on the ground nearby I could use.

As you can see from the photos, I erected an ‘A-frame’ with string so as to get a straight wall. Also, the keen eyed amongst you might see some metal poles protruding. These will form the supports for the new hen netting. Built into the wall, they will be discrete. The netting itself will only be a few inches high, it’s all it needs really.

rebuild underway

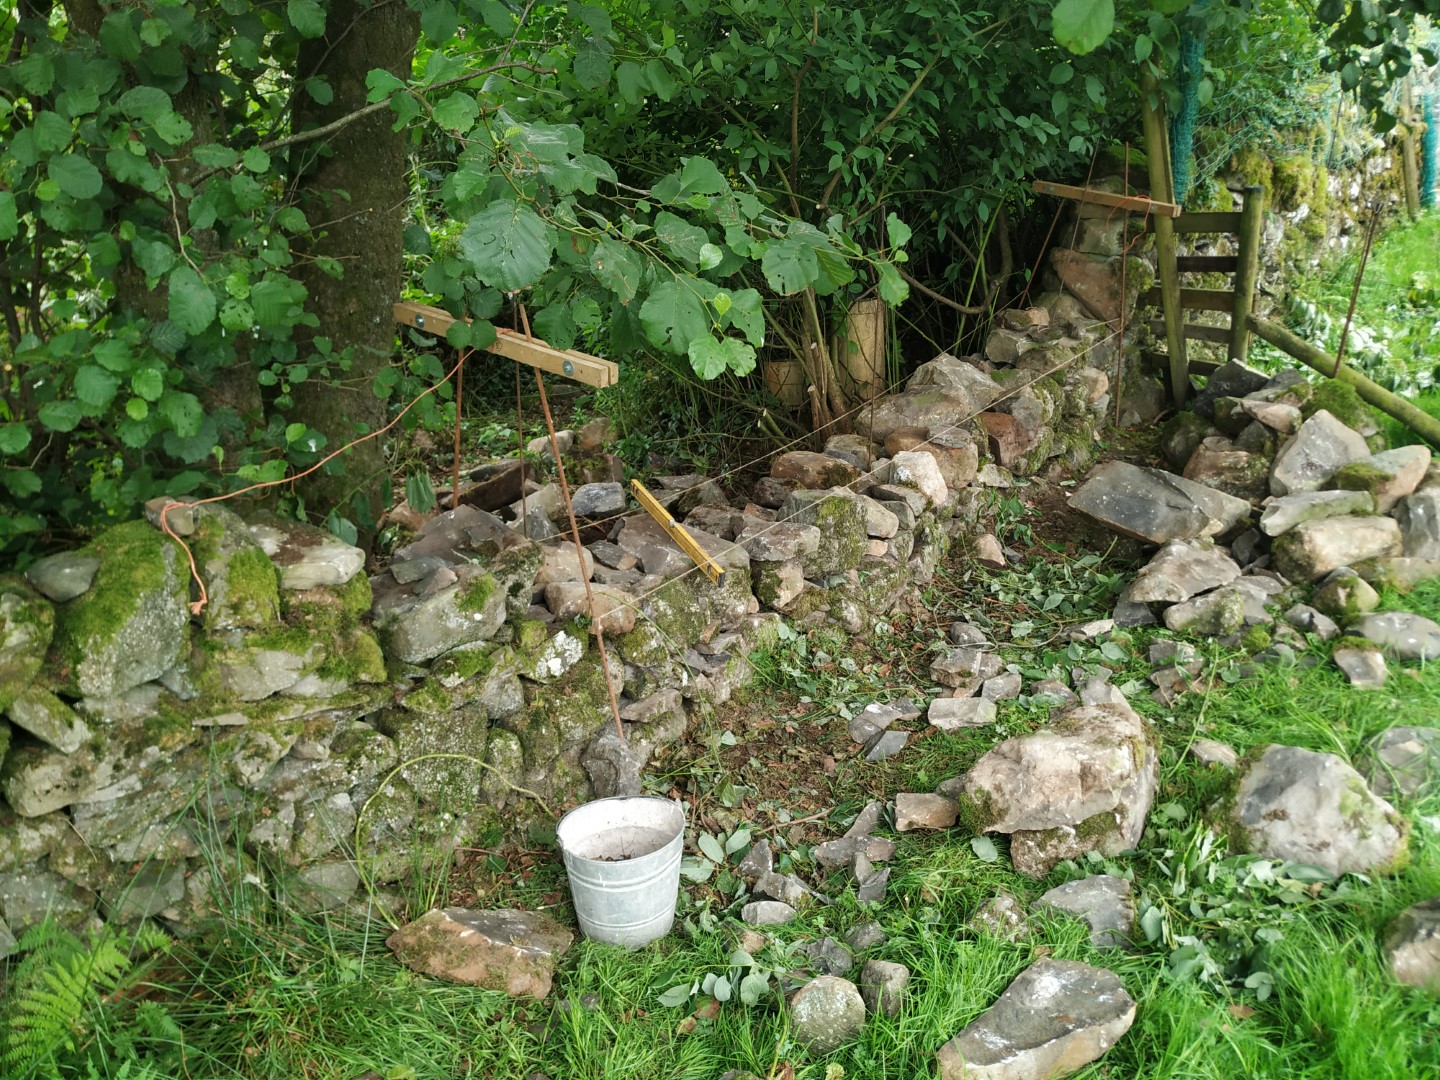
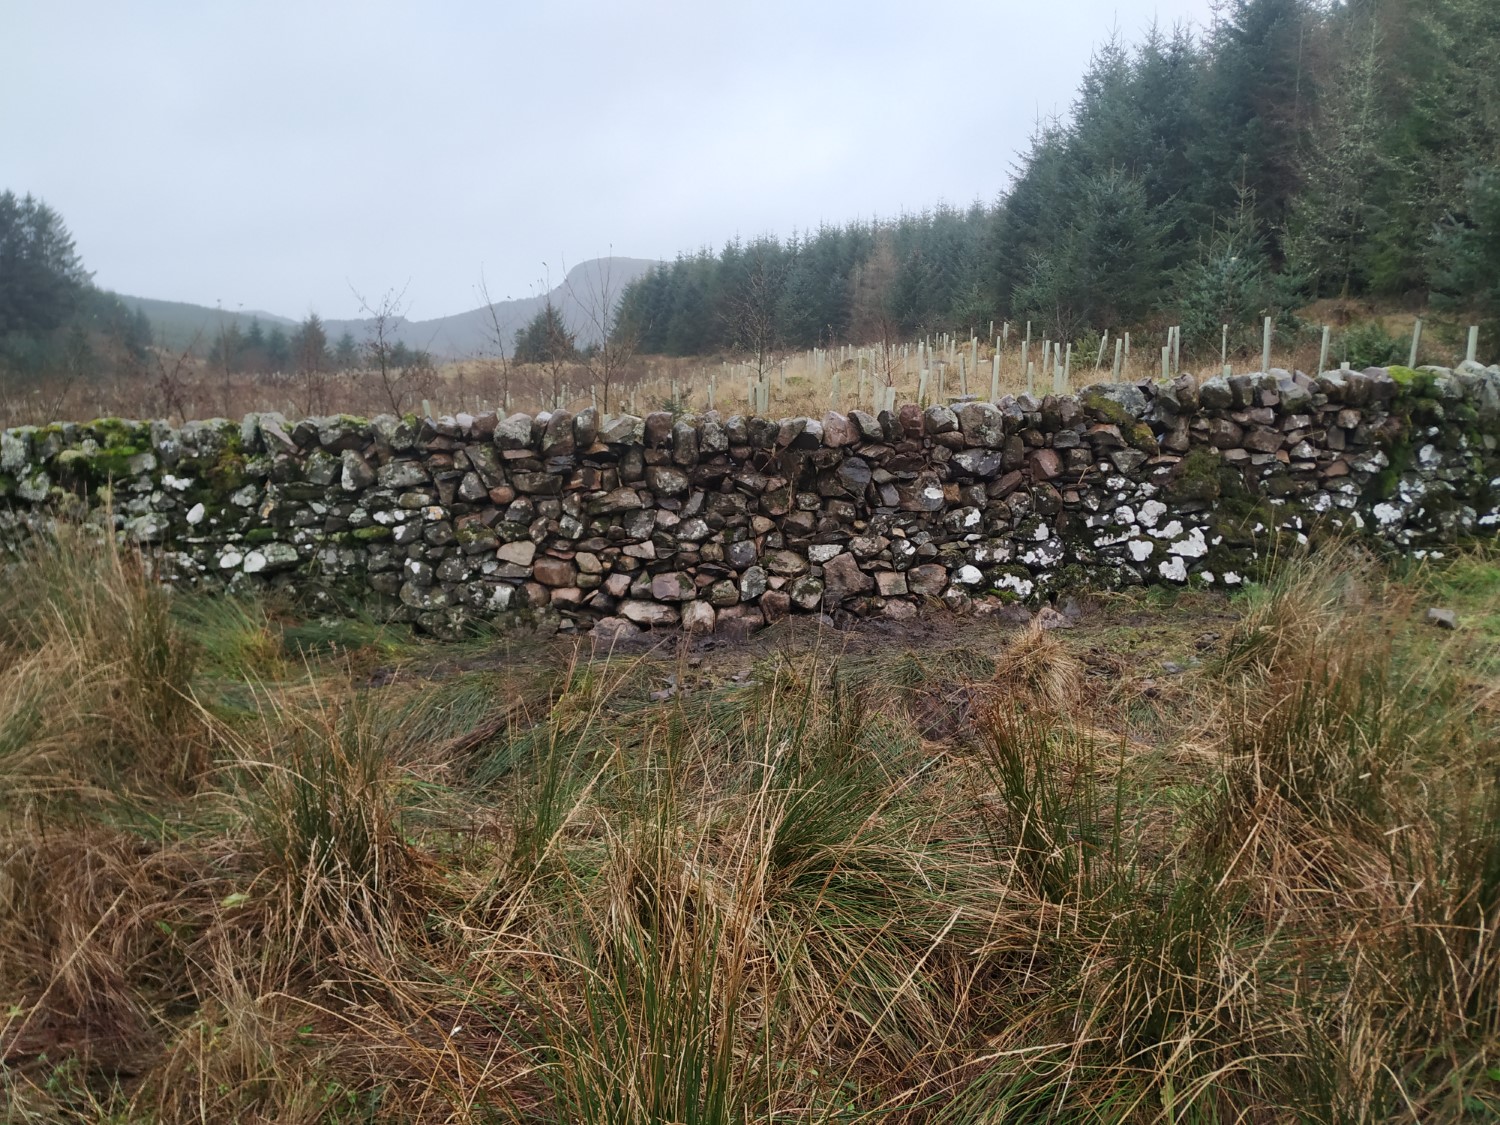
From then on, it’s just effort combined with an eye for which stone will best go where. Although hard work, I enjoy building drystane dykes, they are almost works of art. It is immensely satisfying to see them grow, particularly when you get to the top.

half way there

For this rebuild, I was blessed with a few decent days of dry weather combined with a long weekend I’d booked as holiday, so I made good progress.

In the midst of this was our tenth wedding anniversary and I’d bought a sneaky bottle of champagne which went down a treat. I added the bottle (empty of course) into the wall as a feature. You can see it in the picture to the bottom right.

I was pretty tired when I finished it because, as is my way, is I got closer, I just kept going, stopping only for a brief cup of tea and a quick lunch. Luckily the sun was out so I collapsed into a chair with another cuppa and a book. The day was nicely rounded off off with a bottle of cava and a pizza.

finished
finished
Posted on Leave a comment

Tawny Owl Box

Pretty much every night we hear tawny owls at some point. Recently, they have been hooting all around us as we take the dogs out for their evening stroll. For some time, I have been telling myself I should put up an owl box.

Back when the weather was warmer and the ground not white, I actually constructed one. I looked at a few designs and settled on the one provided by the RSPB. Well, I am a fellow of the RSPB so it seemed only right. Plus I liked the roosting bar. It didn’t take long to make and, with three coats of wood preserver applied to the outside, it was ready. I put it in the shed where it sat patiently as the weeks went by. I kept telling myself to get it in place sooner rather than later as the owls would need time to get used to it. Leaving it to the spring would be too late.

tawny owl boxLast Sunday, I grabbed the bull by the horns, or the ladder by the rungs, and got ready to put it up. I had found the perfect spot, on a large tree trunk at the edge of some woodland. It’s also quite close to the house so easy to monitor, but not too close (tawny owls can be a little territorial in the breeding season). Of course, I couldn’t get the ladder in place, it being heavy and the tree unobliging. Thankfully, our neighbour was on hand to help. Ladder set, I forced my dislike of heights to one side and scurried up. Perched carefully on the top rung but two, I apologised to the tree and put in a nail as gently as I could.

I scurried back down, picked up the box and, a little more gingerly, headed back up. I should point out that the ladder was kind of leaning a little to the right beyond which was a steep slope down to a river. It was also frosty and slippy. These thoughts were at the forefront of my mind as the tree did everything it could to block my progress by snagging the owl box in its branches. Taking deep breaths, I negotiated the three dimensional puzzle posed by random twigs and the long owl roosting bar. It was tempting to lean back, but…

Anyway, that was the easy part. The hard part was getting the owl box in place, i.e. trying to hook it over the nail. Cue much random manoeuvring of said box with increasingly burning arms and interesting vocabulary. Finally, more by luck than design, it popped into place. I secured it, then made my back to terra firma to admire my handiwork.

Now, it’s wait and see, but hopefully it will be used by owls next spring.

Posted on Leave a comment

Dry Stane Dyke Rebuilt

dry stone dyke repairs

One of the common themes of this blog is the repair of dry stane dykes (dry stone walls). Most of these repairs are carried out in order to keep the sheep in, but some are just because we like these walls and want them to look good.

dry stane dyke falling down

The latest section needing repair was at the far corner of one of the fields. As ever, a small section had crumbled but repairs extended quite far in both directions. In fact, this wall is very old and there has been a lot of subsidence, so much of it is teetering on the brink of collapse. Finding an upright section either side of the crumbling part was something of a challenge.

dry stone dyke - section to be repaired
dry stone dyke – section to be repaired

In the end, I had to take down around 6.5 metres. Being a boundary wall, it was 1.5 metres tall (5 feet), so that meant moving a lot of stone. A rough calculation showed it to be about 5,000Kg (5 tons). On top of that, it was built in the Galloway style which means big stones near the top. I made sure to keep my feet well clear as those stones were taken down.

As ever, the demolition phase was not too hard, the most strenuous part being carrying the the top stones a few metres to one side. I always keep them in a line so I know I’ll have enough nice stones to finish the top of the wall when I get there. In this case, a drainage ditch forced me to carry them a little further than usual.

dry stone dyke stones layout

The big beasties I lined up close to the wall (on the far side, so not visible in the pictures). The rest I piled up nearby ready so they would be close at hand.

Over a few days in various weather conditions (from sunny to windy rain), I built the layers up. The ground was very soft and soon turned to mud. I found myself sinking from time to time as I attempted to lift larger stones onto the wall.

dry stone dyke - big stones on top
dry stone dyke – big stones on top

The big stones that went onto the top section I did in one session. I just picked them up and manoeuvred them into place, one at a time, hoping they would fit together nicely. It seems to have worked. Only one or two gave me grief, doing their best to slide off and land on my feet. They were the biggest two and needed some clever lifting to get them up there given the wall was around a metre high at that point.

dry stone dyke - repaired
dry stone dyke – repaired

For the final section, I brought in some additional stones, just in case. A huge pile seems to evaporate when fitted neatly together. It was good forward thinking as I ended up using them all.

Despite the weather morphing from bright sunshine to blustery rain and the impatient whining of Elliot, who found the whole process a bit of a bore, I persevered and got it finished. It is always tricky to get the top stones aligned neatly, but ultimately very satisfying.

Usually, I sit down and admire my work a while when I finish, but inclement weather and impatient dogs persuaded me to head back the moment the last stone was in place. I shall have to make do with the photos on this one.

dry stone dyke repaired - front view
dry stone dyke repaired – front view
Posted on Leave a comment

Splish Splash

It has not been the driest of summers which has had it’s good and bad points. However, it has been one of the wettest of Octobers I can remember. Someone turned the rain tap on and has forgotten to turn it off again.

more puddlesThe ground has been turned from firm grassland into puddles. This is particularly true of the flatter areas where water settles having flowed down the hill. Sadly, there’s not much we can do about it except hope for some dry weather to give it all a chance to drain.

puddlesIt’s not great for the animals. The hens gather and huddle in their shelters, trying to keep dry. The sheep venture out to find grass (plenty of that), but retire to dry off in one of their field shelters.

We’re having to keep a close eye on the sheep’s hooves, checking for signs of foot rot which can flare up in these conditions.

And autumn planting of garlic has been postpones lest the bulbs float away.

In the woodland, the drainage ditches are full but doing their job. Anyway, that’s the way it is in SW Scotland, either too much water or too little.

Thank heavens for wellie boots :).

woodland in autumn
woodland in autumn
Posted on Leave a comment

Harvest Time

The harvest rush has been on in the last week. We already had collected what was left of the beetroot (see beetroot bother), but other fruit and veg were ready and needed picked before the pesky slugs had those too. The only things that seem to be safe are the tomatoes (polytunnel too dry for them) and the carrots (special anti-slug box works a treat).

In the last week, we’ve harvested the apples, onions and cabbage. That leaves the sprouts (what’s left of them), broccoli (which will be ready next year) and turnips (haven’t dared look).

Left to right – red wine, cider vinegar (x2), sauerkraut behind 2 x cider

We got a good harvest of apples this year. The best have been set aside for eating, the rest converted into cider vinegar, cider and frozen apples for winter roasts. We got the cider press up and running this year (only taken 5 years), so got some apple juice. We got 5 litres to be exact and all is being made into cider. The eagle eyed among you might be wondering why I have split it across 2 x five litre demijohns. Well, it did all fit into one, but in my experience, wild fruit can be pretty vigorous in the fermentation process and has been known to spray the walls. Of course, nothing has happened yet as the temperature has dropped a bit and the yeast is shivering rather than getting on with it.

There are still a few late developing apples on the trees. Hopefully, they’ll be fine for eating as they come.

We also harvested all the cabbage. That, in itself, removed an army of slugs from the veggie patch. All leaves were examined carefully and any wildlife removed before the cabbage was shredded. Salt was added, massaged in and now that is also fermenting quietly. Should be ready in 3 or 4 weeks.

All takes time, but very satisfying once it’s done.


Posted on Leave a comment

Moving the Hens – Part 2

hen central - omlet walk in run complete

Carrying on from last week’s story, Moving the Hens, we have both been busy installing and preparing the new area for the chicken coops. We call this ‘Hen Central’ because it’s where they eat, drink, sleep and lay their eggs. The big jobs this week were to install two new fences and put up a walk in run.

hen central - old gate
hen central – old gate, new stob already in place

The first new fence is where the old entrance used to be. There was a fence there, but it was only chicken wire. Given it was along the track, this is where the biggest threat from unsupervised dogs was to be found. The gate was removed and proper stock fencing put up. Not 100% dog proof, but far stronger.

The second new fence is in the orchard which doubles as the hen run. It is needed not to keep the hens in, but the sheep out. Sheep have a penchant for scratching themselves on any available object, so they could do a lot of damage. They also are partial to corn, so would be tempted to get into the feed bins. Plus, the hens need somewhere where they can have a bit of peace and quiet.

Also, if a hen goes broody, we need to be able to set aside a space for the nursery run and an area for them to wander out and about, free from the danger of sheep’s hooves.

The walk in run is more to deter night time threats and also, prevent wild camping. The plan is, at roosting time, to tempt them into the run and shut the door. That way, the hens’ only option is to sleep in the safe chicken coops.

bye bye electric fence

We ordered the Omlet Walk-in Run and it was earmarked for delivery on Tuesday. So, I got started on the deconstruction of the old hen central. First to go was the anti-badger electric fence. It had done it’s job, but was no longer needed. It would also no longer be a trap for the unwary, easy to trip over.

Next was the first of the two fences. That was fairly straightforward as most of the stobs were already in place.

Come Tuesday, no delivery date was available from DHL so I got on with the second fence. That was soon up complete with purpose built hen flaps.

hen central - new gate and fence
hen central – new gate and fence

Wednesday came and still no run or delivery date. I attempted to decipher the jumbled misinformation on the DHL tracking service and worked out that 13 of 14 parcels had been forwarded from the Glasgow depot to the local delivery agent. One was missing. Of course, modern customer service comprises the above misinformation and a chatbot that is worse than useless. We contacted Omlet to see if they could find out any more. They, too, struggled to get any meaningful information from DHL.

hen central - boxes opened omlet chicken run
hen central – boxes opened

Anyway, Thursday arrived and Nicole and I carried on and got as much of the new run ready as we could. The fences and new gate were in and all the shelters and feeders were laid out in their new locations. Thursday afternoon, still no news from DHL. Without warning, a van pulled up and disgorged 14 packages. It had arrived! DHL were kind enough to send an email to let us know it had been delivered.

hen central - level one omlet chicken run
hen central – level one underway

Friday, our day off, so to speak. Normally we take the dogs and a picnic and head off somewhere for a break. Not today. I got started on the new run. First off, I had to build a small bank as, at one corner, the land slipped away quite steeply. This meant transporting a fair few stones and some road scalpings. No sooner had I finished that than Mrs Mills Junior began to dismantle it. I gently persuaded her to move on and retired to ponder the Omlet instructions. An hour later, I felt ready to begin.

I have built a few Omlet runs in the past so was aware of the clip system they use. However, nothing had prepared me for the new ‘double-clip’ used in certain places. It needed about 20 tons of pressure to close it. I have to confess to employing some choice language. Finally, I worked out a technique I could use.

hen central - omlet walk in run complete
hen central – omlet walk in run complete

It’s not a one person job. Nicole pitched in to help and we worked non-stop till we had it built. We were both loudly cursing the Omlet plastic clip on by the end of it. We were both completely shattered when we finished some time around 6pm. We were delighted with the result, the run looked excellent. Cherokee, the cockerel was already hovering as he likes to get to bed early. But, he’s pretty cool and waited patiently. The moment we stepped out of the run, he stepped in and went to bed.

Seizing our opportunity, Nicole threw some rice and corn into the new run. All but two hens rushed in. Pepper and one of the youngsters (still to be named) decided to run round the outside instead. With deft care and precision, I coaxed them round to the front where Nicole was managing the door. To our relief, they crossed the threshold and we shut the door behind them. The hens were safe and happy. We had turned a two hour vigil into a five minute gathering. Wine and beer called, it was time for a celebration.

Then we counted them.

One short – who else but Mrs Mills Junior? Nicole arranged the search party and located her at the far end of the paddock having a dust bath. Gently, she was persuaded all the way back and, in another dance of co-ordinated movements, she was herded through the door.

Now we could celebrate.

Later on, when they were all tucked up in bed and the doors to their coops closed, Nicole opened the door to the run so they could get out in the morning. My next job will be to install an automatic door. We have the door motor, I just have to build a panel. Once that’s in place, we can leave the run securely closed at night and the door will open automatically for them in the morning.

Over the coming days, the goal is to train them to go into the run just before bed time. Hopefully, in time, they’ll forget about sleeping in the bushes.

hen central - view from the orchard
hen central – view from the orchard


Posted on Leave a comment

Beetroot Bother

beetroot eaten away

As we move into September, our thoughts turn to harvesting. Over the next few weeks, we’ll be collecting apples, tomatoes, carrots, cabbage and onions. We already have a nice crop of garlic drying in the kitchen.

beetroot nibbled
beetroot nibbled

Normally, we leave the root crops, mainly turnip (swede outside Scotland) and beetroot in the ground and harvest them as we need it. However, this year has been a battle with the veggie patch pests. On inspection, we found every beetroot had been nibbled, some almost to nothing. Slugs, mice or voles? Who knows. We had to act.

The weather was dry and warm so I spent the day gathering the beetroot into a box. The veggie patch was then covered in cardboard ready to be mulched. I did wonder whether the pesky beetroot nibblers would be out scratching their heads that evening.

beetroot chopped
beetroot chopped

We decided to turn some of it into soup and freeze the rest. That meant a lot of chopping. It also meant a lot of time spent chopping as each beetroot had been nibbled in different ways. Each had to be carefully trimmed. There were a lot of trimmings heading for the compost bin.

beetroot ready for baking

The first batch went into soup, as did the next three. That involved filling a baking tray, sprinkling the beetroot with oil, honey and pepper, and roasting it for half an hour. That was added to fried onions along with water, potoates, garlic and stock.

All in all, I must have made about 18 jugs of soup, around 15 litres or so. It’s very tasty indeed. Most of that is in the freezer ready for lunch on those cold winter days.

trays of beetroot for freezing
trays of beetroot for freezing.

The rest was frozen. This was chopped and laid out on baking trays. Those were put in the freezer. Once it had frozen, it was scraped off with a fish slice and bagged up. Some advised that the pieces of beetroot should not touch. Too much effort I thought. The risk paid off and all the pieces separated quite happily.

Other perceived wisdom was to blanch it all. Well, I suspect whover suggested that didn’t have 8Kg of beetroot and had plenty of time on their hands. Ours went straight in the freezer. Most of it will end up in soup anyway.


Posted on Leave a comment

Sheep and the summer shelter conundrum

sheep grazing silvo

If there’s one thing we have come to realise about our sheep over the years, it’s that they like their shelters. Their favourite is one we knocked up just after we moved here. It kind of resembles a low rise mass built bungalow and so has been nicknamed Brookside, after an old tv soap opera.

brookside sheep shelter
Brookside sheep shelter

The sheep spend much of there waking lives in it. If it’s sunny, the sheep head for Brookside. If there’s the merest hint of rain, the sheep head for Brookside. If there’s a mist rolling in, the sheep head for Brookside. In fact, it has almost become an addiction, a comfort blanket in which they wrap themselves at the merest hint of discomfort. This is not a problem in the winter when they have access to the larger lambing shed which has a raised, hardcore base. However, in the summer it’s a different story.

There probably would not be a problem but for the fact that, unlike pigs, sheep tend to pee and defecate where they happen to be. So, it only takes a few hours for the floor to be covered. Daily cleanouts help, but in wet weather, the pee has nowhere to go and the floor can tend towards the unhygienic. We installed drainage, but while that has been helpful in eliminating puddles, the floor can become muddy and wet. Basically, it’s on a flat spot and water gathers there on its way down the hill.

Again, copious amounts of scented sawdust helps, but this merely serves to make the place more attractive. On top of that, the low roof leads to aching backs and bumped heads during cleaning.

During the hot days, we noticed that it was like an oven in there. All in all, there had to be a better way. So, we decided to open up some of the woodland for them. This comes with risks as sheep are partial to bark. They can bark an adult tree in minutes when the mood takes them. Nevertheless, there was a small copse of evergreens that were fully grown and, also, sheep tend to be more interested in eating bark in the winter months.

sheep pondering new silvo
sheep pondering “silvo shelter”

So, we cleared the copse of brambles, added a gate and waited for a hot day. These are more plentiful in SW Scotland than they used to be and we did not have to wait long. To give Brookside a chance to recover, we’d closed access to the field where it is located. The sun was out, the air was warm and the sheep were gathered in a tightly knit group at the gate, gazing longingly at their favourite shed. We led them up the hill, reluctantly (lots of sheep nuts were involved), and showed them their new ‘shelter’.

first sheep enter silvo
first sheep enters “silvo shelter”

Despite the plentiful willow herb at their disposal, their reluctance to try anything new was stronger and hesitancy prevailed. Eventually, Yarr’s curiousity trumped his caution. Even then, he took his time. It was an excellent test of our patience.

sheep entering silvo
more sheep entering “silvo shelter”

Slowly, the rest followed. Well, most of them anyway. Some got to the gate and veered right, tasty morsels of grass seemingly more attractive.

Those that did enter inched forward until their eyes fell upon the young willow herb. That was all it needed and they were soon tucking in, those at the back now trying to push through.

sheep find the willow herb
sheep find the willow herb growing amongst the trees

Soon, they settled and were grazing happily. Inside the woodland, the canopy of needles and branches provided plenty of shade and a gentle breeze made it feel cool and fresh. Compared with the oven that was Brookside, there was no contest. Job done, or so we thought.

We left them to it.

Twenty minutes later, they were back at the gate gazing mournfully at their favourite shed.

sheep grazing silvo
sheep grazing “silvo shelter”

This has been the pattern for most of the summer. We have even cut back more of the fencing so that they don’t feel boxed in. But, on hot days, they gather at the gate and gaze. We lead them up and watch them relax into the cool and refreshing area under the trees. We step back and watch. After a short period, one of them, usually Selene (the flock matriarch) suddenly remembers their favourite shelter and makes off towards it. The rest follow.

On some days, particularly stormy or heavy rain days, we open up the lambing shed for them and they appreciate that. But, on hot days, walls, tin roofs, stifling heat and oven conditions seem preferable to cool, leafy shade and refreshing breezes. That’s sheep for you.

Posted on Leave a comment

Chicks Move to the Big House

Our chicks have had a purpose built predator proof run from when they were eggs. After they hatched, they had a couple of days to find their feet before being let out into the wider world. Each night, they returned in the early evening, had a quick meal of corn, and turned in for the night. Every morning, they were waiting by the door, eager to get out and about.

At around four weeks old, their mother, Mrs Mills Junior (MMJ), decided it was time to return to the main chicken coop. This could have gone smoothly… …but it didn’t

First, MMJ decided it would be a good idea to roost in the bushes behind the coop. A few of the hens like to do this from time to time. However, reaching said perch was an impossible ask for the chicks. They might be getting quite big, but they are not yet close to being able to fly.

Pipette looking out at chicks

MMJ set up herself up, got comfortable, closed her eyes and settled in for the night. We watched, wondering how best to intervene. Then, MMJ realised something was missing and, after an elongated period of calling, flew down to find her chicks. Much clucking and shaking of feathers ensued before, finally, she decided to head into the coop. The chicks were not sure about this and took their time, but eventually, they all followed her in. Quickly, we shut the door.

The following evening, it was raining. This time, MMJ decided the coop was the better option. However, two of the chicks had forgotten the way and sat disconsolately under the coop. This caused much scratching of heads. Eventually, I approached and threw a little corn down. They were straight over and were joined by Pepper. Pepper returned to the coop and this was enough to show the chicks the way. Phew!

is it bed time?

Next day, I made some adjustments to make the ladder easier for the chicks to use, basically, I made it a little less steep. However, MMJ decided to go for the tree roost option once again causing panic in her brood. This time, she seemed oblivious. We intervened, shaking the bush causing her to fly down. Cue mass clucking and shaking of feathers. She led her chicks around for about half an hour before finally settling into the coop. Once all five chicks were in, we shut the door.

We thought things were settling by now, however, we hadn’t made allowances for Clippy. Clippy is the flock matriarch and the most feral. She likes her wild camping. That would be fine, but she also feels the need to announce it to the world. Next evening, MMJ and the chicks were happily ensconced in the coop when Clippy flew onto the roof on her way to the bush. She clucked her intentions out loud and the chicks all rushed out to see. Cue mass disruption as other hens joined in.

it’s lovely in here

This whole stramash was made more complicated by MMJ deciding the coop was for her, her chicks and the cockerel only. No other hens allowed. Fortunately, we have two coops. Nevertheless, the four hens cast out were none too impressed. They checked out the other coop, but seemed unsure. In out. In out. When, finally, all were in, we pounced and closed the door.

Yesterday, things finally went smoothly. The chicks and MMJ joined the cockerel in the Green Frog coop. The other four headed straight into the Solway coop and roosted.

Who knows what fun and games tonight will bring?

Posted on Leave a comment

Chicks Thriving in Summer Weather

The recent summer weather has been welcome for many reasons and, in particular, it has benefitted the hens. Unlike many birds, hens do not have waterproof feathers so when it rains, they prefer to stay under shelter. For young, keen to explore, bubbling with energy little chicks, that’s like being stuck in playpen with no toys.

The last week or so has been much drier and the chicks have been out and about, foraging, scoffing and having a lovely time. They have also been growing and are now bigger than blackbirds. As each day passes, they get a little braver and can be seen scuttling further and further from their mother, Mrs Mills Junior (MMJ). They are also looking a bit scruffy as their adult feathers are pushing through the fluff they were born with. You can see tiny feathers poking out through their tails and also their developing wings. There’s nothing they like better than stretching their wings out in the sun.

Exploring far and wide, they come into contact with the rest of the flock and it is great to see that they are already accepted. Anyone who’s introduced new hens to an existing flock will know what I mean.

Cherokee the cockerel likes to keep a watchful eye over them. MMJ is more tolerant of him than some of the other hens who are sent away if they get too close.

Given our hens have pretty much given up laying, we are looking forward to the next generation of layers growing up and once again filling our kitchen with eggs. That will take the pressure off the older timers who can then live their lives out in gentle tranquillity and luxury.

At night, they still use their nursery run and coop. We put them to bed around 6pm. Soon we will leave it open till sunset and see if MMJ moves them into the main hen house.

The nursery run has been a huge success and in future, we’ll use the same approach for broody hens. We’re already in the planning stages for a small, fenced off area that can keep the sheep at a safe distance and provide room for multiple nursery runs.

Although it’s hard to tell the girls from the boys at this age, it’s looking like four girls and one boy. Time will tell, but we’re hopeful.