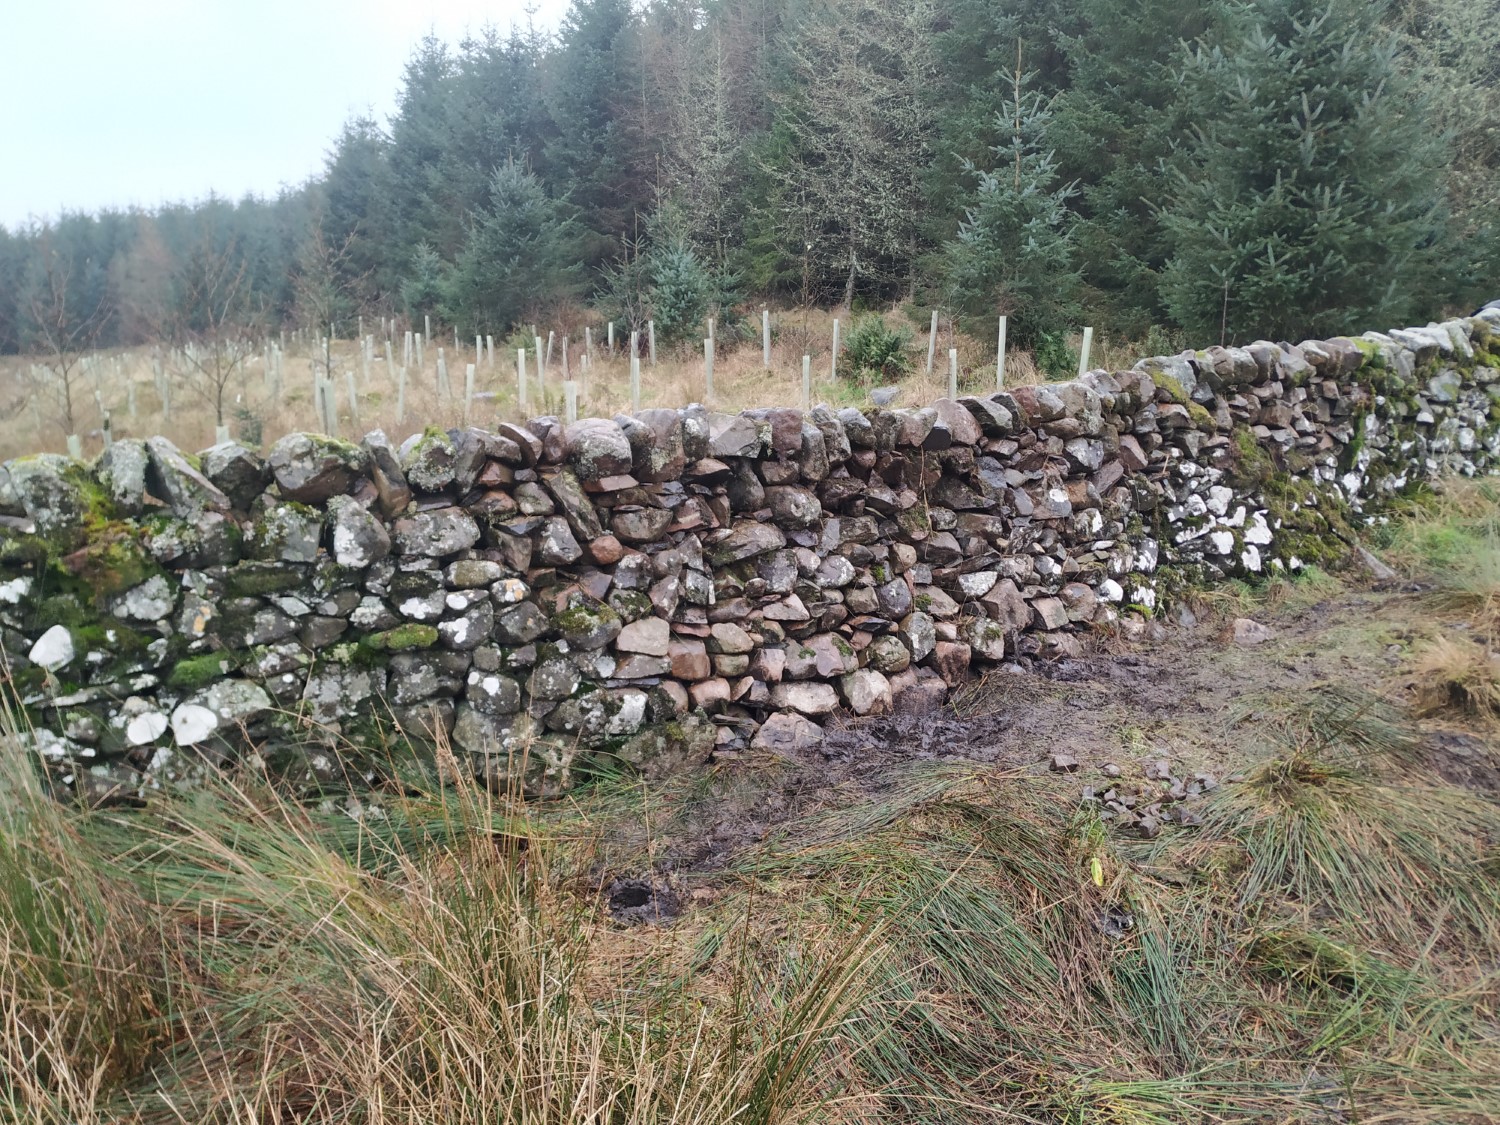
One of the common themes of this blog is the repair of dry stane dykes (dry stone walls). Most of these repairs are carried out in order to keep the sheep in, but some are just because we like these walls and want them to look good.
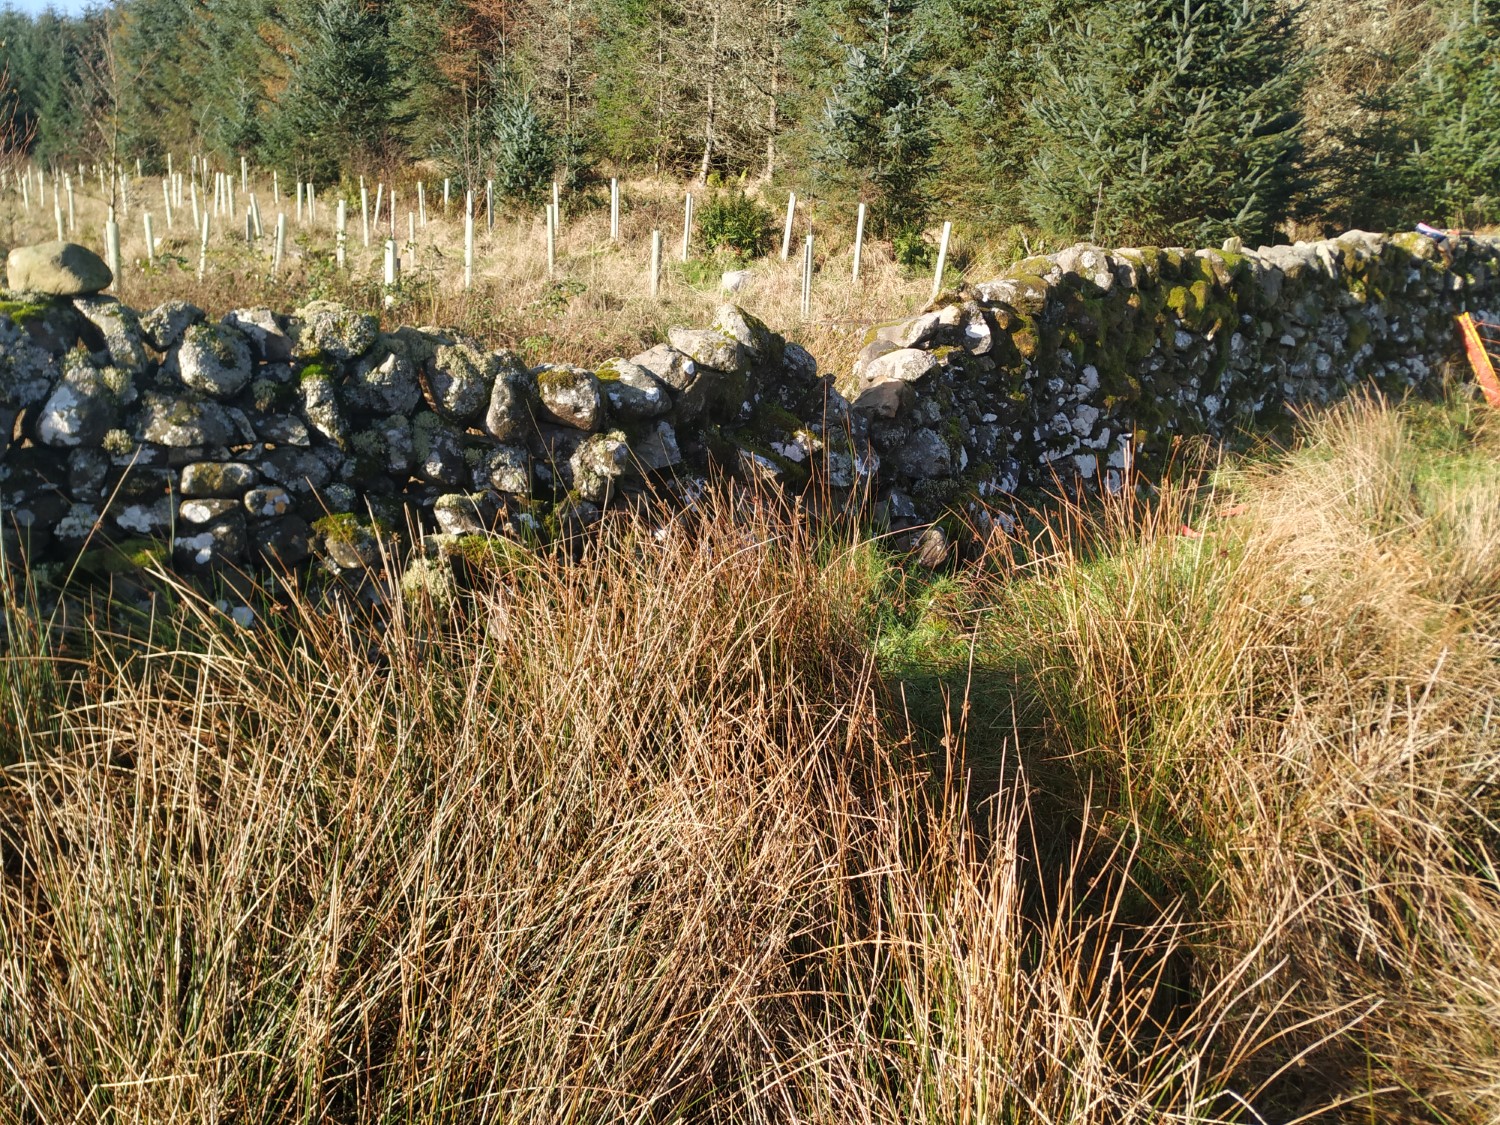
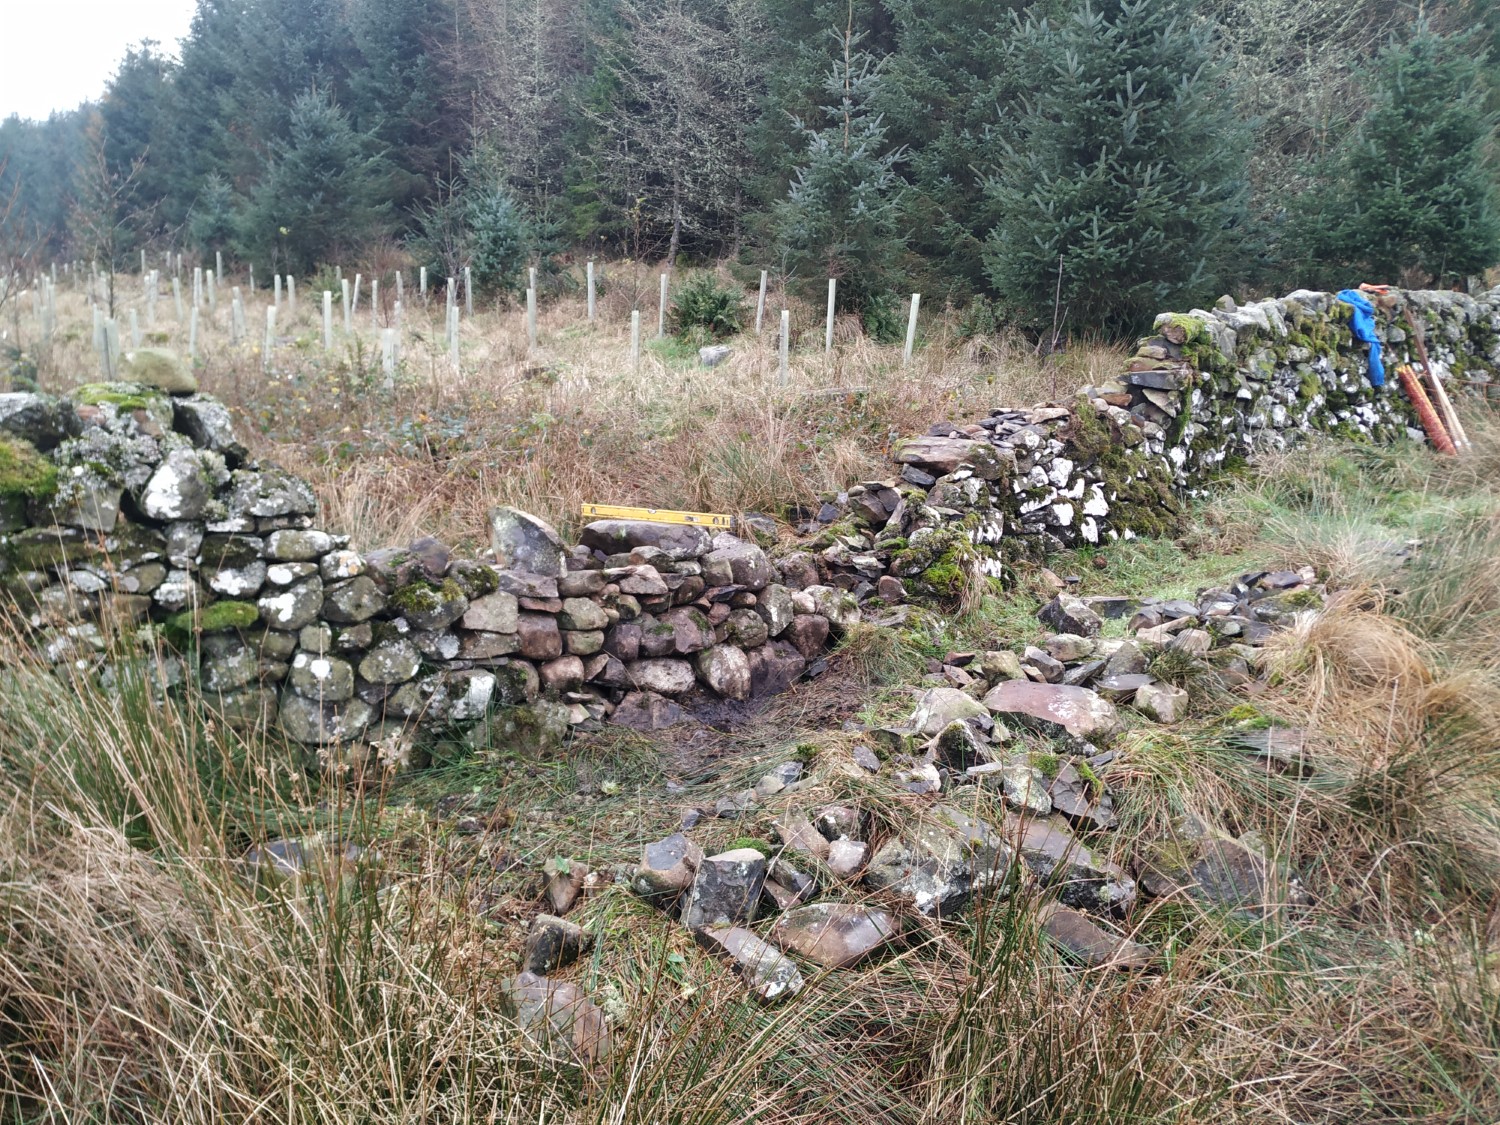
The latest section needing repair was at the far corner of one of the fields. As ever, a small section had crumbled but repairs extended quite far in both directions. In fact, this wall is very old and there has been a lot of subsidence, so much of it is teetering on the brink of collapse. Finding an upright section either side of the crumbling part was something of a challenge.
In the end, I had to take down around 6.5 metres. Being a boundary wall, it was 1.5 metres tall (5 feet), so that meant moving a lot of stone. A rough calculation showed it to be about 5,000Kg (5 tons). On top of that, it was built in the Galloway style which means big stones near the top. I made sure to keep my feet well clear as those stones were taken down.
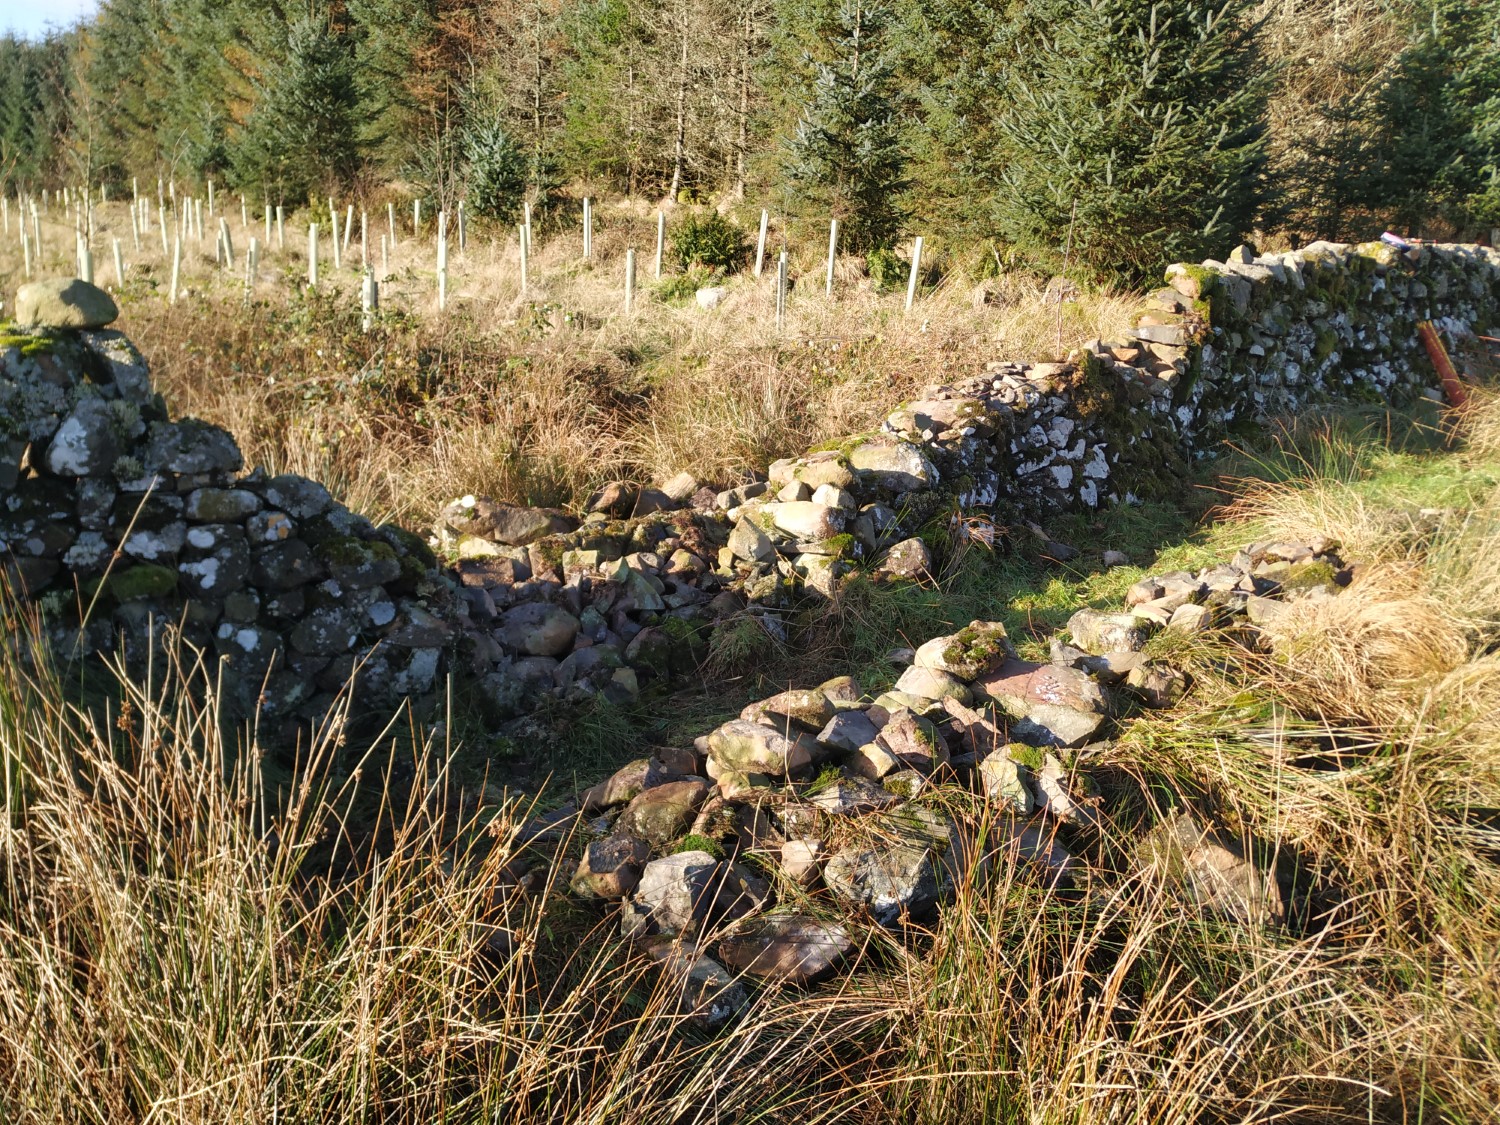
As ever, the demolition phase was not too hard, the most strenuous part being carrying the the top stones a few metres to one side. I always keep them in a line so I know I’ll have enough nice stones to finish the top of the wall when I get there. In this case, a drainage ditch forced me to carry them a little further than usual.
The big beasties I lined up close to the wall (on the far side, so not visible in the pictures). The rest I piled up nearby ready so they would be close at hand.
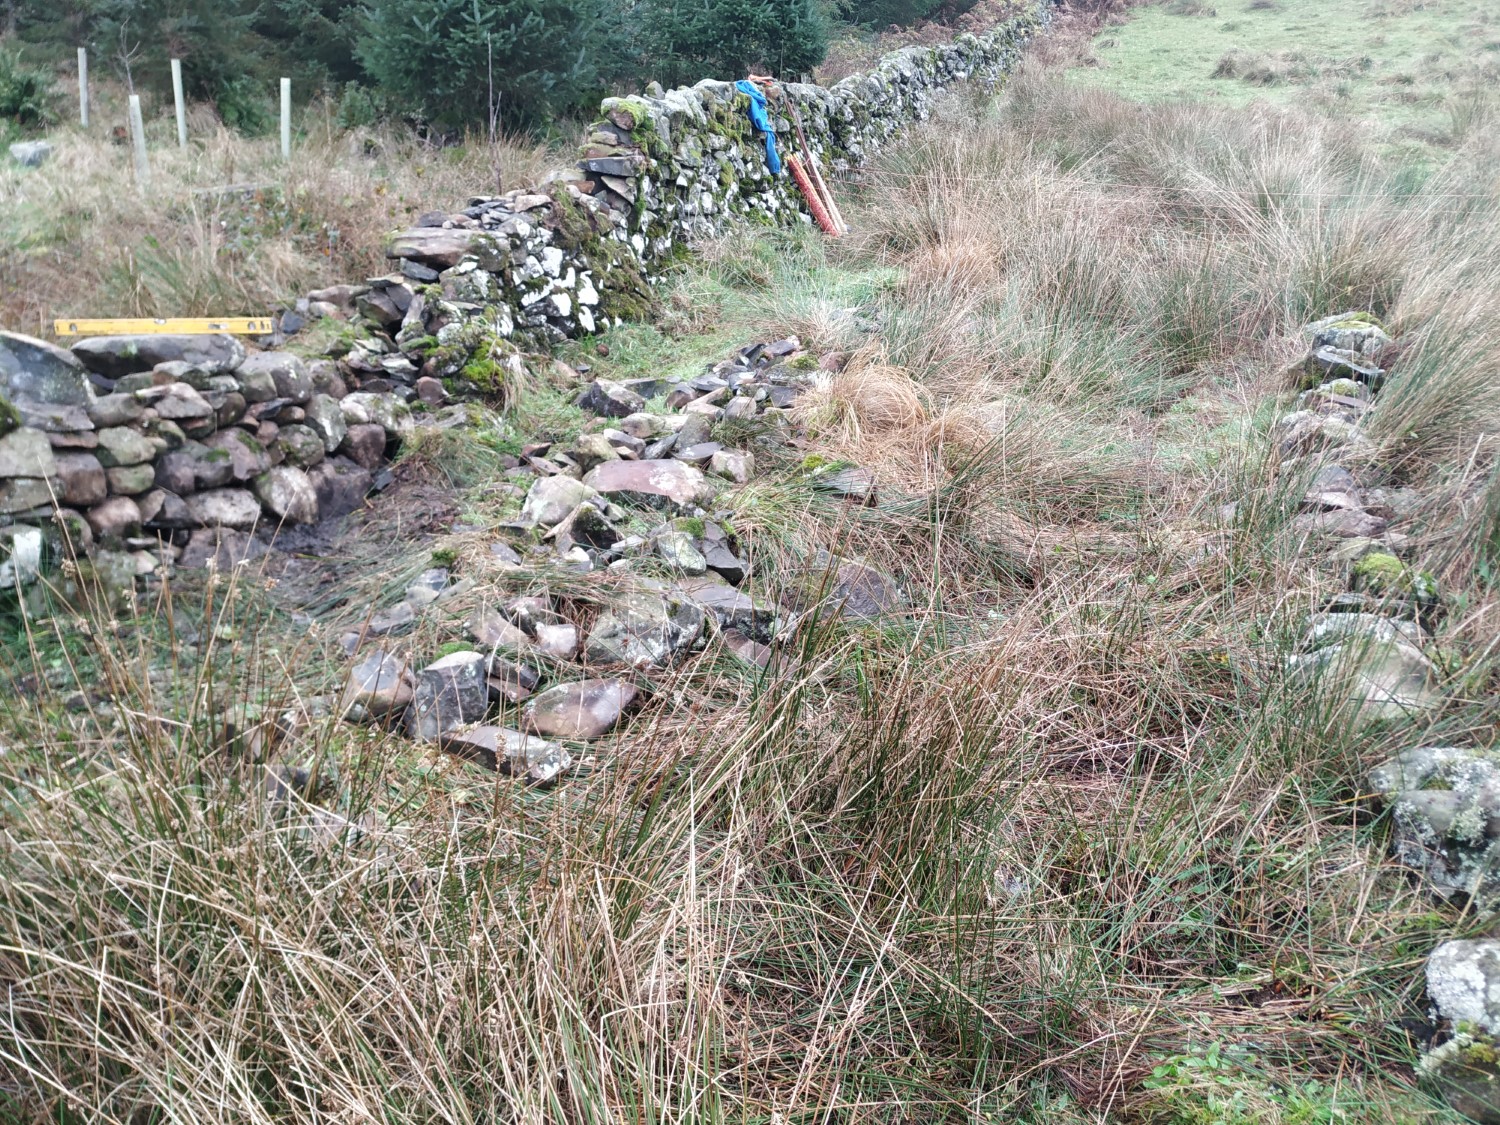
Over a few days in various weather conditions (from sunny to windy rain), I built the layers up. The ground was very soft and soon turned to mud. I found myself sinking from time to time as I attempted to lift larger stones onto the wall.
The big stones that went onto the top section I did in one session. I just picked them up and manoeuvred them into place, one at a time, hoping they would fit together nicely. It seems to have worked. Only one or two gave me grief, doing their best to slide off and land on my feet. They were the biggest two and needed some clever lifting to get them up there given the wall was around a metre high at that point.
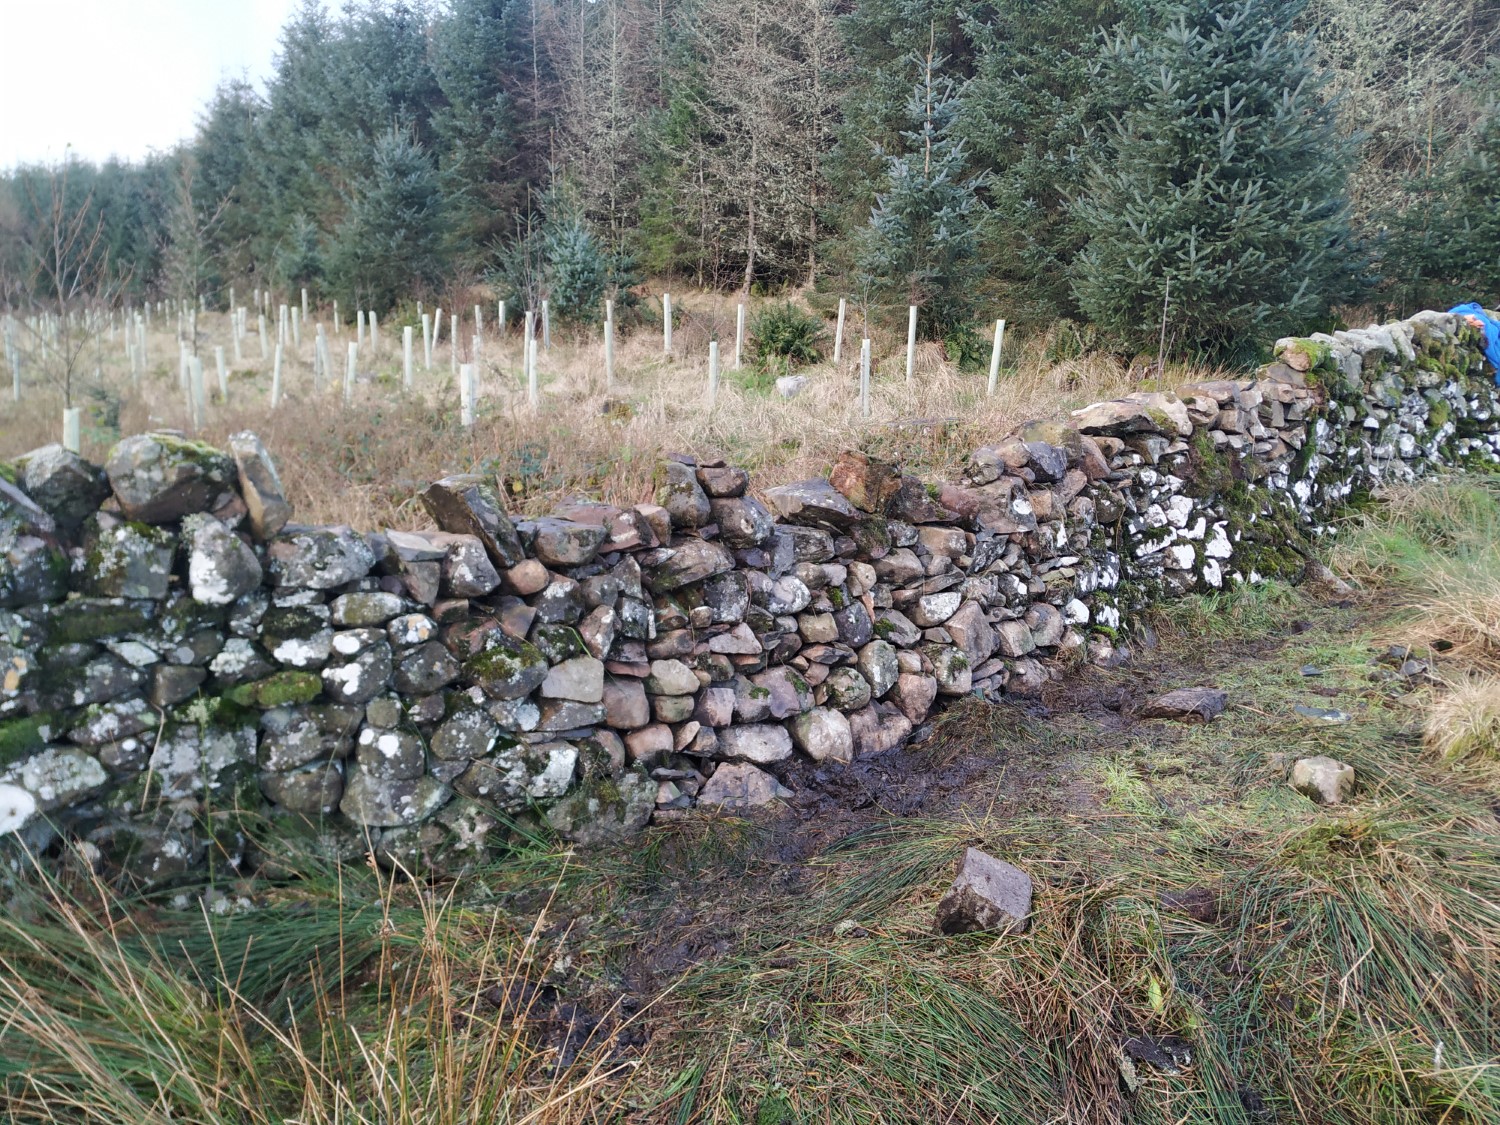
For the final section, I brought in some additional stones, just in case. A huge pile seems to evaporate when fitted neatly together. It was good forward thinking as I ended up using them all.
Despite the weather morphing from bright sunshine to blustery rain and the impatient whining of Elliot, who found the whole process a bit of a bore, I persevered and got it finished. It is always tricky to get the top stones aligned neatly, but ultimately very satisfying.
Usually, I sit down and admire my work a while when I finish, but inclement weather and impatient dogs persuaded me to head back the moment the last stone was in place. I shall have to make do with the photos on this one.