Today’s blog story is to tell you about my rug-making teaching adventures over the summer and about the new downloadable instructions I’ve created on how to make felted fleece rugs.
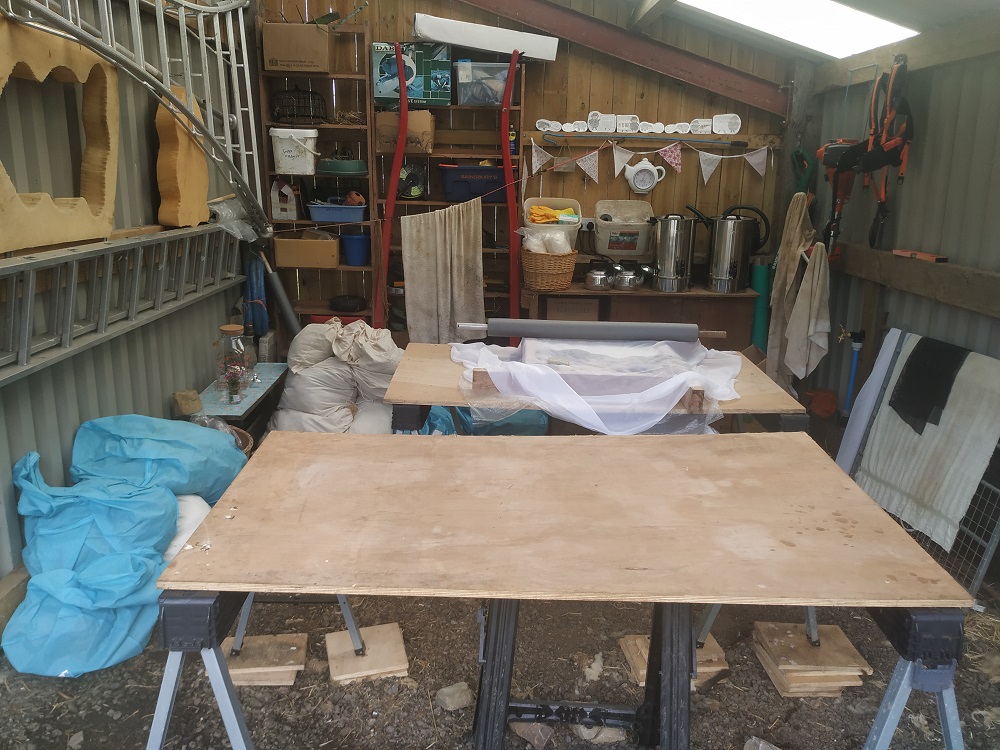
I’ve been thinking about running rug-making workshops here on our smallholding for a few years now. Then Covid happened and my plans went on hold. Truth be told, I didn’t mind too much as the thought of all the spiders I would have to face while clearing out the shed was quite daunting.
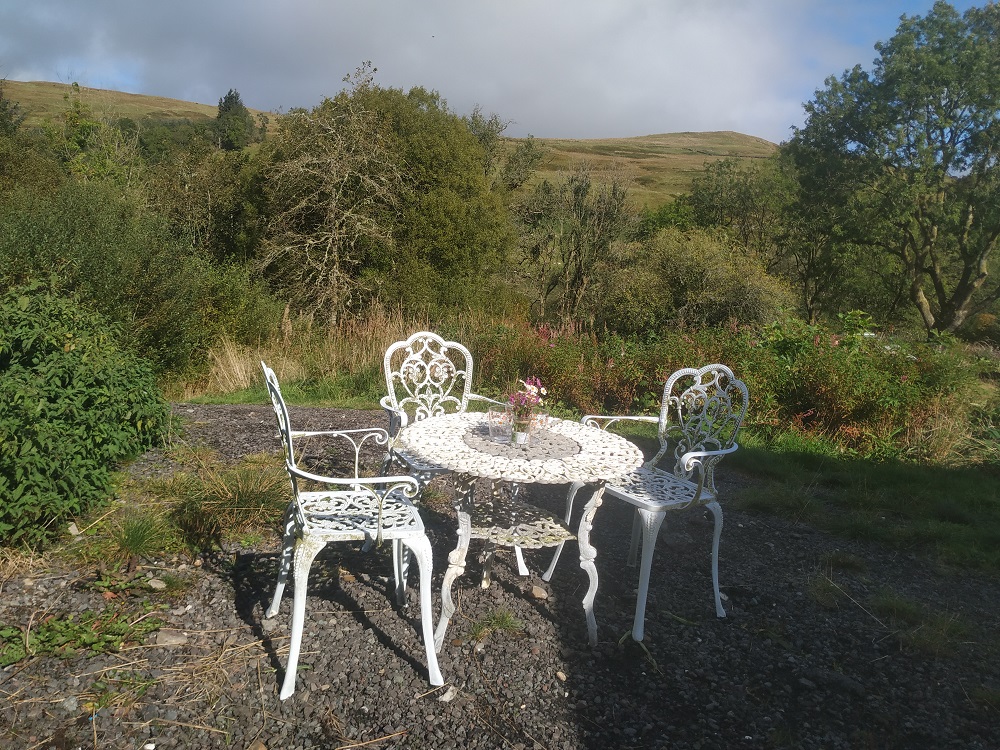
relaxation area
I would need a lot of room, particularly as part of my vision was to include an area for a table and chairs for participants to relax and enjoy tea, coffee and biscuits in between felting – very important for any workshop, especially a whole-day one involving loads of physical effort. All the room I would need would take a huge effort and reorganization of tools and equipment.
I’m happy to say I managed it! (Admittedly with a lot of help from Adrian, my personal “Chief (humane) Spider Remover”). And this summer the workshops became a reality.
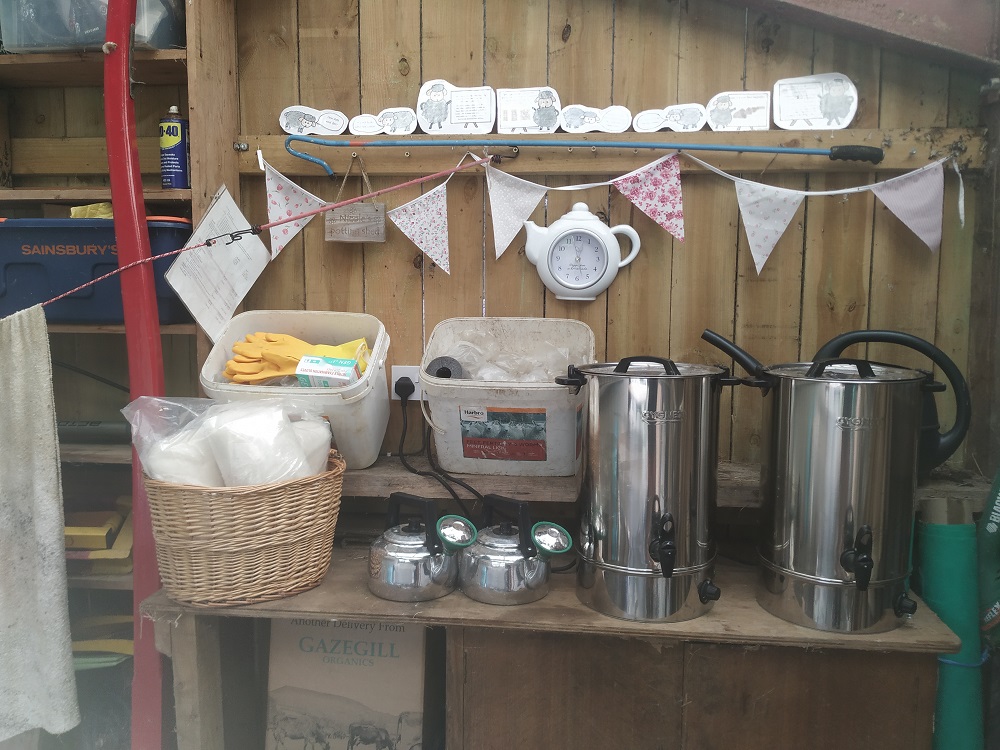
The shed was transformed into a teaching room complete with large tables for felting and shelves for wool, towels, bars of soap and hot water urns. The spiders moved next door, they said they weren’t keen the disturbance and preferred the peace and quiet of the hay shed.
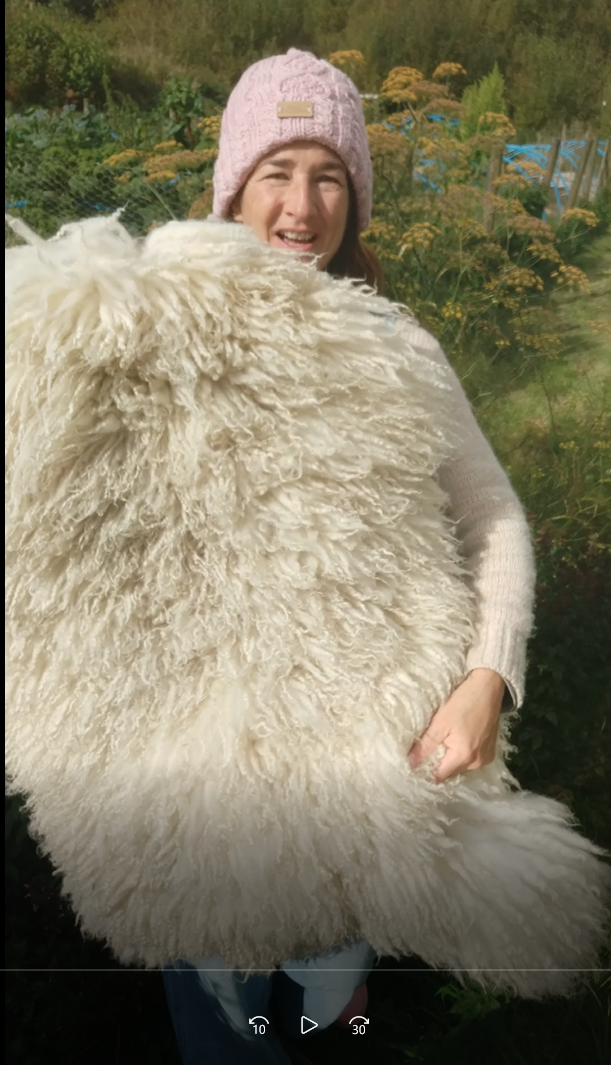
Over the last few months, as well as teaching here on site and meeting some really inspiring and creative people, I’ve also updated my original (face up method) “downloadable rug making instructions”.
You’d be right in thinking I’m on a mission to spread the love of wool 😊
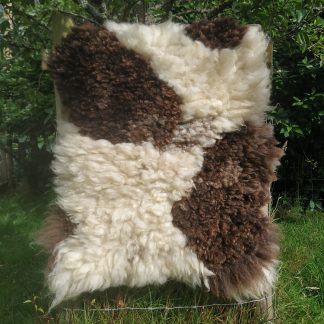
For those of you who know a little bit about making felted fleece rugs, you’ll probably be aware there are two ways to make them. There is the “face up method” which is brilliant if you’re new to rug making as it’s slow and methodical. It’s also ideal if you have a fleece which is in bits but you still want to use the wool. It’s a time-consuming method but a lovely, meditative way to work.
Then there’s the “face down method” which is a little quicker than the above method, but you need a fleece which holds itself together well and isn’t likely to fall apart at the slightest puff of wind. This method can be somewhat daunting if you’re new to rug making as you’re working upside down. (Not you, the fleece).
If you’re interested in making your own rugs and creating something unique and beautiful for your own home, I can’t recommend it enough, just dive in and give it a go! You can buy raw fleeces from ebay and etsy or better still, direct from a farm. Click on the links below to find out more about learning this wonderful craft:
I often get asked how I get my white rugs so clean so I thought it might be helpful to all you woolly crafters out there, if I shared my hints and tips with you.
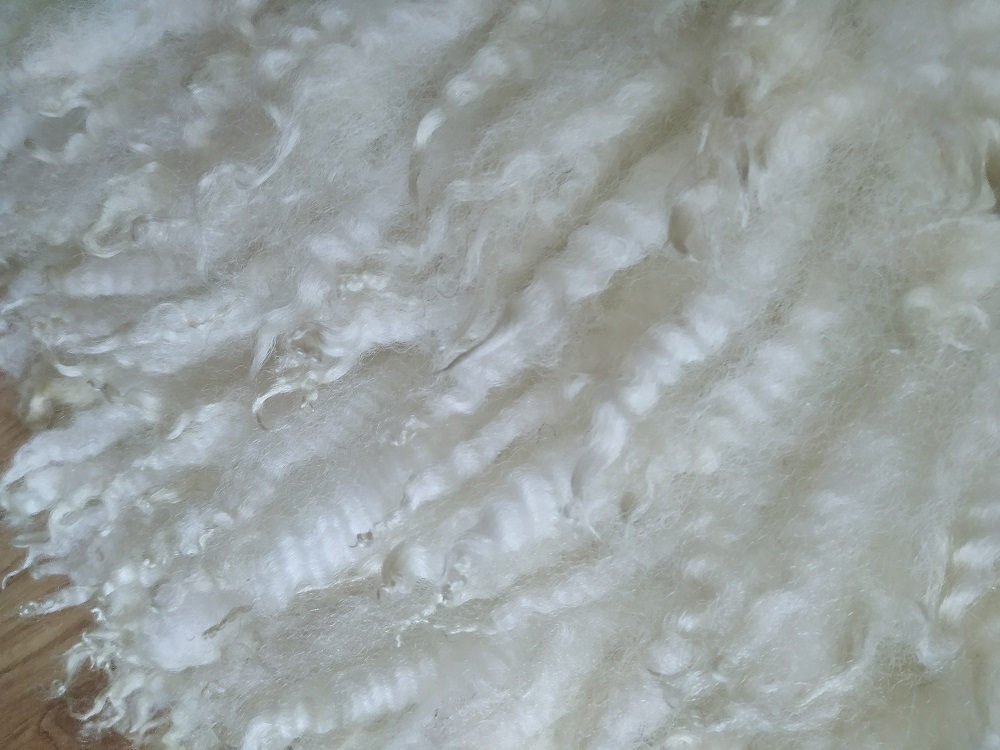
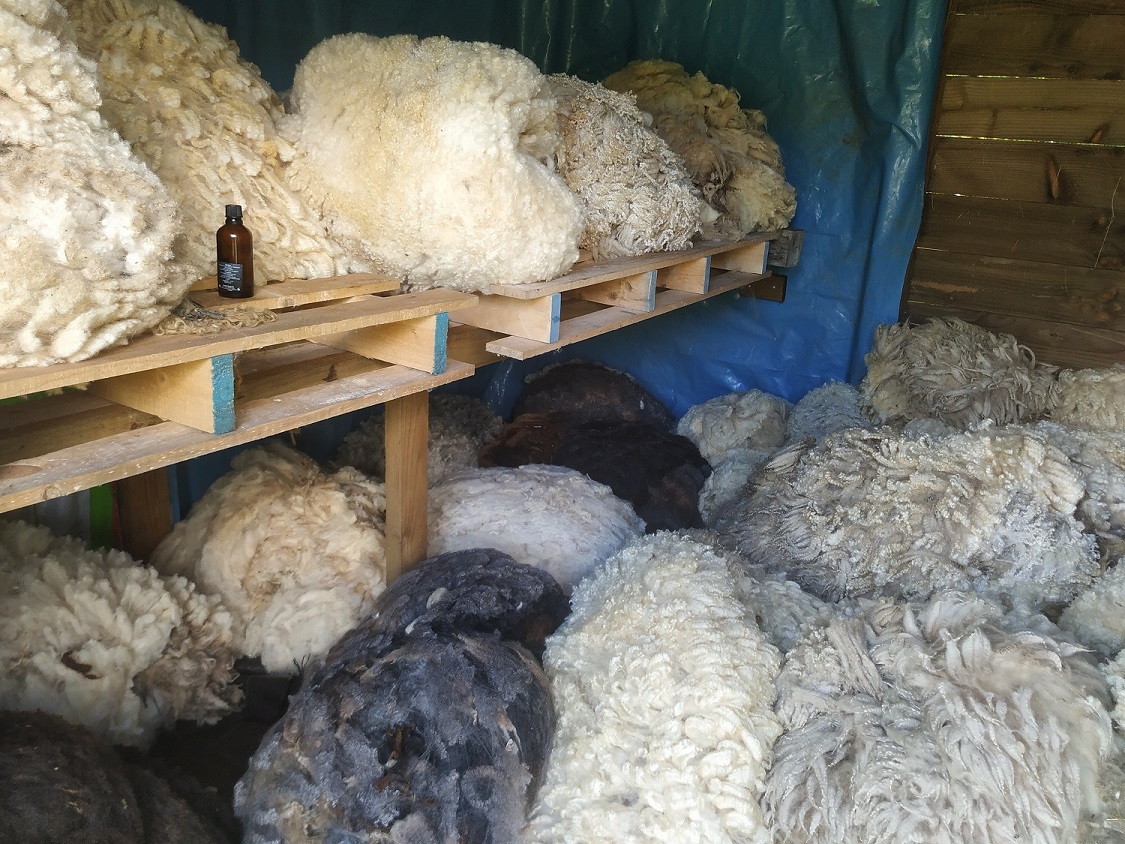
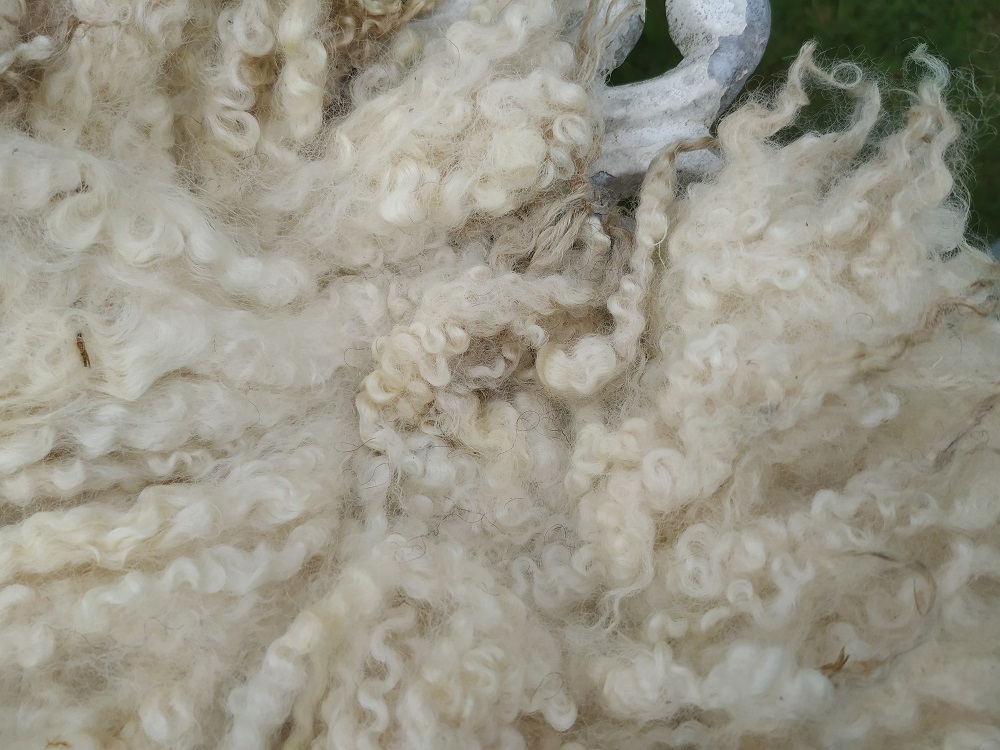
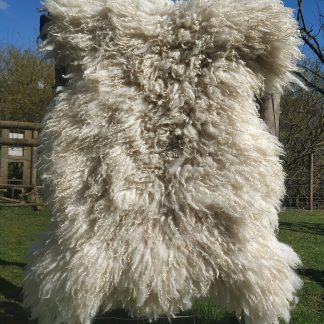
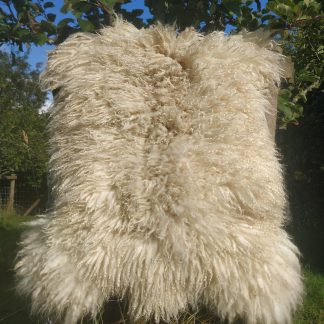
Most of the rugs I make come from Scotch Mule fleeces. The Scotch Mule is traditionally creamy-white in colour with long, silky curls. I’m a real sucker for a soft, white cloud of a rug so my fleece shed is unsurprisingly full of delicious, creamy, curly locked fleeces. Unfortunately, as with most fun things in life there’s a drawback, lighter coloured fleeces take a lot of work to clean up. Every speck of dirt shows and I don’t have an industrial set up here, it’s just me, soap and water.
fleece shed
While the natural look is a huge part of the beauty of these rugs, I like to strike a balance between keeping the wool looking as natural as possible while at the same time encouraging it to look its very best. The look I prefer is a mixture between natural beauty and “just stepped out of the salon”.
Happily, having made a lot of white rugs over the years I’m pleased to say that I’ve learned a few tips along the way which I can’t wait to share with you. Read on to find out about how to clean up a white fleece and get your rug looking absolutely gorgeous.
First and foremost, how the rug turns out depends largely on the quality of the wool that you start out with.
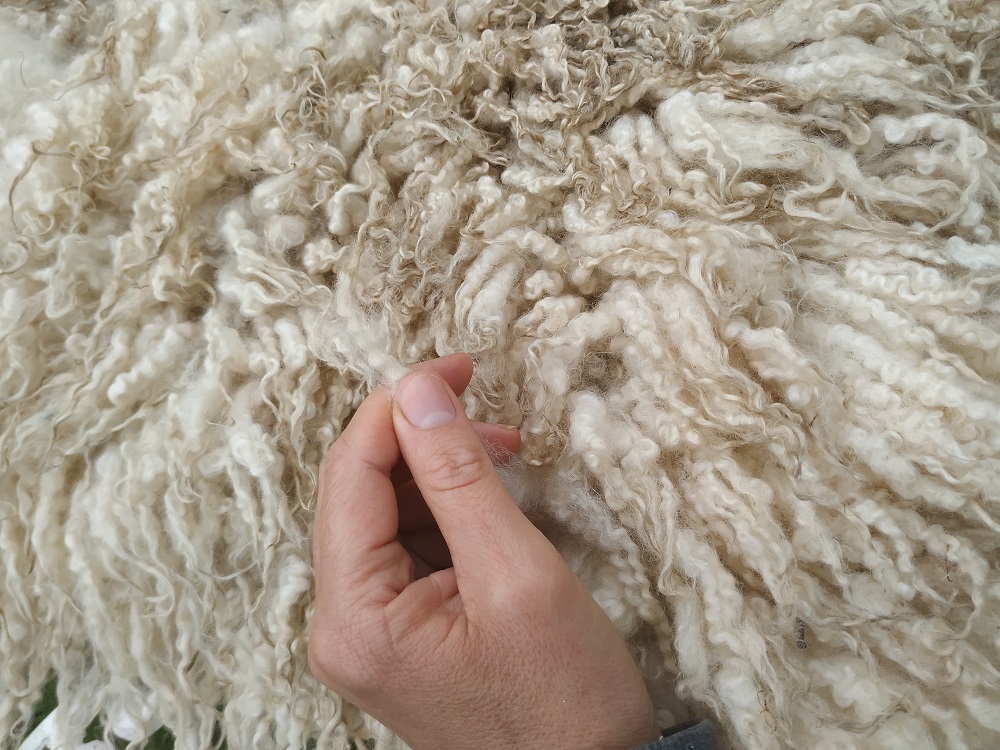
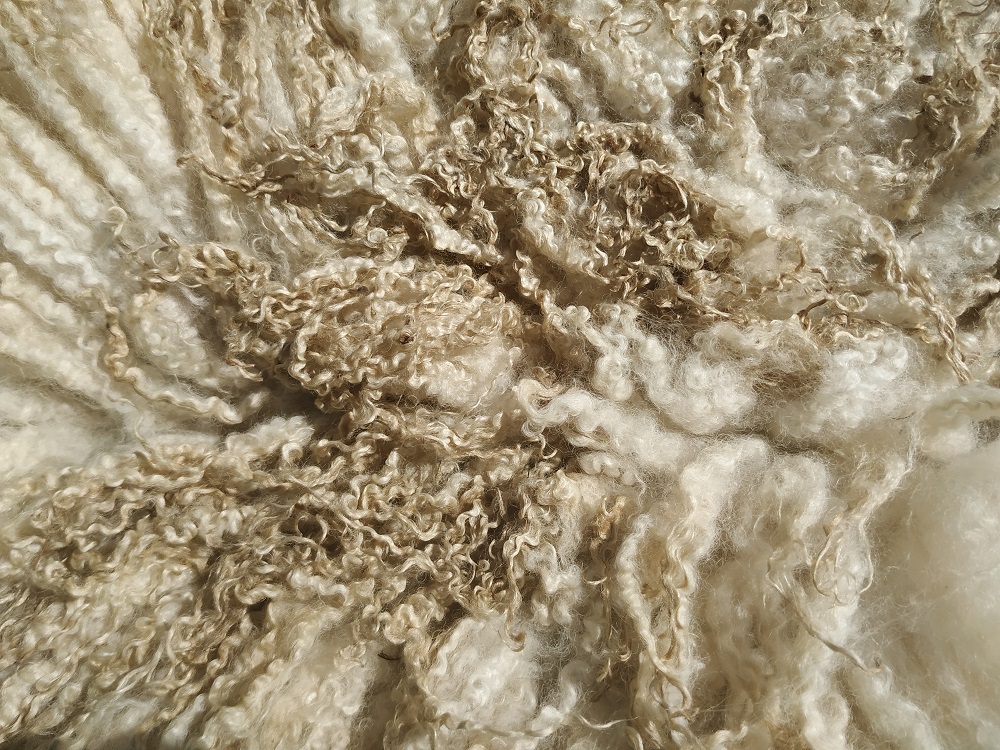
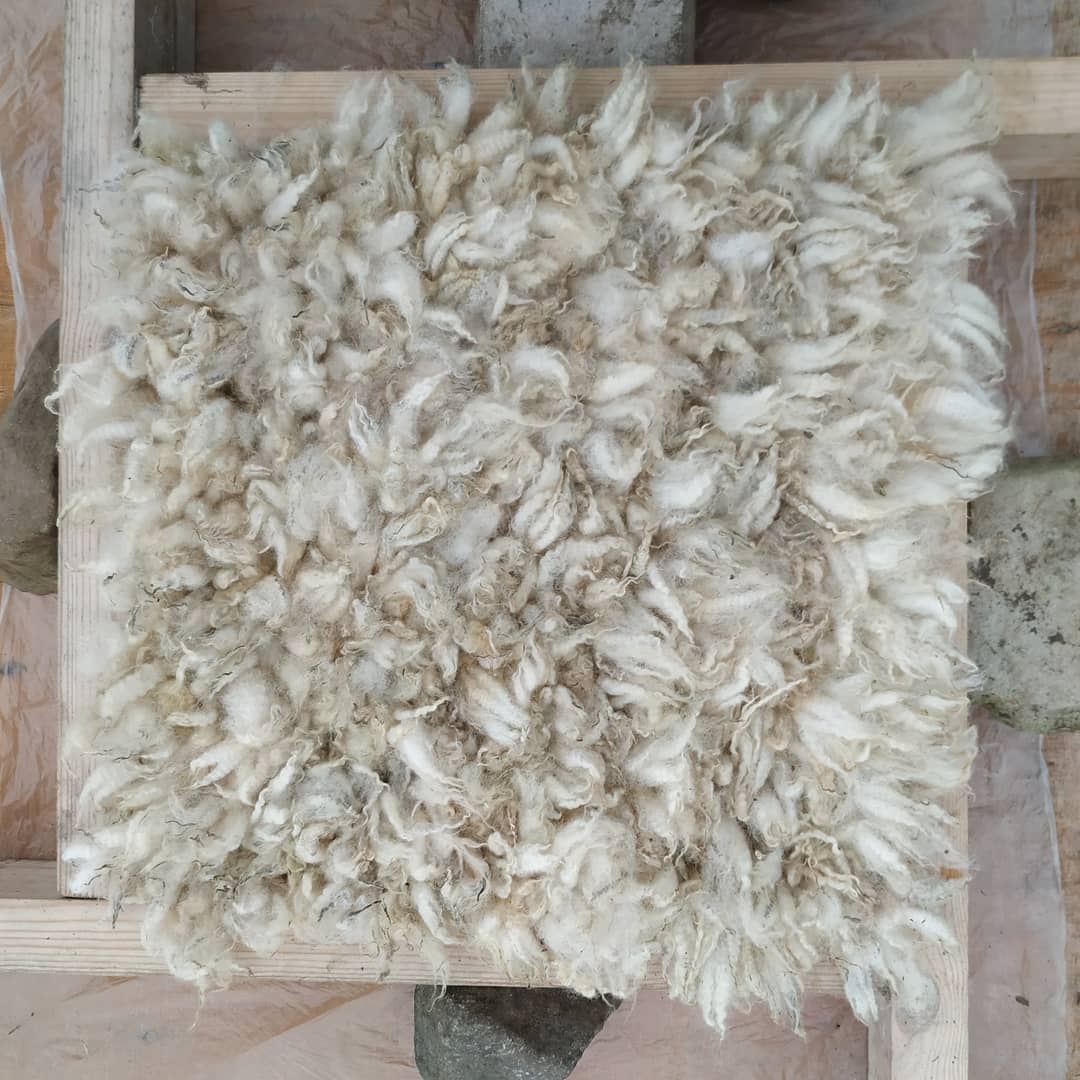
But let’s imagine you have a decent fleece. It’s raw and lovely, full of lanolin and has that yummy sheepy smell about it. There are dags here and there and some matted wool around the edges, but you can see it has lots of potential and would make an amazing rug.
raw fleece
Now let’s imagine you’ve skirted the fleece and removed the matted and daggy wool. You’ve picked out a lot of the vegetable matter (moss, seeds, straw etc). You’ve felted it and made it into a rug.
It’s time to sit down and put your feet up.
Sorry, what I meant to say was, it’s time to roll your sleeves up and do some more work 😉
Firstly, you’re going to remove the lanolin by a process called scouring. A lot of lanolin will have come out in the felting, but there will still be lots left. It’s important to remove it because it attracts moths and you wouldn’t want moths gobbling up your rug after all that hard work.
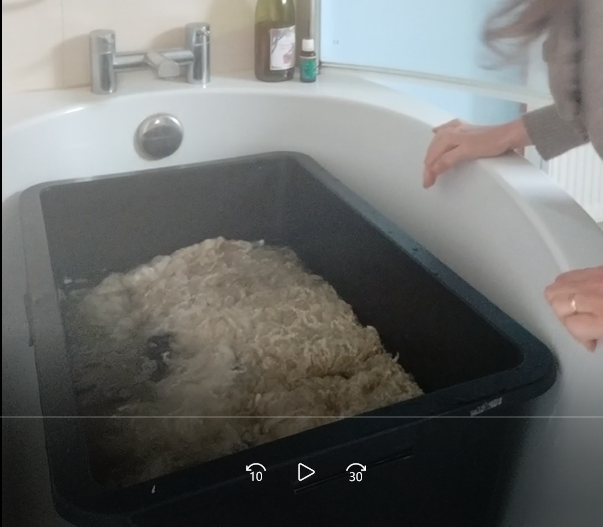
Scouring
Put the rug to soak in very hot water (at least 60’c) with a normal laundry detergent, not a wool one yet, this comes later. You’ll want a detergent which is slightly alkaline to open the wool fibres and get them clean. Don’t agitate the rug, just leave it to soak for 20 minutes. The main purpose of the hot wash is to remove the lanolin and to kill any moth eggs that might be lurking in the wool. Hint, it’s important to take the fleece out of the hot water after 20 minutes and no later. If you leave it in any longer, the water will start to cool down and the lanolin will harden up and stick to the fleece again. Repeat the hot soak if necessary, (once, twice, three times … use your discretion depending on how much dirt and lanolin there is in the wool). The rug is ready for the next stage once the run-off water starts looking clearer. The run-off won’t be crystal clear at this point, but neither will it be a dark murky brown as it was earlier on.
Wool wash
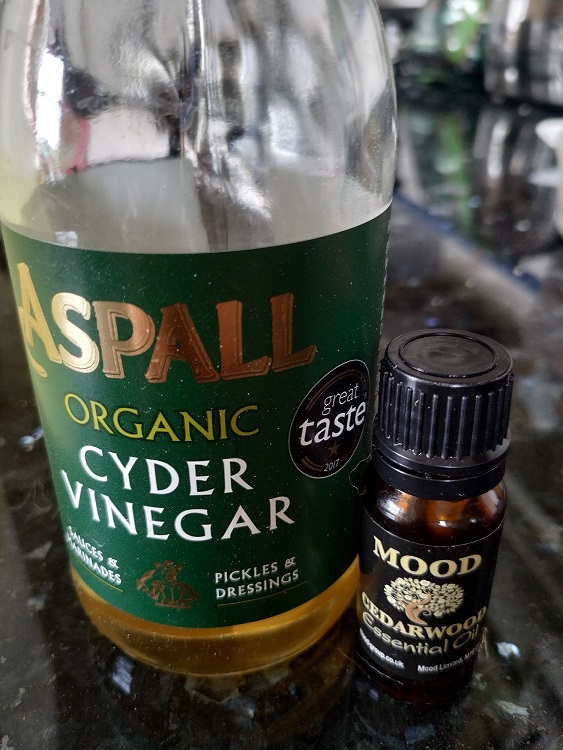
Next, fill your bathtub with lukewarm water (no hotter than 30’c), add a squirt of wool/silk laundry detergent, lay your rug in the water face down and allow to soak for an hour or so. Feel free to swish the rug around a little to loosen up any bits of dirt. Rinse in cool water with a slosh of cider vinegar (or white vinegar) until the water runs clear. Add some drops of lavender oil to the final rinse water as a moth deterrent. Alternatively, put the rug into the washing machine on the wool cycle at 30’c. Make sure you use a wool/silk laundry detergent and never use fabric conditioner/softener. Instead, pour some vinegar (about 15mls) into the rinse drawer with a few drops of lavender oil. Wool really loves a vinegar rinse, it helps to get rid of soap residue and it brings the pH back to wool’s preferred state which is slightly acidic.
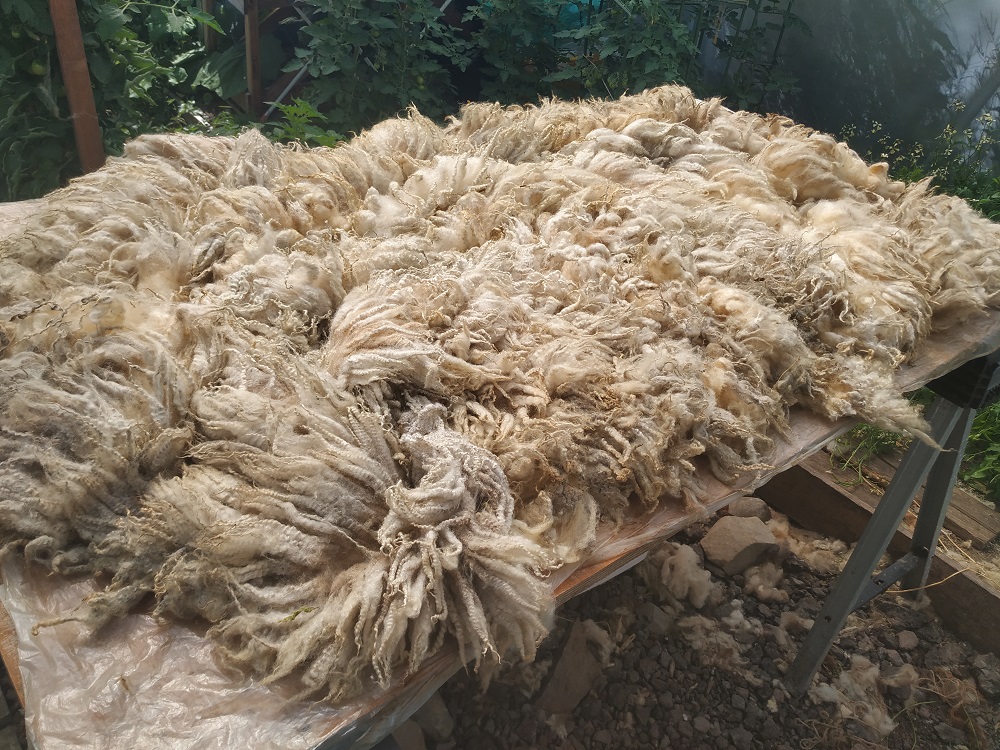
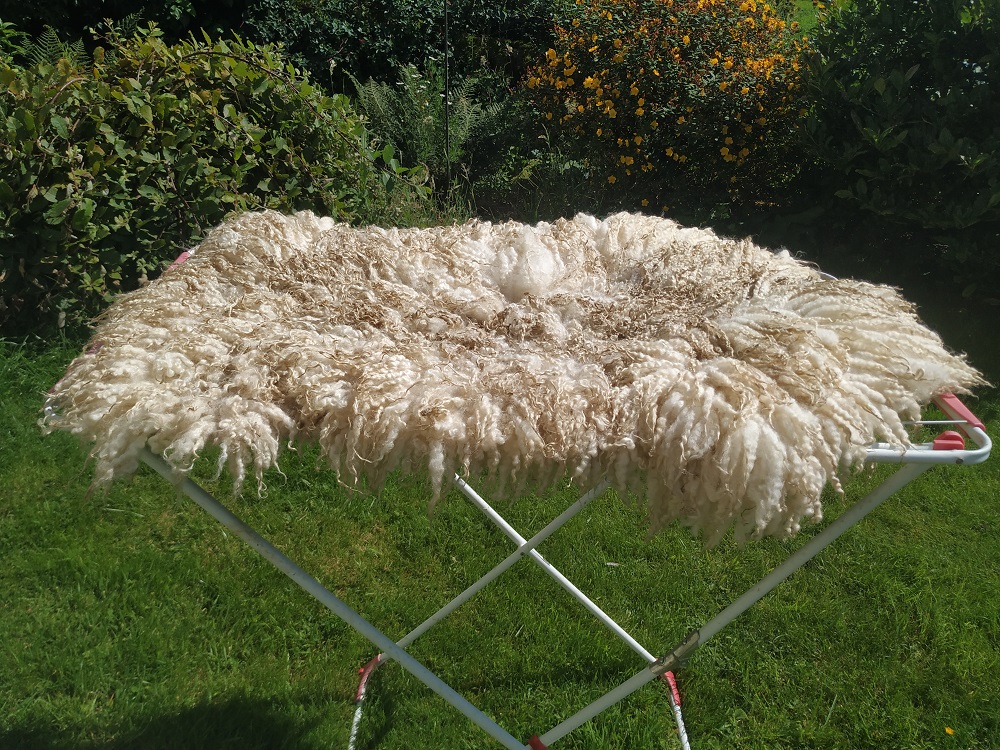
Once the rug is washed and rinsed, lay it flat to dry, curls facing upwards.
rug drying in the sun – pre quality control & beautifying
Beautifying
Once the rug is dry it’s time to check it over, make sure everything’s in place and remove any remaining bits of moss, seeds etc. You may be wondering at this point why your rug doesn’t appear as clean and fluffy as you had imagined it would be after all that washing. You might even think it looks a little grubby and seems a little sorry for itself.
Welcome to “the ugly duckling stage”. 🐣
Fortunately there is a simple explanation for this and a beautiful swan will emerge very soon. The wool is actually much cleaner than you think, but because the lanolin has been washed out it is lighter in colour now. This means that any dirt lingering in the tips of the curls (which is where it likes to linger), is very noticeable in comparison with the rest of the wool.
The other thing that you’ll notice is that a lot of the wool is flattened down. This is perfectly normal and nothing that can’t be fixed.
So, what can be done about those grubby tips and those squashed down locks?
Well first of all it depends on what type of fleece you have.
If for you have a fine woolled fleece, like my favourite Scotch Mule for example, the wool will need very different treatment to a coarser woolled fleece, like say a Herdwick or a Welsh Mountain.
I will leave courser wools for another day, but for fine wools read on to find out how to get your rug looking fabulous:
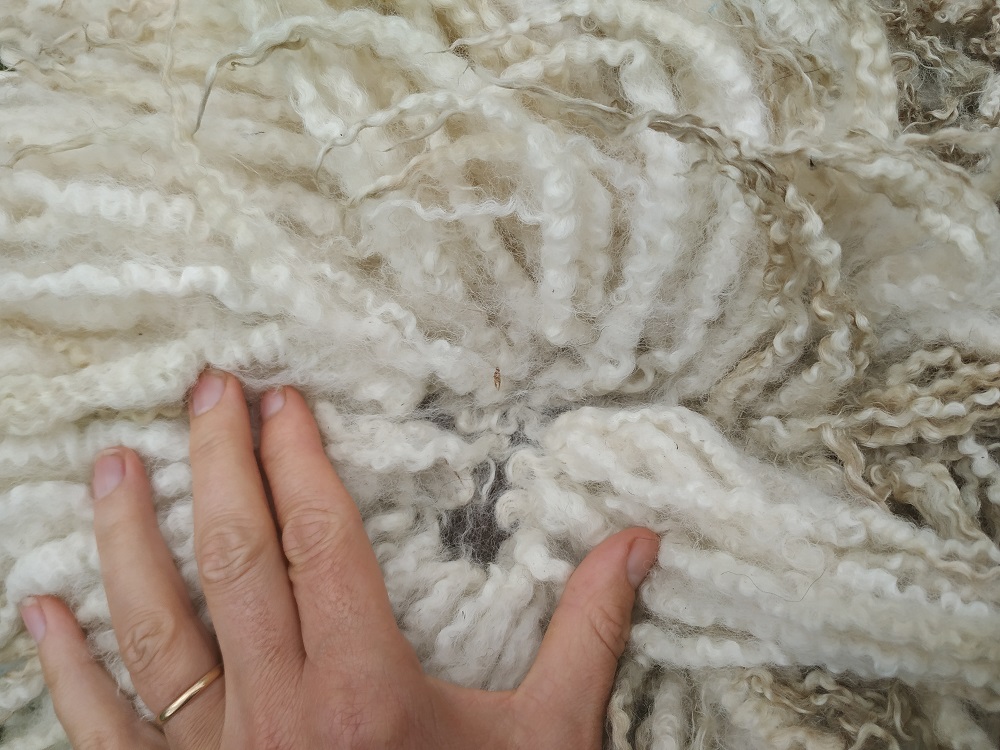
Make sure the rug is completely dry, set aside several hours, and start to work through the wool methodically. I call this process “preening”.
going through and checking the curls little by little
Take a little curl and run it between your finger and thumb from the base to the tip. This serves several purposes:
You’re making sure that each and every curl has felted in properly and there are no bald spots. If you find curls which haven’t taken or a bald spot, this can be remedied using a needle felting tool and popping the curl back into place.
You’re making sure each curl is standing upright and not squashed flat. If you find any flattened down curls, simply tease them up again.
some curls will be squashed flat
You’re checking that the curls aren’t getting over friendly with their neighbours. In the felting and washing process the curls can bunch up a bit so just separate out any clumps you come across.
some curls might be clumped togetheryou might find a bald spot which will need fixing
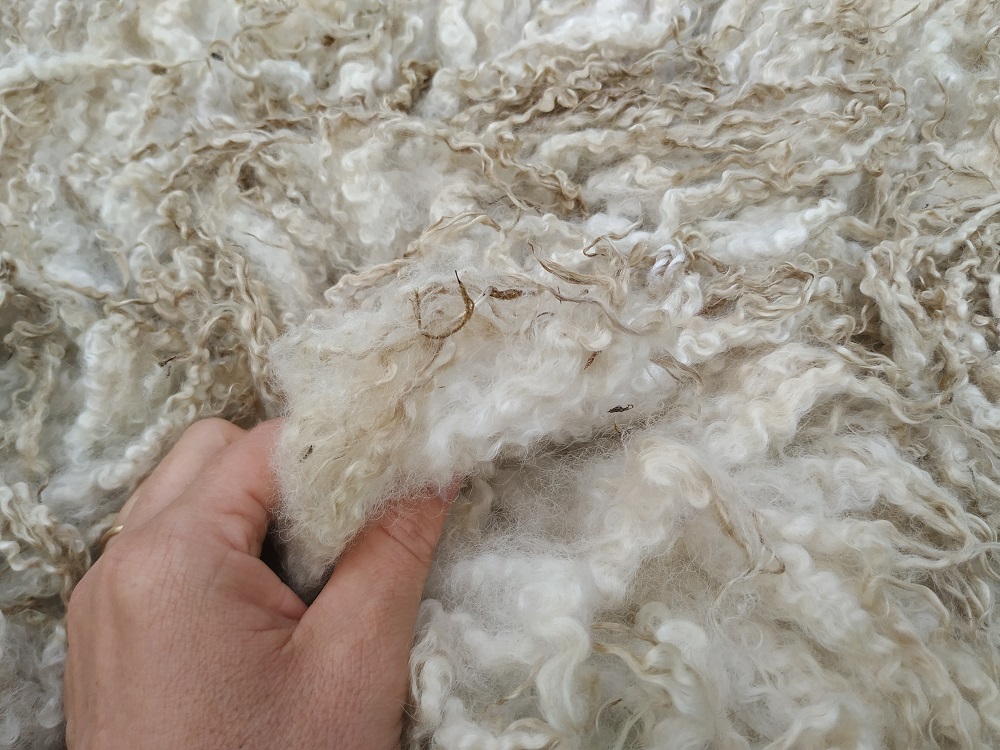
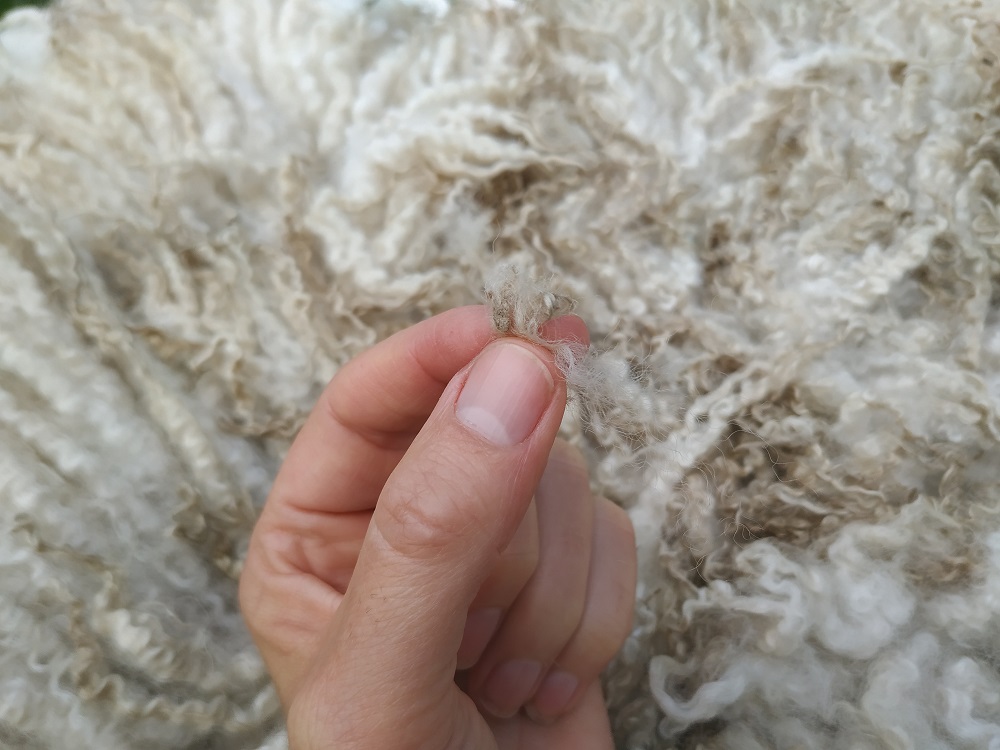
You’re removing crispy tips. Sometimes, depending on the fleece you’ll come across crispy tips, (exactly like dry ends on hair). Afterall, the fleece has been on the sheep for a whole year so it’s not surprising there may be a little patch of dry and damaged wool here and there. These crispy tips are dead wool so can be easily pulled off.
some curls might have crispy tips
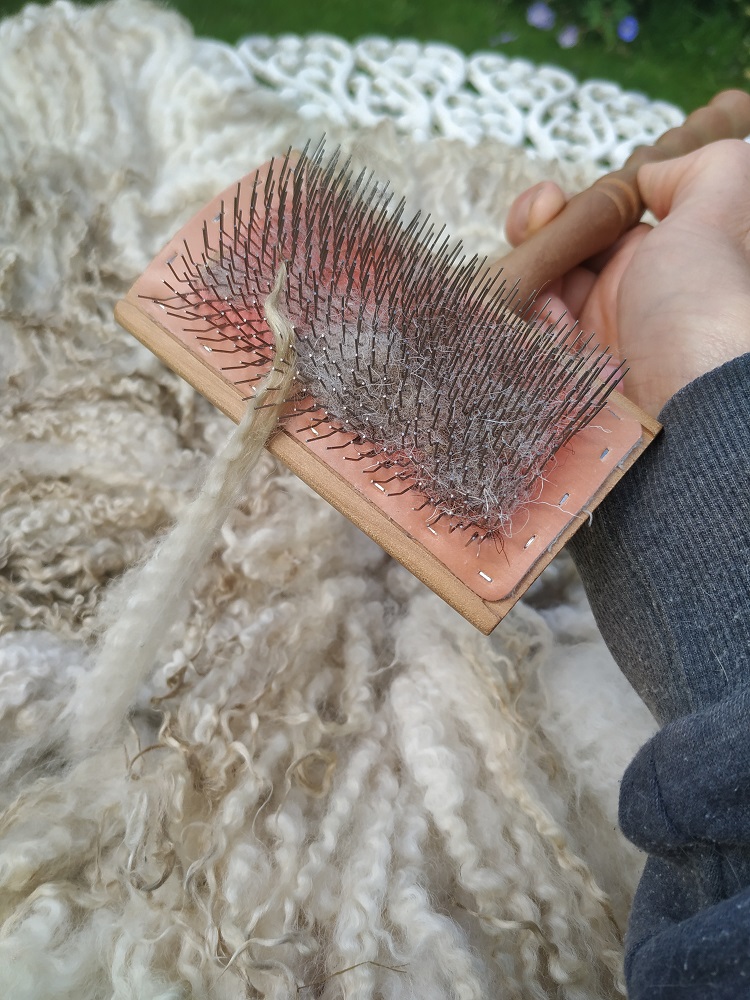
You’re teasing out dirt from the tips. Dirt tends to linger in the tips and no amount of washing seems to remove it. It needs to be manually removed with your fingers. Gently separate the strands of wool at the tips and then “rake” out the dirt with your finger and thumb. You could brush out the tips if you prefer but be sure to only brush the very tip, not the whole curl. You want to keep the curl intact and brushing would destroy it.
pulling off a crispy tip
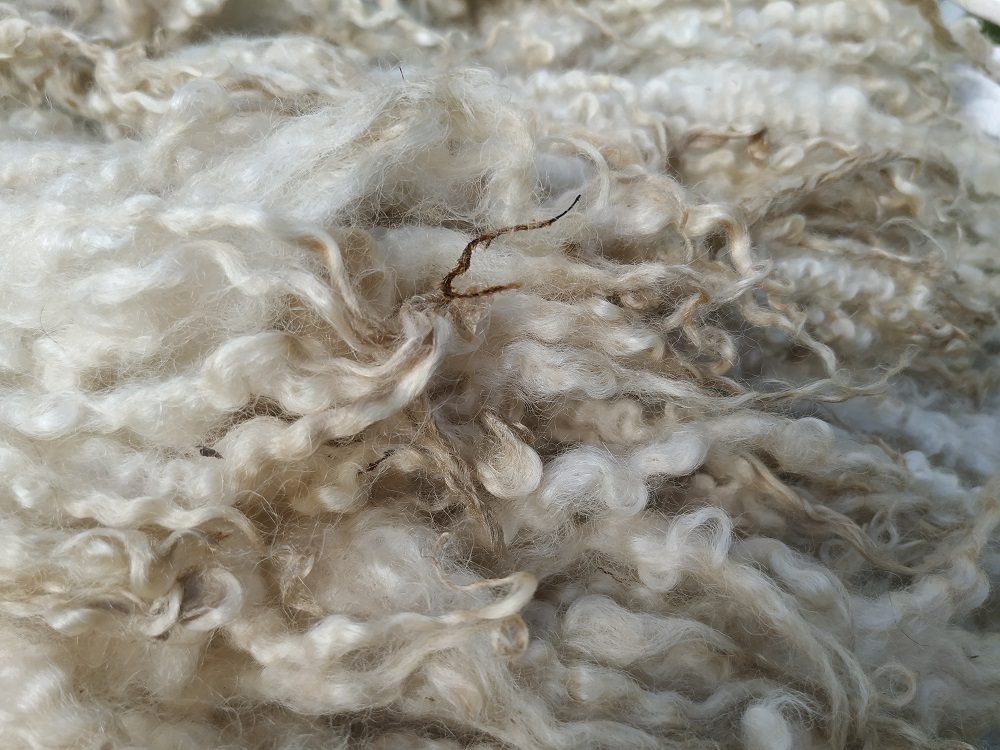
You’re removing any remaining bits of vegetable matter. You’ll find that even after all that felting, washing and rinsing there will be little bits of grass, seeds and moss hiding away in the wool fibres. Part of the beautifying process is removing these remaining bits of meadow sprinklings.
brushing the tip to remove dirt
bit of moss hanging on even after being washed
All this takes several hours but as you work through the fleece and see the wool transform before your eyes you’ll see how satisfying it is.
making progress
Optional stage – second wash
Sometimes the preening can dislodge bits of dirt and you might feel the rug would benefit from another wash. If this is the case, pop it back in the bath or the washing machine (wool cycle) as before. If you handwash it, don’t forget the vinegar rinse.
Optional stage – Hair conditioning soak
Sometimes the preening can leave the wool a little fluffy. Or you might just decide to give your rug a special treat. Either way, a soak in hair conditioner really brings up wool looking and feeling its best. Here’s what to do: Fill your bathtub with lukewarm water, add a generous dollop of SLS and paraben free hair conditioner. Leave it to soak for an hour or so. Rinse in cool water (with a dash of vinegar and some drops of lavender oil) as before. Do not wring, gently squeeze out the water and leave flat to air dry curls facing upwards.
soaking in hair conditioner
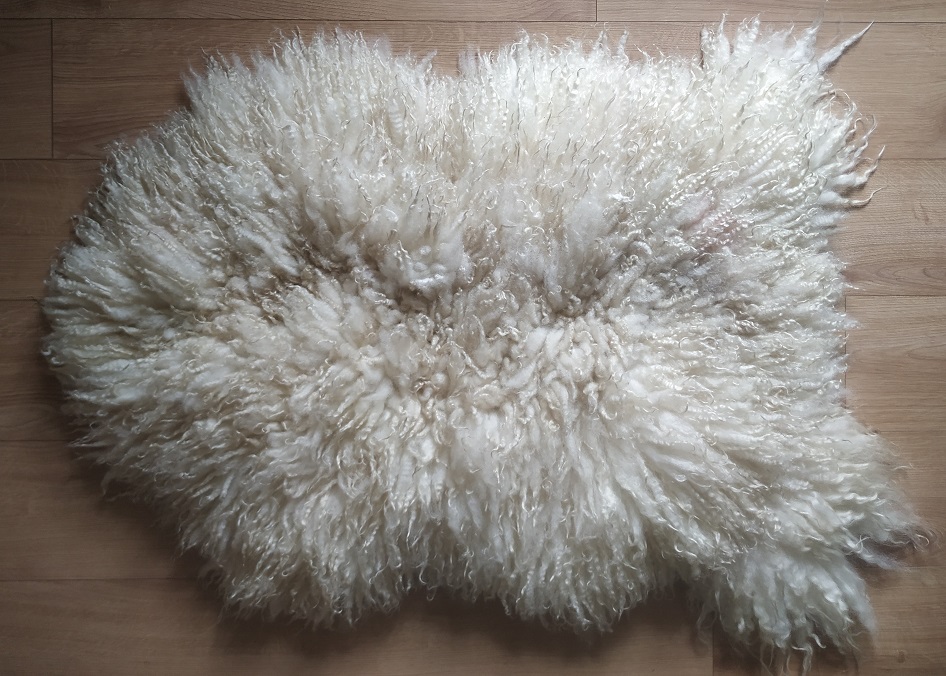
The moment you’ve been waiting for …
After a couple of days or so depending on the time of year, your rug should be dry and you can do that thing that you’ve been wanting to do ever since you first washed it. You can shake it out like hair in a shampoo ad and admire it and feel proud of yourself for putting in all those hours of work beautifying the wool. “Ta daa!”
I love vinegar! It has so many uses around the house other than in the culinary department. I use it in the dishwasher as a rinse aid, I make up a vinegar and water solution and clean my windows with it, I spray a vinegar solution onto the iron and bathroom taps to get rid of limescale and I use it as a stain remover. I even use it in the garden as a weed killer. My list could go on and on! But as this blog entry is part of my “Woolly Tips” – washing wool series, I’m going to rein myself in and focus on the benefits of using vinegar when washing wool, be that woolly socks, jumpers or felted fleece rugs.
First of all, a little bit about vinegar. There are loads of different types of vinegar; wine, sherry, cider, malt, balsamic, white, rice and lots more. Very simply put, each type of vinegar is made from a different core ingredient be this grapes, apples, grain or whatever else. Of all the different vinegars, white vinegar is the one traditionally used for cleaning as it’s slightly more acidic (therefore stronger) than the other vinegars. It is also colourless so there’s no risk of leaving a trail of vinegar stains in your wake as you go around the house merrily spraying it onto your taps and windows.
While my preferred vinegar for cleaning and weed control is white vinegar, I use cider vinegar for rinsing wool whether I’m washing bobble hats, socks and jumpers, or one of my felted fleece rugs. The simple reason I use cider vinegar is that I have litres of it knocking around because we make our own. If I didn’t have a glut of cider vinegar then I’d probably reach for the white vinegar.
So what are the benefits of using vinegar as a wool wash rinse?
I am bursting to tell you so here we go:
It removes lingering soap residue. This is particularly relevant if I’m handwashing a large felted fleece rug because rinsing one of these out can be quite tricky not to mention back breaking. Adding a slosh of vinegar to each rinse makes those soap bubbles disappear faster than a sheep sniffing out a sheep nut.
It closes the cuticles on the wool fibres making it smooth and silky. As with hair, the surface of wool fibres is made up of overlapping cuticles. When washing wool, the combination of warm water and soap opens the cuticles and leaves wool feeling a little stressed and rough to the touch if we don’t close the cuticles again. Enter vinegar! Vinegar does a marvellous job of closing those cuticles and smoothing out the wool fibres.
It restores wool’s pH back to being slightly acidic which is its preferred state. If you get geeky about laundry detergents as I confess I am, you’ll notice that wool and silk detergents have a lower, more acidic pH than “normal” laundry detergents for cottons and synthetics. “Normal” detergents as a rule, shouldn’t be used to wash wool because although the alkaline composition does a great job of cleaning, it is too harsh for wool and over time can cause damage to the fibres. Since I use an alkaline soap to felt my fleeces (alkaline soap is the best for felting), I absolutely need to restore the wool’s pH back to being slightly acidic. Each time I make a felted fleece rug it gets a vinegar bath after the final wash. I can almost hear it sighing with relief as it sinks into the water and the cuticles can relax again after all that hard work felting.
Sometimes people ask me how much vinegar to use in their rinse water/rinse cycle. My answer would be there’s no rule really, I use a “slosh” which probably equates to about 15mls with each rinse.
I also get asked if vinegar makes your woolly jumpers or felted fleece rugs smell like a chip shop. Funnily enough, once the wool is dry there is no vinegary smell at all. I also rinse my hair in a vinegar solution and can assure you that there is no smell of vinegar whatsoever, which is just as well because much as I like vinegar I wouldn’t want to walk around in a cloud of “eau de vinegar”.
This is the first of a series of articles I’m going to be writing about felting fleeces. As a lot of readers probably already know from visiting our shop, I transform fleeces into sheep-friendly “sheepskin” rugs and cushions by wet felting raw wool, a technique which has been around for many hundreds, if not thousands of years.
When I first started felting fleeces to make into rugs I found it very hard to get information about how to actually do it. There seemed to be a lot of mystery around it and everyone had their own technique and way of doing it. In the end I learned mostly by trial and error.
The hints and tips I’m going to be sharing with you over the coming weeks are the things I’ve gleaned over the years I’ve spent throwing fleeces around in my shed amidst tears and many cups of tea. I’ve had so many disasters and I’m embarrassed to say a lot of fleeces have ended up on the compost heap simply because I lost patience with them. But I’m happy to say there have been more successes than disasters along my woolly journey and so I’m delighted to be able to share some of my favourite tips with you.
Today’s article is about using wool which I’d normally discard to make into something lovely and useful.
I hate waste and one of the reasons I started to make cushions as well as rugs, was so that I could use up leftover wool.
scraps of leftover wool
Recently I made a cushion from scraps of wool I had leftover from a rug that I’d made a few days earlier. The leftover wool was all in bits lying on the floor.
It was really dirty and I was going to scoop it up and chuck it on the compost heap for the birds to use for nesting, when I realised that beneath the grubby exterior the wool was actually lovely quality.
Never judge a book by its cover I said to myself as I piled the scrappy wool onto my work table and got to work separating out the nice quality (albeit very dirty!) wool, from the not so nice quality, matted bits.
I was really careful about keeping only the nicest bits, any wool which was even a tiny bit matted or didn’t feel right I discarded. This was quite tricky because most of the wool was so dirty it was hard to imagine what it would look like clean. I did wonder if perhaps I was being a little over optimistic!
After a couple of hours of sorting I had enough wool to lay out into a cushion shaped frame and was able to felt it into a cushion cover.
It took a lot of washing but I was really pleased with how it turned out. It was a real “before and after” moment!
So, even scraps of wool lying on the floor can be transformed into something lovely, but mytip would be to make sure you use only good quality wool from the scrappy pile. Tempting as it may be to want to rescue all the little bits of wool you can, remember dirt can be washed out, however nothing will remedy matted or bad quality wool, you’re best leaving those bits for the birds to make into cosy nests.
There will be washing tips coming up in subsequent posts, washing raw fleeces is one of my favourite geeky things but I have so many tips that I’m going to split into several posts.