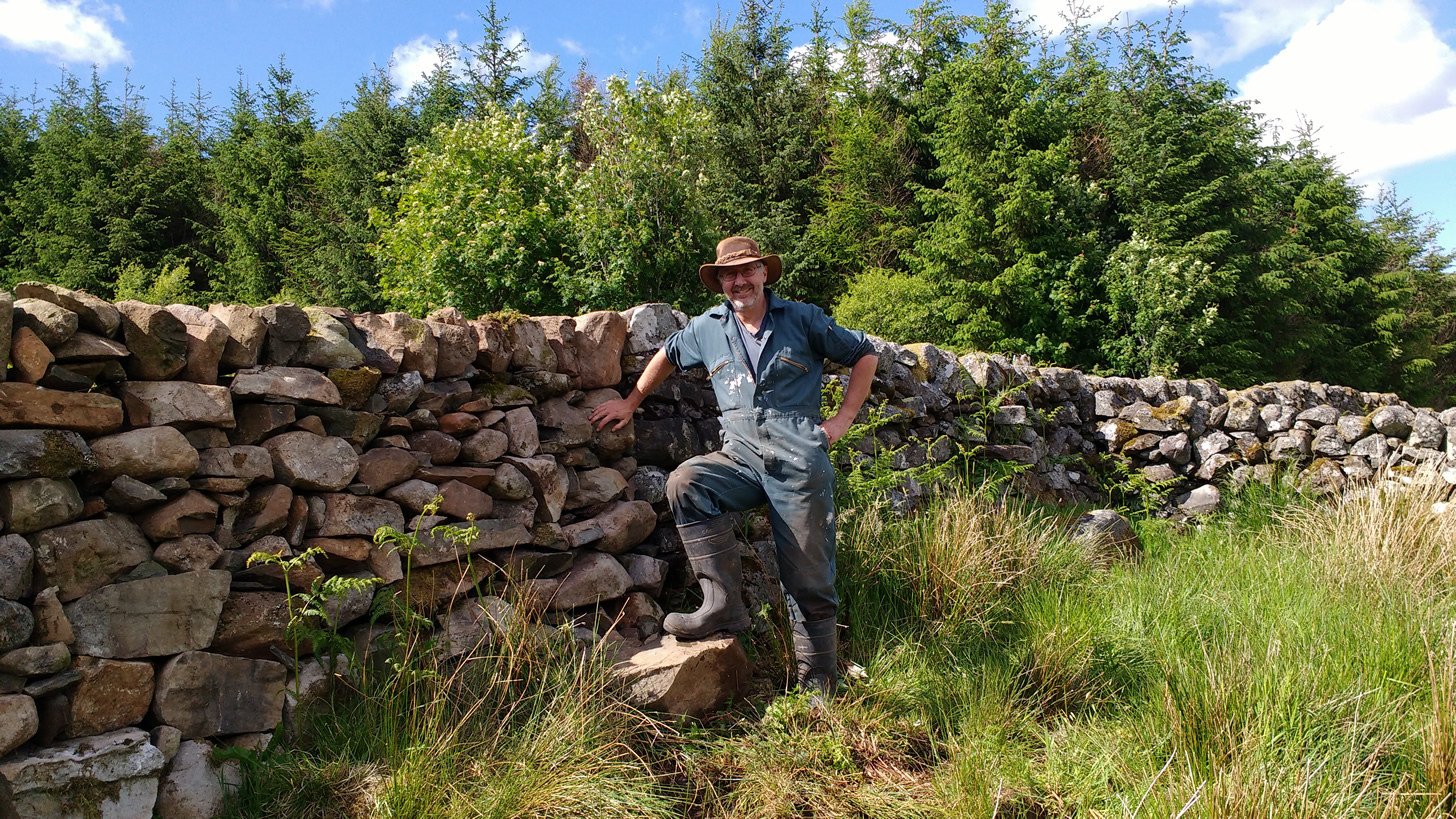
I think I have mentioned before that we have quite a lot of stone dykes here and in areas, they are bit run down. With all the other jobs (firewood, sheep handling area, veggies etc), there hasn’t been much time to do any repairs. However, over the winter I was actually paid to fix someone’s wall. It was a neighbour of one of Nicole’s clients and a few metres of wall in their garden had collapsed in a storm. We had a similar collapse here, as it happens.
 Anyway, while it’s not really part of my plans to become a professional stone dyker, I said OK and took on the job. It was a bit tricky as the front of the wall was an ornamental flower bed, so I couldn’t stomp about in my size 10 boots. But the wall was built on a slope and most of the stones were on the other side so I worked mainly from there.
It wasn’t too bad a job as most of the stones were small, so you can work quite quickly. It was all done in a couple of mornings and I was quite pleased with the result. The client was too – always a good thing.
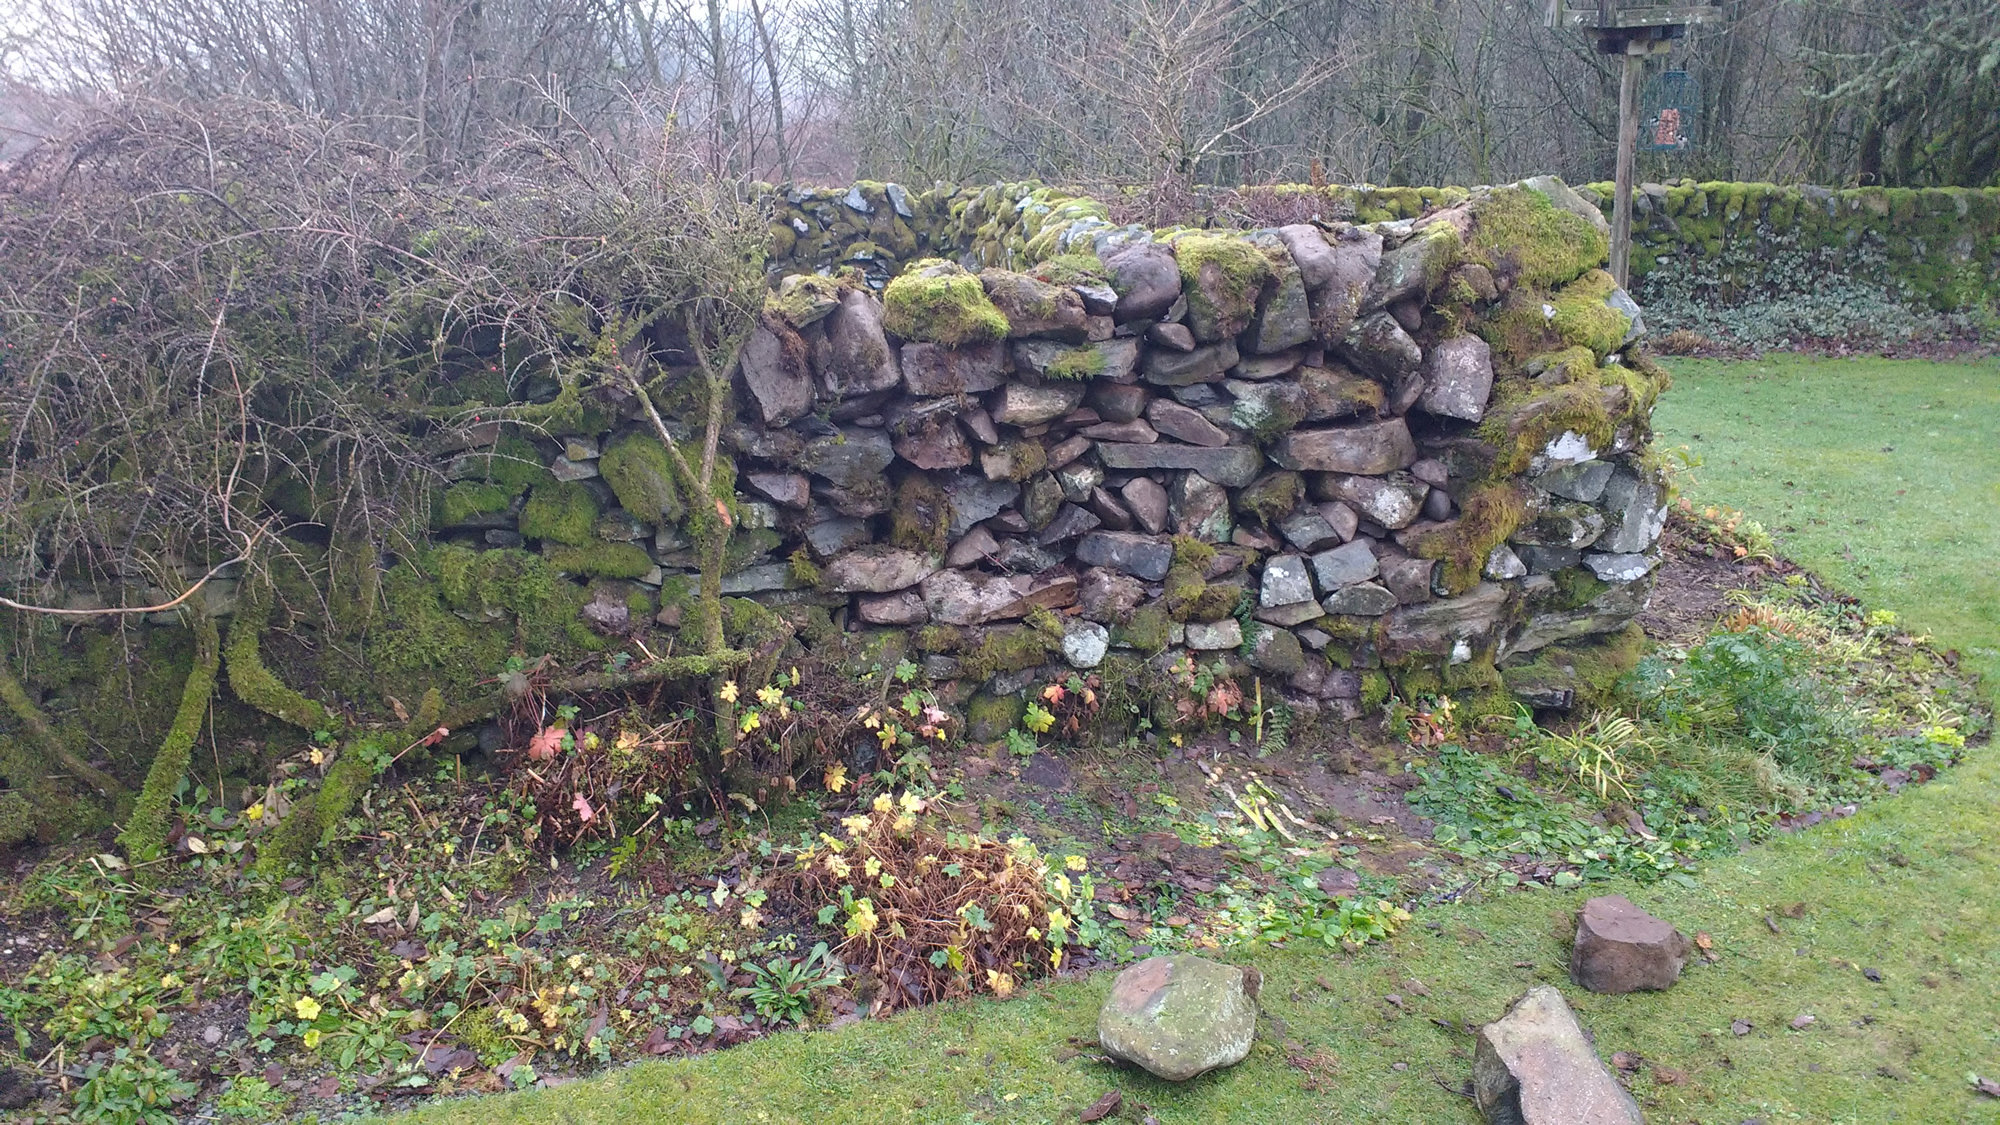
Having done that, there was the collapsed wall bordering our hen run to look at. Again, this was built on a slope and it looked like the wall had been gradually tipping over over the years. Also, all the stones were piled all over the wall and took a few hours to move out of the way. It was a right mess.
These stones were a bit bigger, so it took a couple of days to rebuild this section. It just takes a bit longer to get the bigger stones all to fit together within the lines of the wall. And believe me, you only want to lift them once, so you spend a lot of time figuring out what will go where. Nevertheless, I got there in the end and am quite pleased with the result. I did have a few stones left over which was a bit of a worry. That said, the same thing happened on the course and the instructors just shrugged that off saying that it happens.
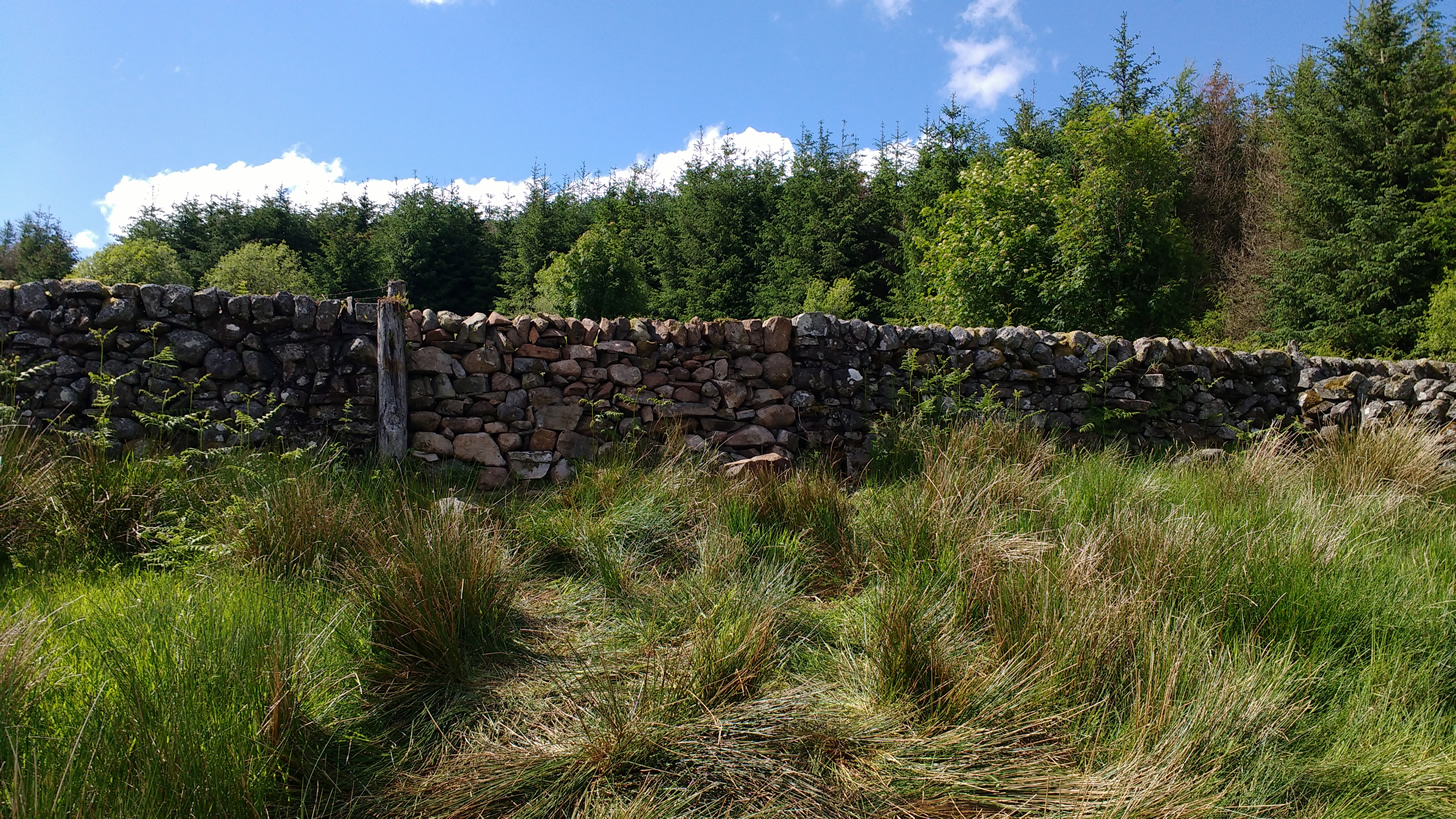
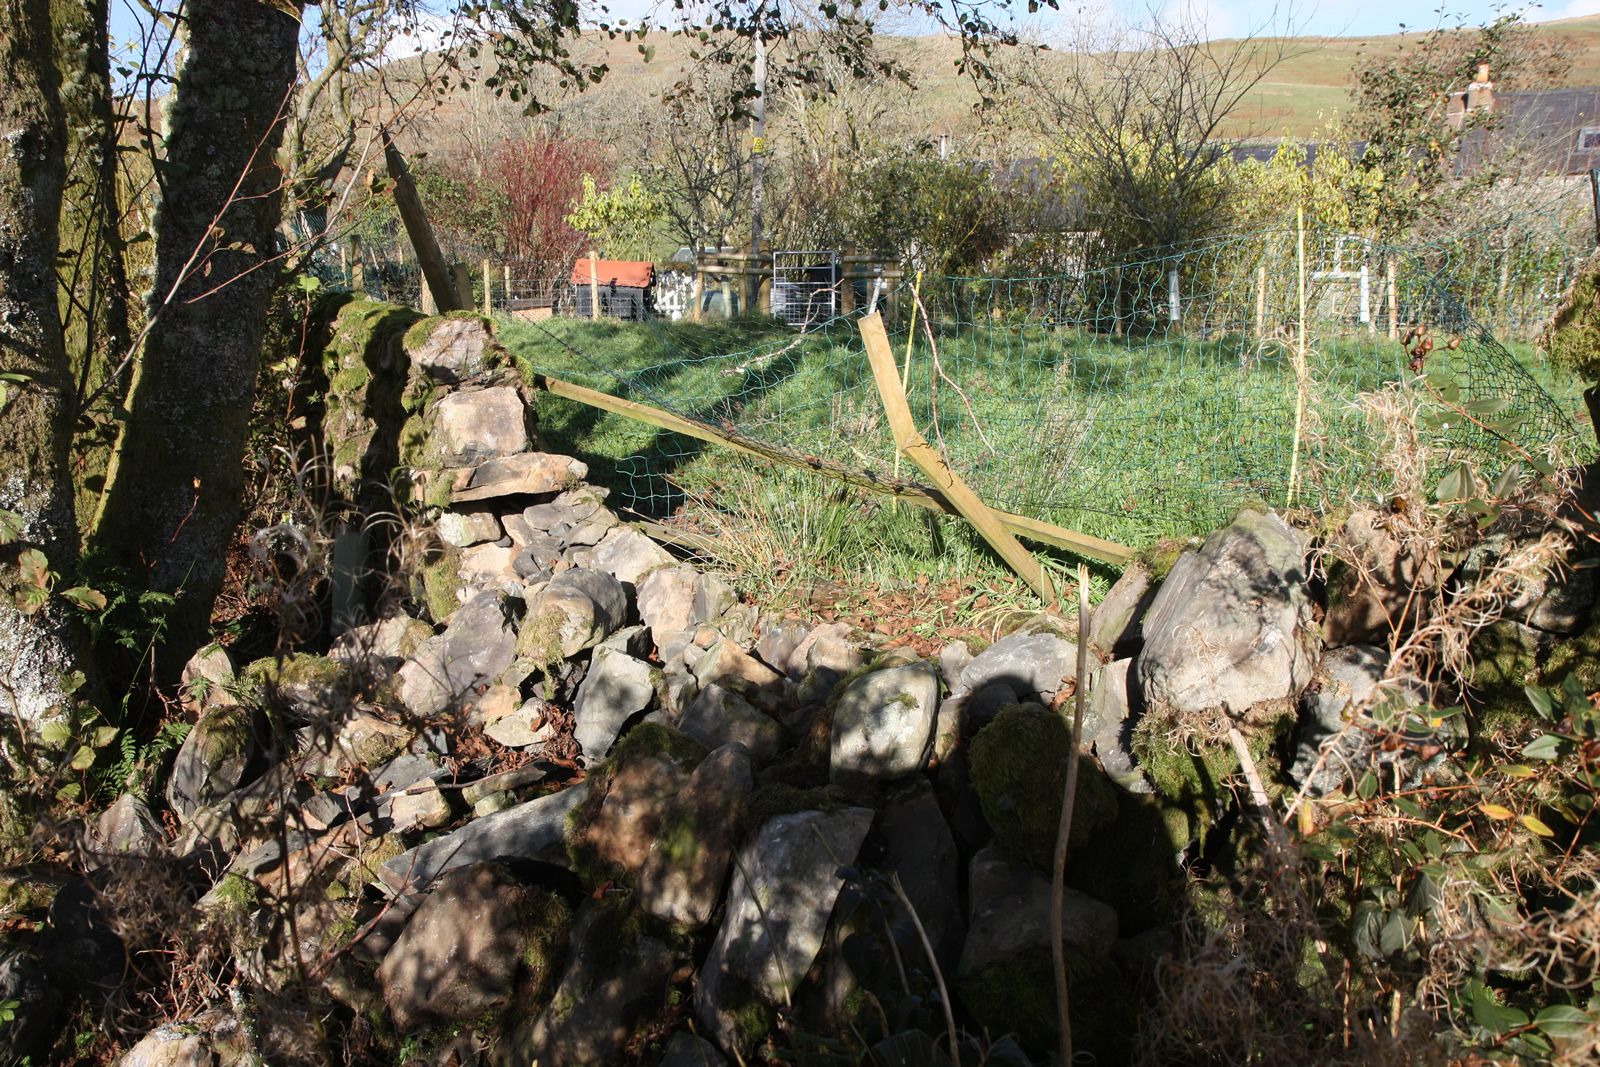
My current project is a slightly bigger challenge. There is a gap in the wall at the top of our largest field. It’s the border between our patch and forestry land. In the past, there has been a livestock handling area the other side and we suspect a previous owner of our patch knocked through the wall so they could “annex” this. Not sure why, it’s full of bracken (poisonous to livestock), hard to get to and far from any power source. That said, it looks like it hasn’t been used for years, decades even, as it’s all a bit run down.

Anyway, there is a small stock fence across this gap and it is about to fall down. So we decided it would be better to restore the wall. It will look better and be safer for the sheep. It should also slow the spread of bracken into our field.
The main problem is that the original stones have largely vanished. There were a few in our field and so I retrieved those. We also have a pile accumulated from the gate opening we put into another wall a while back. I have been bringing those up in a trailer. Unfortunately, the terrain is too dodgy for the tractor – the front loader would have been very helpful for moving and lifting the larger ones. So I have to use the quad bike and muscle power. All the shifting is done by hand, lifting them into the trailer one end and then out again the other end.
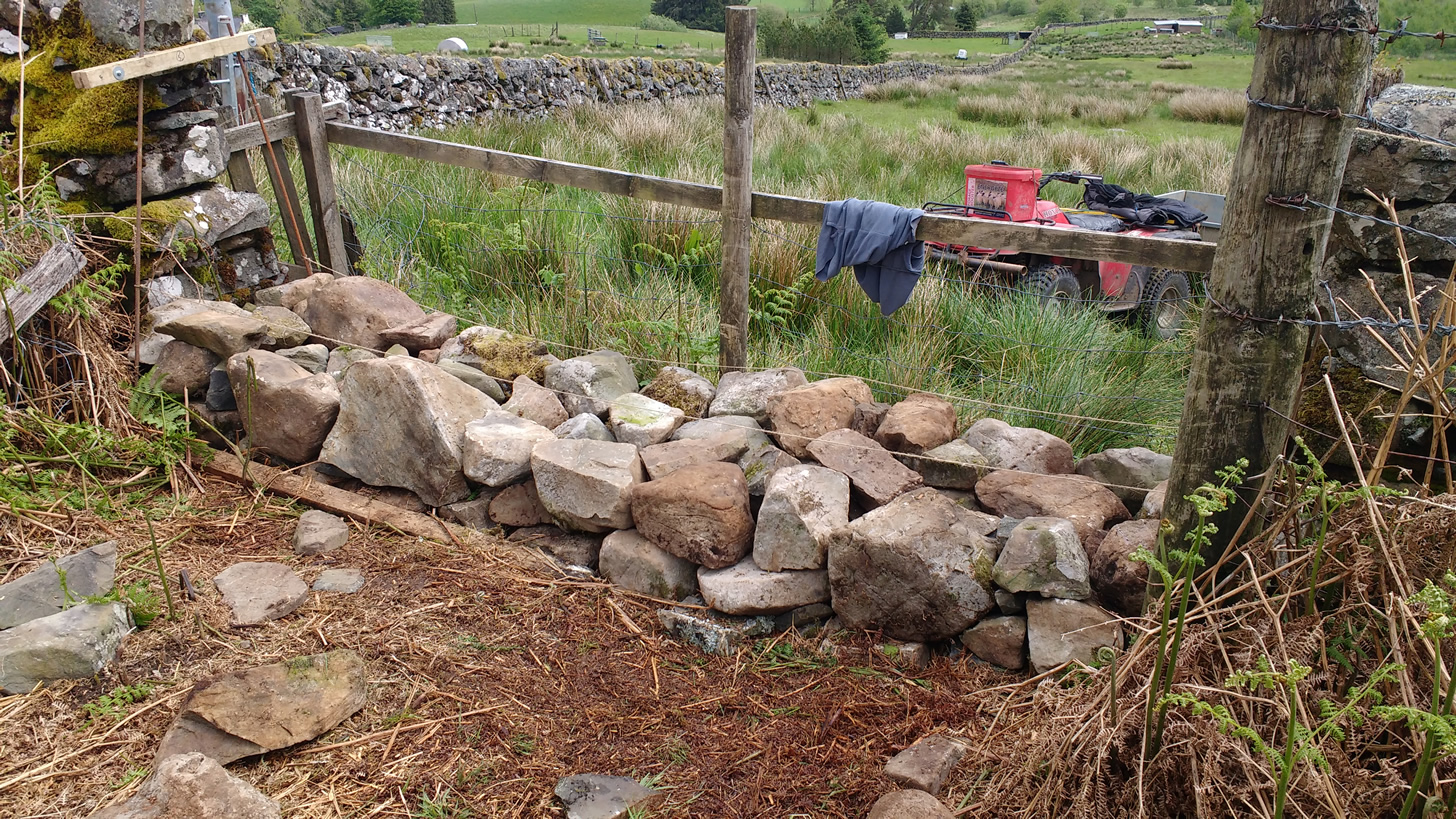
The remaining stones I am sourcing from the surrounding area. There are quite a few lying around on the ground. The main problem is that they are, on average, a good 50m away. So it’s a lot of carrying which takes up a lot of time and effort. They are also all quite big (it’s hard to tell from the picture). The larger ones get rolled. Luckily, I am rolling them downhill.
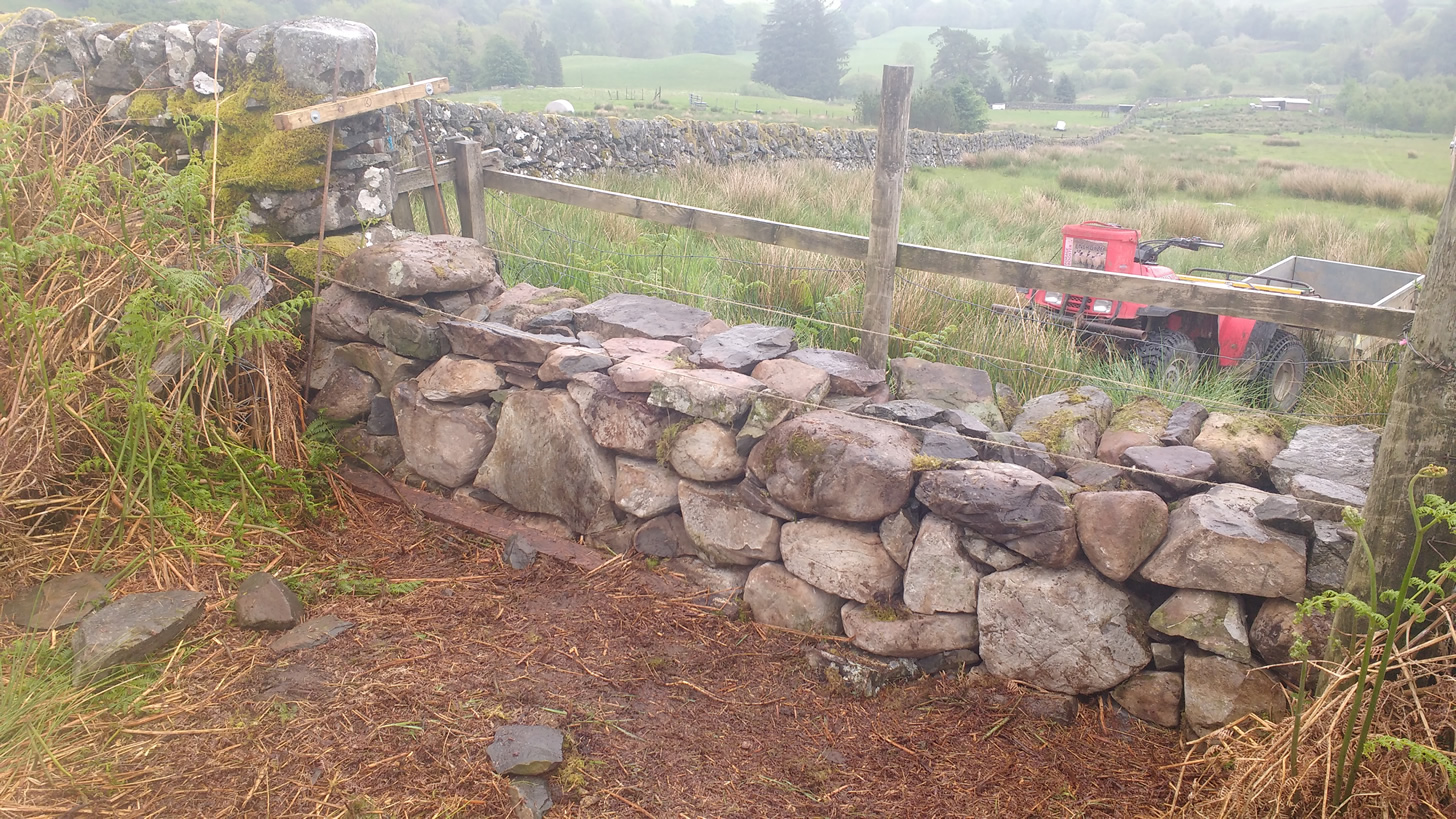
The other problem is the midges – it’s perfect terrain for them. As a rule, they don’t bother me too much (got used to them as a kid), but when you are working in one area, they get into your ears and eyes and are really annoying. So it was midge nets on. Luckily, the wind generally picks up during the day and they hate the wind.
All in all it took 5 days. Most of the time was spent locating and carrying stones. My back is complaining a bit now. Day 4 had its dramas. I had my first wasp sting since I was a kid. I was picking up a stone and something flew straight at my face and stung me. I’d only just taken my midgie net off! It came back for further attempts but I kept knocking it away – the repeat attacks suggest wasp (didn’t actually see it). Having dealt with that, I then contrived to slip while carrying a large rock. As I flew sideways like a falling tree, the rock landed on my knee, painful but thankfully no real damage done. At that point I took a break and put some ice on it and had a cup of tea.
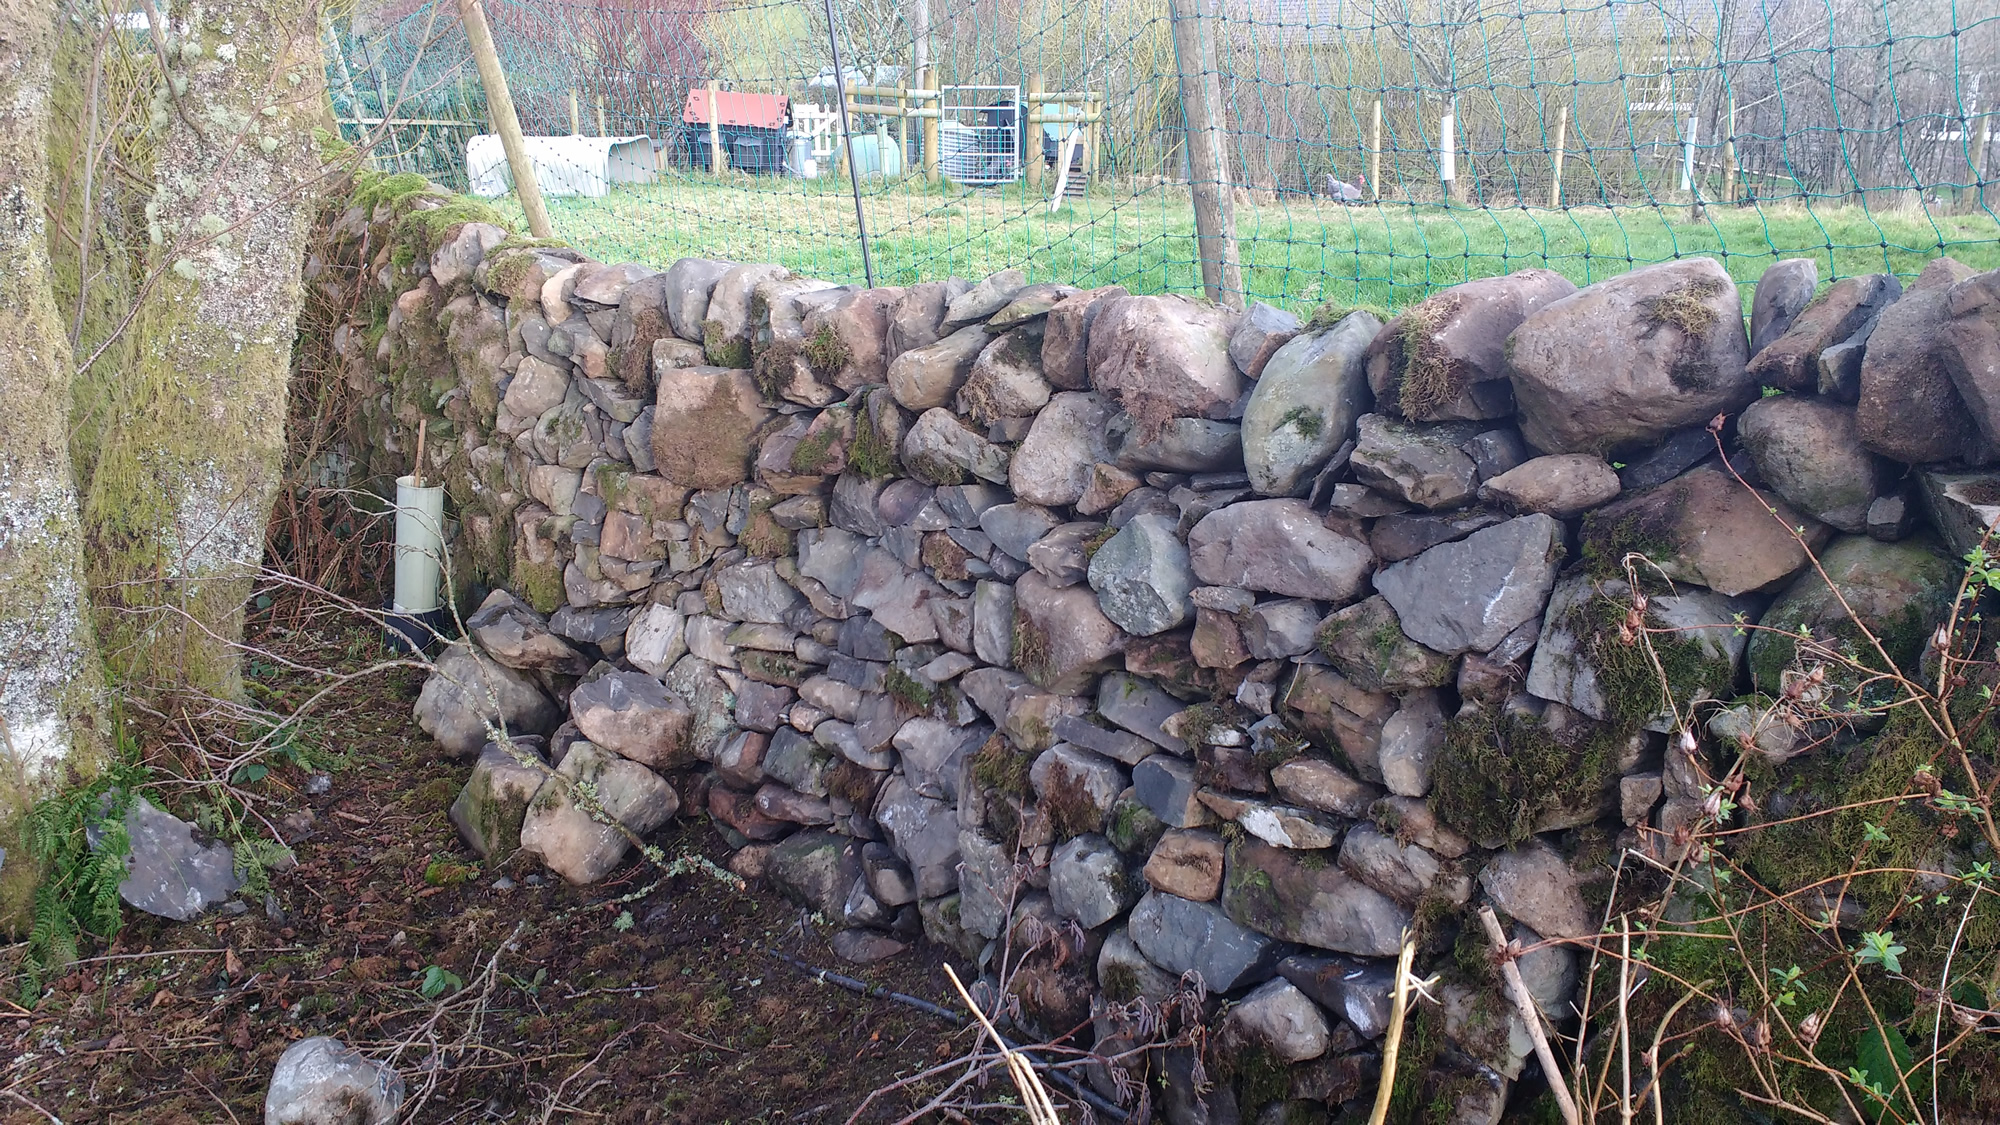
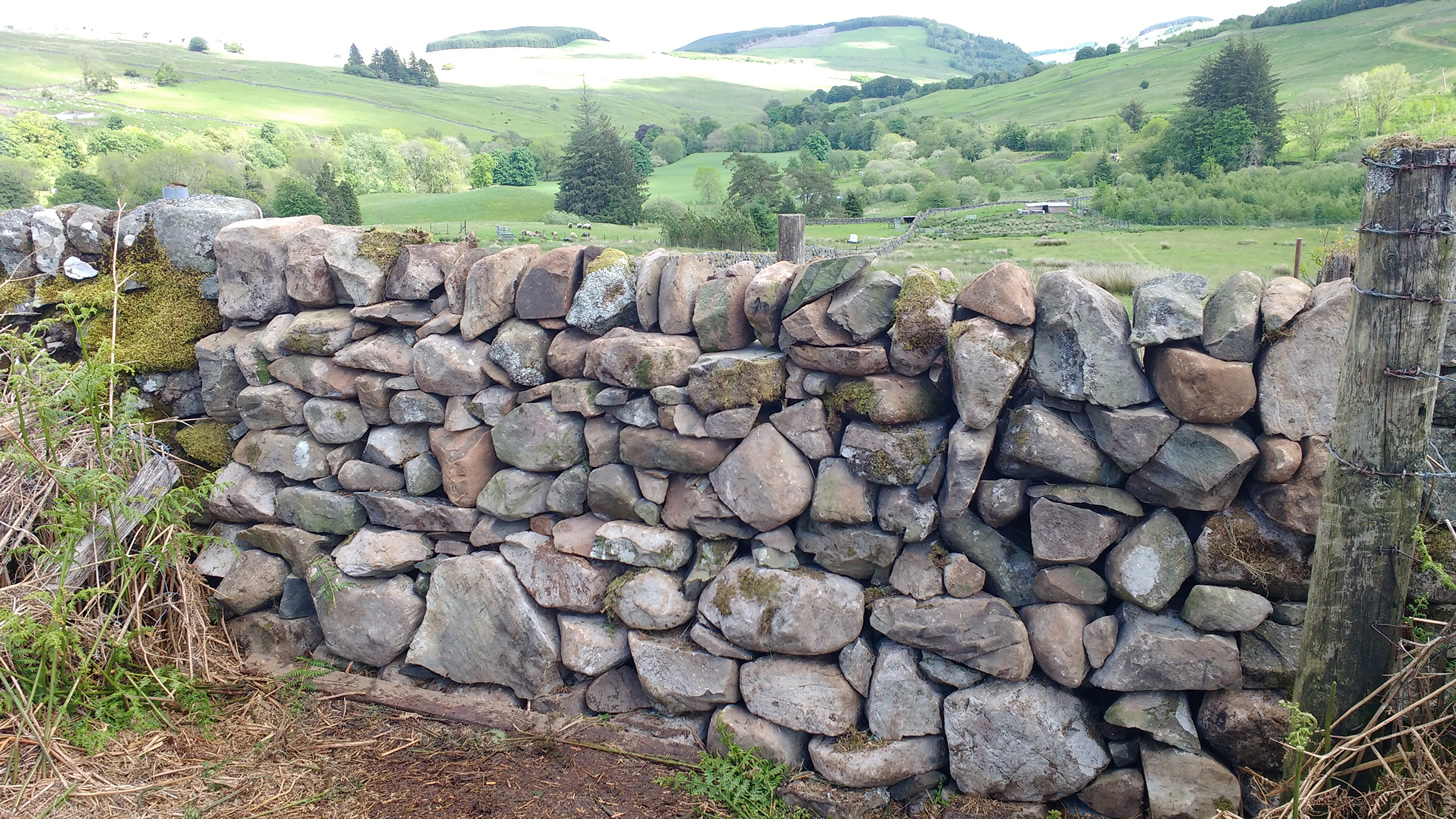
Anyway, on the fifth day the weather was a bit kinder. Dry, windy enough to blow the midgies away and sunny. The gap is filled and the sheep are much safer. And I’m off to run a bath.