Posted on Leave a comment

Pepper not doing so well

Ten days ago I wrote a story about our hen Pepper who had a problem with her crop which wasn’t emptying properly.

Since I whisked her into the vets for an operation at the beginning of January (where the vet found nothing untoward), we’ve been scratching our heads wondering what could be causing poor Pepper’s crop problems.

Pepper in the kitchen

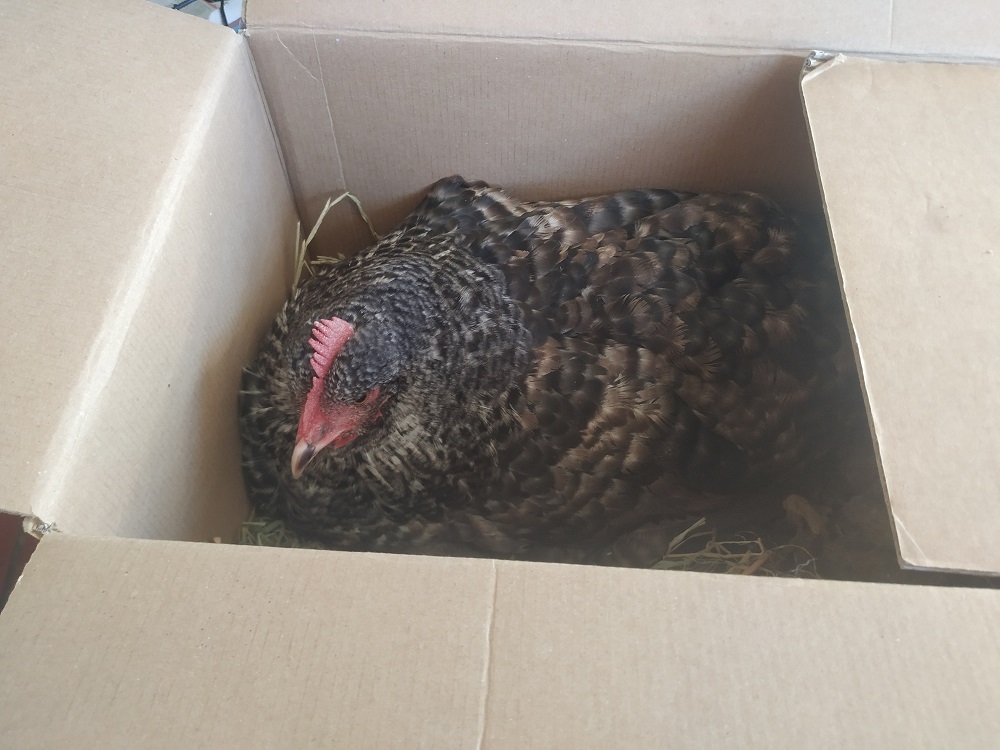
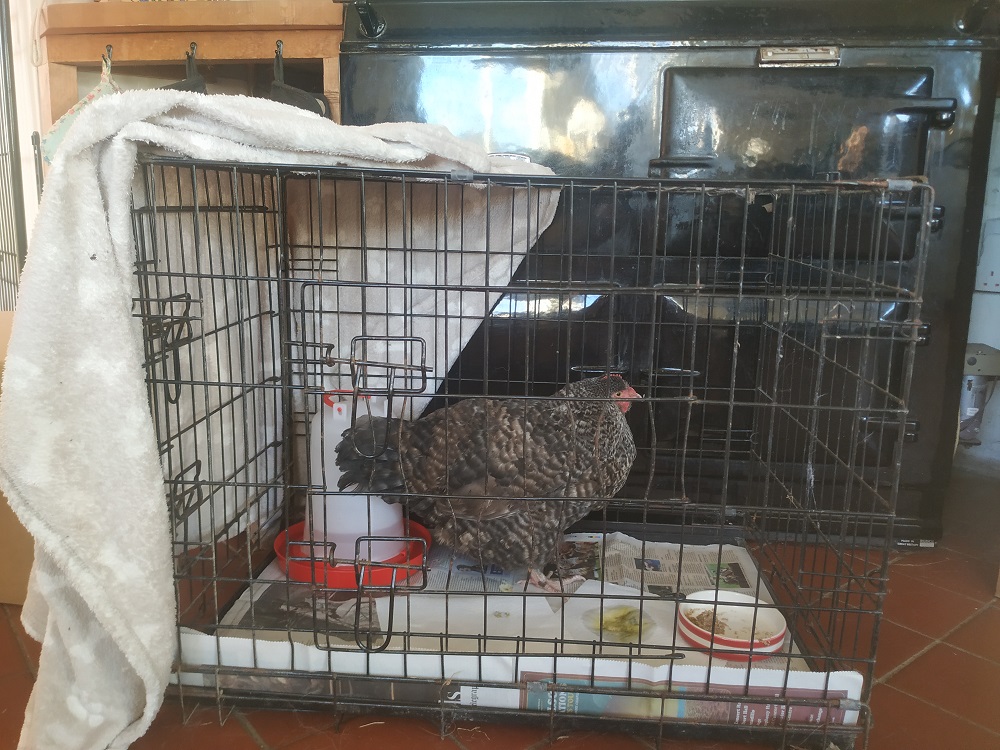
Since her operation, Pepper’s been convalescing in the kitchen in a dog crate where she can stay warm and safe until she gets better.

Since my last story and after chatting with the vet, we’ve given Pepper “Flubenvet” which is a poultry wormer, in a little dropper into her beak over the course of seven days.  The vet didn’t think she had worms, but said worming her wouldn’t do her any harm.  We were willing to try anything.  We also gave her “Beryl’s Friendly Bacteria” which is especially for hens to help her post-antibiotic tummy.

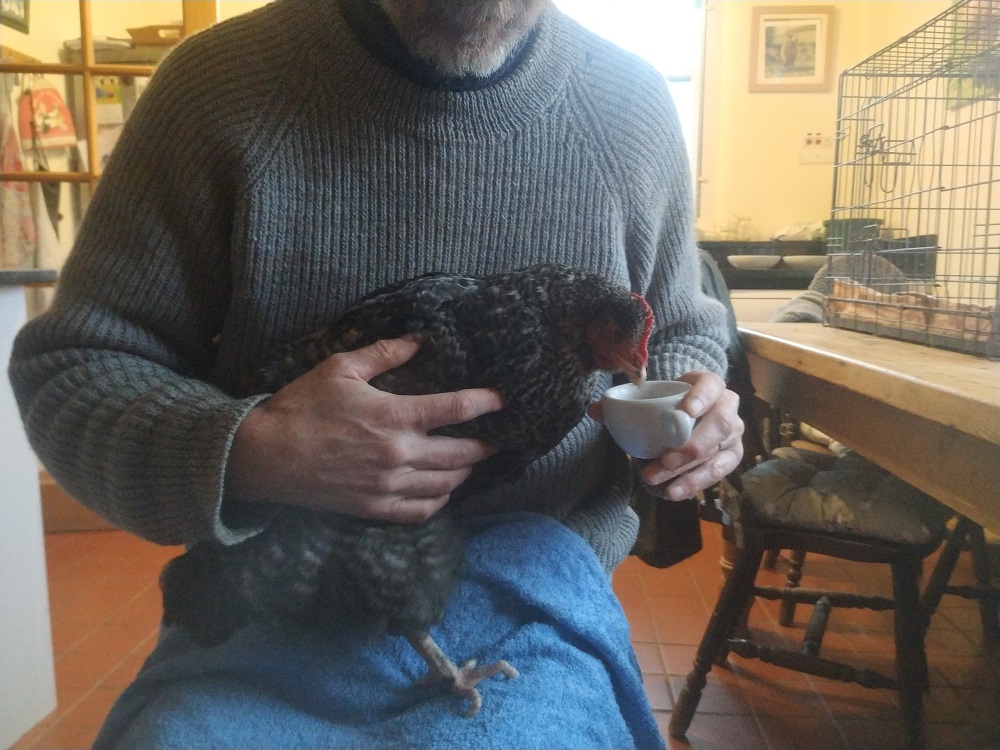
Pepper doesn’t have much appetite but every day she eats a small amount of chick mash, scrambled eggs or porridge and drinks some water.  We massage her crop daily and monitor her droppings.   Each morning we check her crop to see if it has emptied overnight.  Pepper’s crop continues to feel like a ping pong ball in the mornings but she seems relatively perky and continues to have some appetite. She’s still going to the toilet despite her blockage which means that some food must be passing through.

We continue to hope.  However, Pepper’s morning crop situation is worrying and every day at 7.30am when we give her fresh bedding and her morning cuddle we desperately hope to find her crop empty.  A chicken’s crop is like a storage bag, it sits under the right breast and fills up during the day as the hen goes about her business foraging.  Food collected in the crop then trickles into the gizzard and then on into the digestive system.  By morning the crop should be empty and the hen house full of droppings from the previous day’s foraging.

Pepper in the polytunnel last weekend

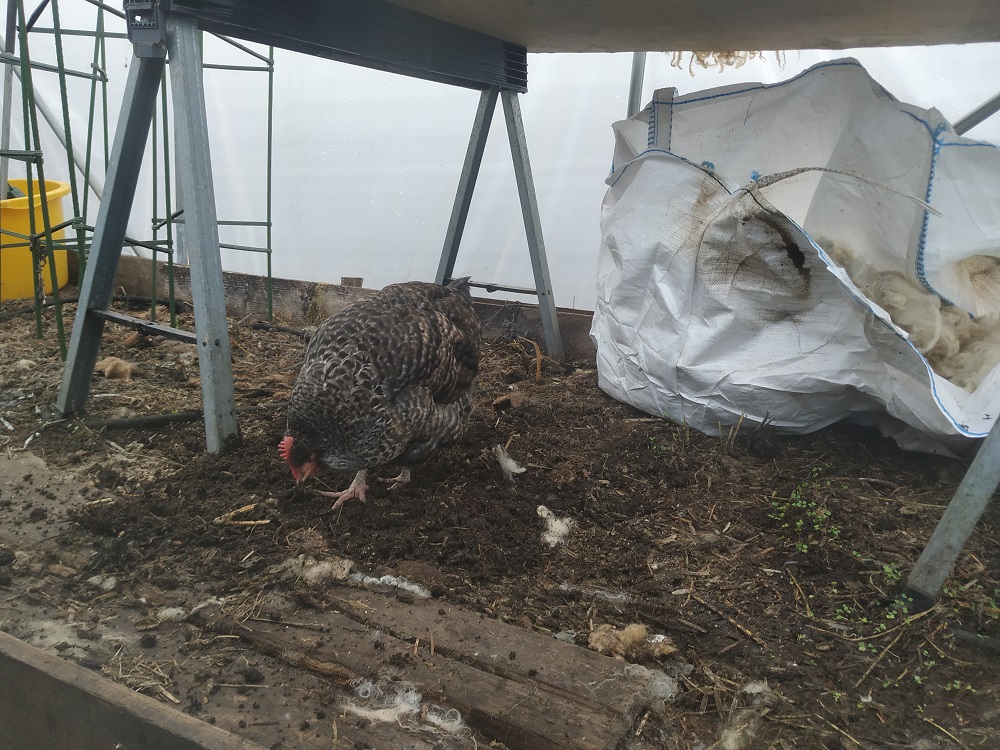
Over the days Pepper hasn’t made a lot of progress but seems perky-ish and enjoys daily trips to the polytunnel where she has an hour or so to stretch her legs and scratch for worms.  We were so happy to see her eating worms and scratching around the first time we took her in.

Last weekend Pepper turned a corner.  On Saturday morning her crop had emptied, I jumped for joy!  Pepper spent Saturday and Sunday looking much happier and more lively and really enjoyed herself in the polytunnel.  If it wasn’t for the fact that underneath her feathers she was very thin, Pepper looked for all the world like her old healthy self.

Sadly though, since last weekend, Pepper’s perkiness has started to wane.  She has become more tired and droopy as each day has passed.  Her crop has gone back to feeling like a ping-pong ball again in the mornings and Adrian and I are preparing to say goodbye to our dear feathered friend.

Pepper last week scratching for worms

I carried Pepper into the polytunnel today but she just stood on the soil and closed her eyes.

I brought her back indoors and gave her some beetroot soup with a dropper but she has spent most of today asleep.  She is getting more wobbly on her legs and we have to take care when placing her back in her dog crate hen house so that she doesn’t topple over.

We are making her as comfortable as we can and keeping her hydrated, but sadly Pepper is fading.  There is only so much we can do.


Posted on Leave a comment

Poorly Pepper

For a wee while now one of our elderly hen ladies, Pepper hasn’t been quite her usual self.  The signs were subtle, in fact, there was only one sign, her tail feathers weren’t as perky as they usually are.  We weren’t unduly worried because she’d gone through a hard moult in November along with the other hens.  Hens can feel a bit depressed when they lose their feathers, particularly if the weather’s bad.  We thought she’d perk up once her plumage grew back.   We were also not too worried because she wasn’t displaying the usual signs of hen illness; her comb was a bright healthy shade of red, her bottom was clean and fluffy and she had a good appetite.  She was also feisty (Pepper is second in command to Clippy the top hen), and she was still merrily bossing the other hens around along with Clippy and keeping order in the flock.

Then, one morning a couple of weeks ago I noticed Pepper wasn’t eating her corn.  She was running in for it and claiming her position next to Clippy to get the biggest beakful, but  she wasn’t actually eating any, just moving it around on the ground.  Alarm bells ringing, I scooped her up and brought her indoors.  The first thing I did was feel her crop, it should be empty first thing in the morning but Pepper’s was full and the size of a large golf ball.  She was also quite thin.  I was relieved and upset at the same time.  I was glad to have found the source of her discomfort, but upset because an impacted crop would need operating on, and sod’s law, it was 2nd Jan, bank holiday in Scotland.

… within a few minutes I had Pepper in a box and Adrian was de-icing my car.  Having spent three seconds philosophising about how these things always seem to happen at weekends, I’d rung the emergency vet and booked Pepper in for a crop op.

A crop operation entails a small incision into the crop and the offending blockage being removed.  It’s done under a local anaesthetic and usually takes about 15 minutes.

Once at the vet’s we got started, I held Pepper in position and the vet got to work.  When the crop was opened, we were both a little surprised to see only corn.  No bailer twine, no ball of hay, no bunch of feathers.  Truth be told we were strangely disappointed, we had expected a big plug of something to plop out, like pulling out a bunch of hairs from the plug hole.

We were a little mystified because Pepper should have been able to digest the corn in her crop, it was soft and should have been able to pass through into her gizzard without any problem.

Pushing that niggling worry into the back of my mind for the moment, I set off for home with Pepper stitched up and looking quite perky considering.

We put her in the kitchen by the aga in a dog crate and monitored her.  The first thing she did was drink lots of water.  That’s good we thought.  Later that day, we offered her a tiny amount of softened chick mash in a mini cup which she ate and enjoyed.

The next day Pepper was looking perkier and we offered her a  tiny amount of scrambled egg which again she enjoyed.  Later in the evening she had some more softened up mash.

Pepper post op by the aga

On day three it was sunny and relatively warm.  After some thought over a cup of tea, we decided to put Pepper outside so she could be with her friends.  It’s always a fine balance when taking care of sick animals, how much we intervene as humans is something we’re always considering.  Hens are sociable creatures and we reckoned being with her friends would lift her spirits.  Not only this, but hens love lazing about in the sun and it was a mild, sunny day.  Indeed, as soon as we put Pepper out, she joined her pals for a catch up and a sunbathe and looked happy as can be.  That evening Pepper was still looking happy and the weather was still mild so we thought we’d leave her to sleep in the hen house with the flock.  We watched her go to roost and made sure she’d hopped onto a perch.  Then we went indoors and had a cup of tea.

Pepper having a cuddle

The following morning I went to check up on Pepper.  I waited by the coops as the sun slowly rose.  The auto-doors were set to open just before sunrise at 7.30am.  As the doors opened I watched the hens come down the ladder one by one.   All of them trouped out except for Pepper.  My heart sank, quick as a flash I ran round the back of the coop and whipped the back panel off and there she was was, sprawled on the floor.  I felt dreadful, what a terrible hen mum I am I thought as the tears started.  But then I saw a small movement, Pepper was alive!  I carefully picked her up and brought her back indoors.  We wrapped her up in a blanket and then gave her breakfast, tiny bits of fat from last night’s slow cooked beef dinner, a small amount of porridge and a small amount of scrambled egg.  Pepper quickly perked up and spent the rest of the day in the kitchen getting small amounts to eat and lots of cuddles.

Pepper continued to improve slowly, but as the days went by I started to get a little concerned that her crop wasn’t emptying as fast as it should be.  She was going to the toilet (albeit on the runny side – post antibiotic tummy), but each morning her crop didn’t feel as empty as it should be.

Not having had crop problems in our flock before I made the mistake of googling “crop issues in hens”.  Two things came up; impacted crop and sour crop.  There was little else about crops not emptying except a brief reference to capillary worms which can affect the digestive system and stop things working properly.  I pondered this info and by the end of the day I had convinced myself Pepper had gigantic capillary worms.

The following day and thinking more clearly I rang the vet for advice.  I wasn’t convinced anymore about worms, Pepper’s comb was looking too healthy for there to be a worm problem.  The vet and I chatted about Pepper and he told me that sadly only about 50% of hens with impacted crops get better.  Out of the 50% who don’t respond to treatment the problem is usually due to something underlying like a tumour.

Pepper having porridge out of a small cup

The vet also agreed it was unlikely to be worms, but that it wouldn’t do any harm to worm her.  So we decided to give Pepper flubenvet in a little dropper every day, just to make sure.  We’re also giving her probiotics (special ones for hens), and keeping her spirits up with regular cuddles and strokes.

We’re taking each day as it comes, fingers crossed for our dear hennie.

Posted on Leave a comment

Tawny Owl Box

Pretty much every night we hear tawny owls at some point. Recently, they have been hooting all around us as we take the dogs out for their evening stroll. For some time, I have been telling myself I should put up an owl box.

Back when the weather was warmer and the ground not white, I actually constructed one. I looked at a few designs and settled on the one provided by the RSPB. Well, I am a fellow of the RSPB so it seemed only right. Plus I liked the roosting bar. It didn’t take long to make and, with three coats of wood preserver applied to the outside, it was ready. I put it in the shed where it sat patiently as the weeks went by. I kept telling myself to get it in place sooner rather than later as the owls would need time to get used to it. Leaving it to the spring would be too late.

tawny owl boxLast Sunday, I grabbed the bull by the horns, or the ladder by the rungs, and got ready to put it up. I had found the perfect spot, on a large tree trunk at the edge of some woodland. It’s also quite close to the house so easy to monitor, but not too close (tawny owls can be a little territorial in the breeding season). Of course, I couldn’t get the ladder in place, it being heavy and the tree unobliging. Thankfully, our neighbour was on hand to help. Ladder set, I forced my dislike of heights to one side and scurried up. Perched carefully on the top rung but two, I apologised to the tree and put in a nail as gently as I could.

I scurried back down, picked up the box and, a little more gingerly, headed back up. I should point out that the ladder was kind of leaning a little to the right beyond which was a steep slope down to a river. It was also frosty and slippy. These thoughts were at the forefront of my mind as the tree did everything it could to block my progress by snagging the owl box in its branches. Taking deep breaths, I negotiated the three dimensional puzzle posed by random twigs and the long owl roosting bar. It was tempting to lean back, but…

Anyway, that was the easy part. The hard part was getting the owl box in place, i.e. trying to hook it over the nail. Cue much random manoeuvring of said box with increasingly burning arms and interesting vocabulary. Finally, more by luck than design, it popped into place. I secured it, then made my back to terra firma to admire my handiwork.

Now, it’s wait and see, but hopefully it will be used by owls next spring.

Posted on Leave a comment

A spate of sore hooves

Up until recently we’ve had week upon week of rain, followed by … yet more rain.   On a farm or smallholding, where there’s rain there’s mud, particularly where livestock likes to congregate.  All through the autumn mud has featured heavily around the hay feeders, entrances to gates and along our woolly friends’ favourite paths.  (Did you know sheep create little paths to get from A to B)?

Trudging through mud is no fun, not for us in our wellies, but even less so for the sheep who don’t have the luxury of boots.  Not surprisingly they’ve been spending much of their time in the shed cudding and peering out into the gloom.

Last week the rain gave way to frost and we’ve all breathed a sigh of relief.  The sheep are happy sunbathing on the hill again and we’re no longer slipping and sliding about.  Nor are we getting in a tangle with items of clothing dangling from chairs and draped over the aga in various stages of drying off.

But then, as a reminder that resting on laurels isn’t something you can do in this farming life, we’ve had a sudden spate of lame sheep.  Undoubtedly caused by the wet pastures which softens hooves, bacteria lurking in the soil enters the sensitive internal structures under the soles and causes an abscess.  The signs are easy to spot, a sheep with a foot infection will limp and have an unhappy demeanour about her.  If not treated straight away she will have trouble standing and will resort to grazing whilst resting on her front knees.

Violet resting in treatment pen

With Violet, Ynca, Yssi and Shelby all limping this week, I’ve been out every other day with my first aid kit.  I like keeping our sheep’s hooves in good nick so I have a little bag (a bucket actually) specifically for looking after hooves.

When treating a lame sheep, the first thing I do is see how the sheep is walking and work out which hoof is the one I need to look at.  Then I’ll bring the sheep into a pen and start by checking the hoof for little stones or anything else which might be causing the sheep to limp.  Then I’ll clean the hoof up and scrape away any mud.  Next, I’ll cradle the foot in my hand for a moment or so to check for temperature.  A foot infection will cause a little heat and this is quite discernible, especially if you compare the infected hoof with a non-infected hoof.

Yssi

If I suspect there’s an infection I’ll spray the hoof with anti-bac spray, especially the interdigital space (the gap between the toes).  Then, I’ll give the sheep an antibiotic injection, I like using Betamox LA for feet as it gets to work quite quickly.

Violet, Ynca and Shelby are all fine now, it’s just Yssi who is still limping.  I’ll be going out again later today to check up on her and give her another wee “jag” if necessary.  Betamox is given every two days until the infection clears so fingers crossed Yssi will be feeling better soon.


Posted on Leave a comment

Dry Stane Dyke Rebuilt

dry stone dyke repairs

One of the common themes of this blog is the repair of dry stane dykes (dry stone walls). Most of these repairs are carried out in order to keep the sheep in, but some are just because we like these walls and want them to look good.

dry stane dyke falling down

The latest section needing repair was at the far corner of one of the fields. As ever, a small section had crumbled but repairs extended quite far in both directions. In fact, this wall is very old and there has been a lot of subsidence, so much of it is teetering on the brink of collapse. Finding an upright section either side of the crumbling part was something of a challenge.

dry stone dyke - section to be repaired
dry stone dyke – section to be repaired

In the end, I had to take down around 6.5 metres. Being a boundary wall, it was 1.5 metres tall (5 feet), so that meant moving a lot of stone. A rough calculation showed it to be about 5,000Kg (5 tons). On top of that, it was built in the Galloway style which means big stones near the top. I made sure to keep my feet well clear as those stones were taken down.

As ever, the demolition phase was not too hard, the most strenuous part being carrying the the top stones a few metres to one side. I always keep them in a line so I know I’ll have enough nice stones to finish the top of the wall when I get there. In this case, a drainage ditch forced me to carry them a little further than usual.

dry stone dyke stones layout

The big beasties I lined up close to the wall (on the far side, so not visible in the pictures). The rest I piled up nearby ready so they would be close at hand.

Over a few days in various weather conditions (from sunny to windy rain), I built the layers up. The ground was very soft and soon turned to mud. I found myself sinking from time to time as I attempted to lift larger stones onto the wall.

dry stone dyke - big stones on top
dry stone dyke – big stones on top

The big stones that went onto the top section I did in one session. I just picked them up and manoeuvred them into place, one at a time, hoping they would fit together nicely. It seems to have worked. Only one or two gave me grief, doing their best to slide off and land on my feet. They were the biggest two and needed some clever lifting to get them up there given the wall was around a metre high at that point.

dry stone dyke - repaired
dry stone dyke – repaired

For the final section, I brought in some additional stones, just in case. A huge pile seems to evaporate when fitted neatly together. It was good forward thinking as I ended up using them all.

Despite the weather morphing from bright sunshine to blustery rain and the impatient whining of Elliot, who found the whole process a bit of a bore, I persevered and got it finished. It is always tricky to get the top stones aligned neatly, but ultimately very satisfying.

Usually, I sit down and admire my work a while when I finish, but inclement weather and impatient dogs persuaded me to head back the moment the last stone was in place. I shall have to make do with the photos on this one.

dry stone dyke repaired - front view
dry stone dyke repaired – front view
Posted on Leave a comment

Bottoms, hooves and face trims

In the sheep world, Ryelands are often referred to as “teddy bear sheep”.  The reason for this, as you might have guessed, is their striking resemblance to roly poly teddy bears.  Most sheep have wool only on their backs, with their faces, tummies and legs remaining almost bare.  The Ryeland however has wool all over and can cause shearers to go a little pale.  It can be tricky to shear those woolly faces, tummies and legs and it takes longer too.

Yaar “before”

One of our jobs in making sure our Ryelands are happy and healthy is to keep their bottoms and faces trimmed.  During the summer months it’s especially important to keep their bottoms neat because woolly bottoms attract flies and flies are bad news for sheep, especially the blow flow.  We don’t use chemicals on our little lot so we take special care to keep their rear ends spick and span at all times.

We also keep their faces trimmed.  If we don’t trim around their eyes, they can become ‘wool blind’ (where the wool grows around their eyes preventing them from seeing).  Being ‘wool blind’ makes sheep unhappy as they like to be able to see what’s happening around them in order to feel safe.  Sheep have surprisingly good vision, they can see all around them, almost 360 degrees.  If they have wool growing around their eyes they can get nervous and twitchy because they lose the ability to check for predators which is an important part of being a sheep.

Yaar “after”

It’s a lot of work trimming all those faces and bottoms, (and not to mention hooves), so we rotate through the flock each week and work on three or four at a time.  Yesterday it was Yaar, Seline, Scarlett and Vera’s turn for hair cuts.

Adrian and I have got a little hair salon set up in the orchard, we put together some hurdles and bring the sheep in one at a time.  They seem to quite enjoy it and we have no trouble bringing them in.  It’s a good opportunity for us to catch up with the flock and spend quality time with our teddies.


Posted on Leave a comment

The hay ceremony begins again

to eat grass or not to eat grass, that is the question

Every year, round about the beginning of November we start the “hay ceremony”.  In other words, giving the little darlings hay for the winter.  The sheep let us know when they’re ready for hay, towards the end of October they make a daily pilgrimage down to the orchard and hang around the feeders (usually when they know we’re around so they can make a point).  Sheep are clever and have their ways of communicating with us.  They do this ritual twice a day, once in the morning and once in the afternoon, just to make sure.  After hanging around and sniffing for a bit, they have a meeting and then off they go again to graze grass in the higher pastures.

yippee!!! Hay!!!

Timing is important when it comes to hay, start the little fluffballs on it too soon and they take a few mouth-fulls and decide they’ll give the grass another chance.  This means hay is wasted because it stays in the feeders not being eaten and goes mouldy.  Start them on it too late and you have unhappy sheep.  Our sheep are lowland sheep so they need the extra forage during the winter, they wouldn’t survive without it, especially up here in Scotland.  Upland sheep and hill sheep on the other hand, (which you see a lot of around here) are much more thrifty and seemingly survive on next to nothing.

transporting hay

This year we started the hay ceremony last Saturday.  First of all we had to ferry bales from the big green shed down to the lambing shed in the orchard.  This started off badly because we discovered a flat tyre on our trailer.  An hour or so later after some descriptive language regarding the location of the pump, we were able to load up the trailer with hay bales and transport it down to the shed in the orchard.  After several journeys we had piled up enough hay bales to last a couple of weeks.  At the moment the sheep are on one bale a day but as winter sets in they’ll be up to two or three bales a day and then we’ll need to make more journeys.

Before that though, we’ll be heading down to the garage in the village for a new tyre for the trailer.


Posted on Leave a comment

Auchenstroan Wool & The Galloway & Southern Ayrshire Unesco Biosphere

Recently you might have noticed a new logo in the corner of our home page.  If you click on it, you will be taken into the Galloway & Southern Ayrshire Unesco Biosphere’s website.

To re-wind a bit, one sunny day back in the summer, I was enjoying a chinwag and a cuppa with my friend Kate.  We were in the Catstrand café in New Galloway (which incidentally also serves delicious cakes).

Kate works for Nature Scotland and is really plugged into the world of conservation, sustainable living and all things related to permaculture, particularly farming.  Kate and I always have a giggle and great chats whenever we get together.

Whilst putting the world to rights over our cups of tea, Kate asked if I had heard of an organisation called the Galloway & Southern Ayrshire Biosphere.  I said it rang a bell but I wasn’t sure what they did exactly.  (I should probably get out more!)  Kate filled me in and said it might be worth me getting in touch as we, (my woolly business) was just the sort of thing the Biosphere were interested in.  Part of the Biosphere’s work is to promote small, sustainable businesses.

I decided to apply to become a “Proud Supporter” with a view to becoming “Biosphere Certified”.  I clicked on the relevant buttons on the website and up popped a load of forms to fill in.  I’m fortunate to be married to a man who is a whizz at form filling so I roped Hubs in to help me and by the end of the day we had clicked through the pages and sent everything off to be processed.

Last week, out of the blue I received an email from the Biosphere team and saw that happily my application had been successful!

Soon, one of the team will come up to meet us and look at what we do here on our smallholding.  We are very much looking forward to showing them around, introducing them to our animals and chatting about what we do here.

Posted on Leave a comment

Splish Splash

It has not been the driest of summers which has had it’s good and bad points. However, it has been one of the wettest of Octobers I can remember. Someone turned the rain tap on and has forgotten to turn it off again.

more puddlesThe ground has been turned from firm grassland into puddles. This is particularly true of the flatter areas where water settles having flowed down the hill. Sadly, there’s not much we can do about it except hope for some dry weather to give it all a chance to drain.

puddlesIt’s not great for the animals. The hens gather and huddle in their shelters, trying to keep dry. The sheep venture out to find grass (plenty of that), but retire to dry off in one of their field shelters.

We’re having to keep a close eye on the sheep’s hooves, checking for signs of foot rot which can flare up in these conditions.

And autumn planting of garlic has been postpones lest the bulbs float away.

In the woodland, the drainage ditches are full but doing their job. Anyway, that’s the way it is in SW Scotland, either too much water or too little.

Thank heavens for wellie boots :).

woodland in autumn
woodland in autumn
Posted on Leave a comment

Autumn mulching

Today while I was in the polytunnel having a tidy up, I became aware of some strange noises coming from outside.  It sounded like pigs scoffing their way through a pile of apples and bananas.  I wondered if Adrian had got me an early birthday present.  There were snuffles and grunts interspersed by a strange high pitched creak.  I stuck my head out to investigate,  the noises seemed to be coming from the direction of the veggie patch.  There was also a sheepie-smell drifting around which I couldn’t quite place but seemed familiar.

Looking over at the veggie patch I spotted a huge wheelbarrow filled to the brim with manure trundling down the path going “creak, creak, creak”.  Behind the barrow emerged Adrian going “grunt, ah, ooh, aaa”.  Atop the barrow like a cherry on a cake was a pitch fork.

mulching the dormant beds

Then I remembered, this week is mulching week!

Mulching week entails something we do regularly here, shifting dung from one place to another.  In the case of mulching, this means shovelling well rotted sheep dung from the manure heap, over to the veggie beds.  This is done using a pitchfork, a large wheelbarrow, muscle power and lots of huffing and puffing.

glorious sheep dung

Our veggies love a good mulching, the soil has improved a million-fold since we started piling on the dung every autumn.  When we created our veggie patch five years ago, the soil was in a terrible state, all claggy and compacted.  We think there might have been a structure at some point in the history of the farm, where the veggie patch now is because the soil was so compacted and there was a ridiculous amount of rocks just below the surface.  Mind you, that is normal around here!

Fast forward five years and the soil is crumbly and lovely to work with.  The veggies are happy and thriving, and so are the slugs, but that is another story for another day.