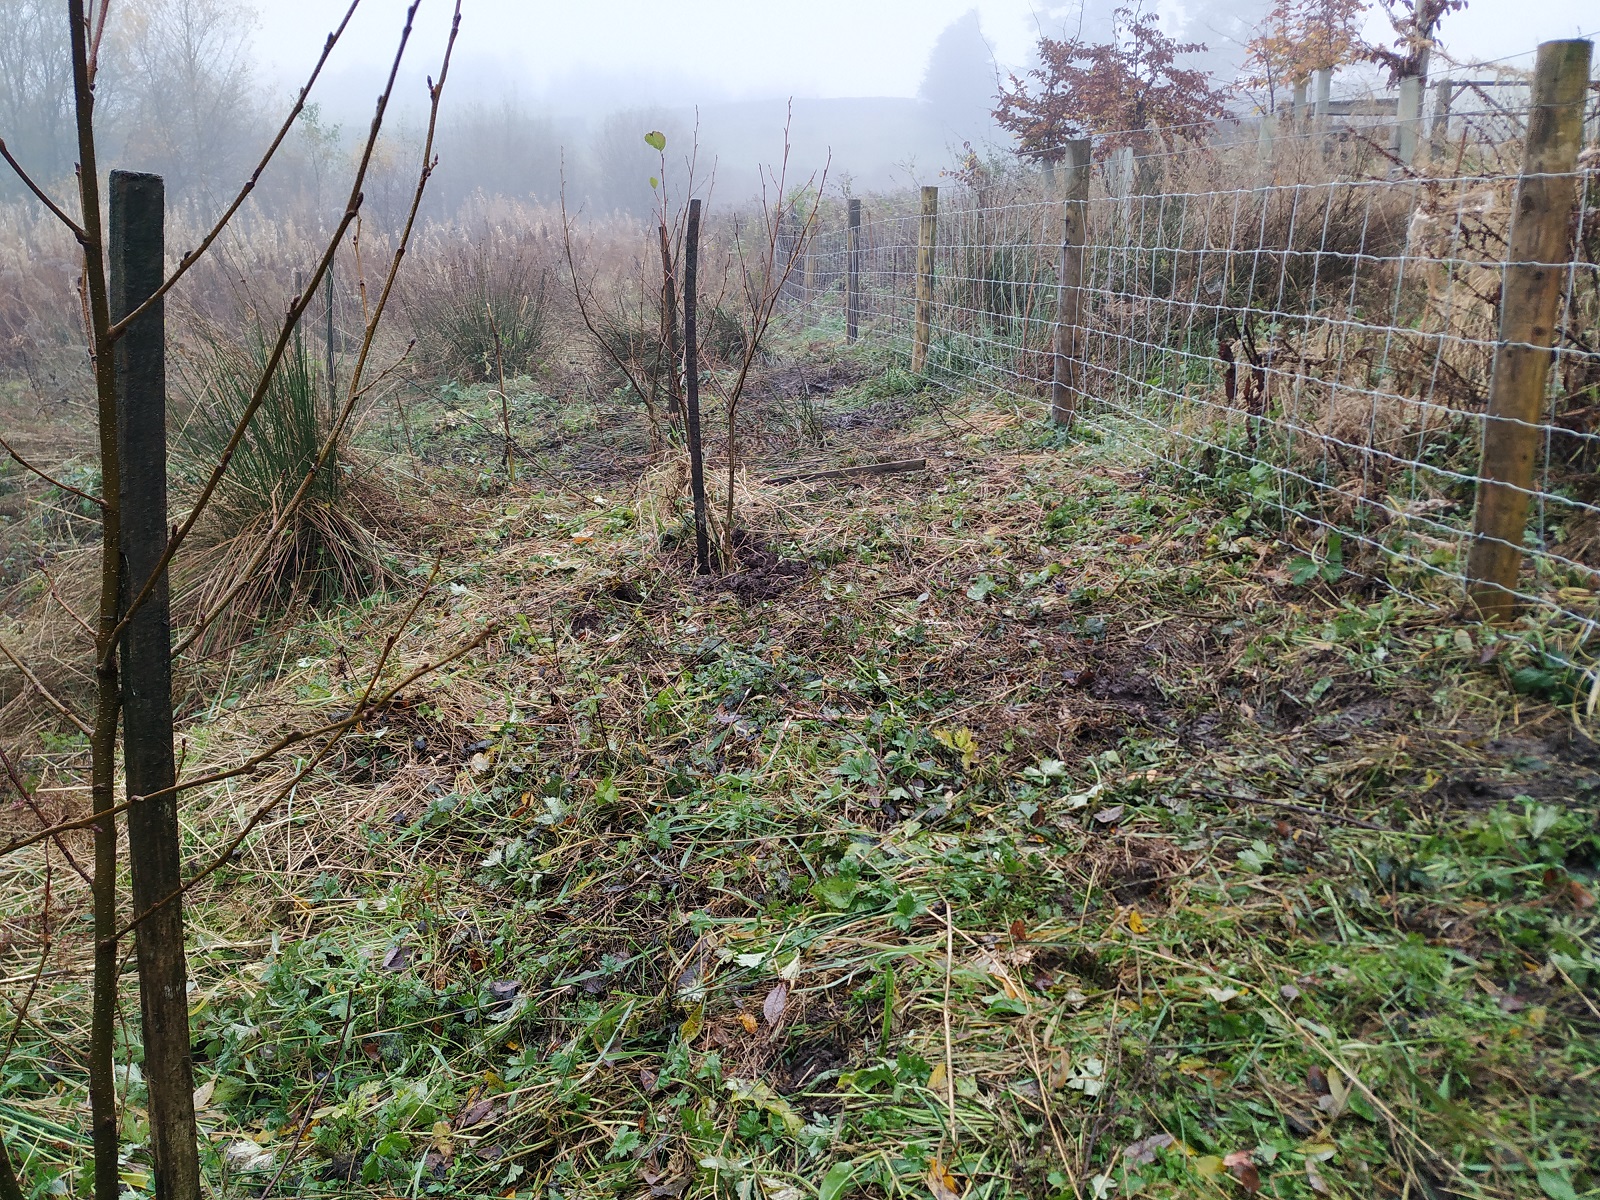
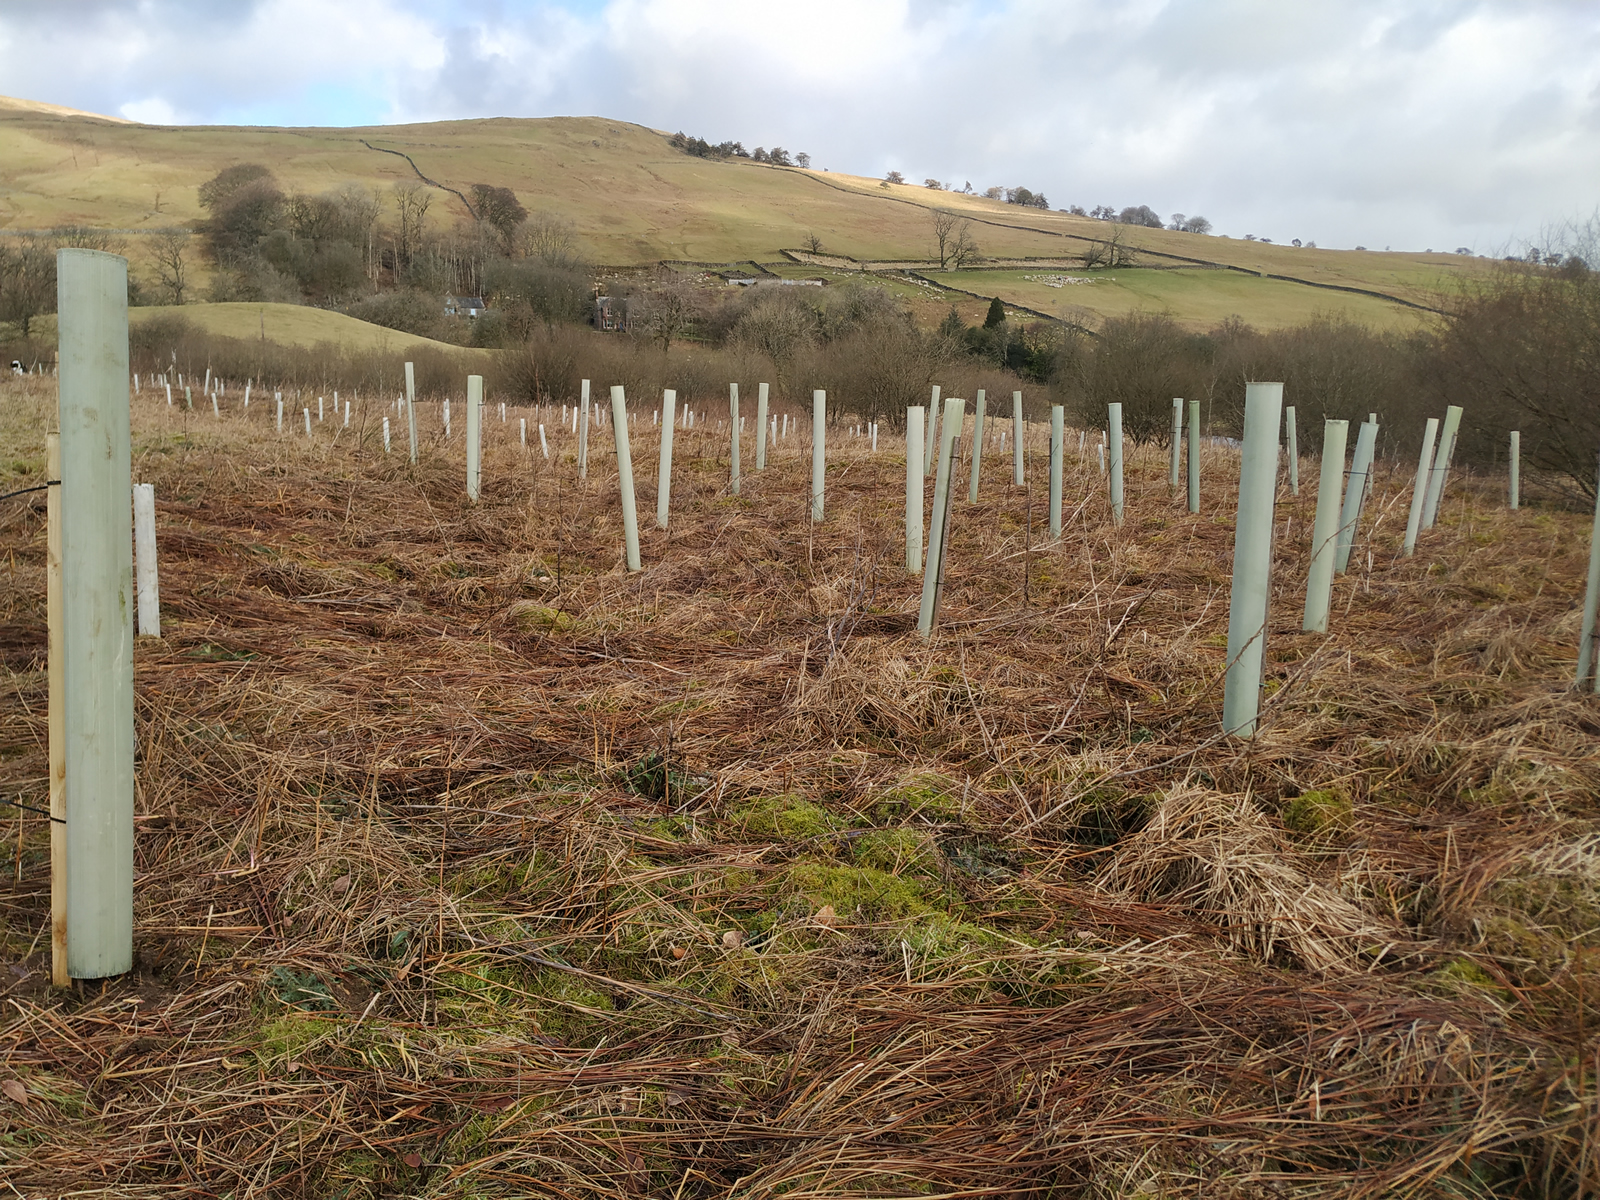
Since moving here, we have been slowly expanding the woodland coverage. The goal is to create an area that can be coppiced thus providing a supply of wood and also a haven for wildlife. In the late autumn, we took delivery of around 400 trees (bare root) and quickly heeled them in to protect the roots. I got around 30 planted and then the first snow hit. From then, the ground remained pretty much frozen right through till February making planting impossible. On the few days the ground was soft, the forecast was for more freezing weather so planting would have been unwise.
Finally, the ground thawed and the forecast looked warmer (above freezing anyway), so I got going. I was somewhat surprised to find that many of the baby trees were budding and some were even coming into leaf. I had to get them in more quickly than I had thought. Easier said than done, the ground is quite rocky and each stake needed a pilot hole drilled. For that, it was heavy hammer and chisel. It meant each tree took around 5 minutes to plant.
Also, each needed a tall deer guard as deer are regular visitors here. Even with deer guards, the deer can still sometimes get at and nibble away the young shoots.
It took the best part of a week before they were all in. Of course, the next in line of the recent batch of storms immediately blew some over. As well as rocky, the ground is very soft in places, so the fallen saplings had to be rescued and their stakes made firmer.
We are looking forward to watching them grow over the coming years.
As they days shorten and the night draws in, the autumn harvest is coming to a close. The onions are all tied up in onion strings. We had a much better crop this year, netting them off helped stop the birds digging them up. As ever, those grown from seed soon caught up with the onion sets so maybe we’ll just sow seeds in future.
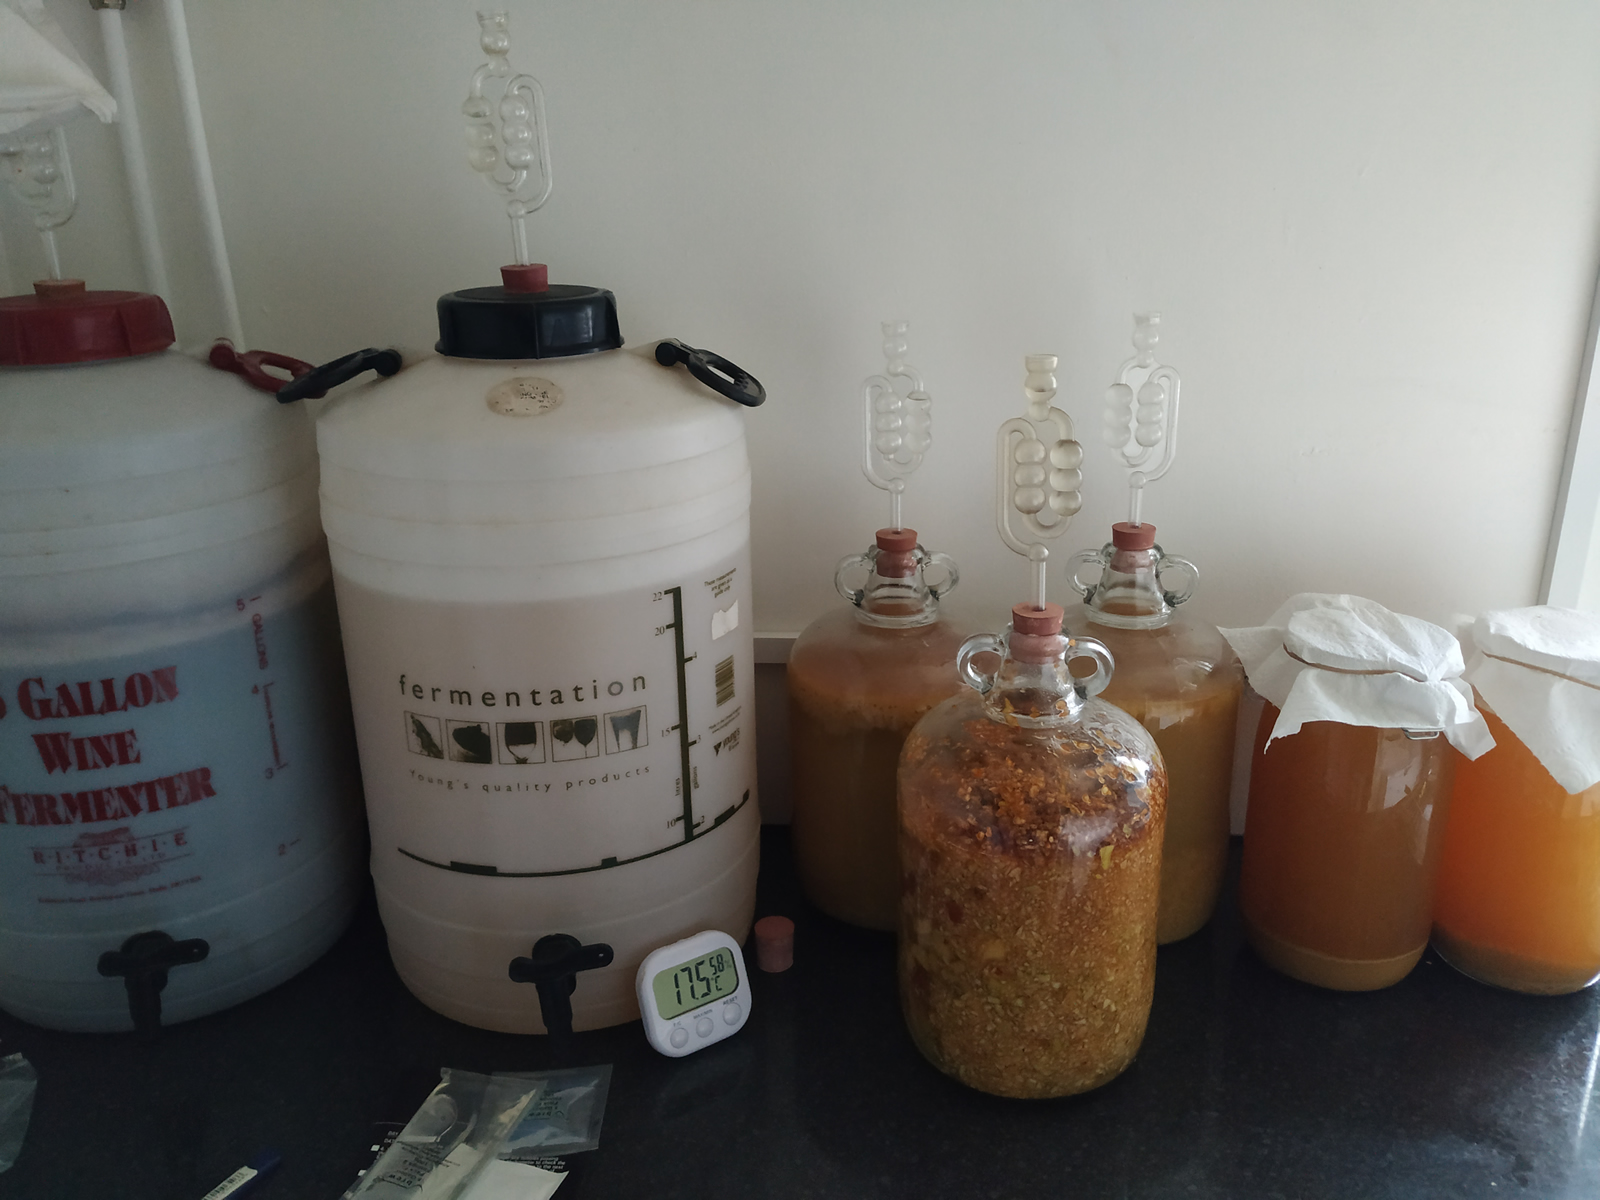
The last apples are clinging to our neighbour’s apple tree. Those on the ground are being hoovered up by blackbirds or whisked away in the beaks of crows. Our apples are all picked, and have found their way into the freezer (for future apple crumbles) or the brewing room where cider and cider vinegar production is underway.
It has not been that warm but fermentation has continued, albeit a little slowly.
turnips
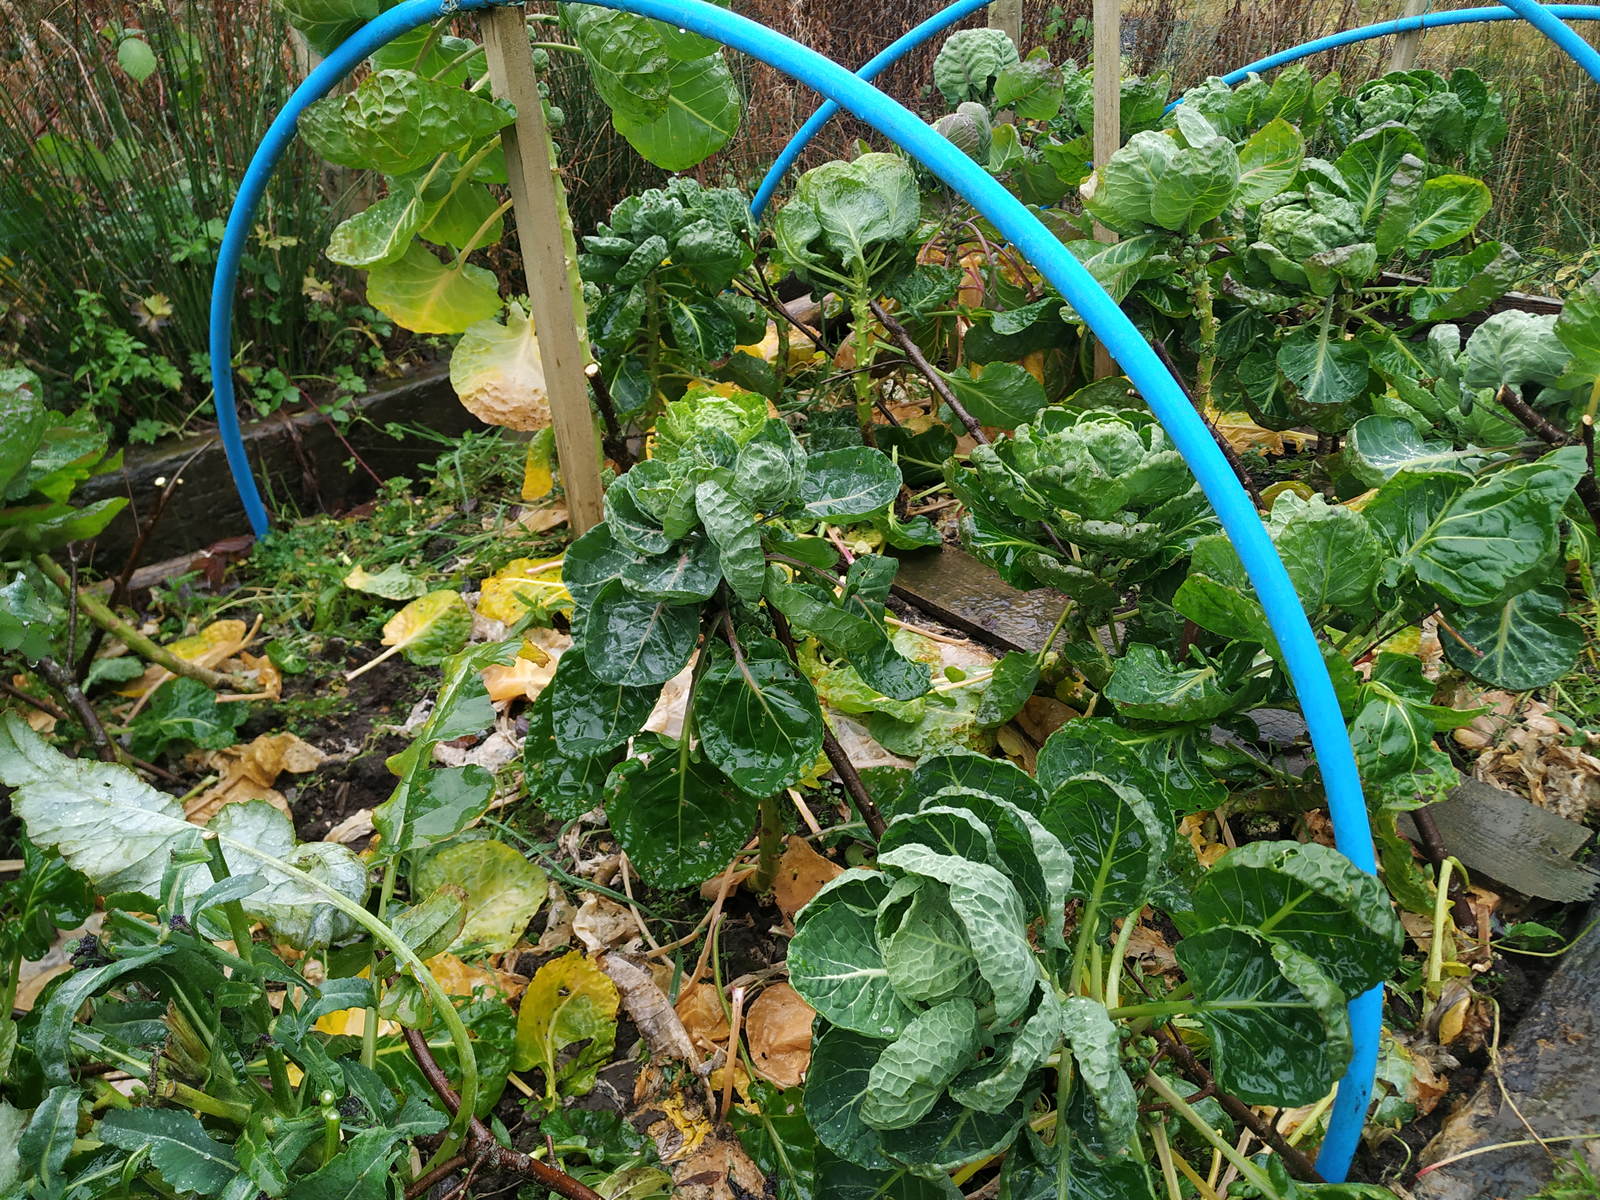
We still have a few winter crops left, plenty of beetroot and turnips sit petiently in the ground awaiting their turn to be made into soup. The nematodes did their work and slug damage has been minimal. The mice or moles have, however, been helping themselves to the beetroot. Fortunately, this year they are large so there’s plenty left for us.
The carrot box did brilliantly and there are only one or two carrots left so one job this winter will be to build a second box. It has been a long time since I have managed to grow perfectly shaped carrots.
The only crop not doing so well are the brussell sprouts. Seemingly strong and healthy plants are producing few sprouts. We’ve been racking our brains on this one though general consensus seems to be stress (they’d fallen over) and nitrogen deficiency (though healthy leaves would contradict this). So, not too much green veg for the winter motnhs.
Preparation for next year is well underway with lots of mulching.
After eight months of writing, re-writing, editing, re-reading and proof checking, I am pleased to say I have finally published my second book “Dogs Talk – Four Dogs Tell Their Stories”. The original idea actually came from a journal kept a few years ago by a dog called Kika.
Kika
Kika came to stay with us while her owner was in hospital. Kika had many issues and was what could best be described as a badly behaved dog. I say this as an experienced dog psychologist who has helped a number of problem dogs over the years.
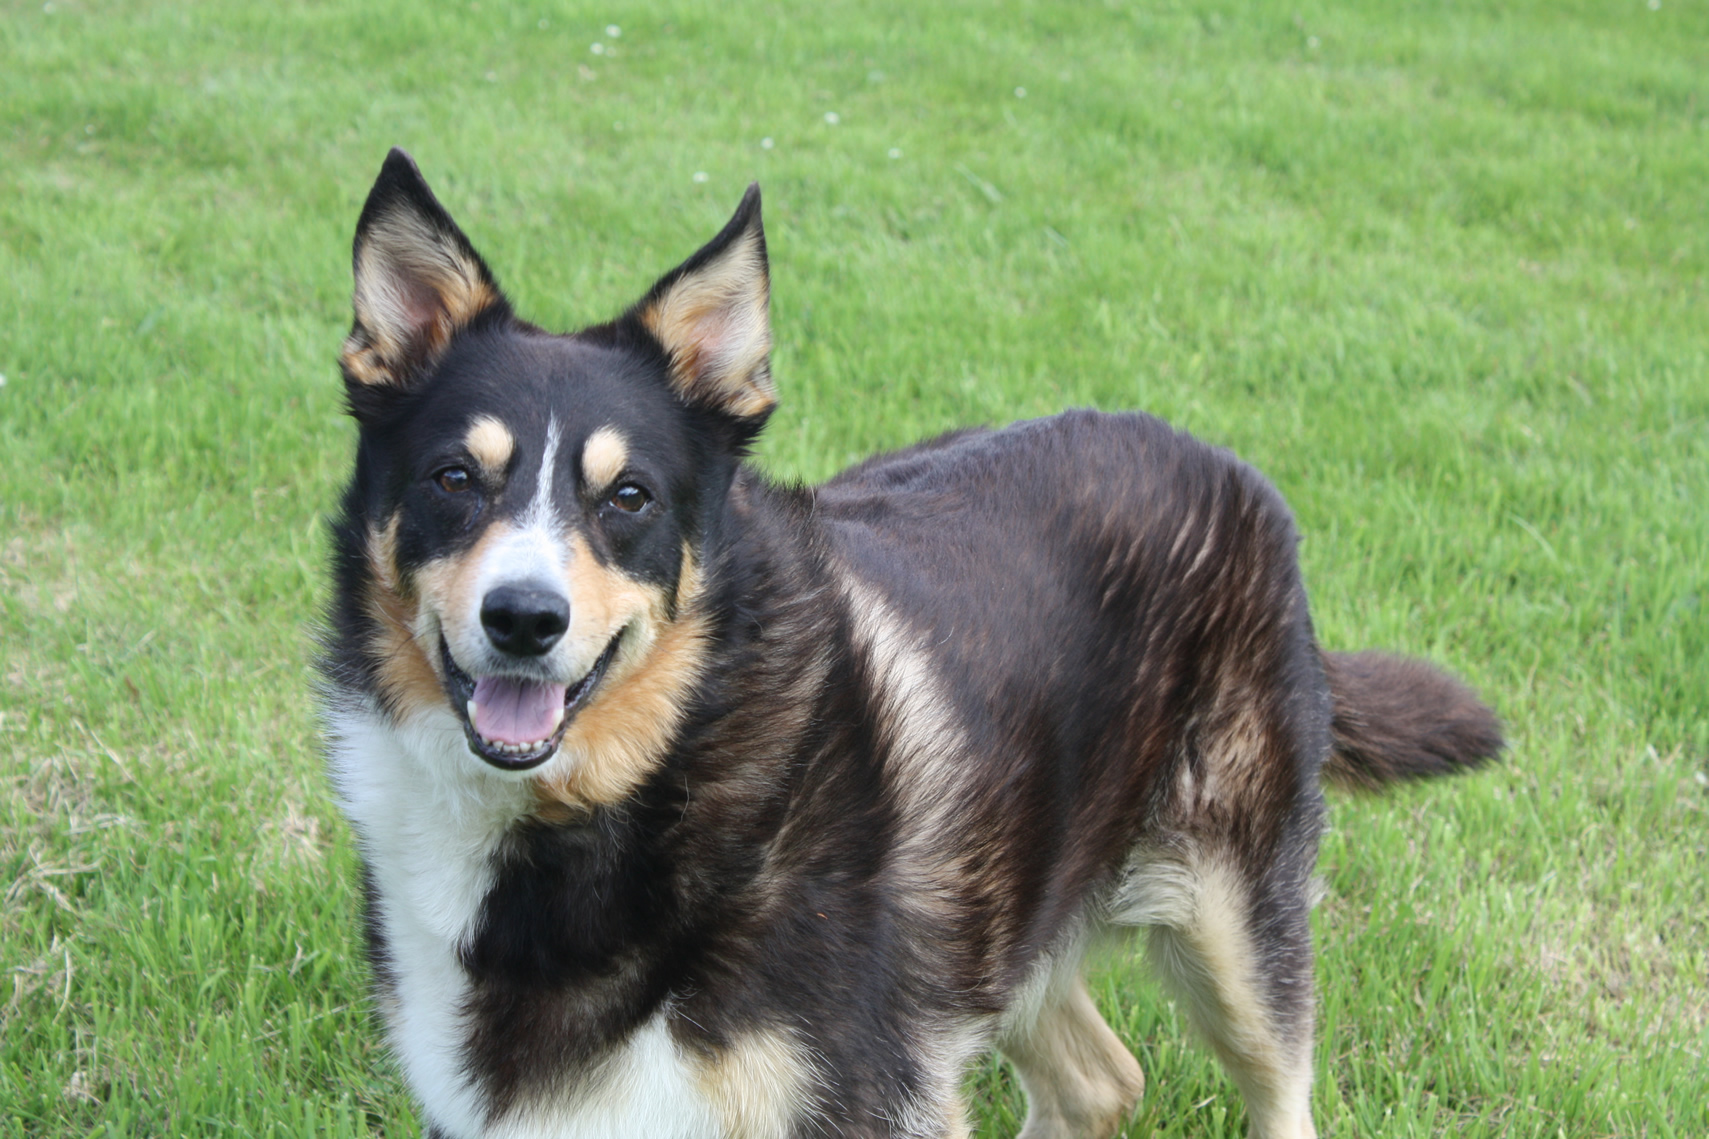
George
In an attempt to explain some of the principles of dog psychology to her owner without sounding bossy or patronising, Kika kept a journal. The idea was that Kika’s explanations, from a dog’s perspective, would help Kika’s owner better understand Kika’s needs. By doing so, Kika would become both happier and better behaved. I added a number of useful pointers at the back. It was called the Kika Chronicles.
Maxi
Over the years, I have had a number of dogs, each a rescue dog and each with it’s own set of issues. Building on the idea of the Kika Chronicles, I wrote three sections, one for each dog, relating their experiences on moving in with me. Each is written as though it is the dog telling its own story.
Haribo
The three dogs are quite different in terms of breeds, needs, issues and temperament. Each presented a unique challenge. All benefitted and became happier and more balanced dogs.
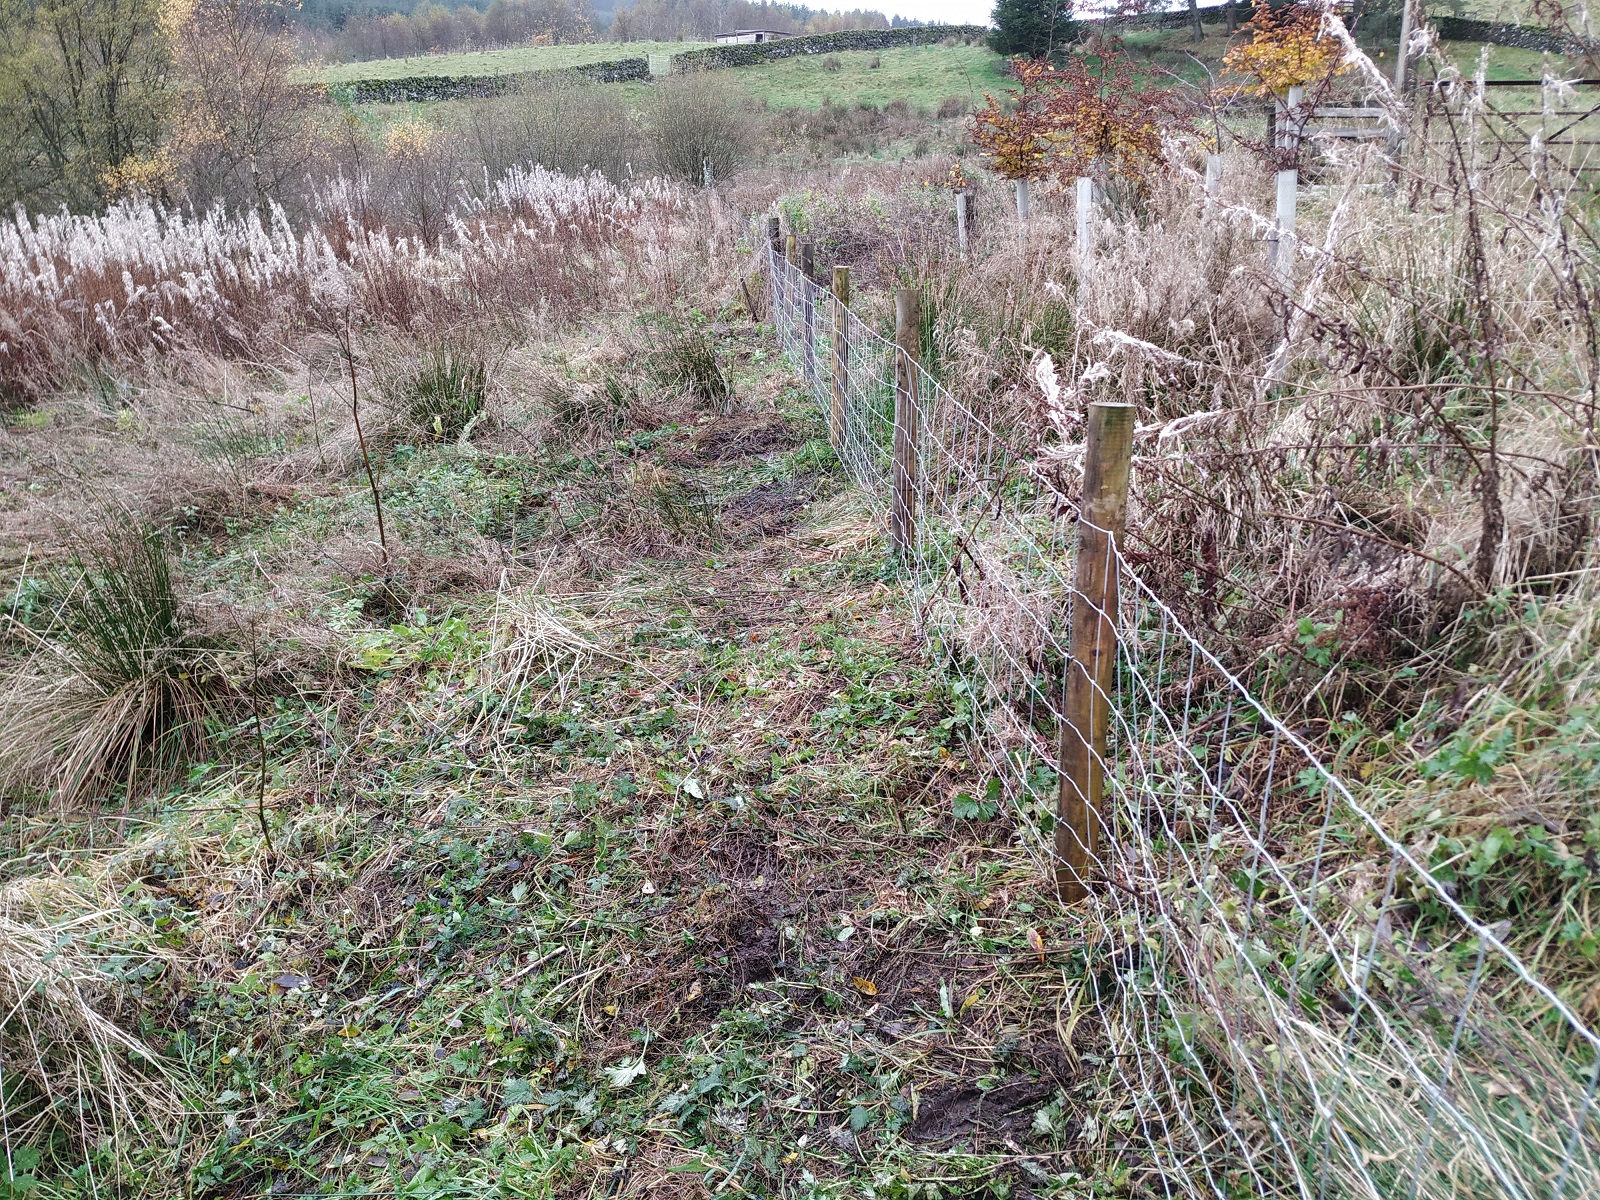
As autumn turns into winter and the harvest is complete, our focus turns to winter jobs. These are mostly maintenance to the walls and fences. There are a number of gaps where previous owners have taken down stone dykes for one reason or another and they look kind of wrong, for want of a better term.
I like doing these kind of outdoor jobs in the winter because there are no midges. First stop was a gap between a stone dyke and a gate. at around 10m, it was too long to put in a stone dyke mainly because there were not enough stones lying around. We decided on a combination of hedge and fence. Some extra hawthorns were added to a pending tree order (we plant trees most winters too) and I got to work putting in the fence. For once this was easy. The ground was soft and the posts went in with just a few taps. No underground rocks lay in wait. Further, at one end a fence already existed so there was a large, strong post already in place.
After the fence was in, I added some trees. There are a lot of self seeding willow and hazel trees growing in inappropriate places, so I dug about 20 of these out and planted them in their new home. Once the hawthorns arrive, I’ll add the hedge and also plant up the surrounding area with a small mixed woodland.
We have two dogs here, George and Haribo and both have a number of pet names. For example, George is often called “G” and Haribo “H”. Haribo also gets called “Bot”. This is a shortened version of “Haribot” which was spawned during the period Britain had the “maybot” as prime minister.
Anyway, recently, Haribo(t) has taken to leaving us presents in the night. These are not pleasant presents, in fact they are night time poos. These have been coming in various sizes, textures and smells, all spread across a wide area (as collies like to do) and all of which are not a lot of fun to clean up. Not every night, but pretty much one night in two. As you can imagine, we didn’t take photos.
We tried the most likely approaches of which, top of the list, was a good worming. A good wormer was procured from the vet but it only seemed to help for a week or so. We wormed him again with much the same result. The night time poos continued to adorn the morning living room floor.
We switched both dogs’ meals so that they got their large meal in the morning and a snack in the evening. Still the poos came. We were scratching our heads. Haribo is only eight so it shouldn’t be an age related issue.
Finally, the penny dropped. Haribo had become quite overweight a while back and so his food was reduced. While doing wonders for his shape and fitness, his tummy is still in denial. As such, Haribo has honed his scavenging skills. Now, we knew he had a pretty stronge urge to eat poo. He likes sheep poo the best, but any poo will do. Because of this, we had been keeping an eye on him. However, like most dogs, he knows exactly when he’s not being watched. As soon as he thinks the coast is clear, he’ll scavenge a bit of poo. Leave him in a down, turn your back, wait a few seconds and turn back and he’ll still be in a down. However, it won’t be where you left him. He’ll have shuffled over a bit, scoffed a quick poo and will be lying there licking his lips with a “butter wouldn’t melt” expression.
So, we tried an experiment – we put him on a lead. That might sound like no big deal but normally the dogs get to roam freely when we walk through our fields. Not that freely, truth be told, as Haribo’s partner in crime, George, also has a bit of a scavenging habit, but that’s another story. Anyway, by keeping Haribo close, we have managed to block his poo eating efforts. And it has worked, we are now getting up in the morning to a clean living room floor. Bliss! Also, Haribo likes being on the lead. Well, he’s a collie and they like being given something to do even if it’s just an instruction to walk next to you.
The whole episode has spawned a new musical ditty, often to be heard being sung around the house – “no shitee in the nightee”
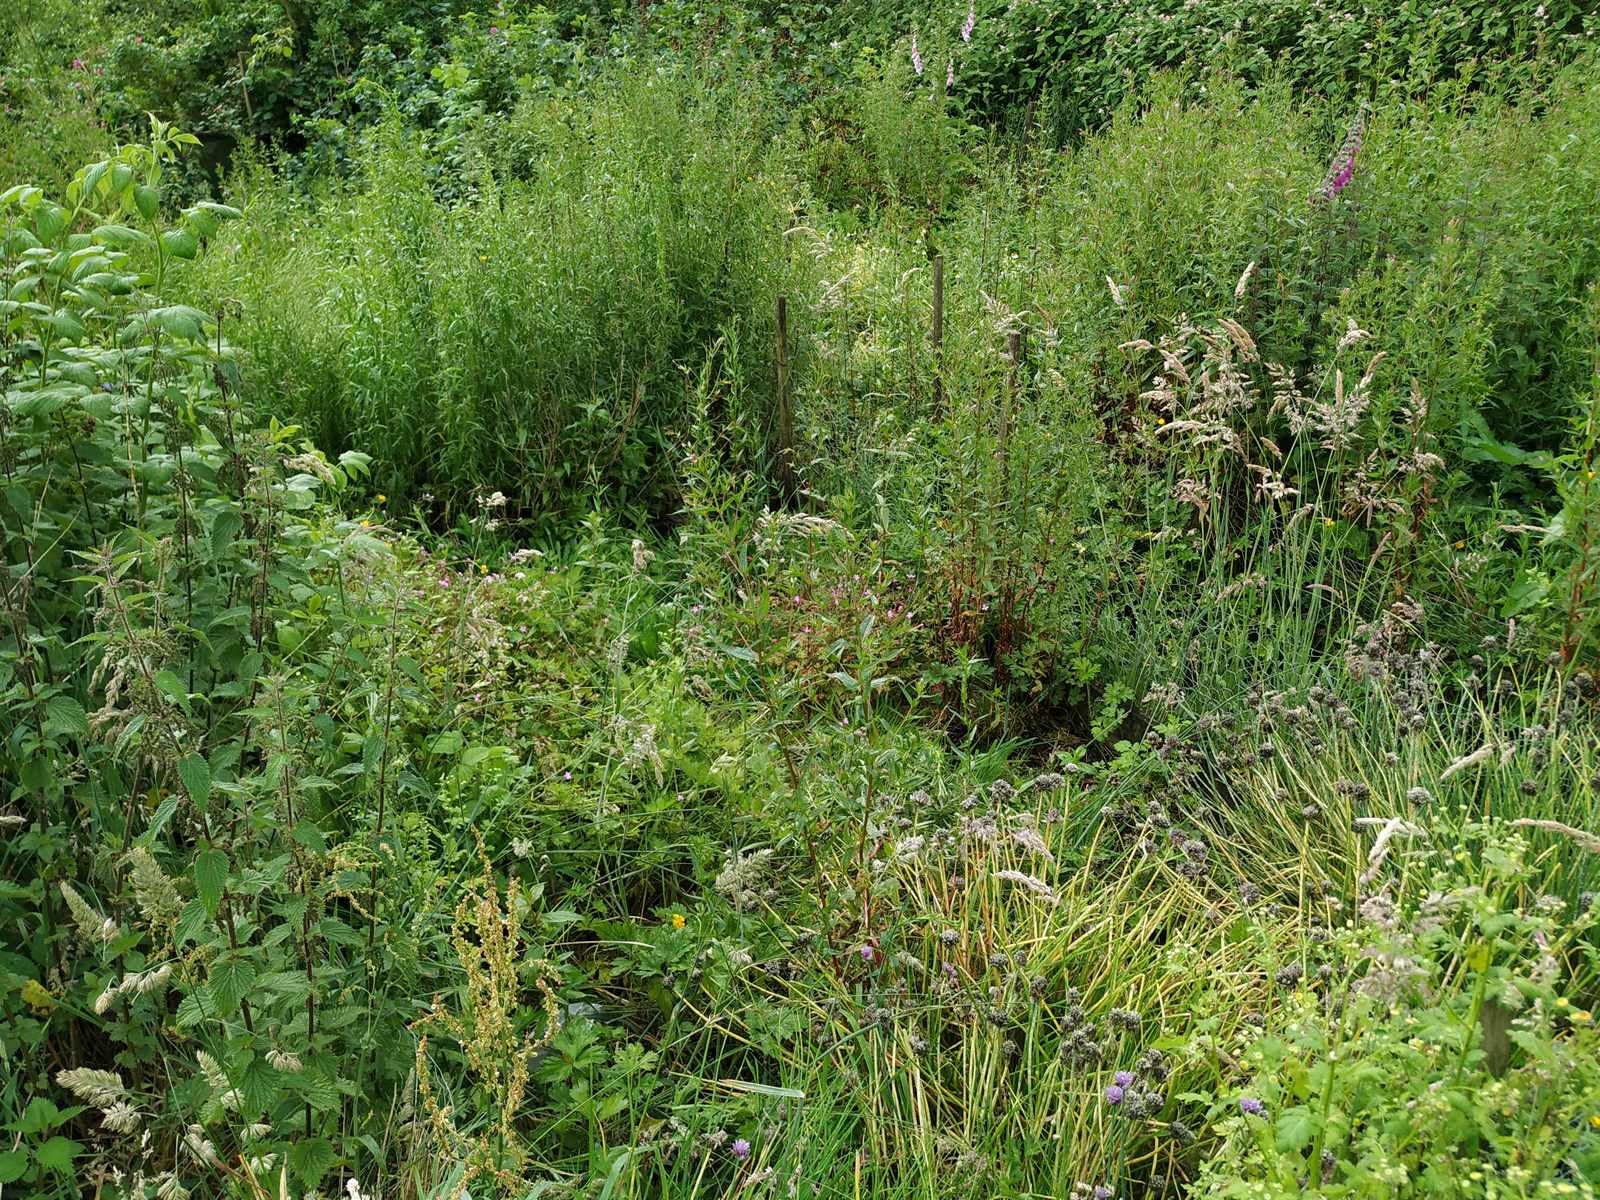
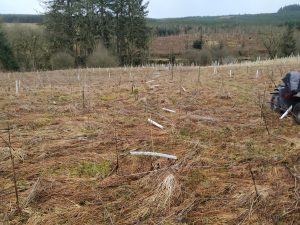
As anyone who has read my book might now realise, it’s hard keeping up with everything on a smallholding. This is particularly true as we both have to work to pay the bills. A while back, I mentioned this loss of control of some of the veggie patches in a blog entry – Taking back control – one area of the vegetable garden had gone completely wild.
veggie patch overgrown
This area was where we should have been growing our salad crops. However, last year the slugs and snails had got the lot and so we were experimenting with pots. We took our eyes of the veggie patch and the weeds took advantage. The pots were not a great success, really lettuces and so on need their roots in the ground to flourish. We had a think about it and thought a polytunnel might prove the answer. Under cover, the salads should do better (it can be a bit wet and windy here). The tomatoes, too, would flourish.
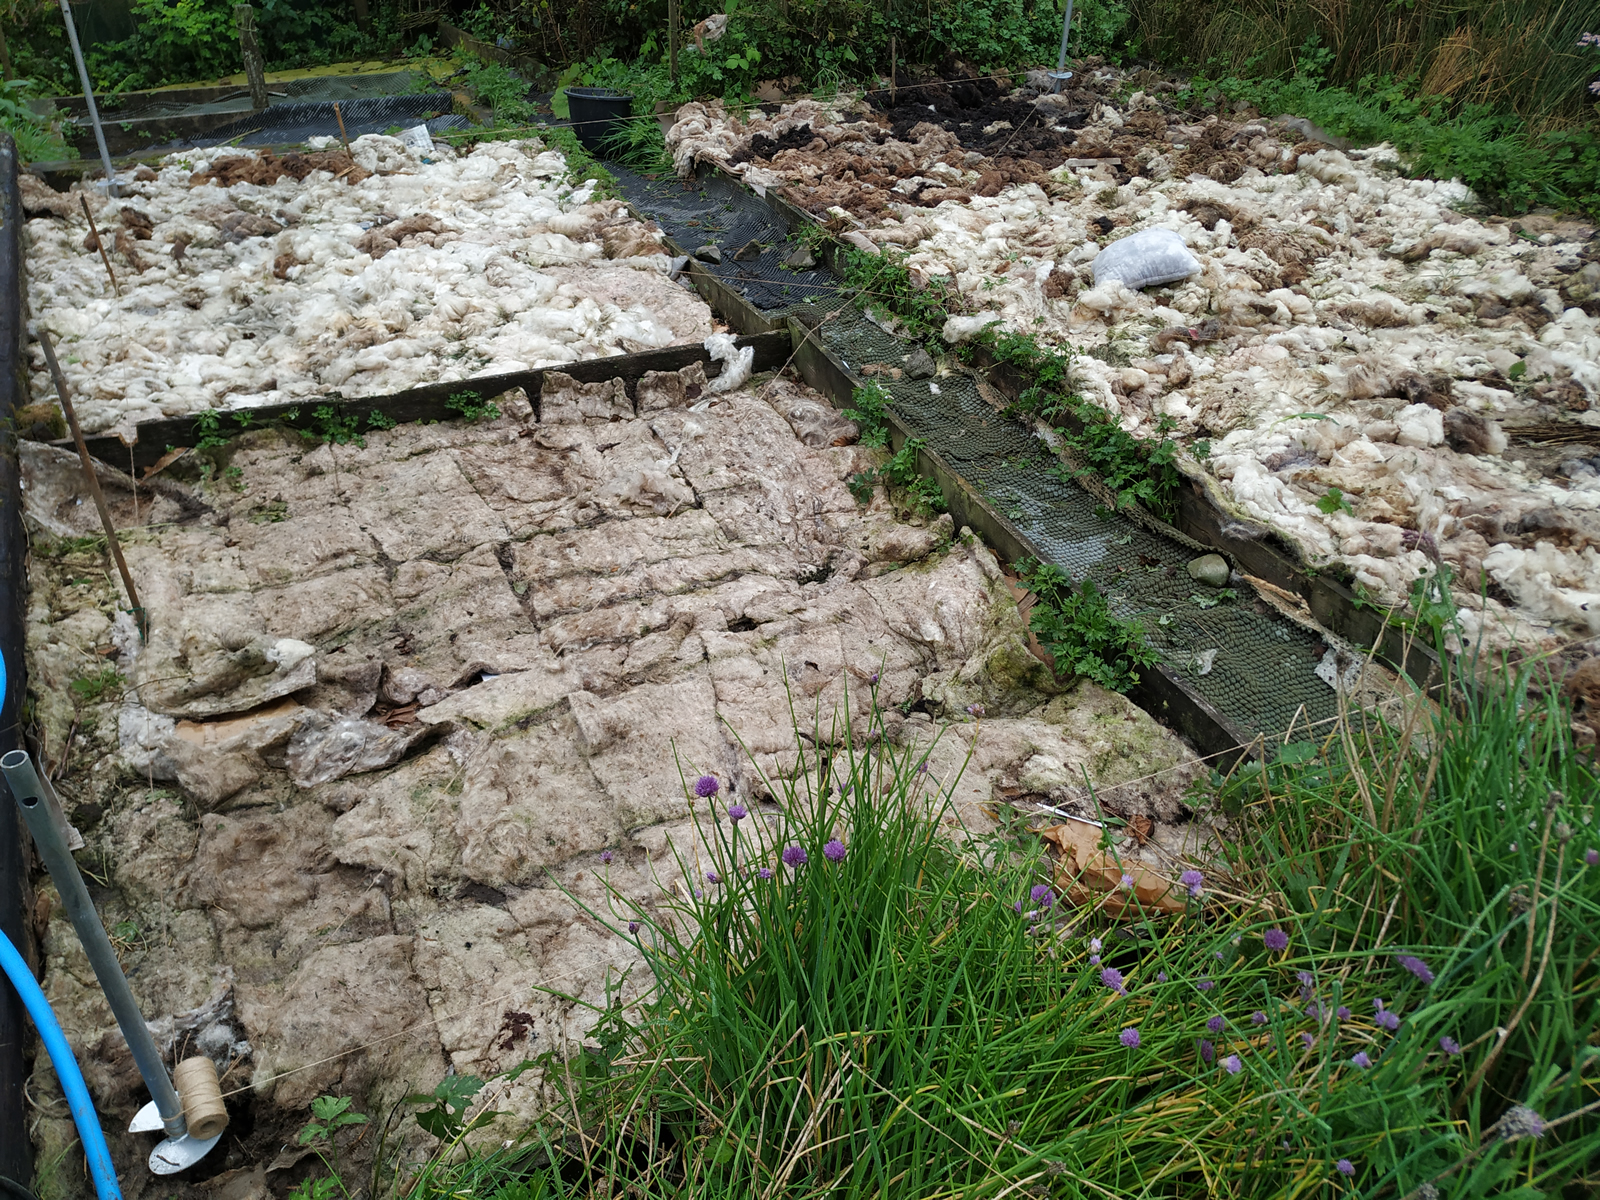
Weed suppression underway
We measured the area and bought ourselves a polytunnel which, of course, arrived in kit form. I stored it in a shed while we started preparing the ground. The paths were covered in old carpet and the beds in cardboard and wool. This suppressed most of the weeds, the buttercups proving the hardest to conquer.
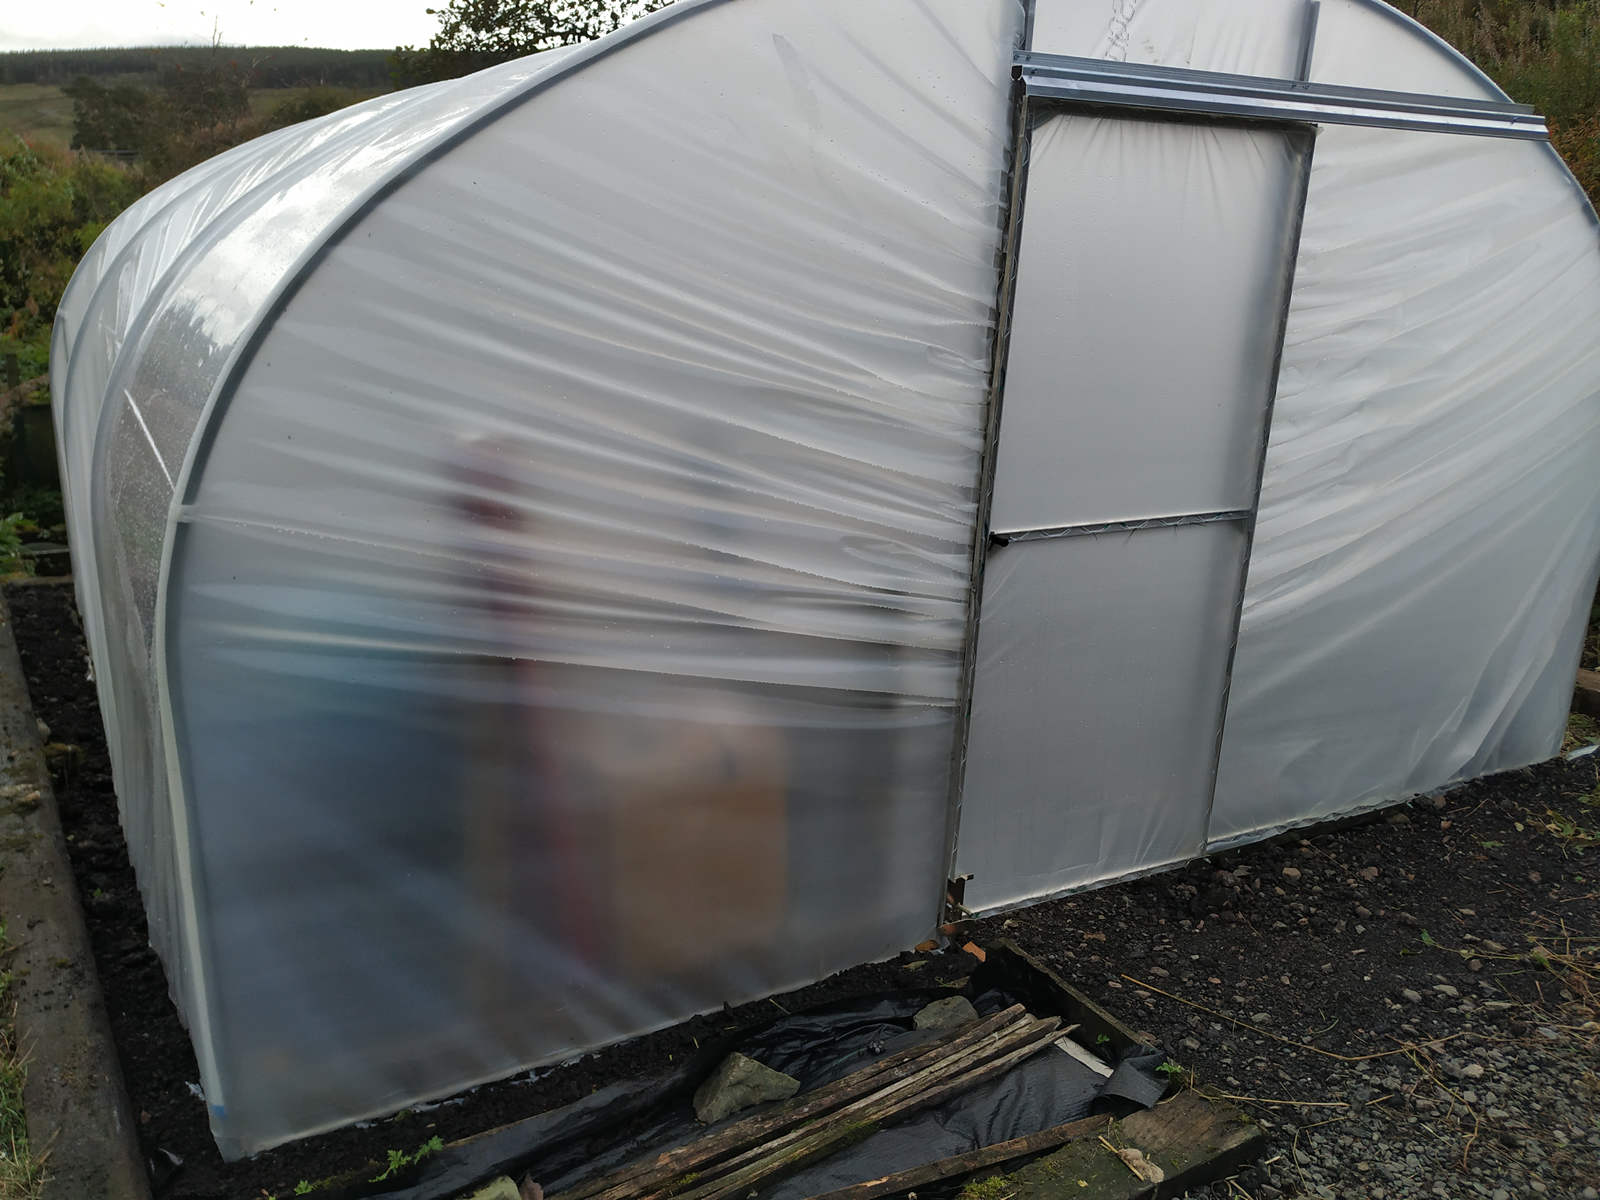
Then it was time to get the build underway. The original plan was to have a contractor put it up. We are so busy it was hard to see where we’d find time to build it ourselves. However, some unexpected roof repairs and a contractor that was also very busy meant I decided to put it up myself. How hard could it be?
Not too hard, as it happened. Not an easy start when I found the instruction leaflet soaking wet and illegible. Thank goodness for the internet and PDF downloads. Having watched the instruction video, I made one of my better decision – rather than going all out and building it in one go, I broke it down into stages.
The first was getting the water pipe and electric cable ready. We had installed a large rainwater tank earlier in the year and the pipe was ready and waiting. It just needed to be put underground and into the polytunnel. The electric cable was laid at the same time.
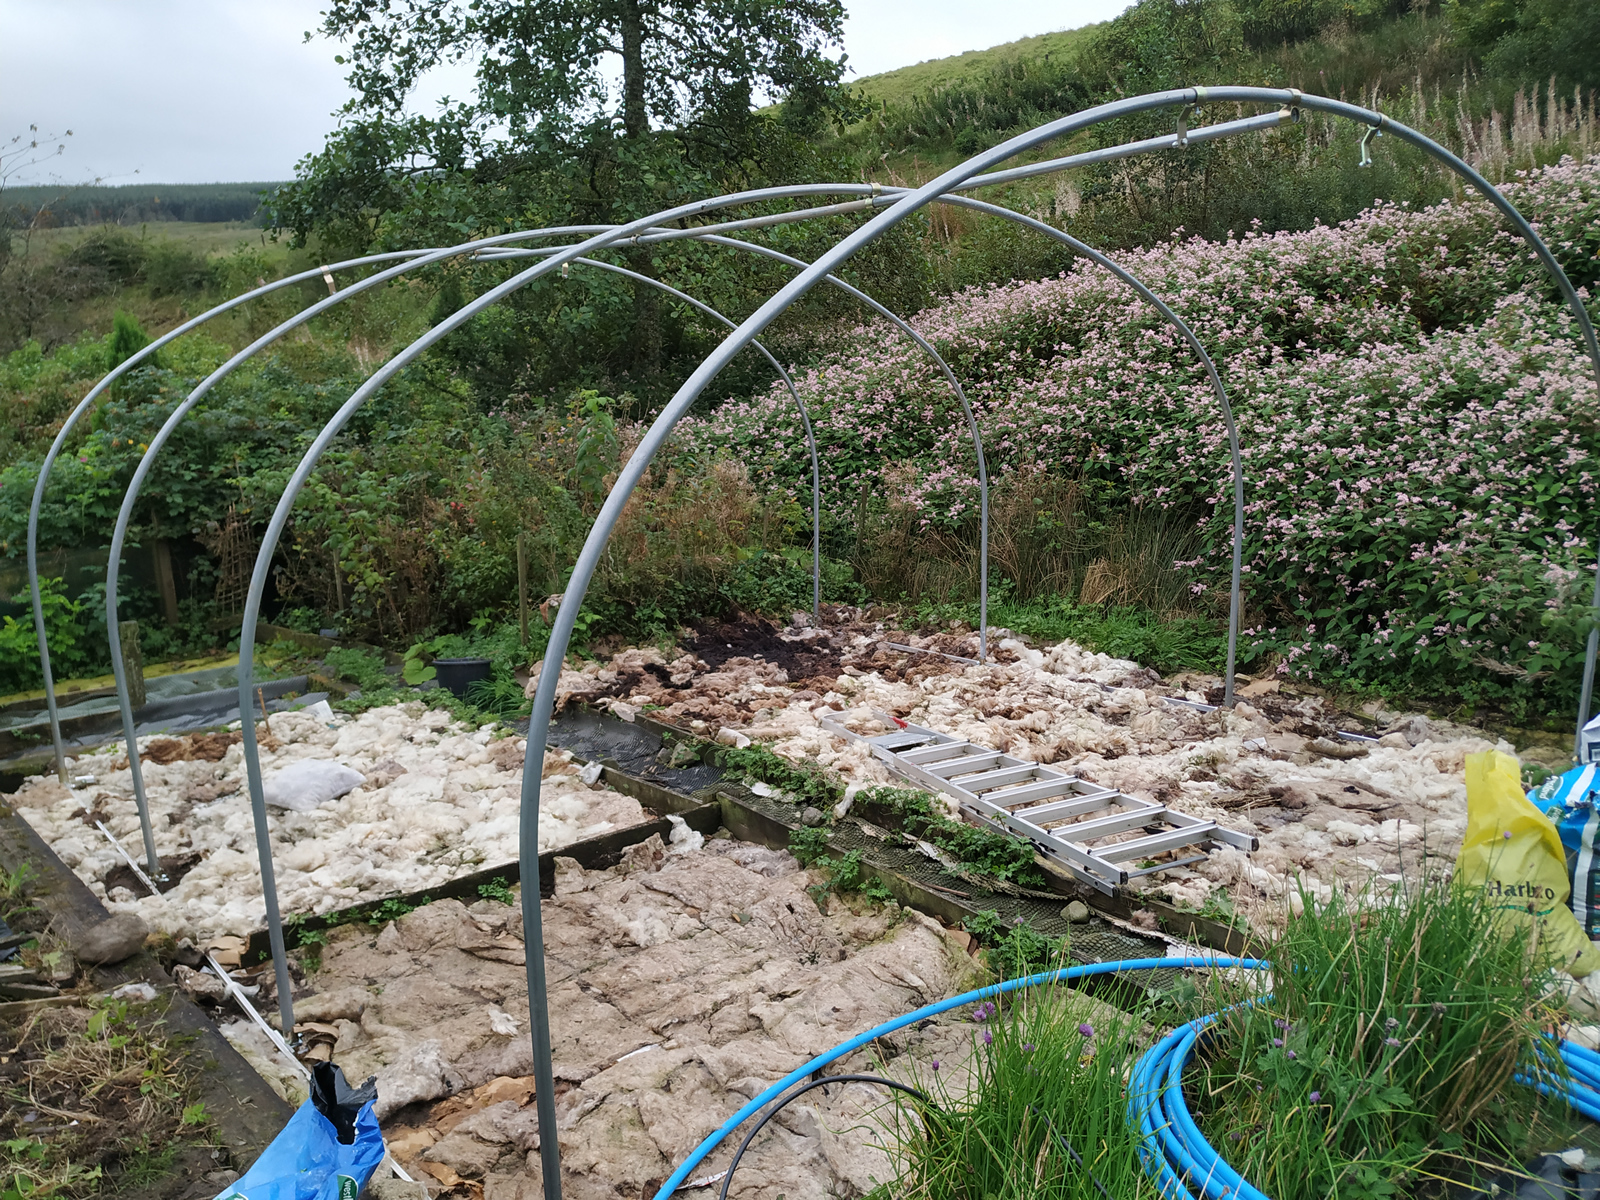
polytunnel hoops
Next was getting the foundations and hoops in place. That went pretty well though, that said, the instructions on squaring the foundations were correct but hard to implement. My maths background was suddenly useful as I designed a simple way to get this right. Quite easy really, I just tied the four corners together with string at the correct length and put them in the ground at roughly the right place. Then I connected the diagonals with string (at the correct length) and marked the middle of the string. Then all I had to do was line up the centres of the diagonals while keeping all the string taut. Took about 20 minutes. That done, the foundations could be drilled into place. After that, the hoops could go up and I had welcome assistance from Nicole in getting them installed. It was starting to take shape.
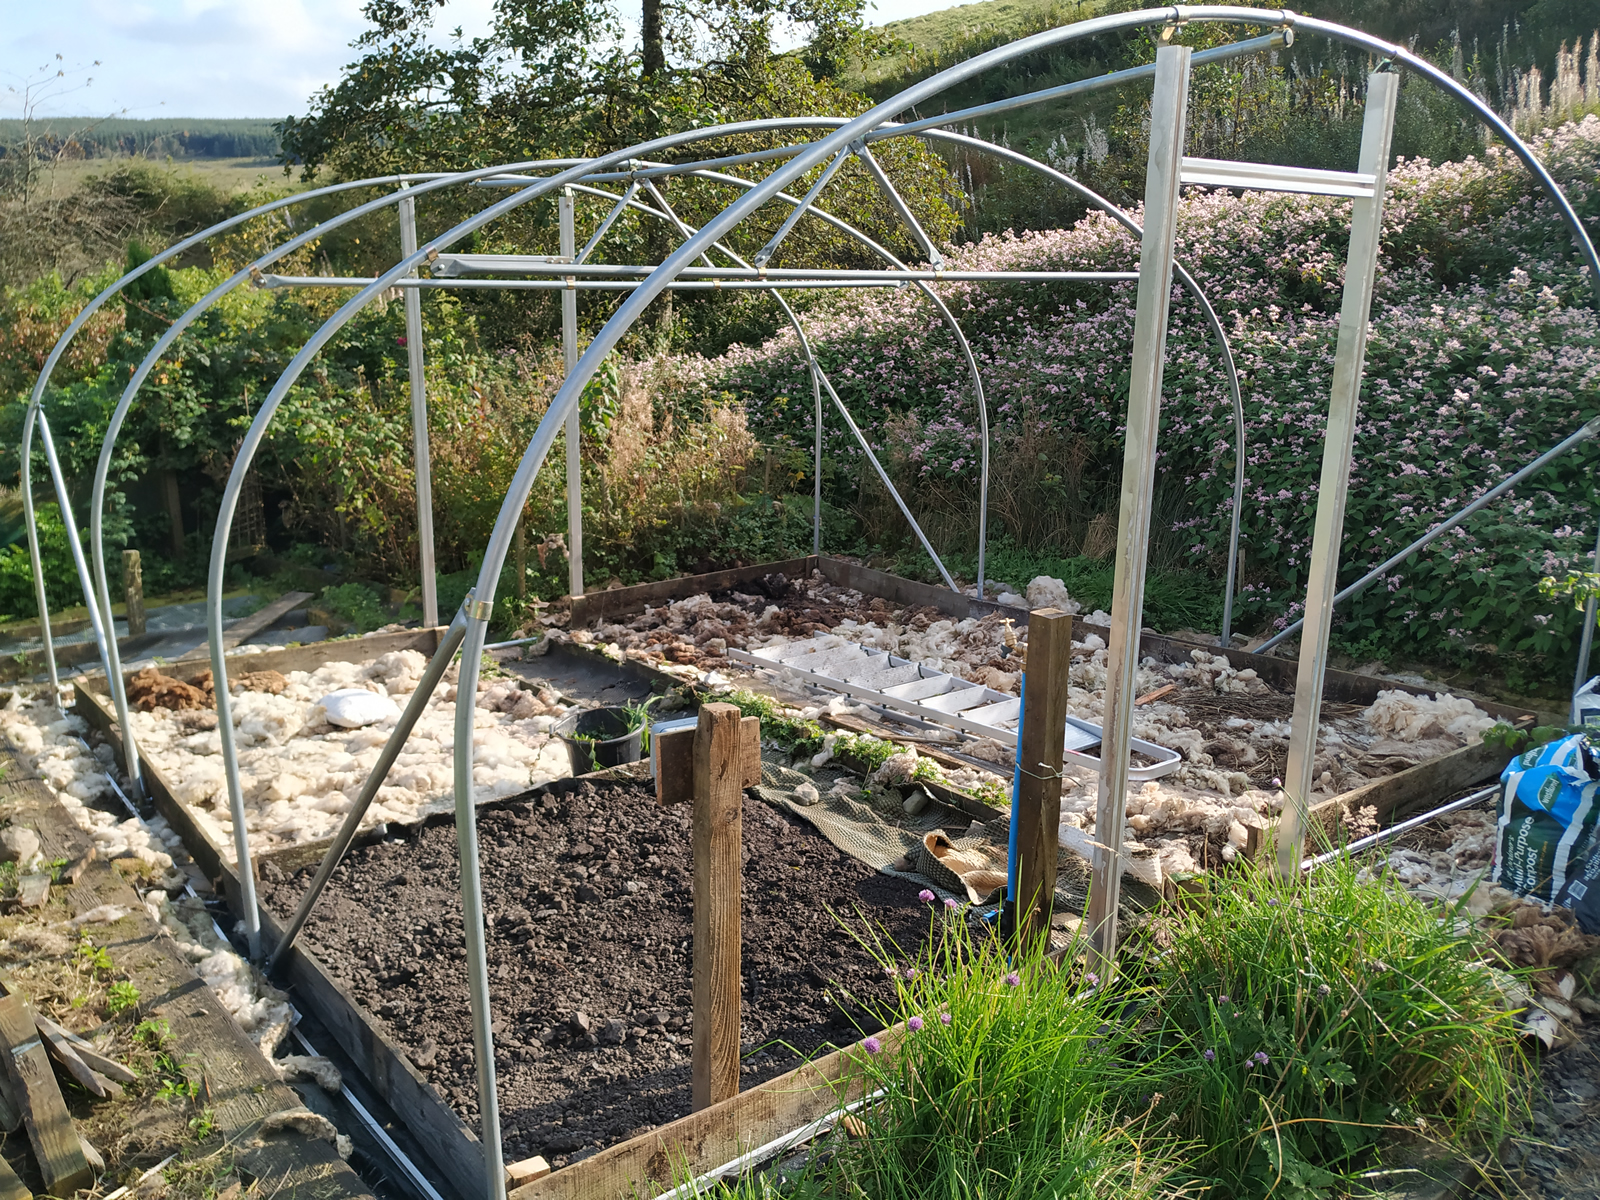
The following day, I put up the rest of the frame. This included A frame bars to add extra strength – it can get pretty stormy here. The door frames proved challenging insofar as it was at this point I found that the existing path and veggie beds were not square and some realignment was needed. I took the opportunity to add frames around all the veggie beds to keep the soil in place.
polytunnel frame complete
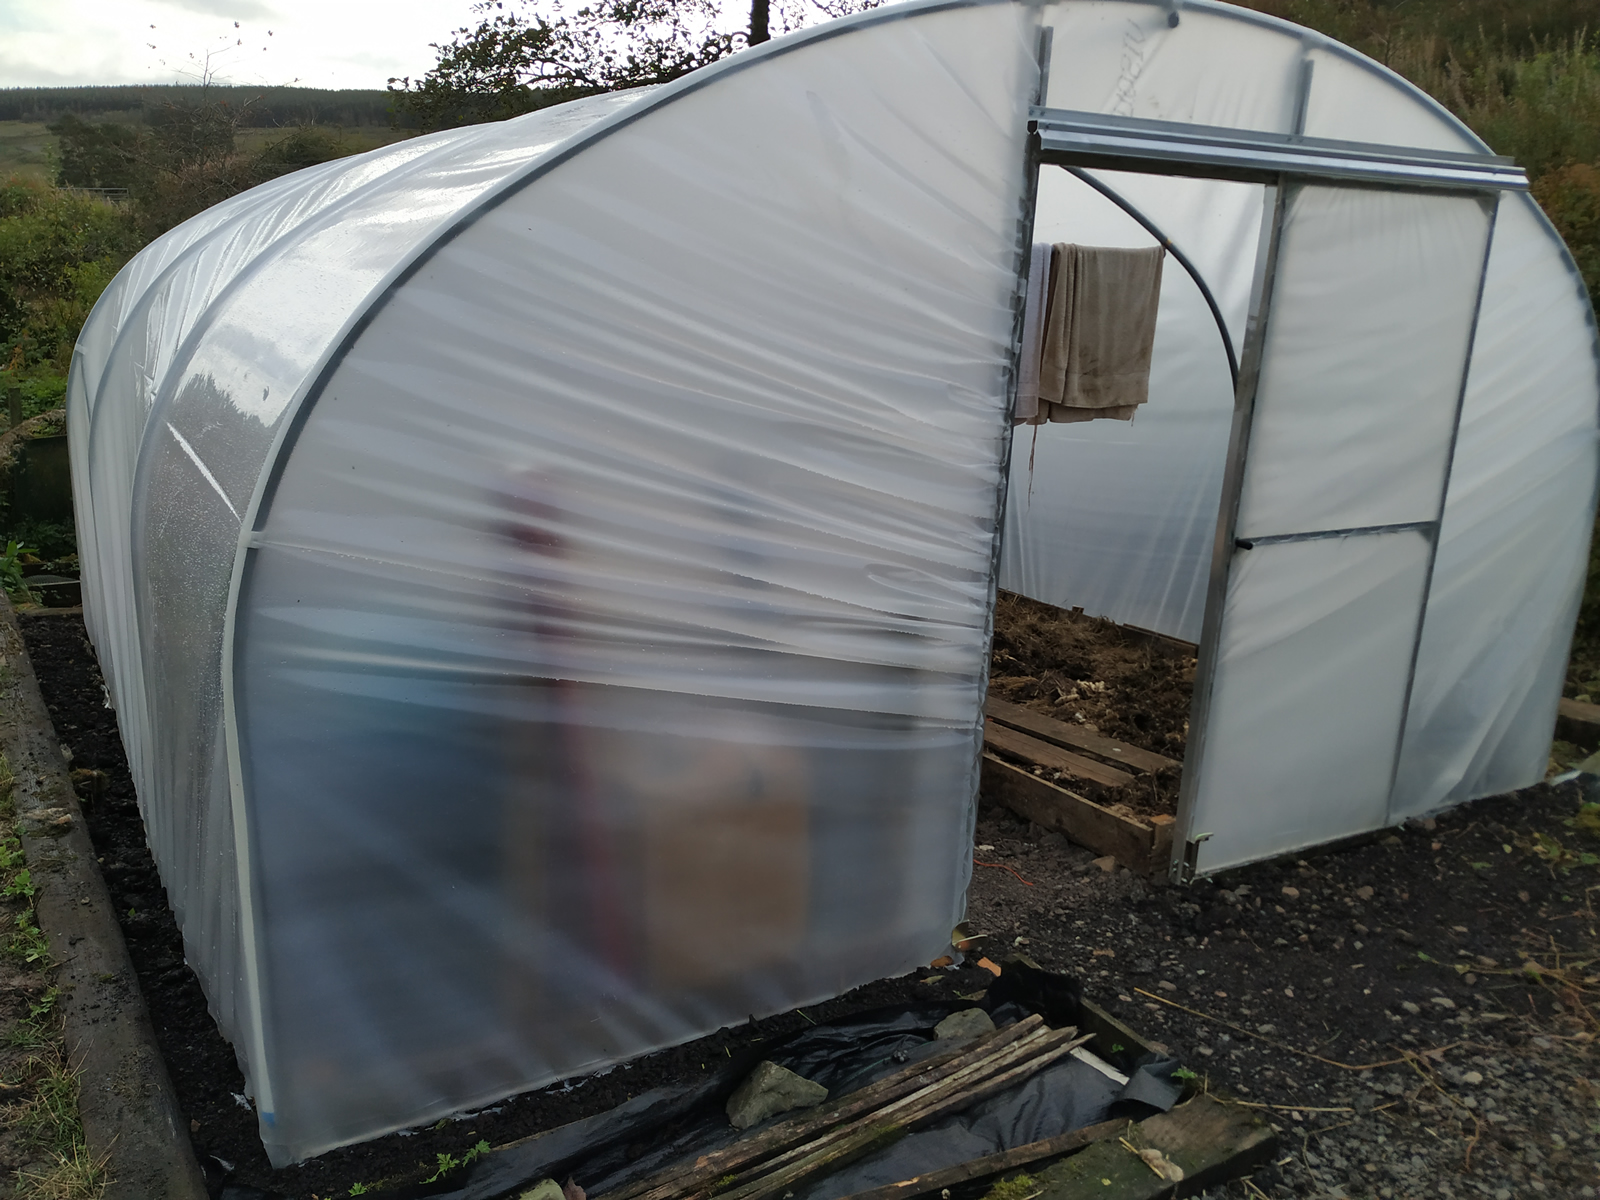
It seemed a good idea to sort out the interior as much as possible before the plastic went on. I had a day or two to do this as I had planned the plastic installation for that rare sunny, wind free day that we sometimes get here. I knocked in a couple of posts and installed the tap and electrical sockets. I also created an area for Nicole to use in her rug making. Making felted fleece rugs uses a lot of water and here, the water could flow freely into the ground (as opposed to all over a wooden shed floor).
That all done, it was time to get the plastic on. This turned out to be harder than it looked. I was working on my own and while I got most of the main area taut, one panel ended up a bit loose. Nicole helped around the door frames with the platting and pulling the plastic tight. The plastic was held in place by metal spring clips which, while fairly simple to install, took its tool on my fingers – blisters galore.
Nevertheless, it’s up, it works and all the veggie beds have been mulched. I have tidied it up around the outer edges sinking the plastic into the ground and laying membrane and gravel to keep the weeds down. We are looking forward to a bumper salad crop next year.
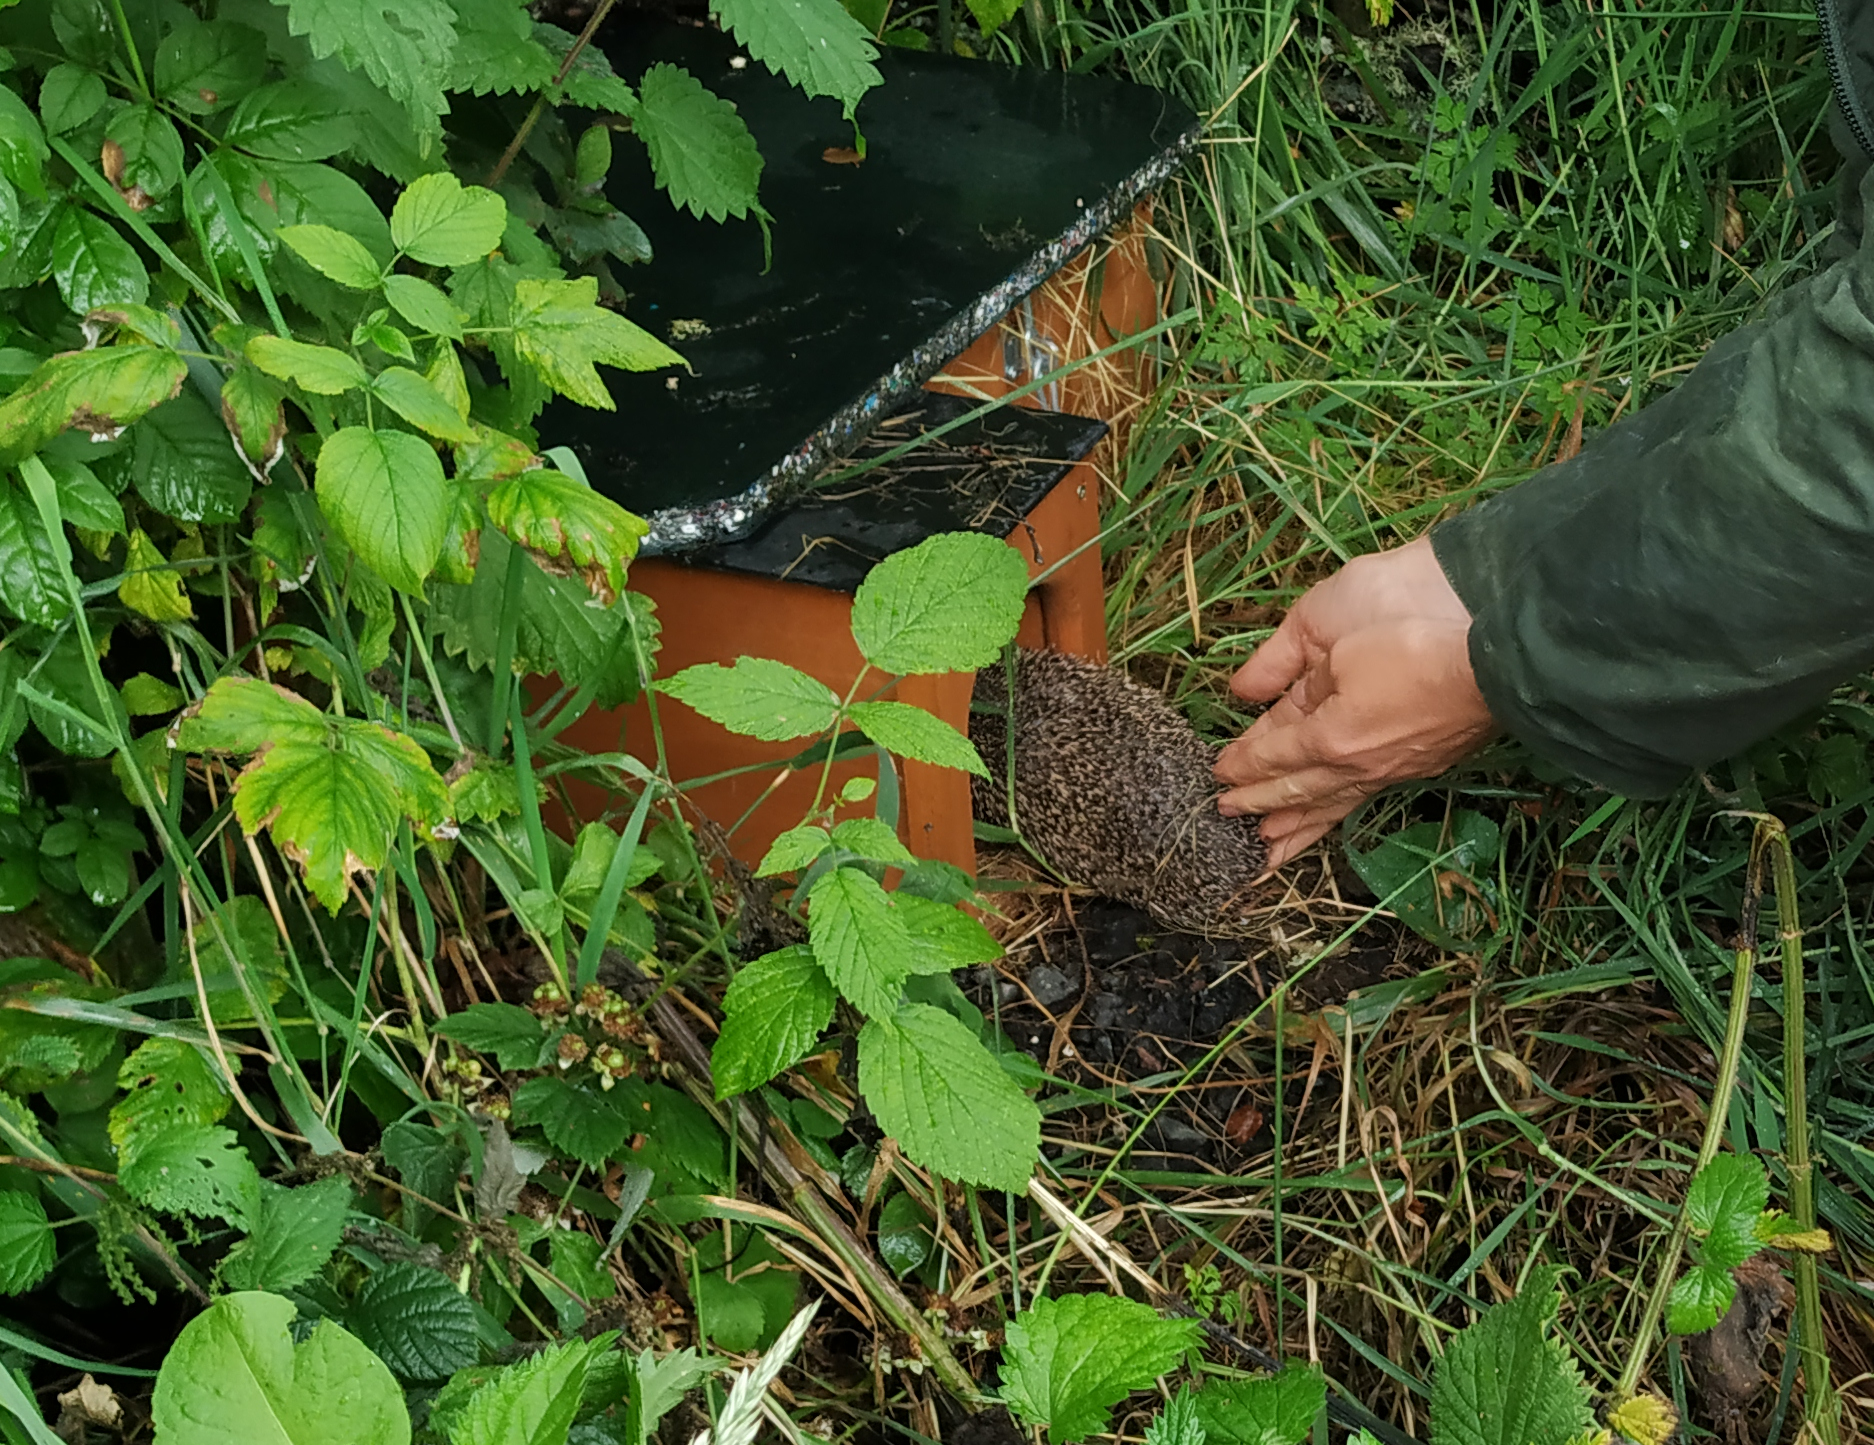
Four weeks ago, we found a tiny hedgehog that was outside, alone, during the day. Without help, it would have died (see Summer Hedgehog Rescue). We took him in and named him Tiggy. Over the last four weeks, he has grown from 125g to over 470g in weight. As it’s summer, young hedgehogs can be released back into the wild once they weigh over 450g and are at least 8 weeks old.
Though we couldn’t be sure of Tiggy’s exact age, his weight when we found him indicated he was somewhere between 4 and 5 weeks old. He was ready for release.
We prepared the hedgehog house with fresh hay and set up the feeding station. We put in place the wildlife camera to monitor what he did.
Next day, the food was all gone but there were no films on the camera. Most frustrating! I set the camera up a bit closer and refilled the food bowl. The following night, we got a great set of videos. Tiggy was coming out of the hedgehog house, having a meal and heading back. We were surprised, normally hedgehogs disappear off when released.
Three nights later, Tiggy is still around and we are leaving out plenty food for him (as well as keeping an eye on him).
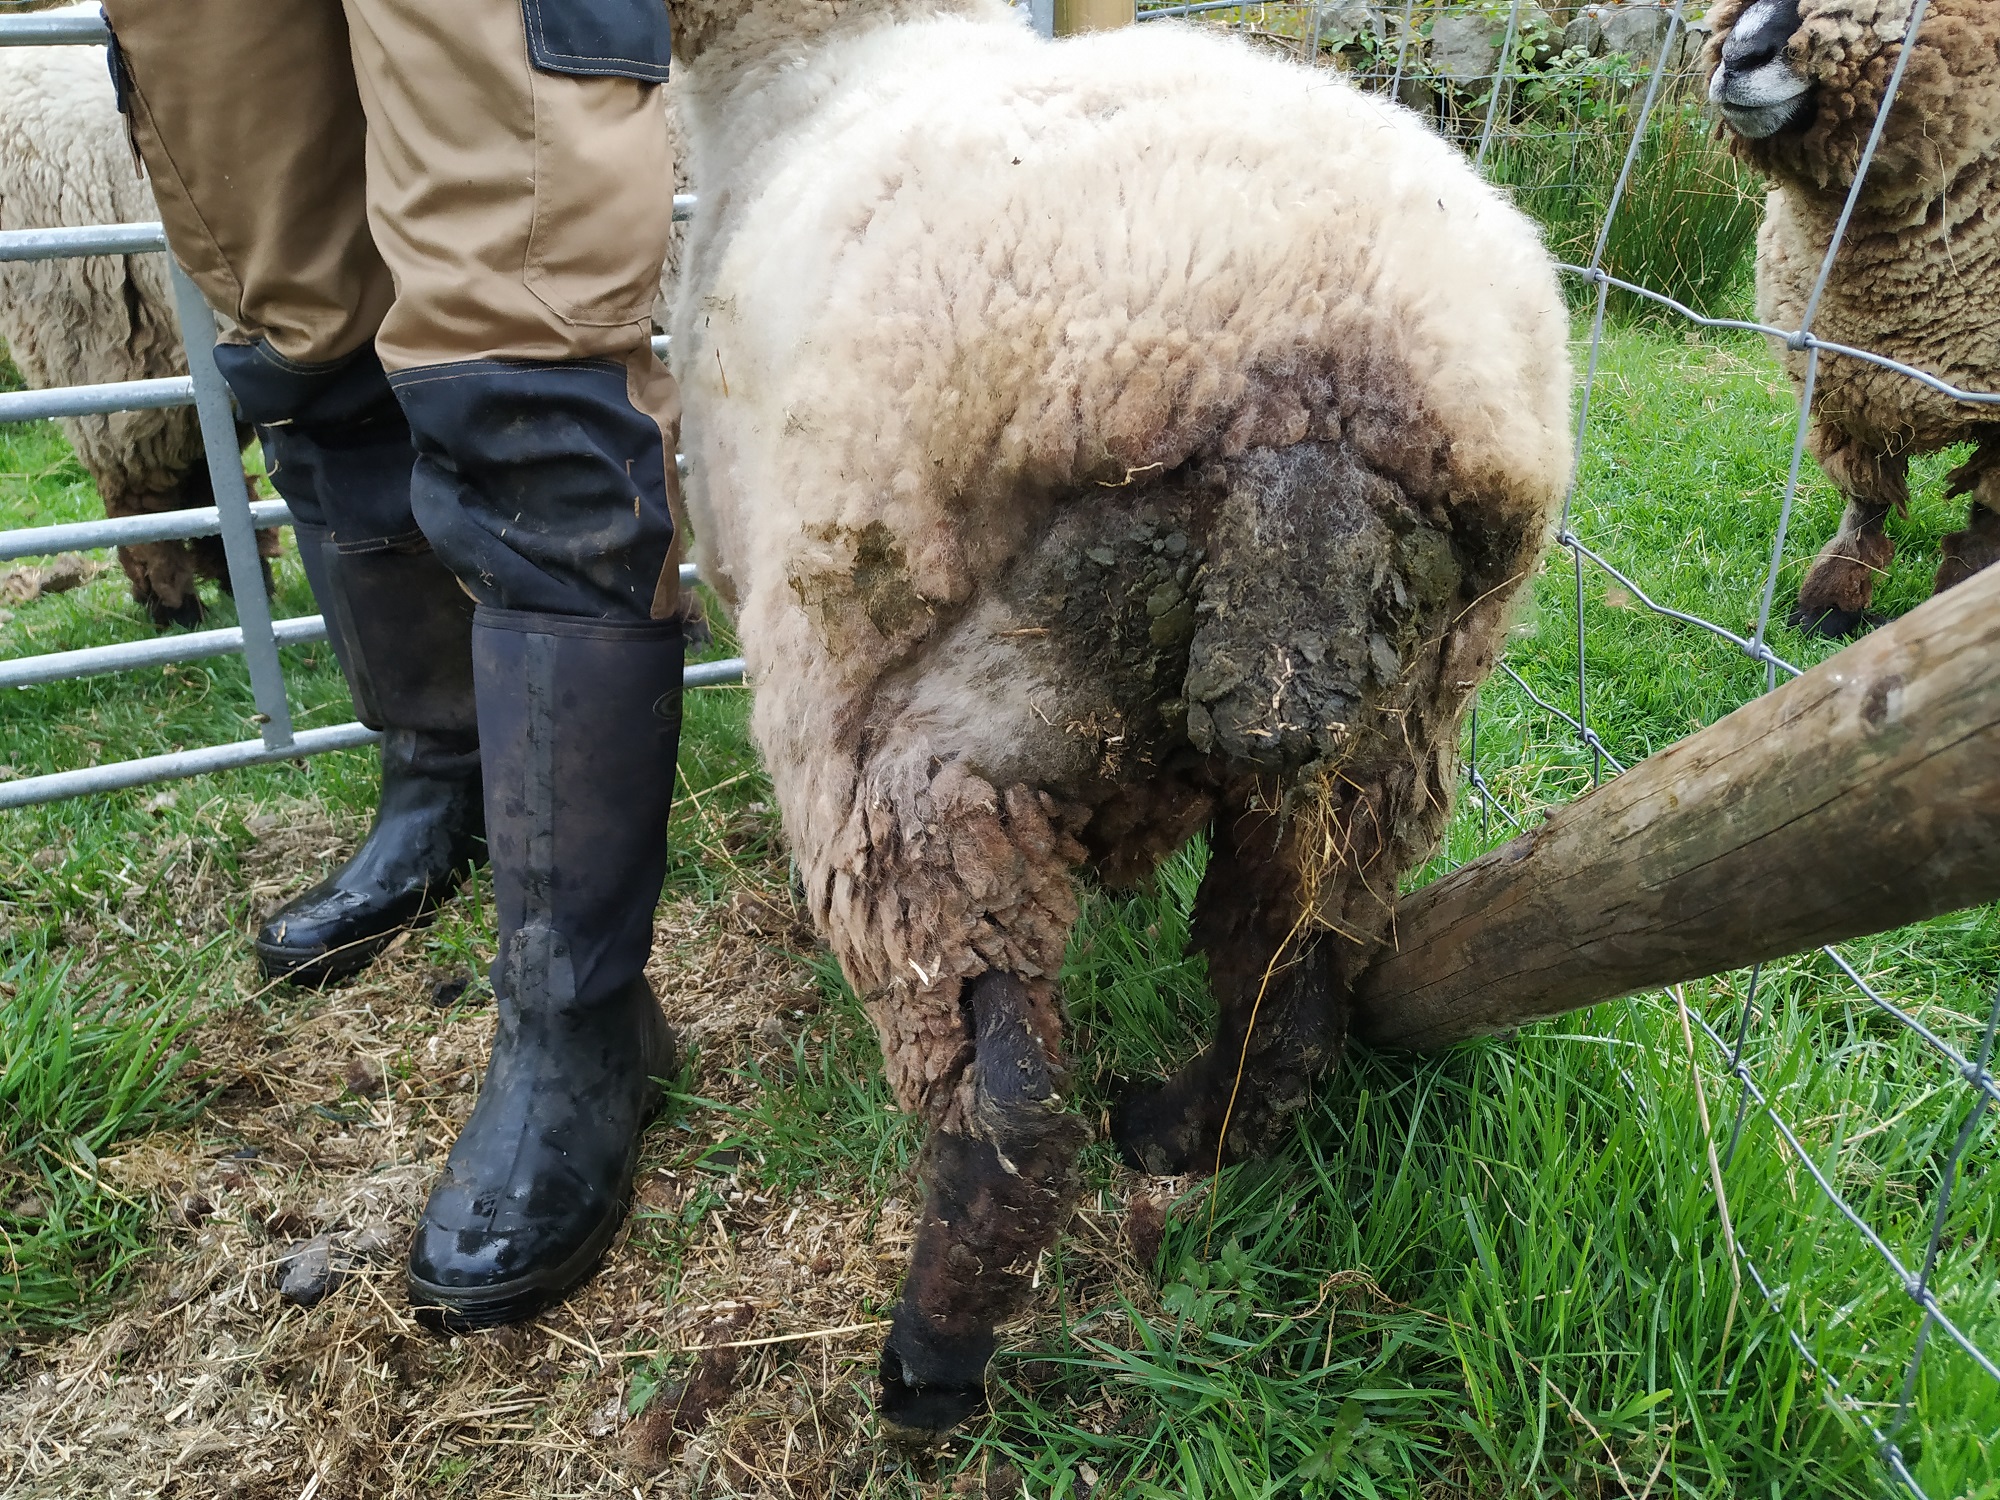
Sheep need a lot of looking after and one of the primary tasks is checking hooves and bottoms. Much like human fingernails and toenails, sheep’s hooves can grow and become uncomfortable. If not trimmed, infection can get in.
Dirty bottoms are a magnet for flies and the last thing you want is the blowfly laying eggs there. These eggs hatch into maggots which will eat the sheep alive. It’s called flystrike and it’s one of the reasons shearing is so important.
While we check our sheep 2 or 3 times a day, it also helps to take preventive measures and this means keeping the wool around the sheep’s bottom short and clean. It’s a process called dagging.
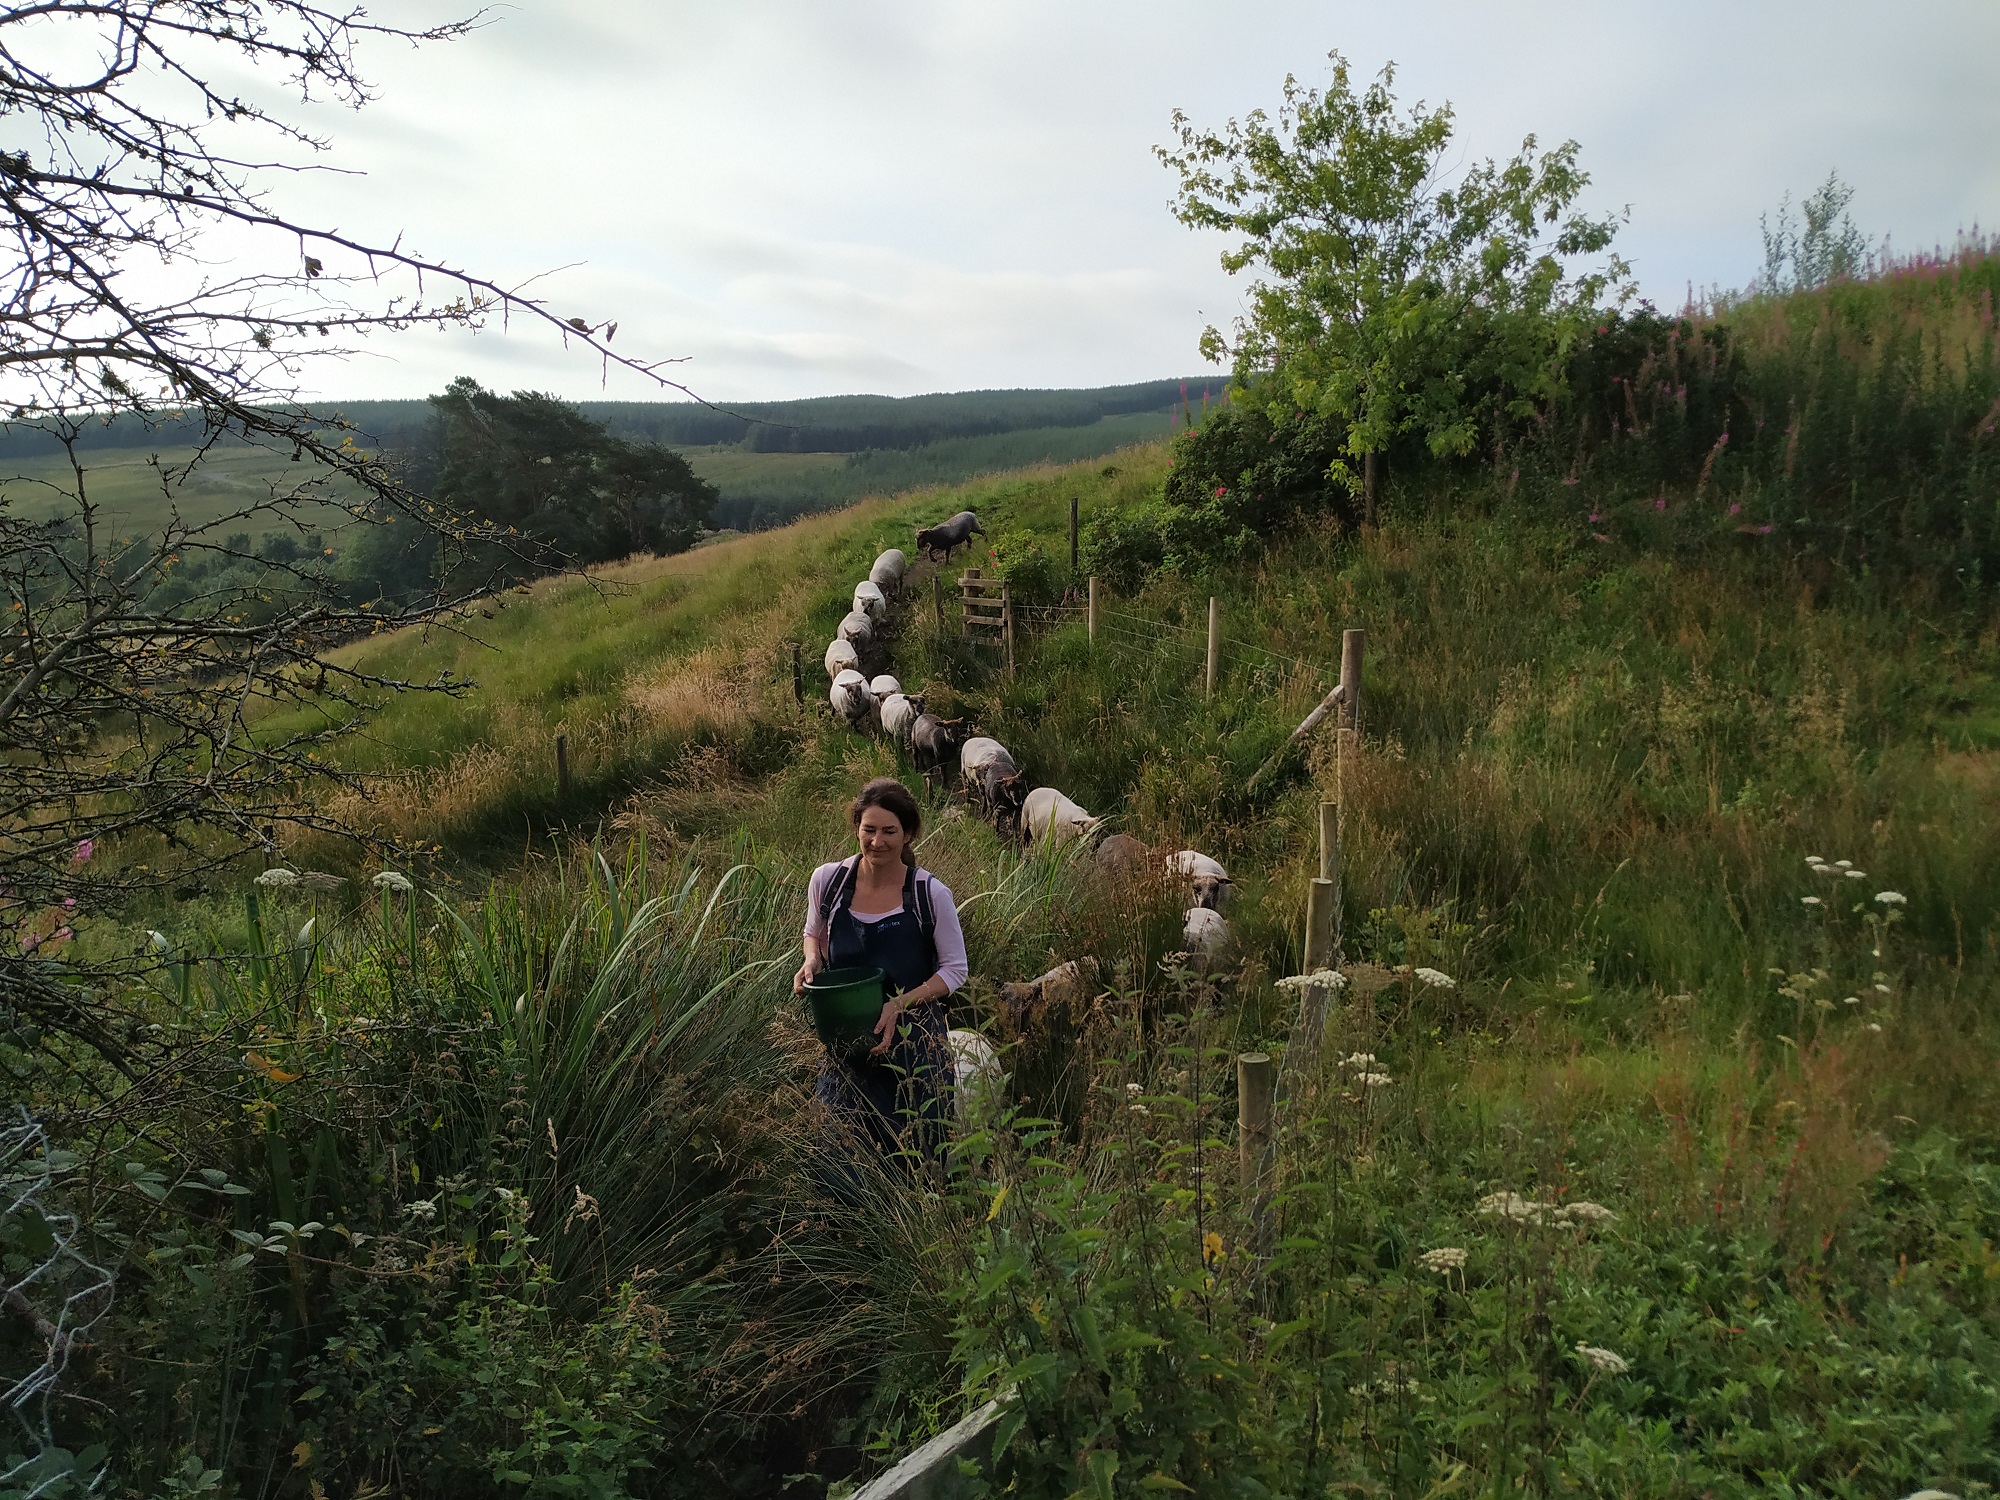
First step was to get the sheep together and penned up. We bring them down to the lambing shed. It means they have shelter from sun or rain or both, as often happens here. While I get busy setting up sheep hurdles, Nicole goes and fetches them. These days, they follow happily.
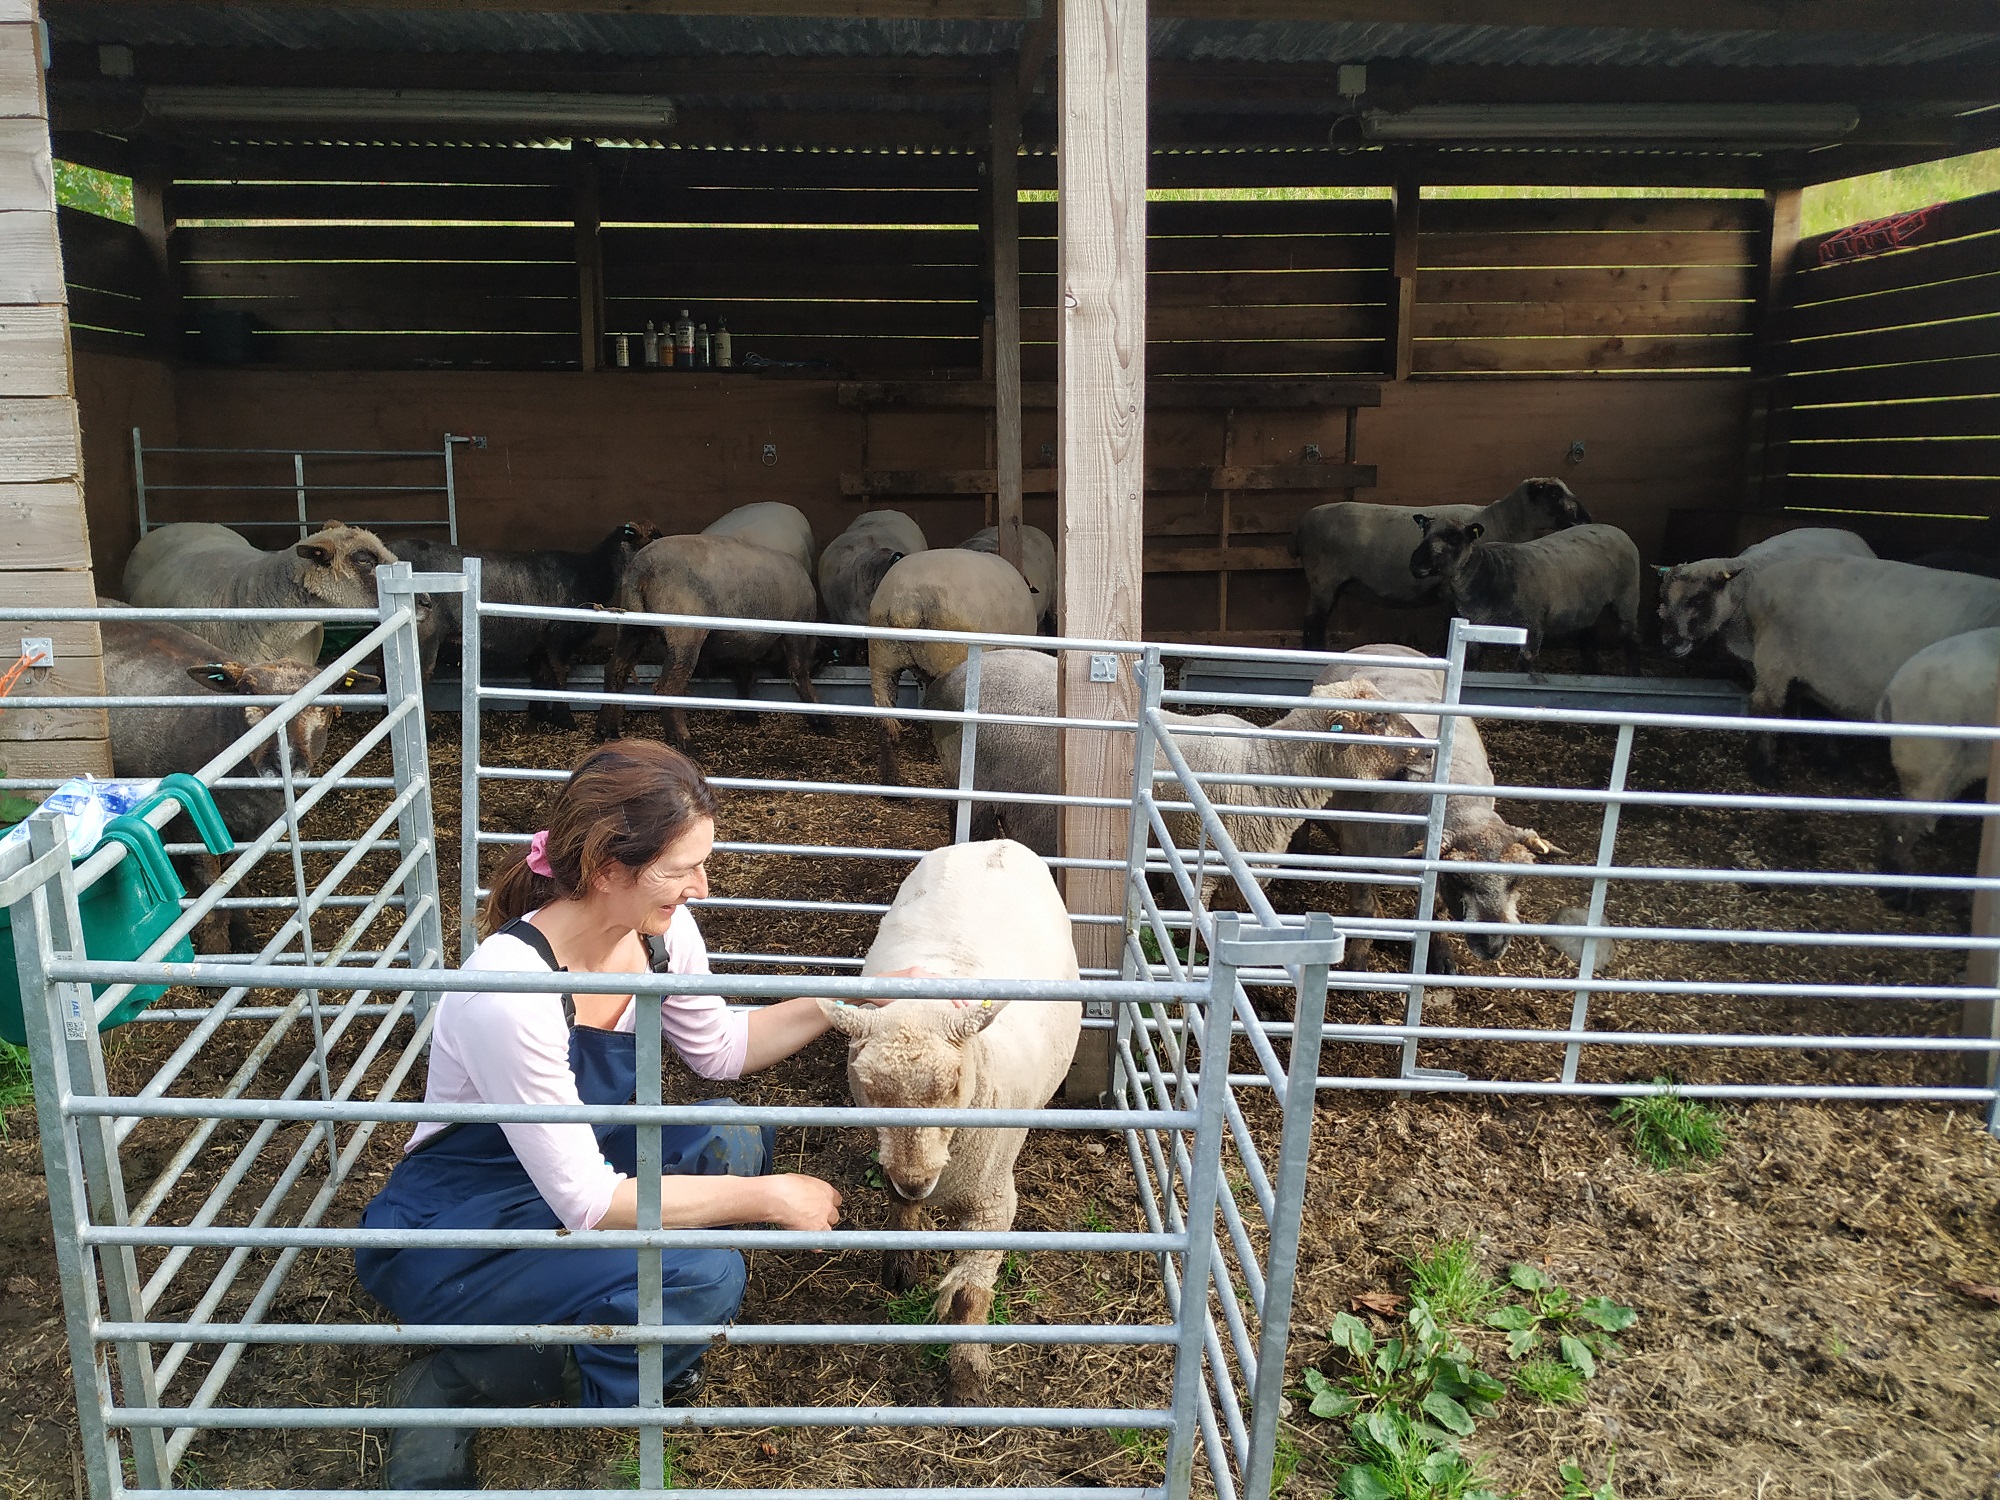
Once in the shed, we construct a small treatment pen. You can’t see it from the photo, but it has a sliding entrance. In practice, that’s a hurdle we can shift sideways to make an entrance.
It’s all pretty calm and most of the sheep just wander in to the treatment pen when called. A couple need bribing with some sheep nuts and one, Bluemli, takes a bit more persuading – she is very wary of pens. We leave Bluemli till last.
It all went very smoothly. I helped keep the sheep calm while Nicole lifted each leg and checked the hooves. Sheep don’t mind their front legs being lifted, but can get a bit twitchy about their back legs losing contact with the ground. I find that if I distract them with neck scratches and soft words, they usually stay pretty calm through the whole process. Each sheep has its own particular sweet spot for a scratch. Find that and it all goes smoothly.
Then it’s a quick bottom check. If the bottom is dirty, it gets a clean and trim. After that, out that sheep goes, the sliding hurdle moves across and the next sheep wanders in.
The ones already treated often hang around outside the pen seeking more tickles. That’s actually quite helpful as their proximity also has a calming effect on the sheep whose hooves are being inspected.
Bluemli, well she went from being a little wild eyed to settling, chewing the cud and then back to wild eyed when it was her turn. I grabbed a handful of sheep nuts, waved them in front of her nose and, to our astonishment, she trotted into the pen with me. Once in the pen, she was quite happy and let Nicole trim her hooves and check her bottom with no trouble at all.
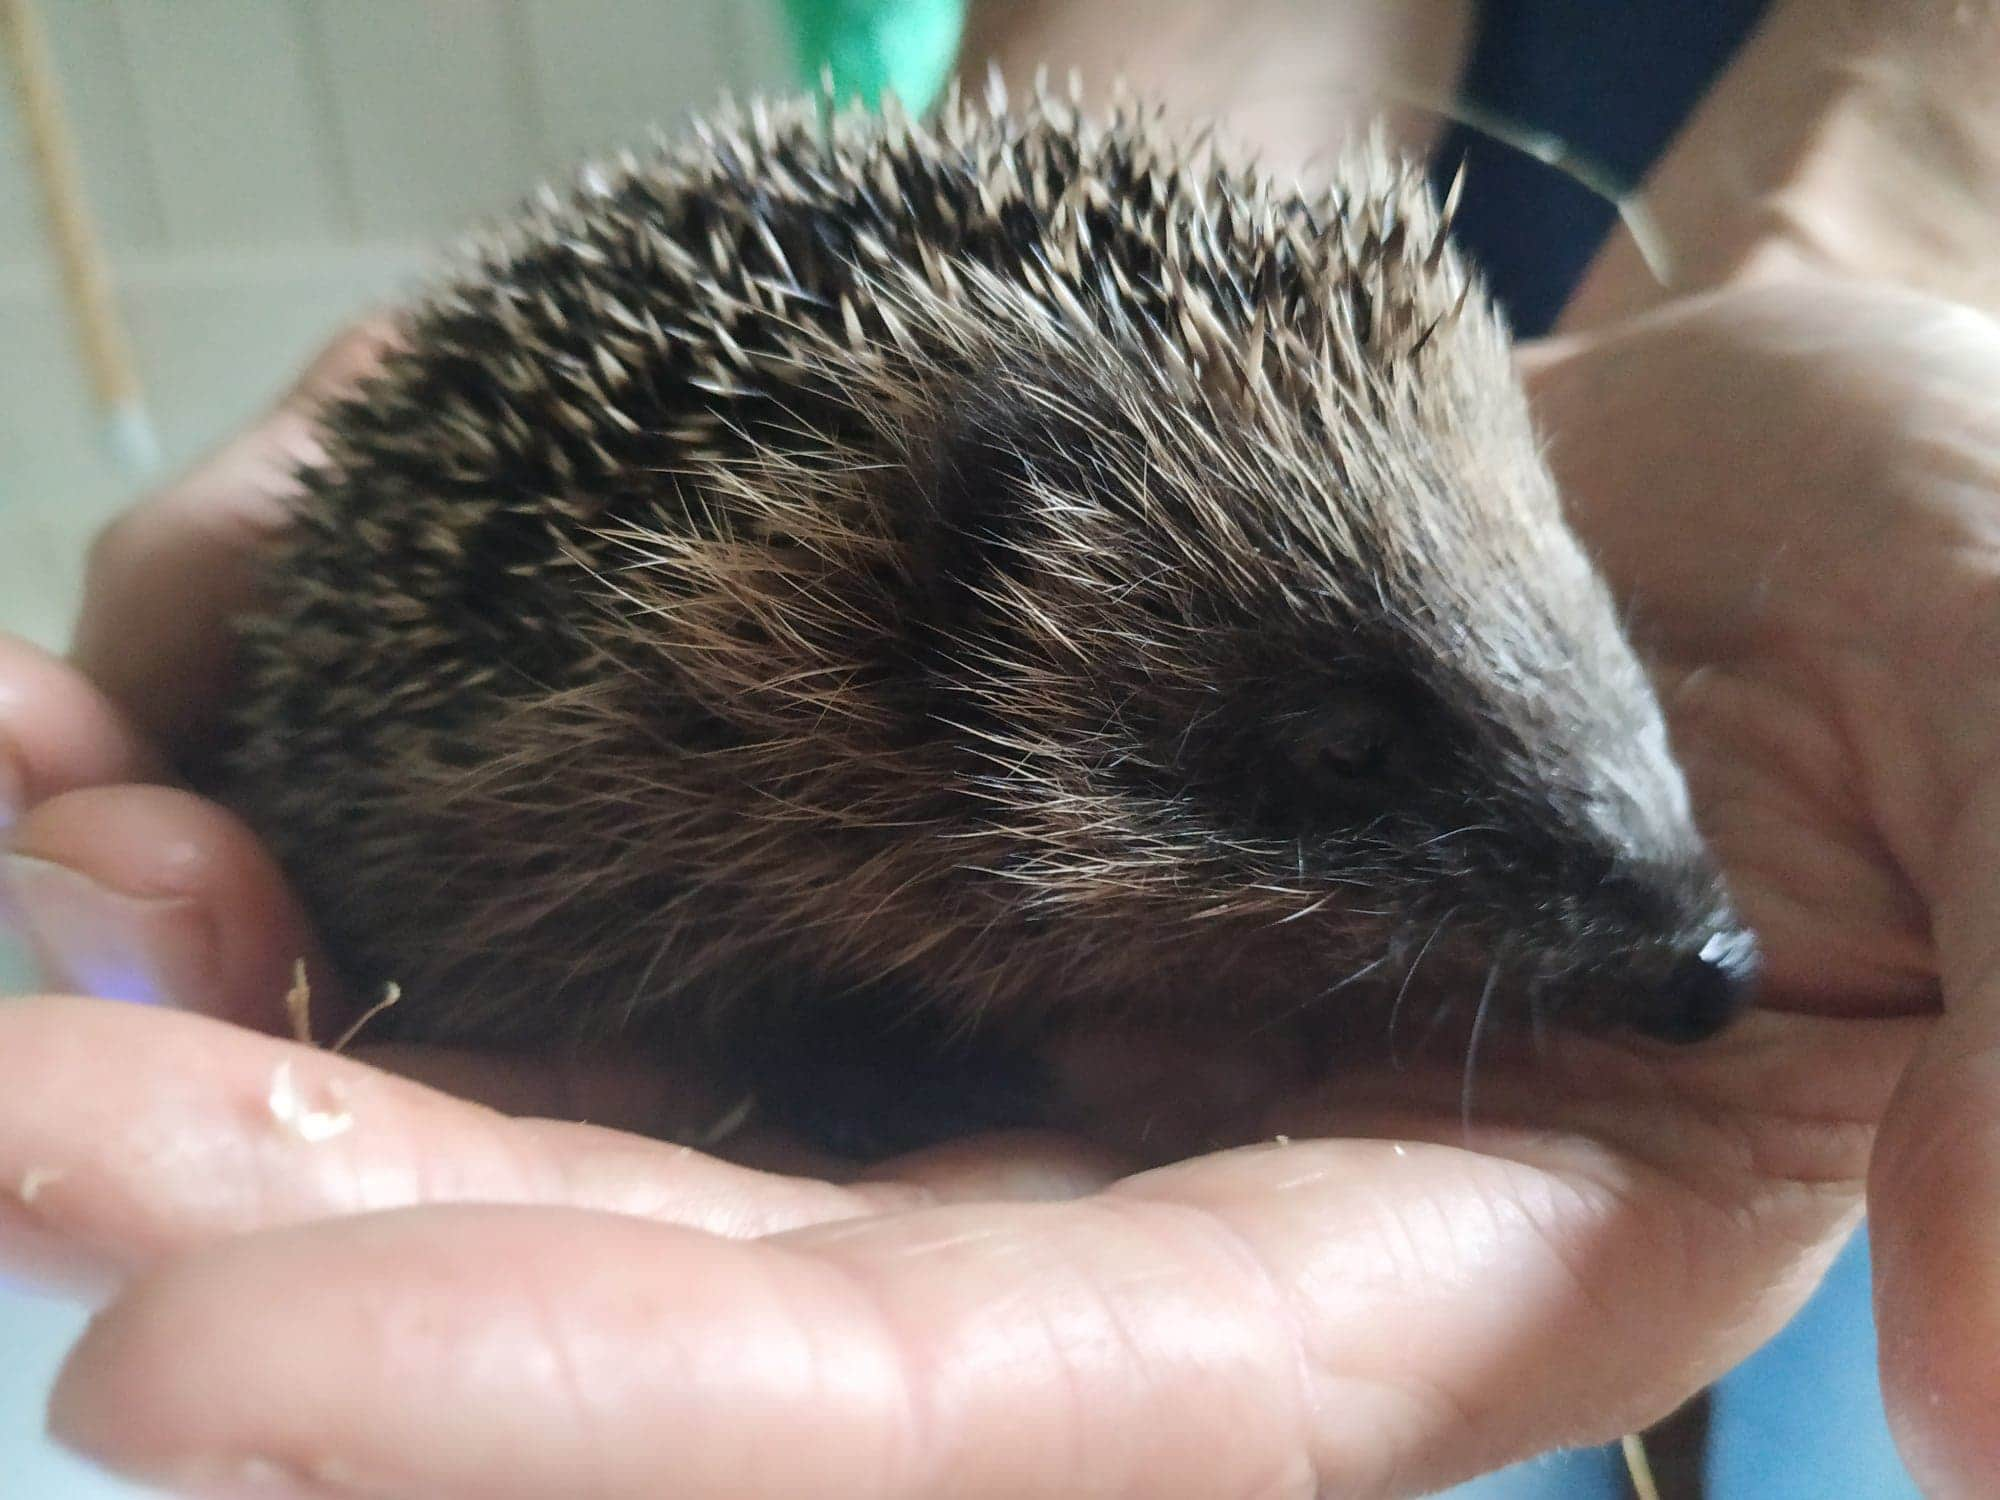
Last autumn, I found a small hedgehog which we overwintered (see Hoggy Released). This can happen a lot, late litters mean they just don’t have time to put on enough weight to hibernate. Without help, they wouldn’t make it through the winter.
What’s a bit more unusual is to find one needing help in the summer. A few days ago, just as I was settling down for the evening, I got a phone call from a neighbouring farm. They had spotted a hedgehog in one of their fields and were worried about it. They had heard about us overwintering hedgehogs so we had sprung into their minds as knowledgeable.
I pulled my boots back on and set off, grumbling slightly to myself if I am to be honest. I was expecting to find nothing but as I arrived at the spot they had described, I found a tiny hedgehog just sitting there. All grumbles evaporated in an instant as I scooped it up into my hand. It must have got separated from its mother and I think it had been there for hours. It had done well to survive as the field was small and full of sheep and so it had been at risk of being accidentally trodden on. It was tiny, but fully formed. By that, I meant it had adult prickles. That was a good sign, it was likely no longer reliant on its mother’s milk.
It was so small it fit snugly into one hand as I ferried it safely back to the house. It was perfectly calm all the way, just sitting there quite happily.
On getting back, we weighed it and it was a mere 125g, tiny indeed. We also inspected it for ticks and fleas and found none, another good sign.
Now, having had Hoggy over the winter, this time we had everything we needed. I left Tiggy (which is what we named him) with Nicole and fetched the hedgehog rescue kit. I set it all up in the pantry displacing the homebrew.
That done, I prepared some food. We had a cupboard full of dogfood so no problems there. I set out about 100g of food, mixed in a little water and added some dried calcium worms.
As I was placing him in his new accommodation, I was suggesting to Nicole we might need to get a pipette and hand feed him. She started unwrapping one but before she’d finished, Tiggy had located the food and was tucking right in. That was a great sign. Once he’d eaten, we helped him find the bed all filled with fresh hay.
That night he ate just over 80g of food and put on a mighty 44g. He must have been really hungry. After, 4 nights , he now weighs 200g, so good progess indeed. He has settled in well and has begun trashing his run, typical hedgehog behaviour (they like to dig). Another good sign.
At this rate, he should be ready for release late August.
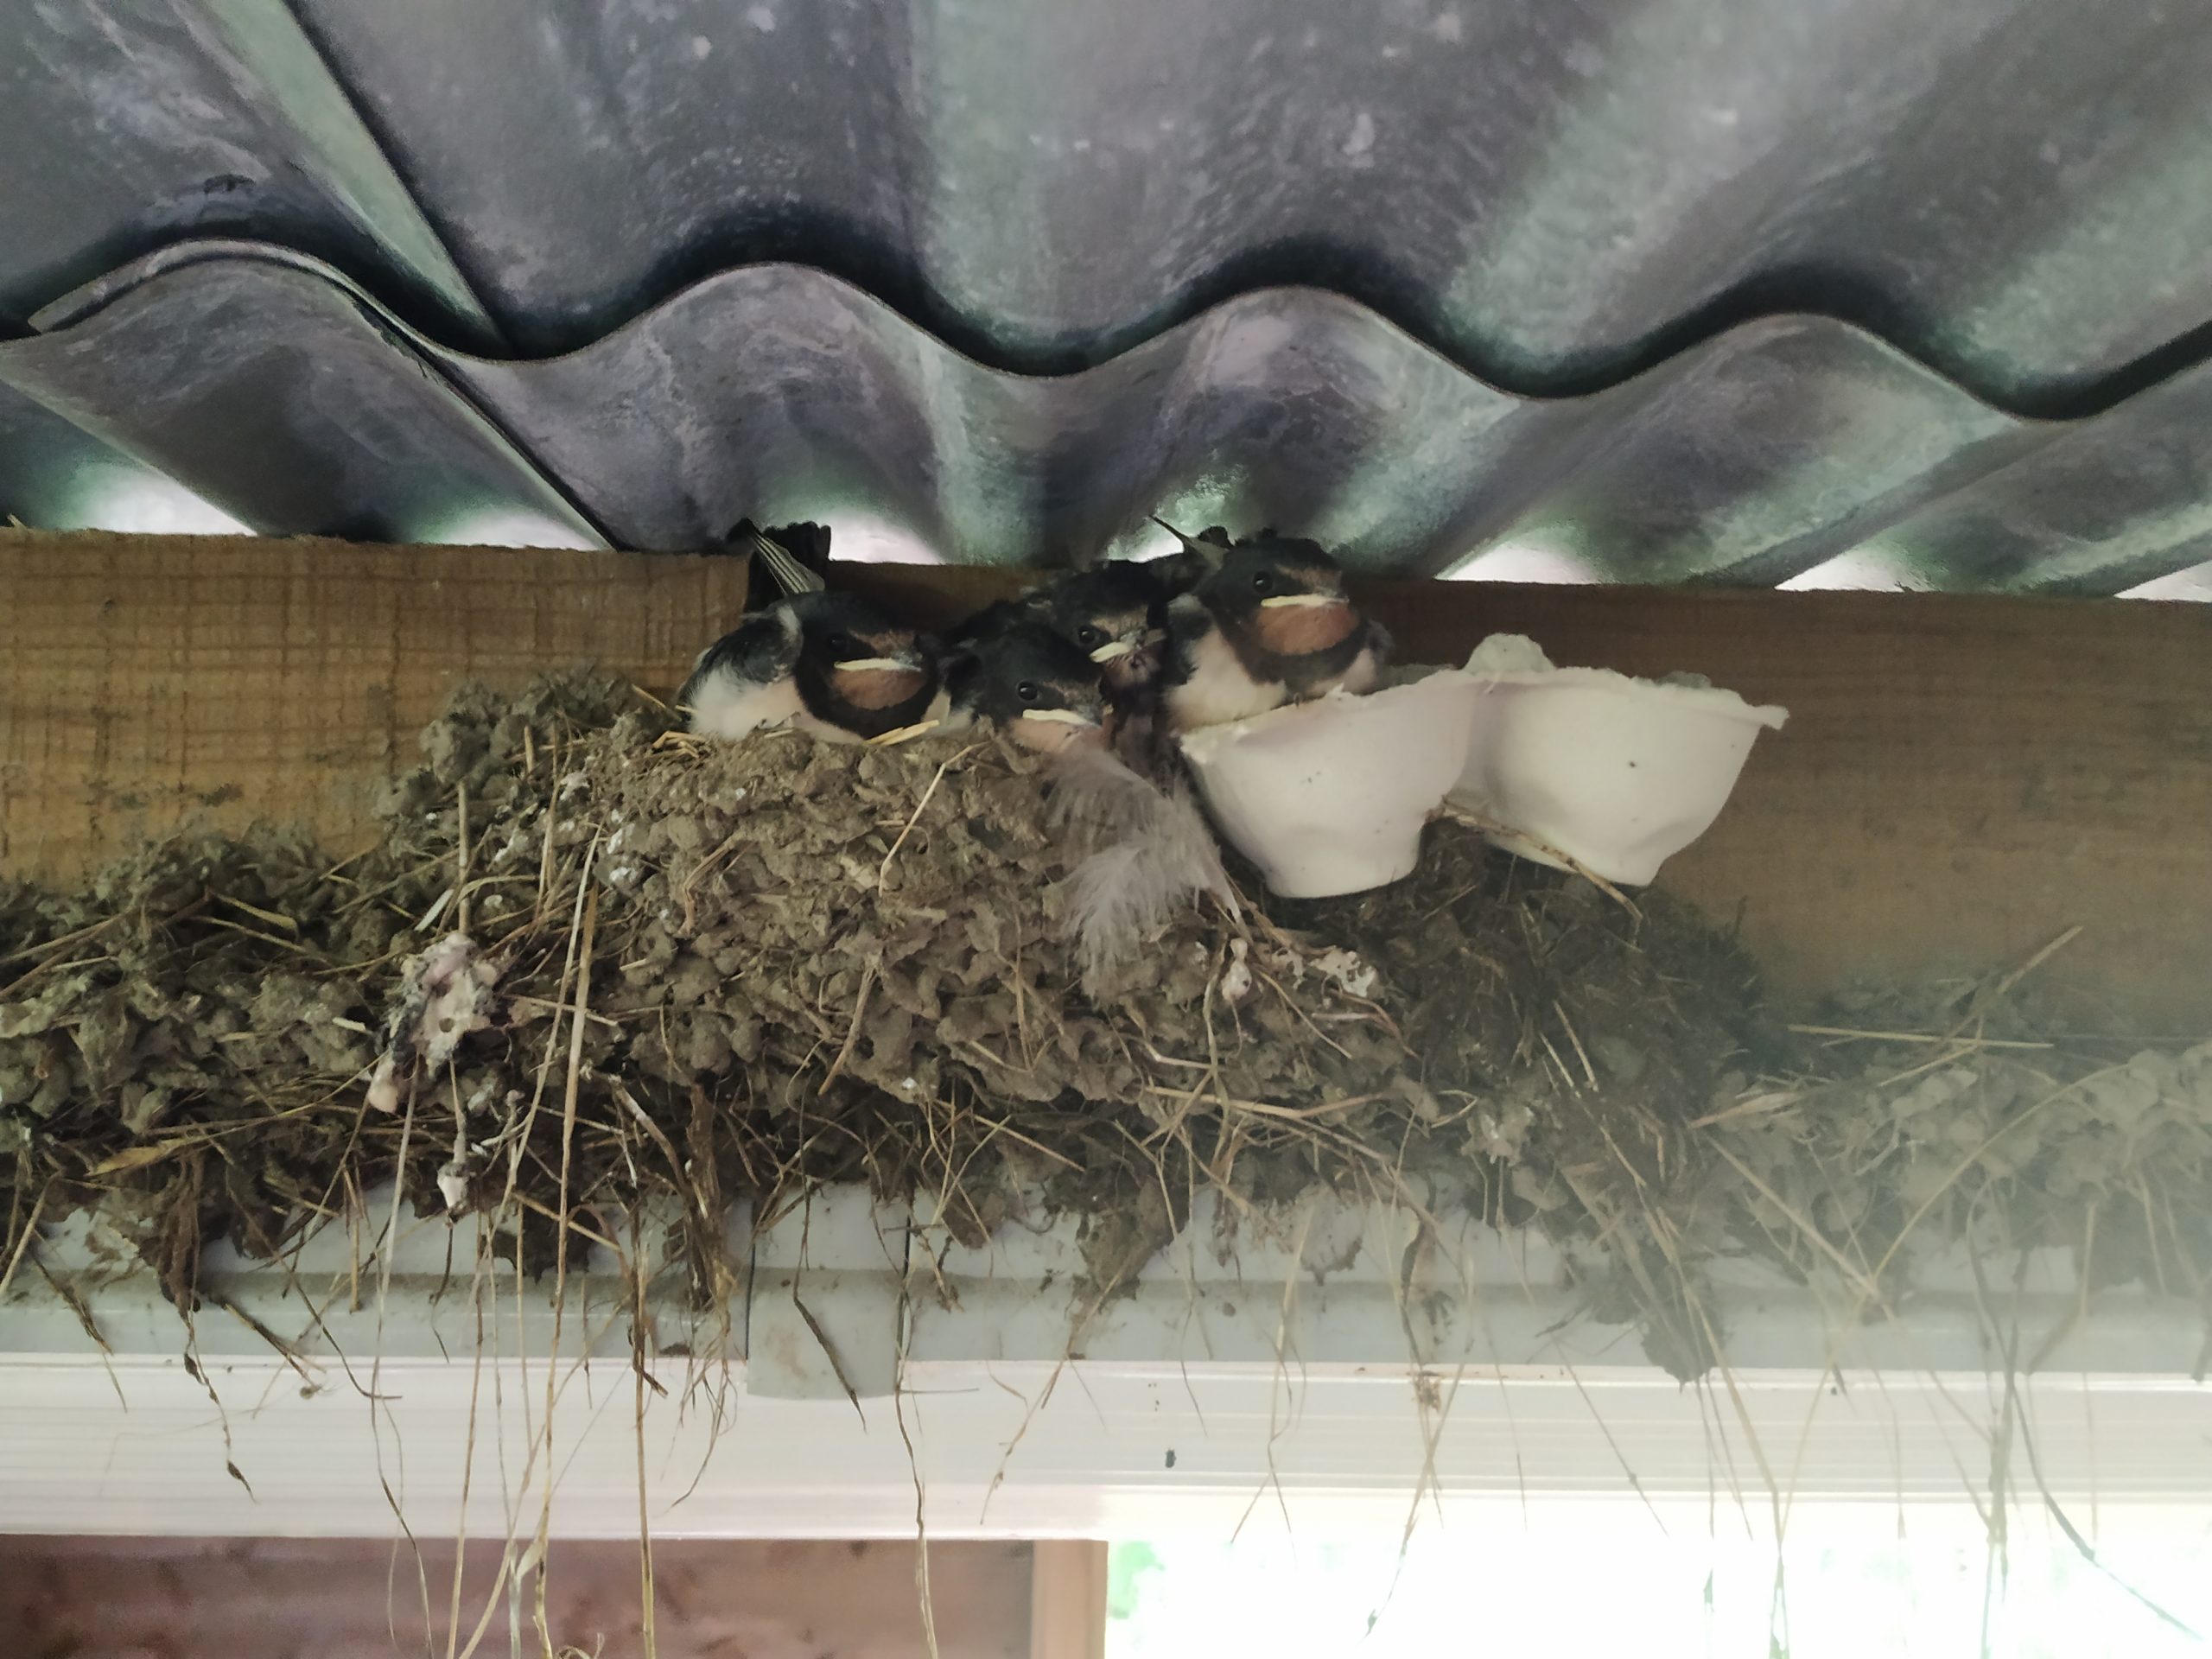
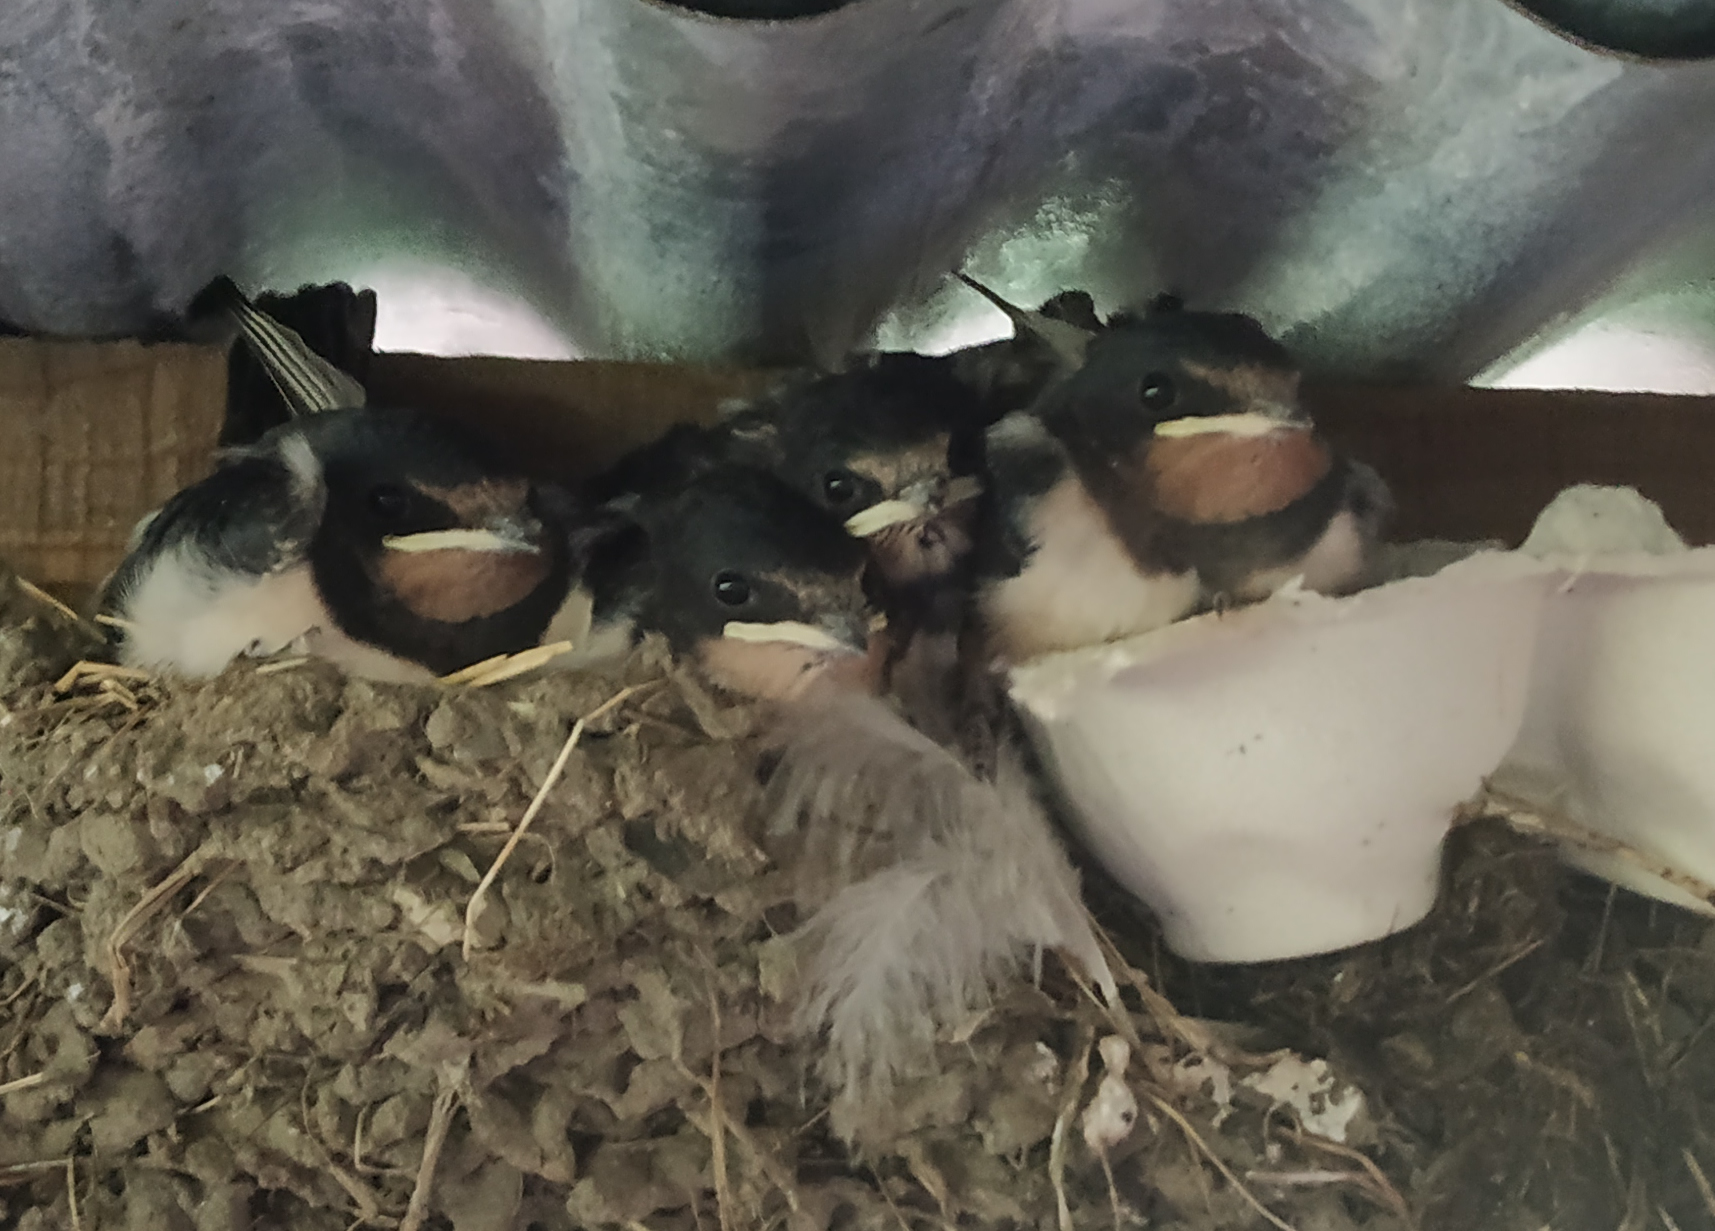
A while back I posted an update on the nesting birds we have here. One of the swallows’ nests is in our lambing shed and it was looking pretty crowded. A total of five fledglings were all vying for space. We kept an eye on it and one day Nicole found a fledging on the ground. It was fine. To be honest, it was a miracle the hens hadn’t eaten it as they spend a lot of time in that shed.
The problem we had is that there was no room in the nest. Even with just four fledglings, it was jampacked with young swallows.
Inspiration came and I went and got an egg box. It was quite simple to put a couple of egg compartments alongside the nest and into it went the fledgling.
We checked from time to time and sadly, the poor fledgling was turfed out again and didn’t make it. Nature can be cruel. However, even with four, room was at a premium and one moved in to an egg cup (see picture).
They have all fledged and flown the nest now and we sometimes watch them swooping around our house and fields. There are certainly plenty of flies for them this year.
 Finally, the ground thawed and the forecast looked warmer (above freezing anyway), so I got going. I was somewhat surprised to find that many of the baby trees were budding and some were even coming into leaf. I had to get them in more quickly than I had thought. Easier said than done, the ground is quite rocky and each stake needed a pilot hole drilled. For that, it was heavy hammer and chisel. It meant each tree took around 5 minutes to plant.
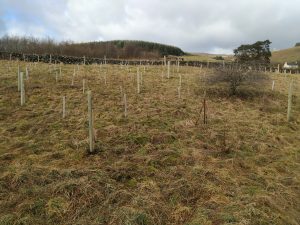 It took the best part of a week before they were all in. Of course, the next in line of the recent batch of storms immediately blew some over. As well as rocky, the ground is very soft in places, so the fallen saplings had to be rescued and their stakes made firmer.