Despite living in what is generally considered to be a wet part of Britain, we do have prolonged dry spells. In fact, for the last 3 years, there have weeks of dry weather in the spring.
Since moving here, we have added two water tanks to gather water from hillside springs. But these springs dry up in the dry weather and if we’re not careful, we have to ferry water up from the river. This year, just before the dry spell hit, we got a new 550 litre trough installed adding extra capacity.
When they first saw it, the sheep were startled; they are not keen on new things appearing unexpectedly. But as the rain stopped and the sun came out, they have found it to be another useful drinking spot.
I think, over coming years, we might add further capacity till we have enough water to last for months rather than weeks.
Since June last year, Bim has been suffering from egg peritonitis, a common condition in hens of all ages for which the prognosis is usually death. Last year, we managed to keep her going with a range of treatments (see Bim the Wonder Hen). As the year progressed, the hens stopped laying and Bim’s condition stabilised.
With spring arriving, egg laying has been in full flow. Bim, too, has been trying to lay. Unfortunately her peritonitis is still with her so her laying has led to her swelling up again and walking like a penguin. The vet prescribed two courses of antibiotics and anti-inflammatories but sadly after two weeks of treament, the characteristic red bulge has refused to go down. So Nicole has been preparing a special afternoon snack laced with garlic, minerals and homeopathic remedies.
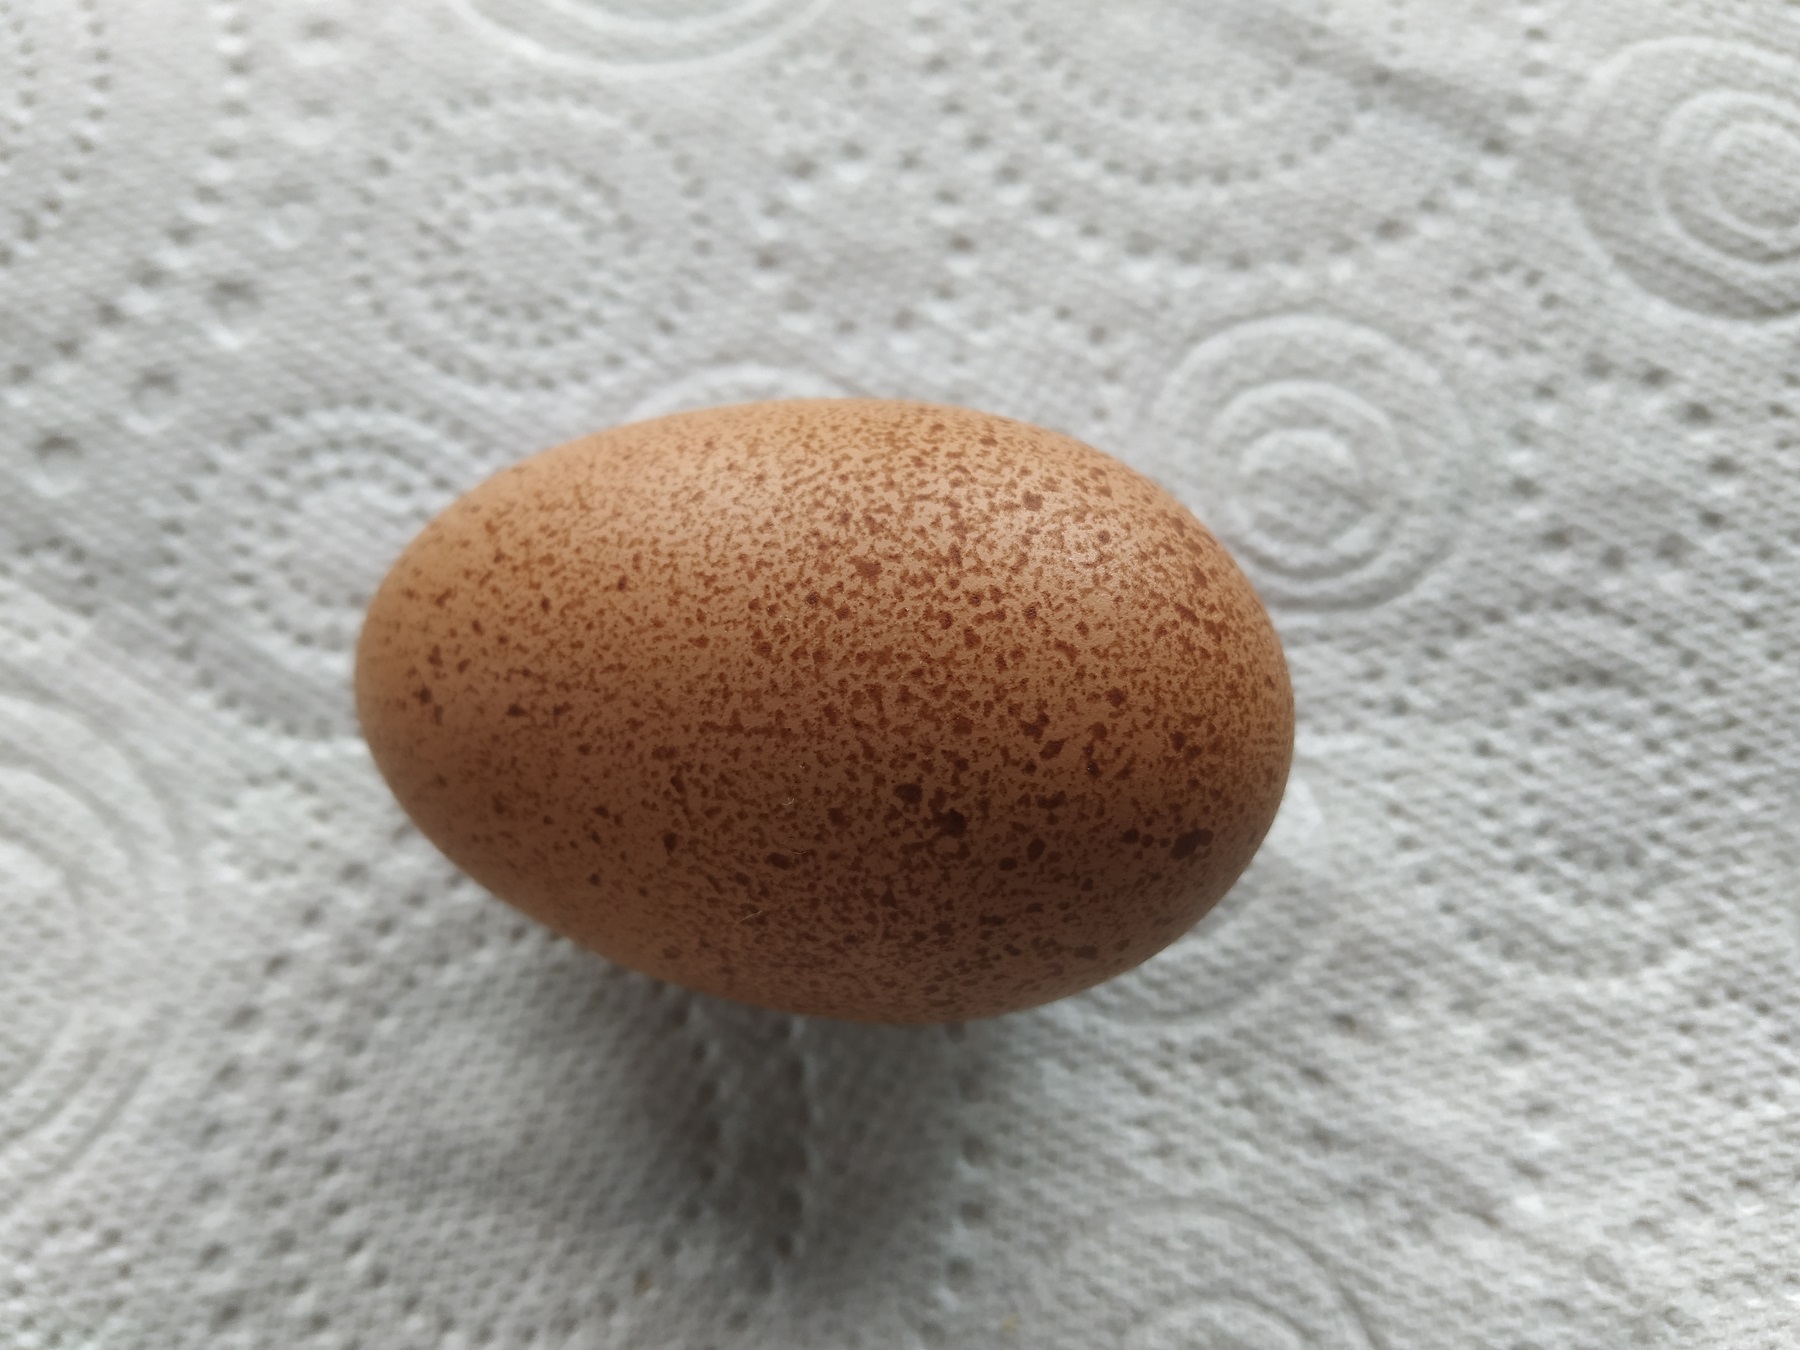
Now, our chickens like the world to know when they are laying an egg. There’s the racket made before is laid and then the racket made afterwards. Just the other day as we were standing by the coops when Bim emerged to announce to the world that she had laid an egg.
“Oh no” was our first thought.
But looking in, we found an egg, a dark brown, cuckoo maran egg that was warm. Bim is our only remaining pure bred cuckoo maran. Therefore, it must be her egg. We jumped for joy!
This is good news – if she can actually make and lay an egg, she might make it through the egg laying season again and survive another year.
Since then, she has laid a second egg, but no more. Unfortunately she appears to still be laying some of her eggs internally as her bulge is still there. Nicole is keeping up the natural remedies which we hope will keep her going until egg production slows down. Bim is an elderly hen so should naturally lay less eggs as time goes on. Fingers crossed she can enjoy her twilight years egg free.
Last November, I found a tiny hedgehog wandering around the garden. It was too small (less than 300g) to survive the winter, so we took it in (see hedgehog seeks board and lodging). With a custom built run, house and a personal heater, Hoggy grew stronger over the winter months.
We released her at the end of March (see Hoggy Released).
We set up a wildlife camera to capture what she did and placed a feeding station near the hedghog house we released her into. In the first week, only videos involving a mouse, a deer, a cat and a robin were captured.
I looked in the hedgehog house and Hoggy had gone. It’s what one would expect from a hedgehog, but for some reason the wildlife camera didn’t capture her leaving. Most annoying.
Hoggy eating
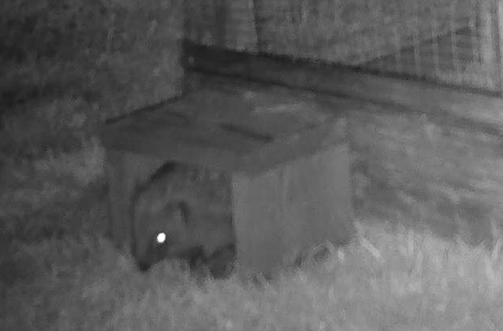
We kept the feeding station and camera in place. A few days later, we had our first video of a hedgehog. It didn’t go into the feeder, but it was a hedgehog in the vicinity nevertheless. It took a couple of days (or nights) before we finally captured a video of a hedgehog in the feeder eating.
We are pretty sure it’s Hoggy because she ate the dog food and dried calcium worms but left the specialist hedgehog food. This is what she had done in her winter quarters.
We shall keep replenishing the feeder to ensure she, and any other hedgehogs, have access to a tasty snack if they need it.
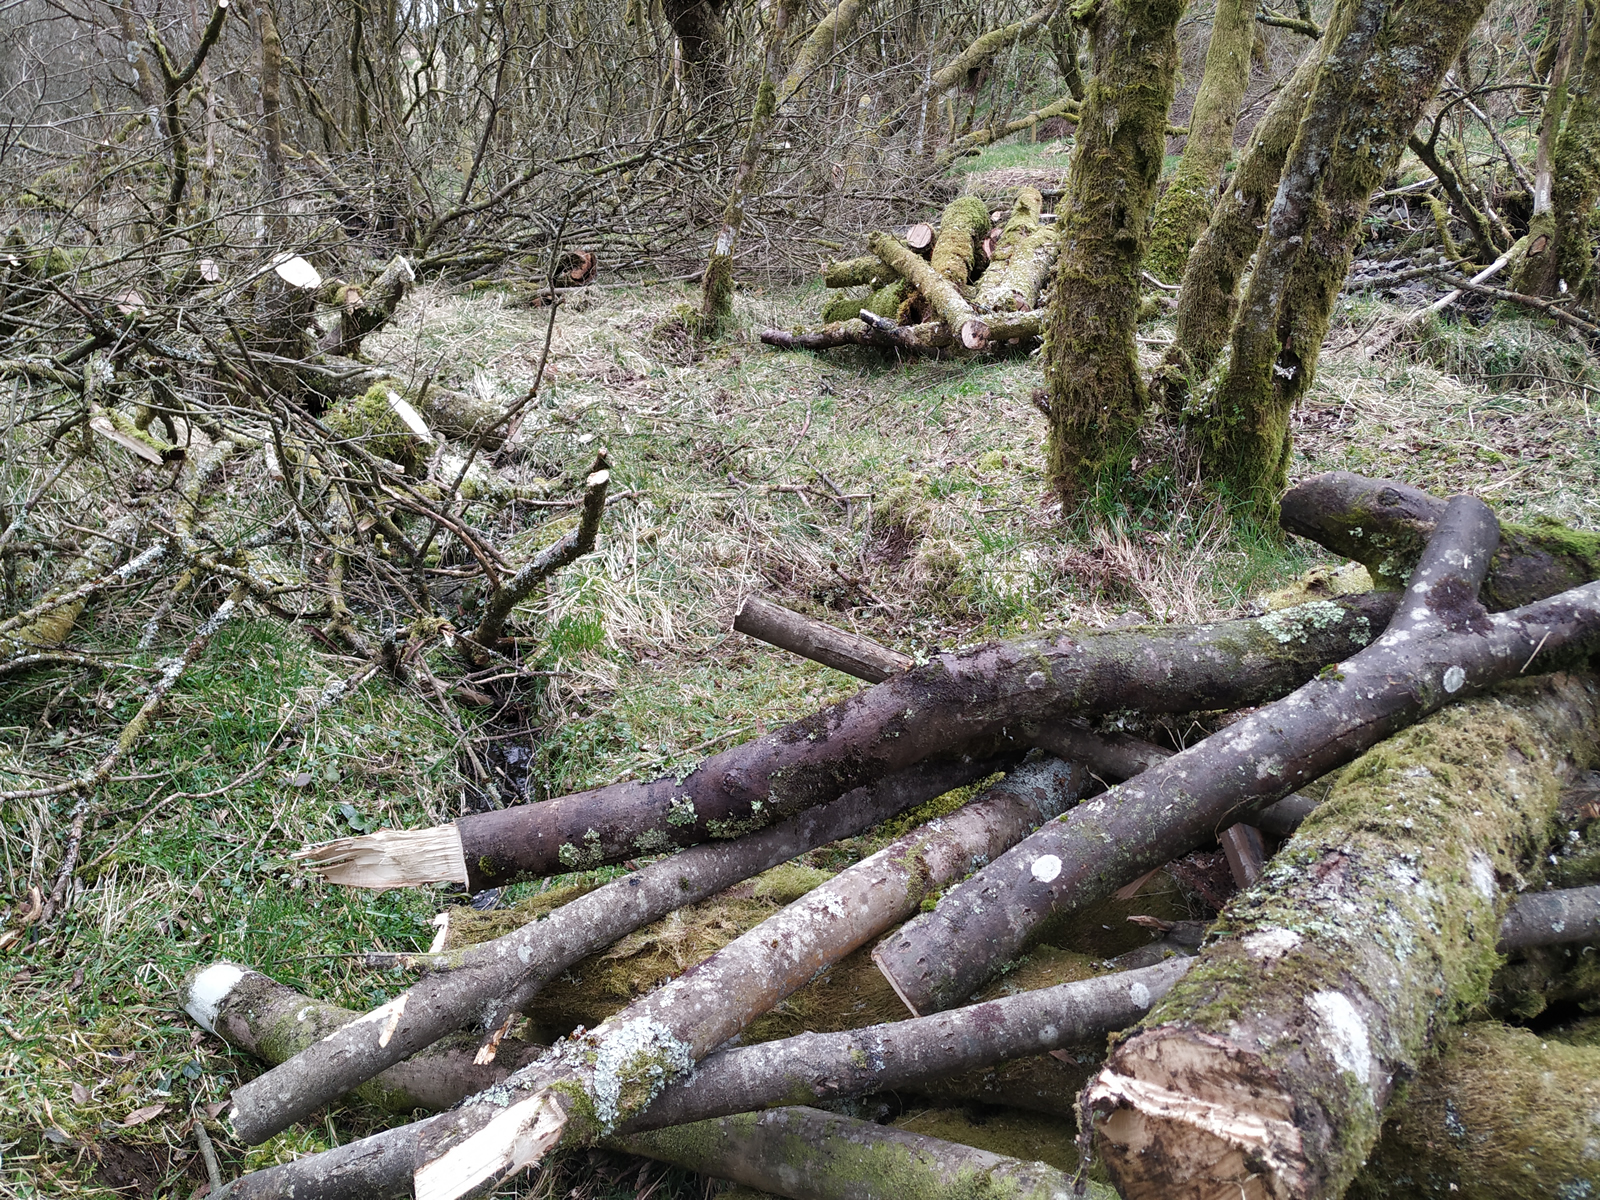
We have quite a large area of willow woodland which spans either side of one of the burns that run through our smallholding. One of the spring jobs is to coppice this. This mainly involves taking out fallen and damaged trees as well as keeping branches away from the road.
It is best done in the spring. In the winter, the burn can be a bit wild and the ground underfoot wet and marshy. In late spring the willow comes into bloom and attracts bees. You don’t want to be felling trees that are covered in bees. Also, as a deciduous tree, it is best to trim willow while it is dormant.
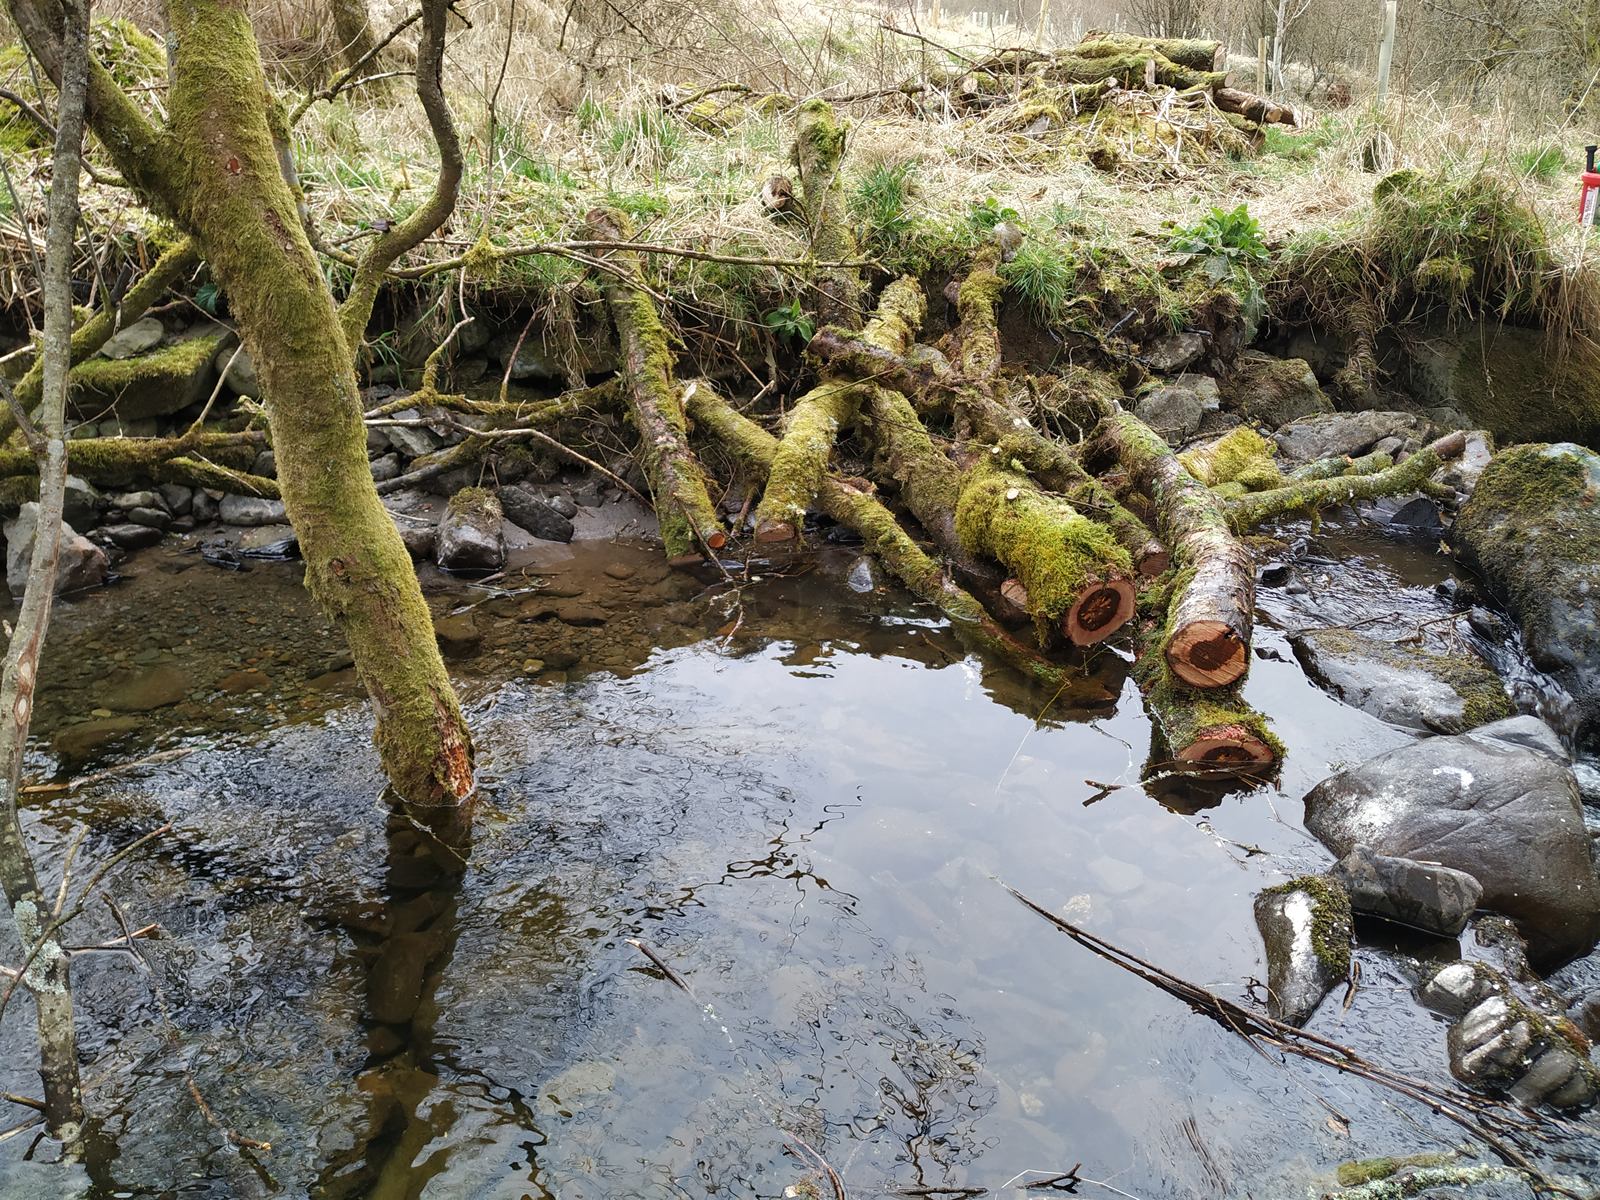
tree trapped in stream
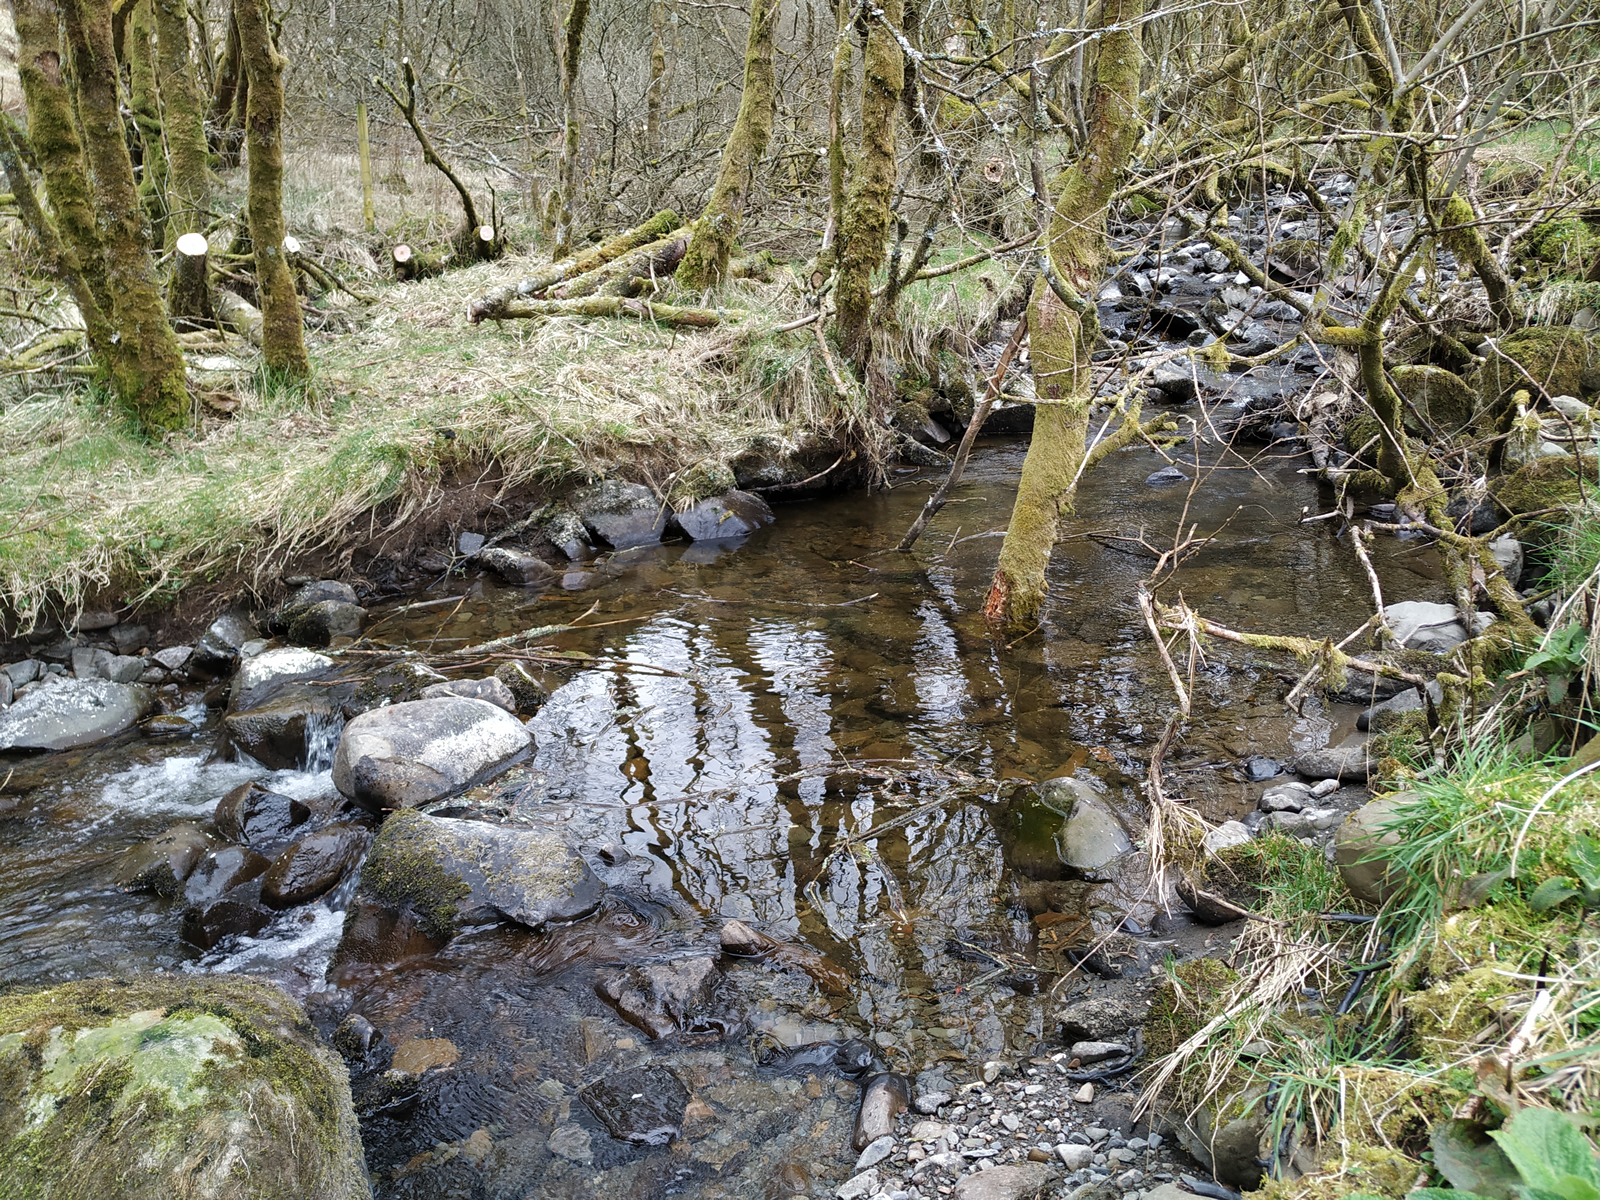
With the weather a little drier and the burn calm enough to wade across, I sharpened the chainsaw and set off. I am always very careful doing this, chainsaws are pretty dangerous. I make sure I am wearing protective clothing.
I also have to careful in judging which way the tree will fall. Most are already leaning over, having been blown over at some point, but they can have tall branches growing up. I wear a hard hat!
One tree decided to have its revenge and, on cutting through its trunk, it swung into the burn and planted itself there. The upper branches remained supported by neighbouring trees. I had to leave it there, I’ll wait and see what the wind can do.
tossing the caber across the burn
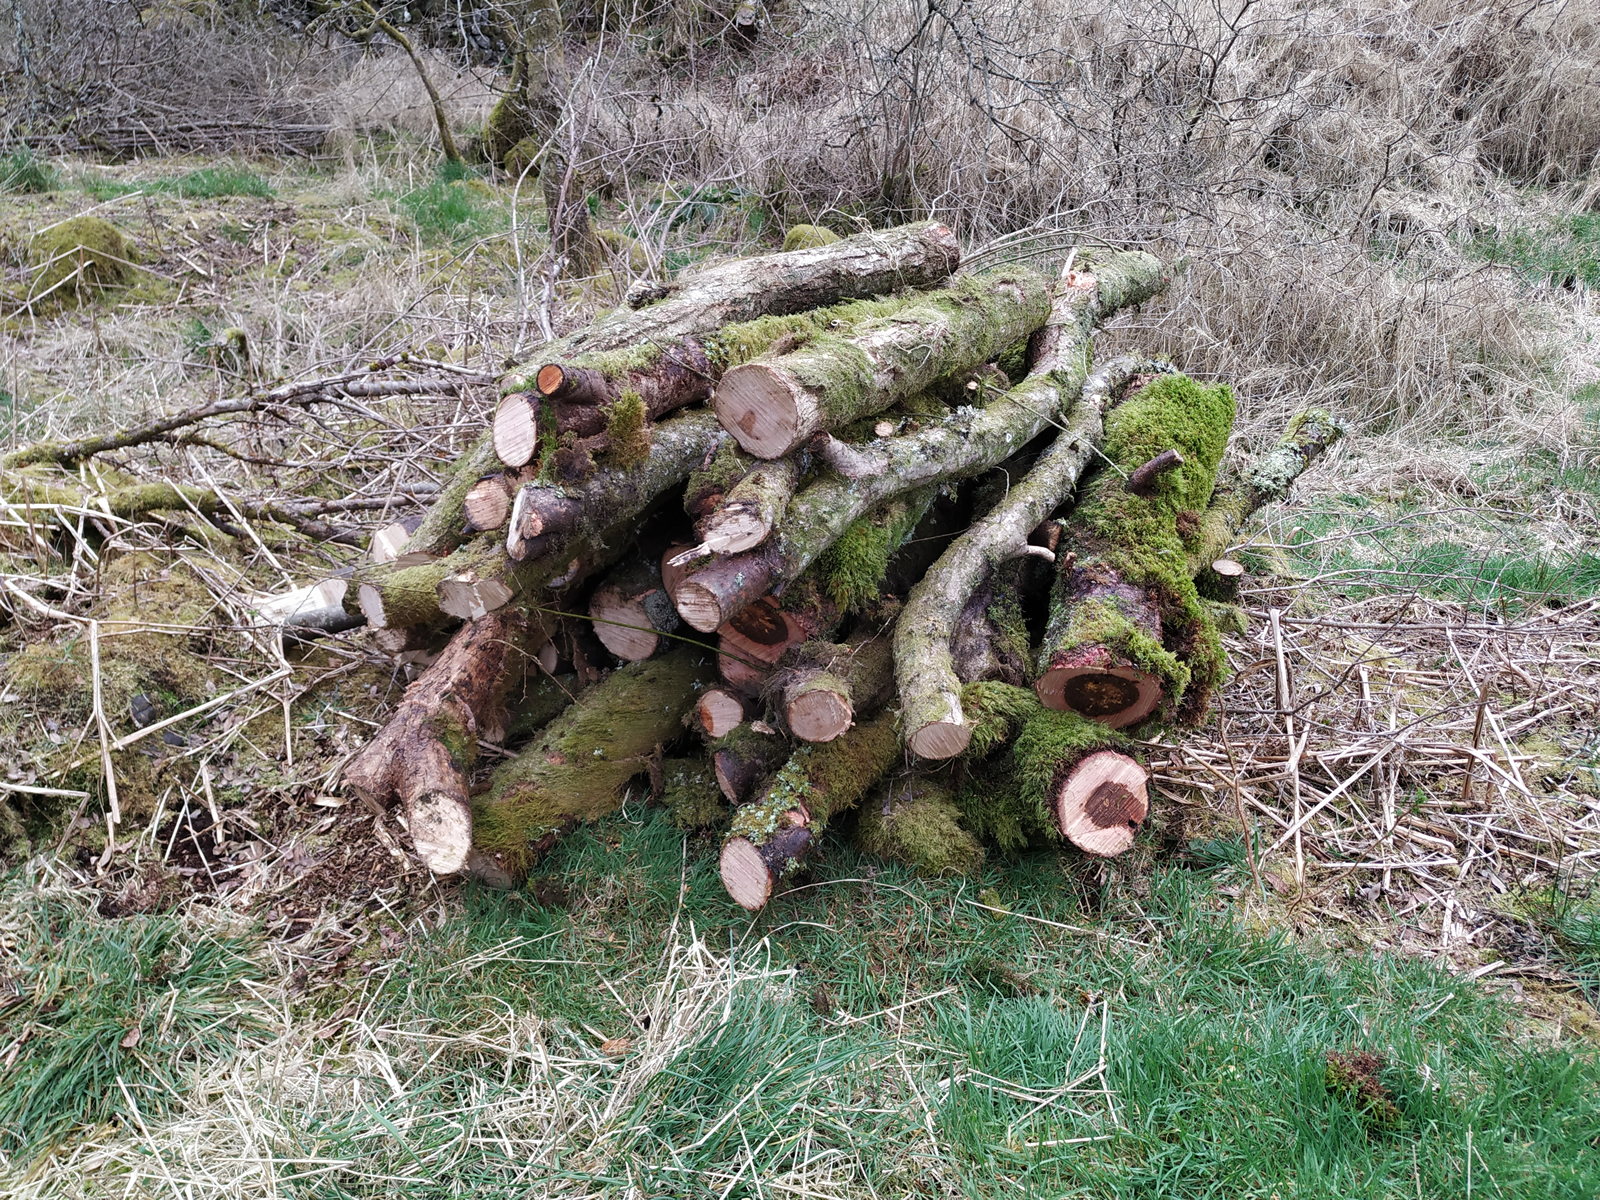
I cleared out the damaged trees one by one and cut the wood into managable lengths. These had to be carried across the burn to where I could collect them. Rather than carry them over slippery stones, I lobbed them over, my version of tossing the caber.
After that, I just gathered them into a tidy pile to await collection – these logs will go into our wood supply. I also pushed some cuttings into the ground to create new trees. Mind you, willow regenerates very quickly so I probably didn’t need to do this.
In our smallholding here, we have a small loch which attracts ducks, herons and other water birds including geese and even occasionally, a cormorant. We also have a duck house that we bought years ago. This year, we got our act together and rooted it out ready to go onto the loch.
We loaded it onto the quadbike and set off. We had plenty of nylon rope (for securing it). They can be attached to an anchor, but we don’t have a boat so we couldn’t take it out to the middle of the loch. Our cunning plan was to tie it to two trees, one on each bank. I also had to relearn a sheet bend, a knot I had failed to learn as a boy scout, a mistake which nearly cost me my advanced scout badge. It’s funny what we remember.
Anyway, first things first, we had to get the duck house on the water. It comes in two pieces, a floating platform and the house itself. It can be quite tricky to get this level, but we got there.
This plan started well with us securing it to the first tree. The idea then was to walk around the bank to the opposite shore. The problem was that there were other trees in the way making this tricky. Also, the first think to happen was that the duck house got tangle up in some branches. We couldn’t pull it free without knocking it and thus causing it to tilt. Nor could we reach it to push it clear.
So, it was boots off and into the water I went. By judicious prodding with a tree guard, I managed to get it free. By this time Nicole was half way round the loch and had come up against a rather tricky tree of her own. This one was in the middle of a marshy area which we couldn’t really walk on.
I nipped back to the house and got a plastic milk carton and some more rope.
Back at the loch, I joined the ropes, attached the milk carton (full of water) and lobbed it over the loch. This enabled Nicole to fetch it and tie it to a tree on the opposite bank.
The duck house was in place and ready for use. Now all we have to hope is that the ducks use it. There are a pair of ducks down there though they are quite nervous so we can’t go and look otherwise we’ll disturb them.
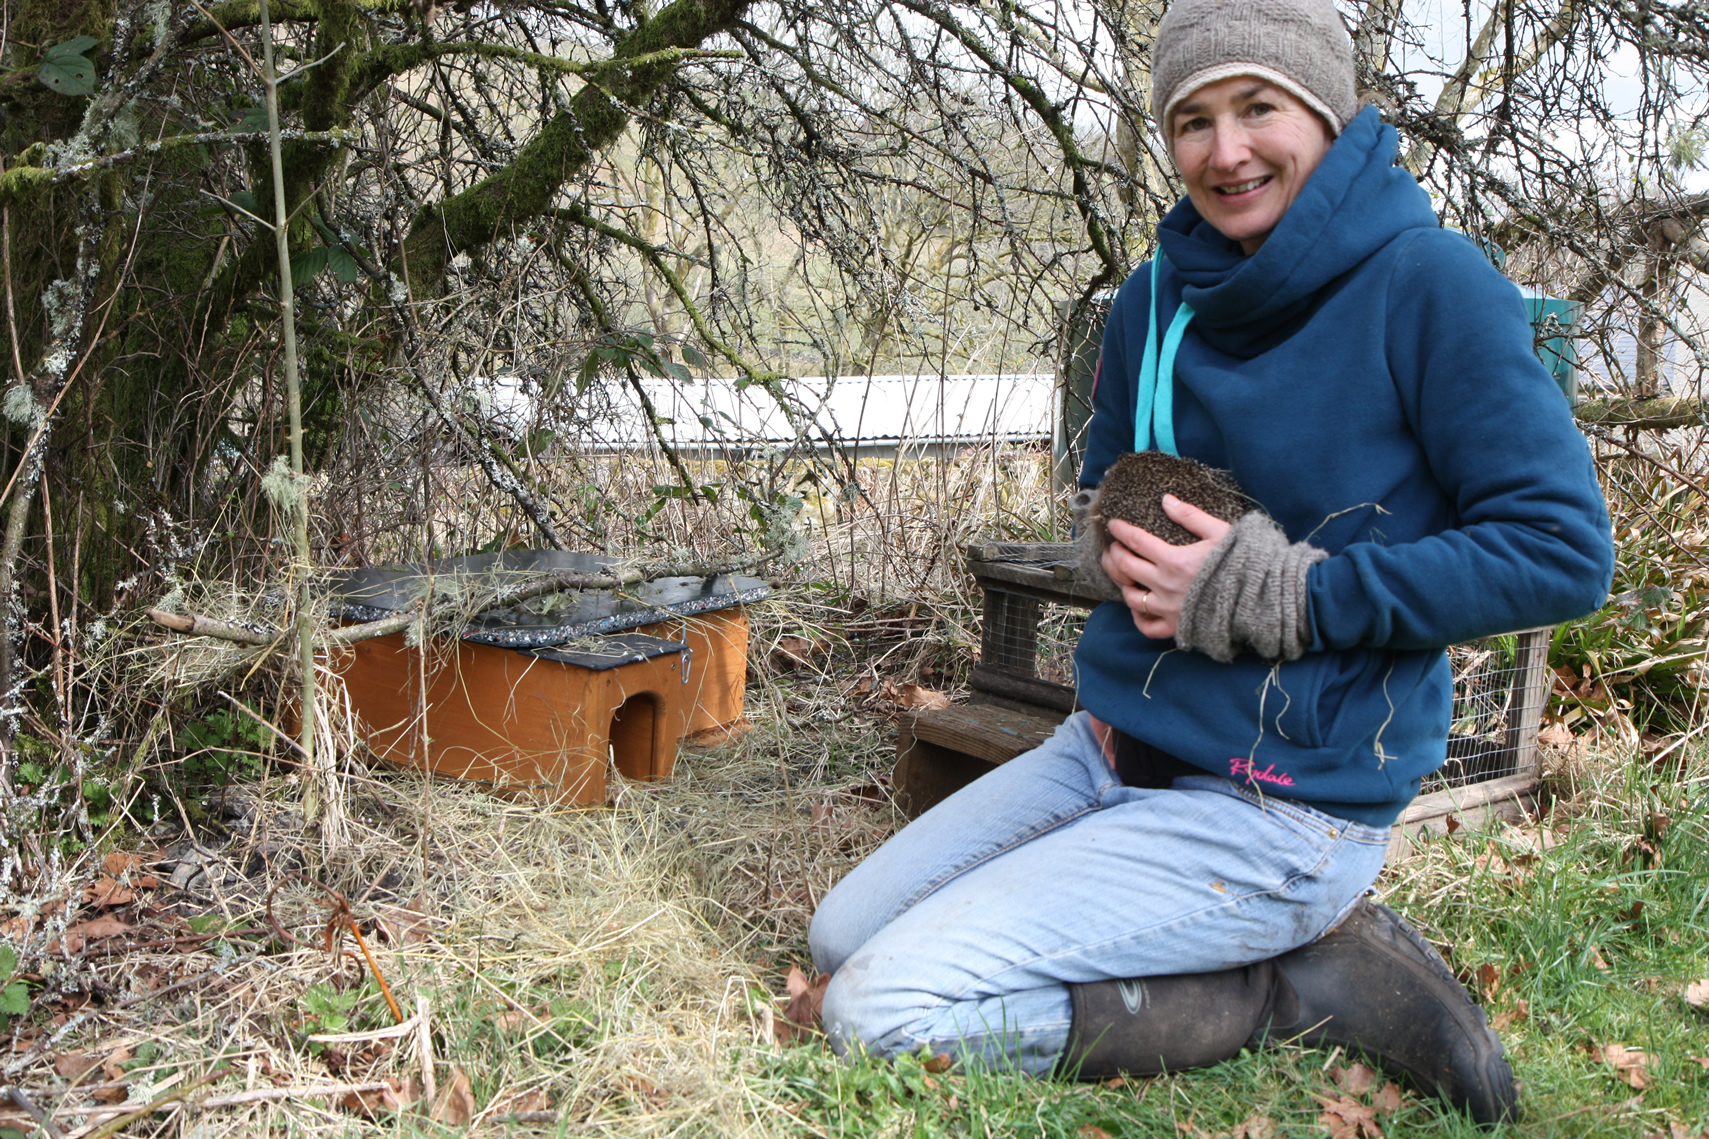
Last November, I found a tiny hedgehog wandering around the garden. At less than 300g, she would never have survived the winter. We took her in and she has overwintered in a special box in the pantry with her own personal heaters.
While the nights are still a bit chilly here, I have seen other hedgehogs out and about. Hoggy has also been very active of late, completely re-arranging her winter quarters every night. We decided it was time to release Hoggy back into the wild. The heaters have been off for the last week or so so she should be a little acclimatised to outdoor temperatures.
Nicole getting ready to release Hoggy
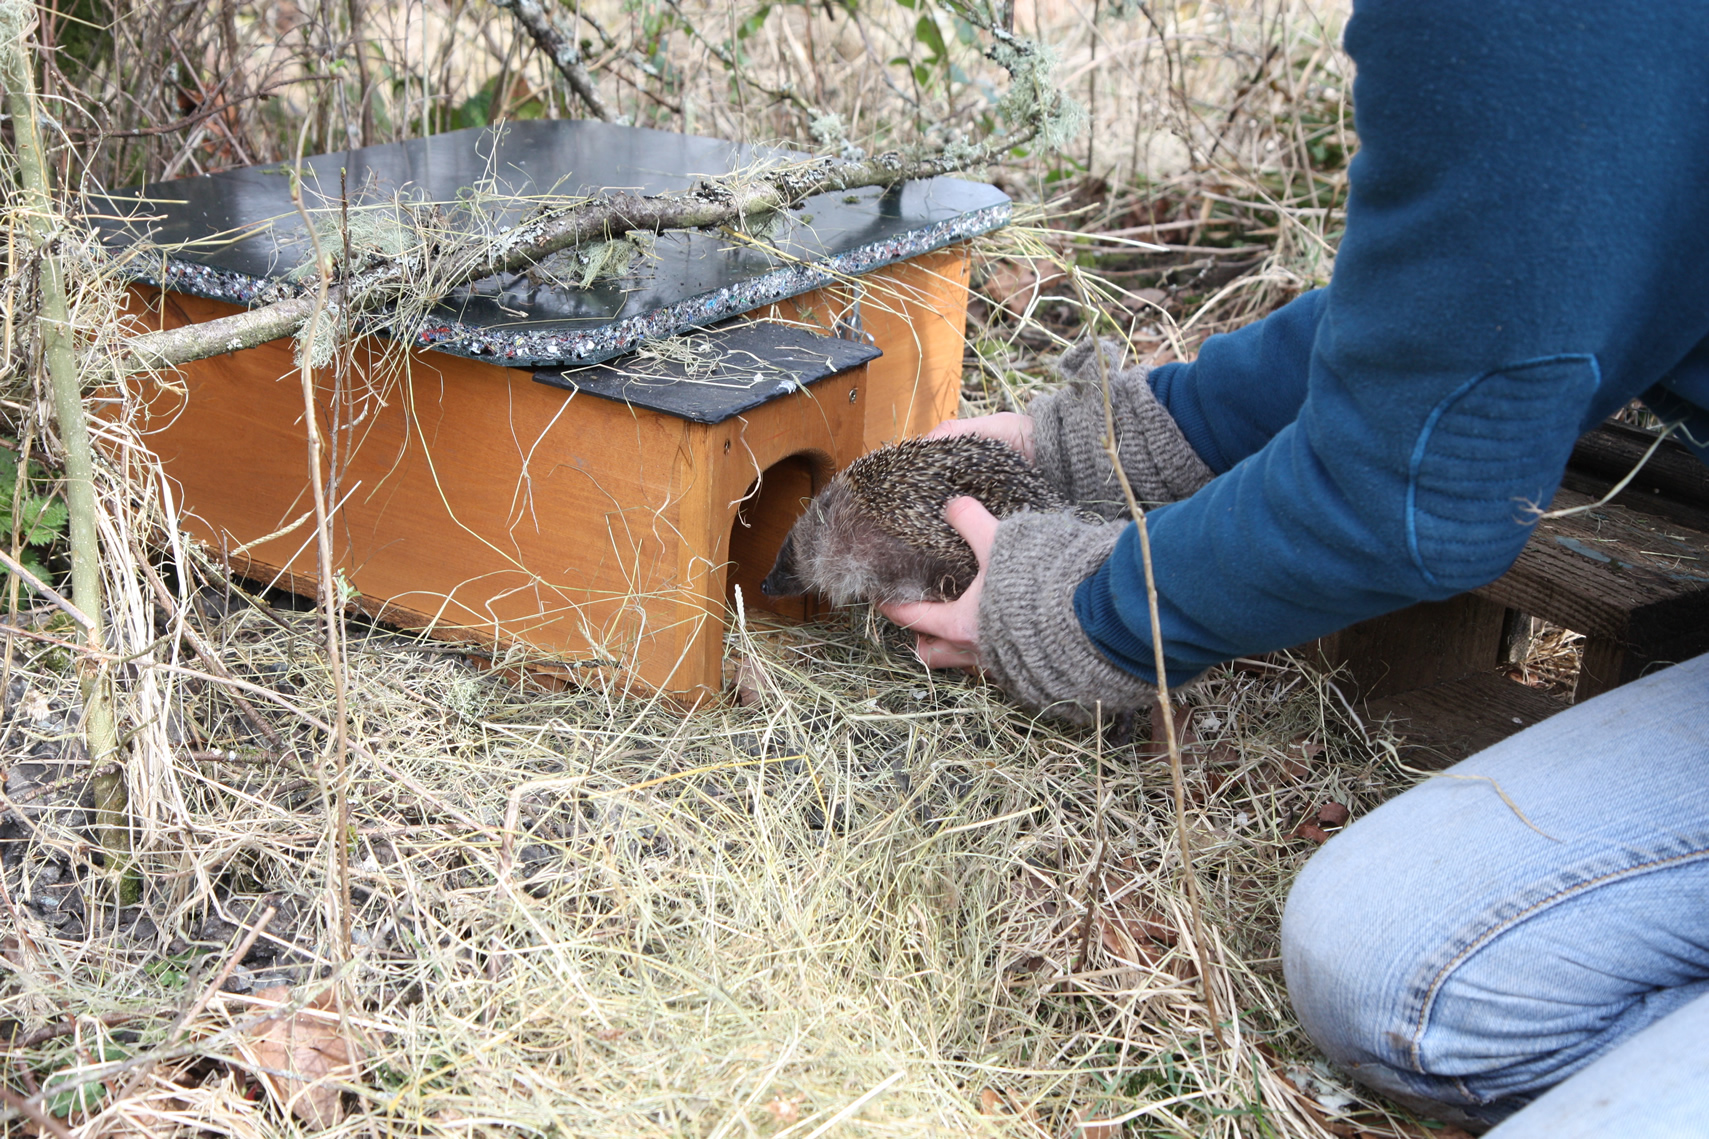
We had a hedgehog house set up under a bush and we stuffed it full of fresh hay. We also added some hay from her indoor bed so that she would recognise her smell. Next to it we placed a cat and dog-proof feeding station that I built years ago so we can continue to provide food.
In the early afternoon we took her out. Nicole did the honours, carrying her to her new home. We say “new home”, but there’s every chance Hoggy will leave and not come back. Like many wild creatures, hedgehogs don’t really have homes like us humans. That said, there are a couple of hedgehogs that nest under the pallets that support our hay, so maybe round here they like to have a nest.
Nicole introduced Hoggy to the tunnel into the hedgehog house. Hoggy needed no second invitation and was straight in. We watched her disappear into the bed area and said our goodbyes. We will be resisting the temptation to look in as hedgehogs don’t really like to be disturbed when they are sleeping.
We have set up the wildlfe camera to see what she does and will do our best to keep an eye on her, should she decide to stay.
Once a year, we borrow some cows from a neighbouring farm. We do these because they are good for the pasture. They eat out the long grass making it accessible to the sheep and their poos are highly nutritious from the grass.
Last year they managed to empty our entire field water supply twice in two days (see cows drink us dry). Since moving here, we have installed two underground tanks that collect water from hill streams and two water butts that collect rainwater from the field shelters. These feed a network of troughs, one per field. In total, it the system held about 2,500 litres of water.
“If we are going to get cows again,” I said to Mrs D, “do you think we should we install a large water trough for them?”
“Good idea,” she said.
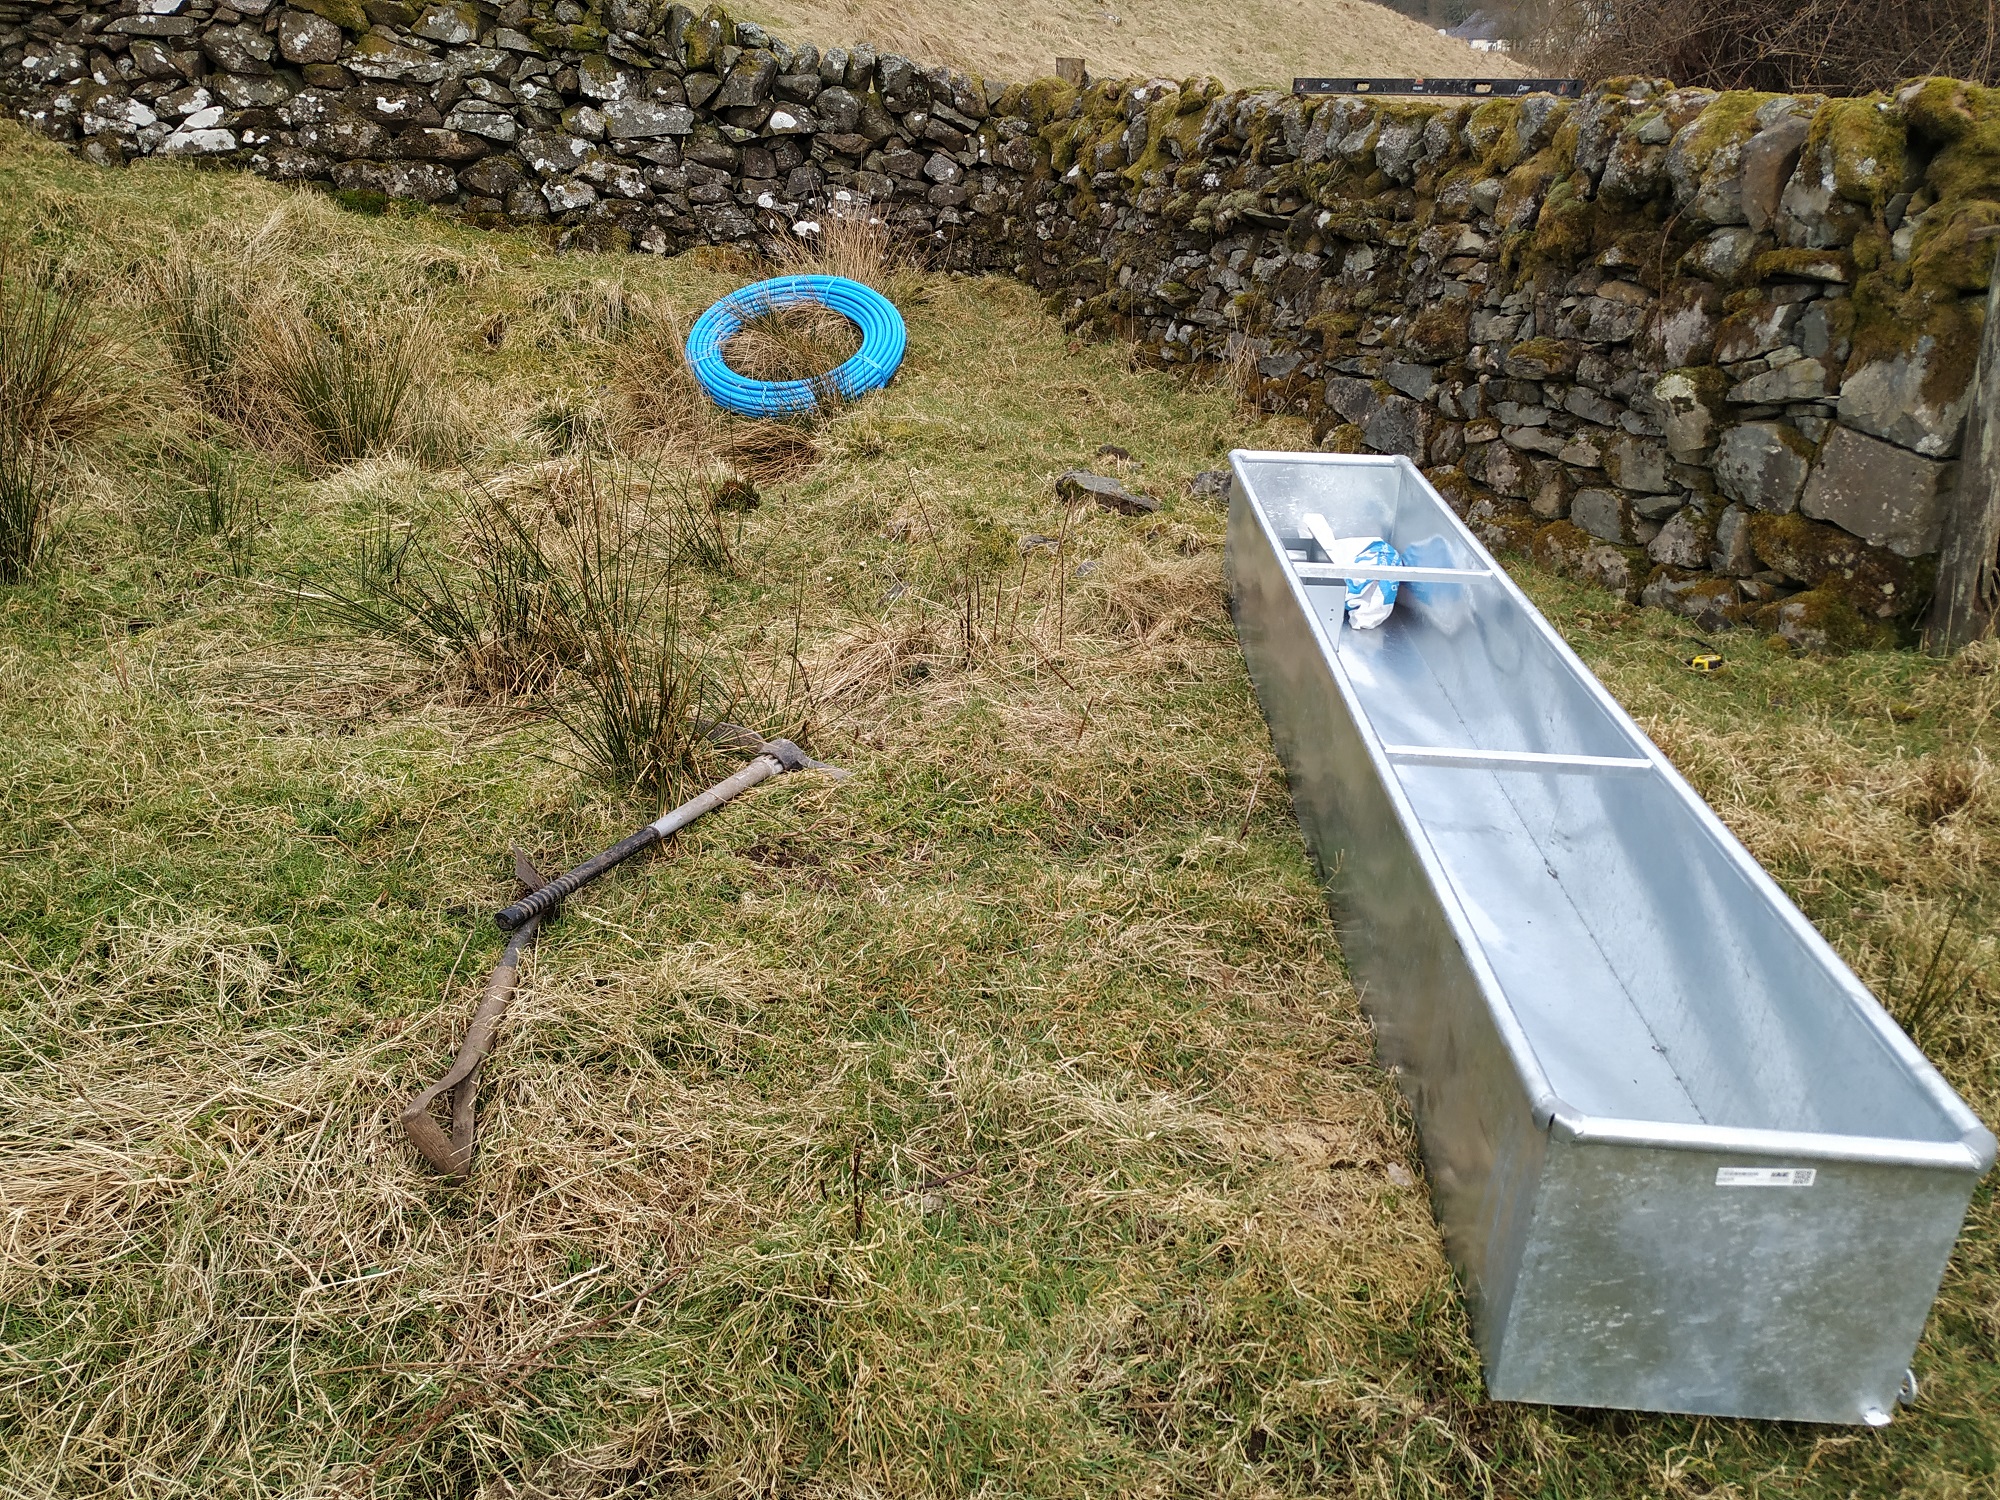
I set about locating and ordering one. I found a large, galvanised steel trough that holds 545 litres. Just the job; I ordered it.
Then COVID-19 hit and delivery was slightly delayed. However, hats of to McVeigh Parker, it arrived Tuesday afternoon. After the relentless wet weather we have been having, it has been pretty dry of late. It only takes a couple of weeks without rain and the springs that feed the underground tanks dry up. I had to get cracking.
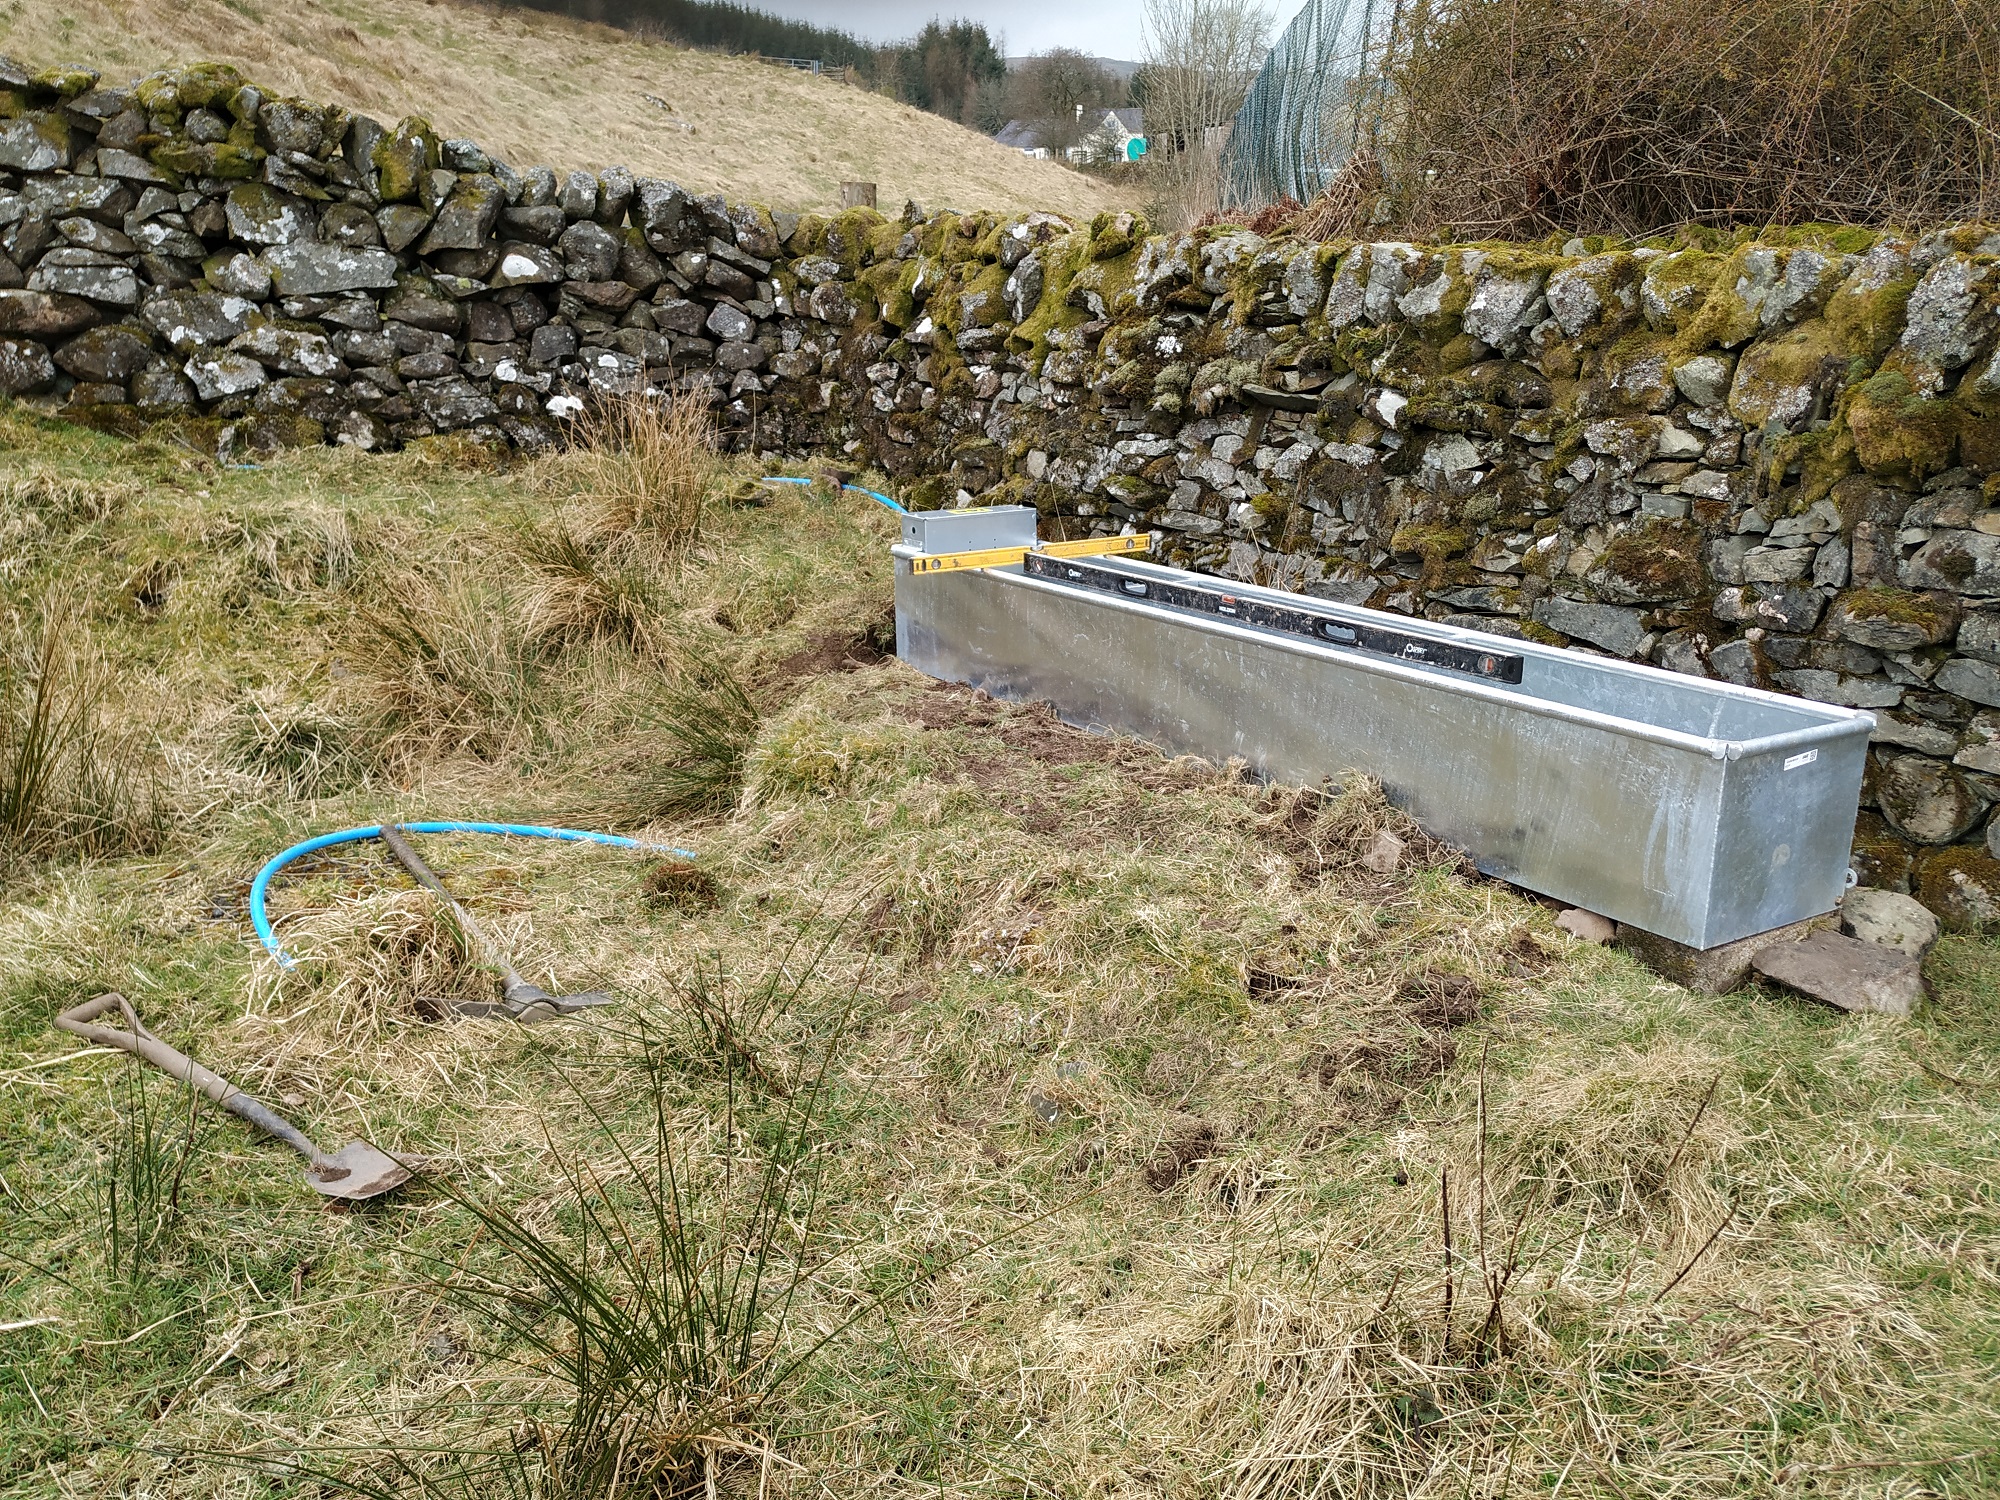
trough in place and level
First thing Wednesday morning, I was hard at work. I had to level the ground where the tank would go. This is never easy. Also, this trough weighed around 70kg so I wanted to be moving it around as little as possible. With pick-axe and spade, I hacked away at the ground. Spirit levels were at the ready. I got it to what seemed level and put the spirit levels on it. Well, miracles never cease, it was level. I put the trough in place and it was level. I couldn’t believe it!
With the trough in place, it was a fairly straightforward job to unroll the pipe up the hill and connect it to the supply. Just a bit of adjustment to the connectors to ensure no drips and all was ready. I turned on the water (I fit isolation valves on all the troughs) and the water poured in. However, it stopped at about three quarters full.
Off I trotted to inspect the tank – no water was flowing in. Thankfully, there was a amall puddle at the intake point, the problem was the filter had become a bit blocked. I cleaned it up and water started to flow in again, albeit slowly.
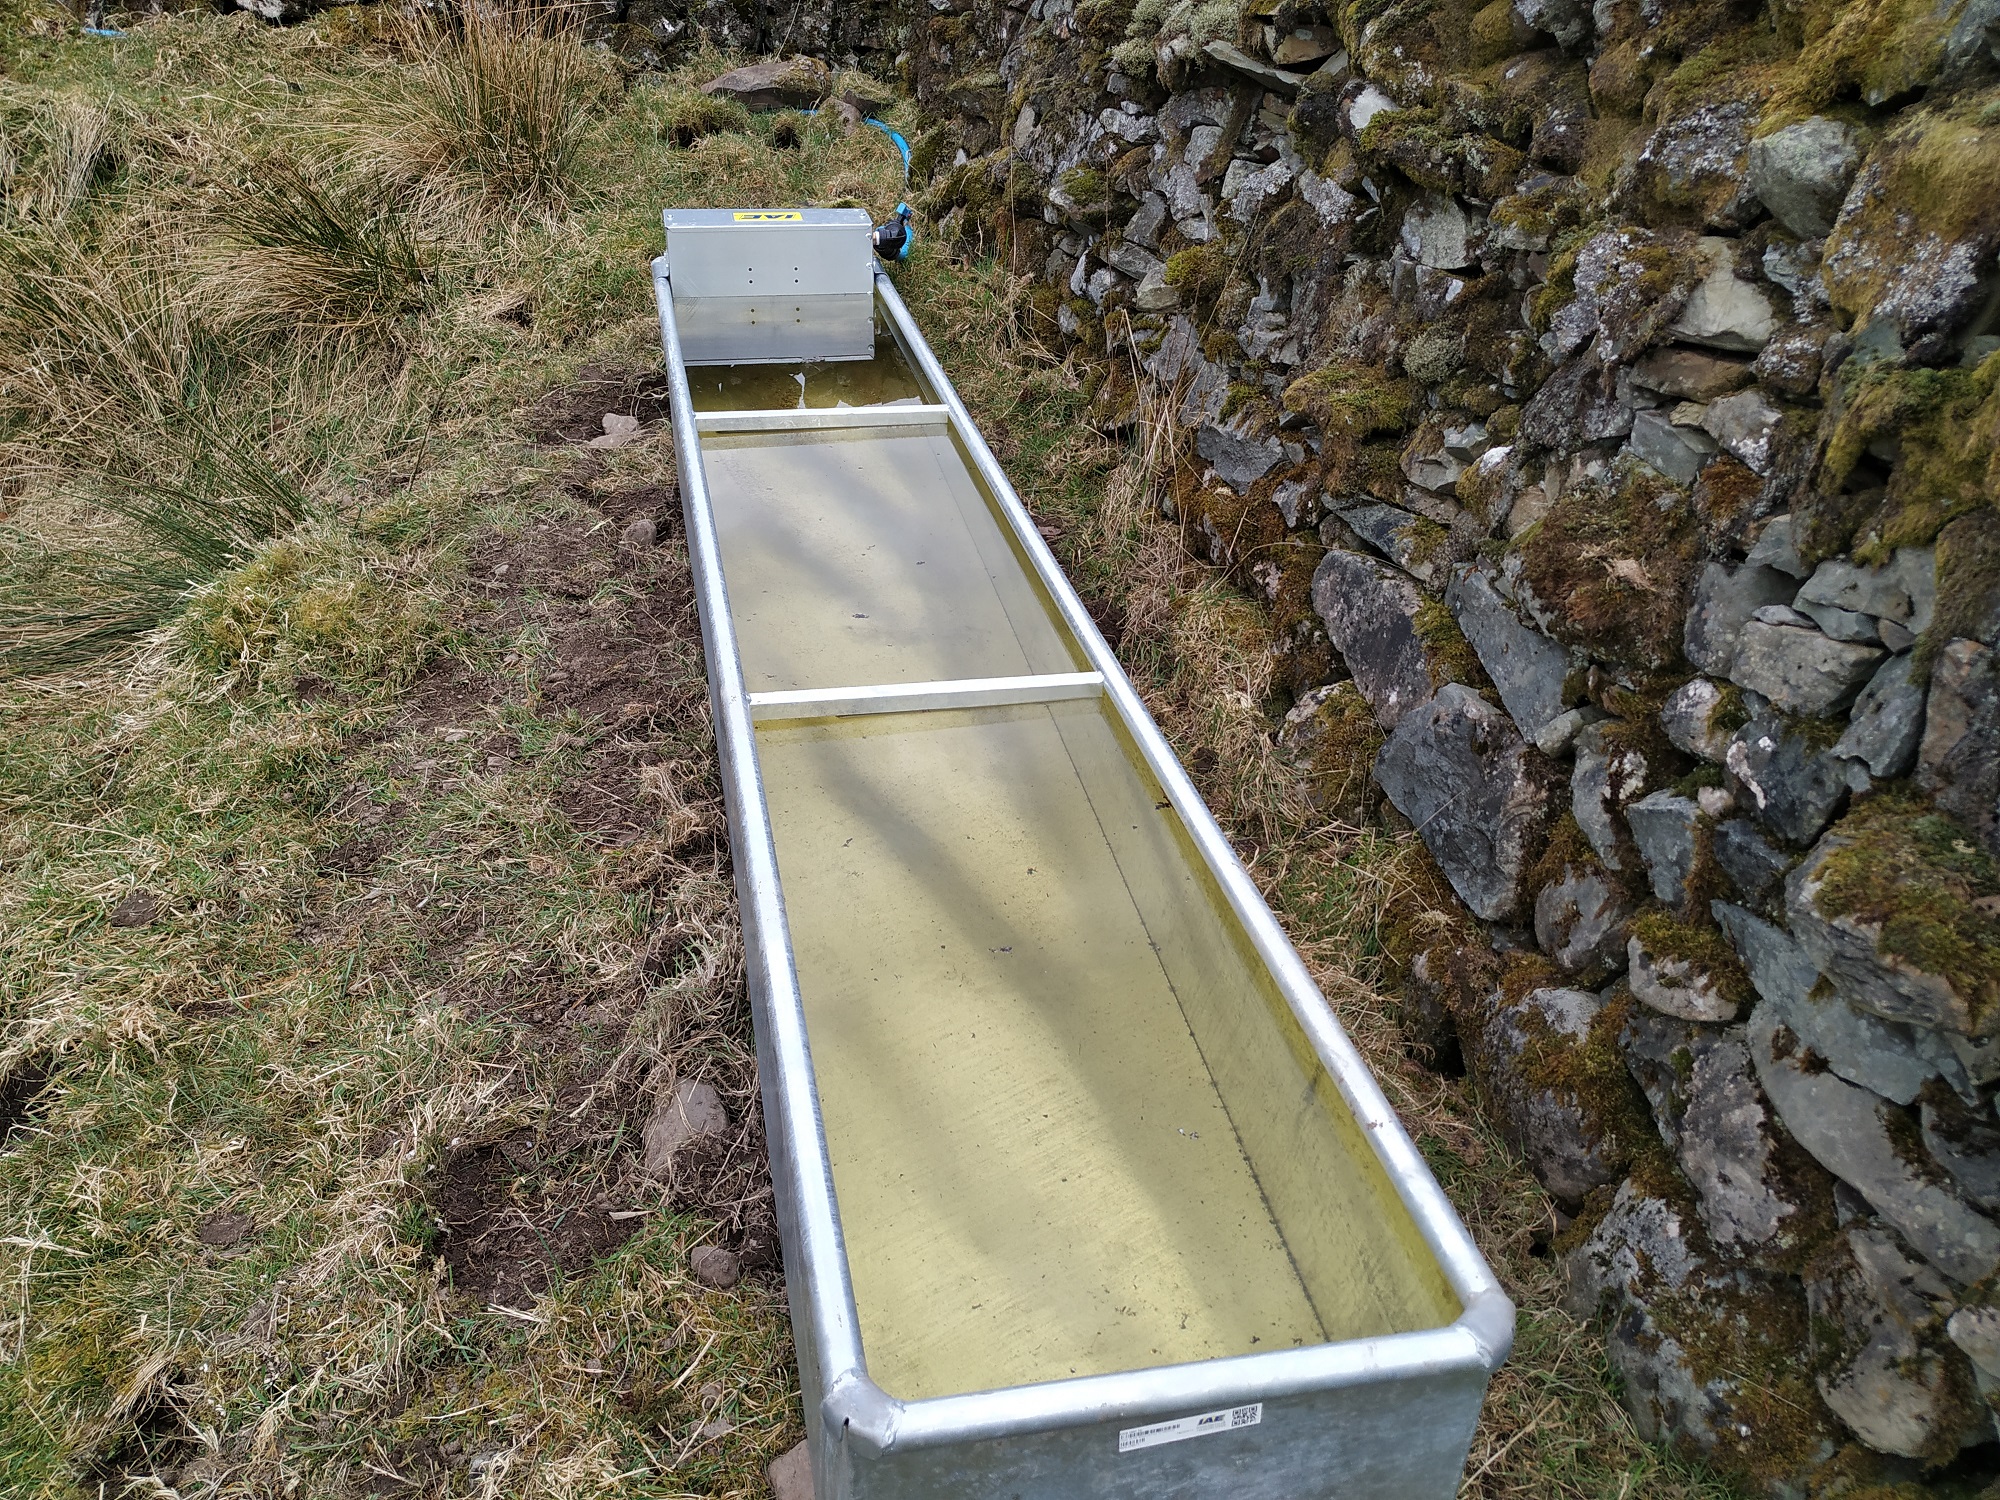
trough full of water
Next day, I checked and the trough was full. The tank was only half full so I checked the inflow again. Clogged up again – this time I replaced the filter (just a plastic mesh) and left it to it.
Today, the tank was full and the spring was dry. I had installed the trough just in time to ensure a full water supply – now over 3,000 litres in capacity. It’s a good feeling to know we have plenty of water for the animals should the weather stay dry.
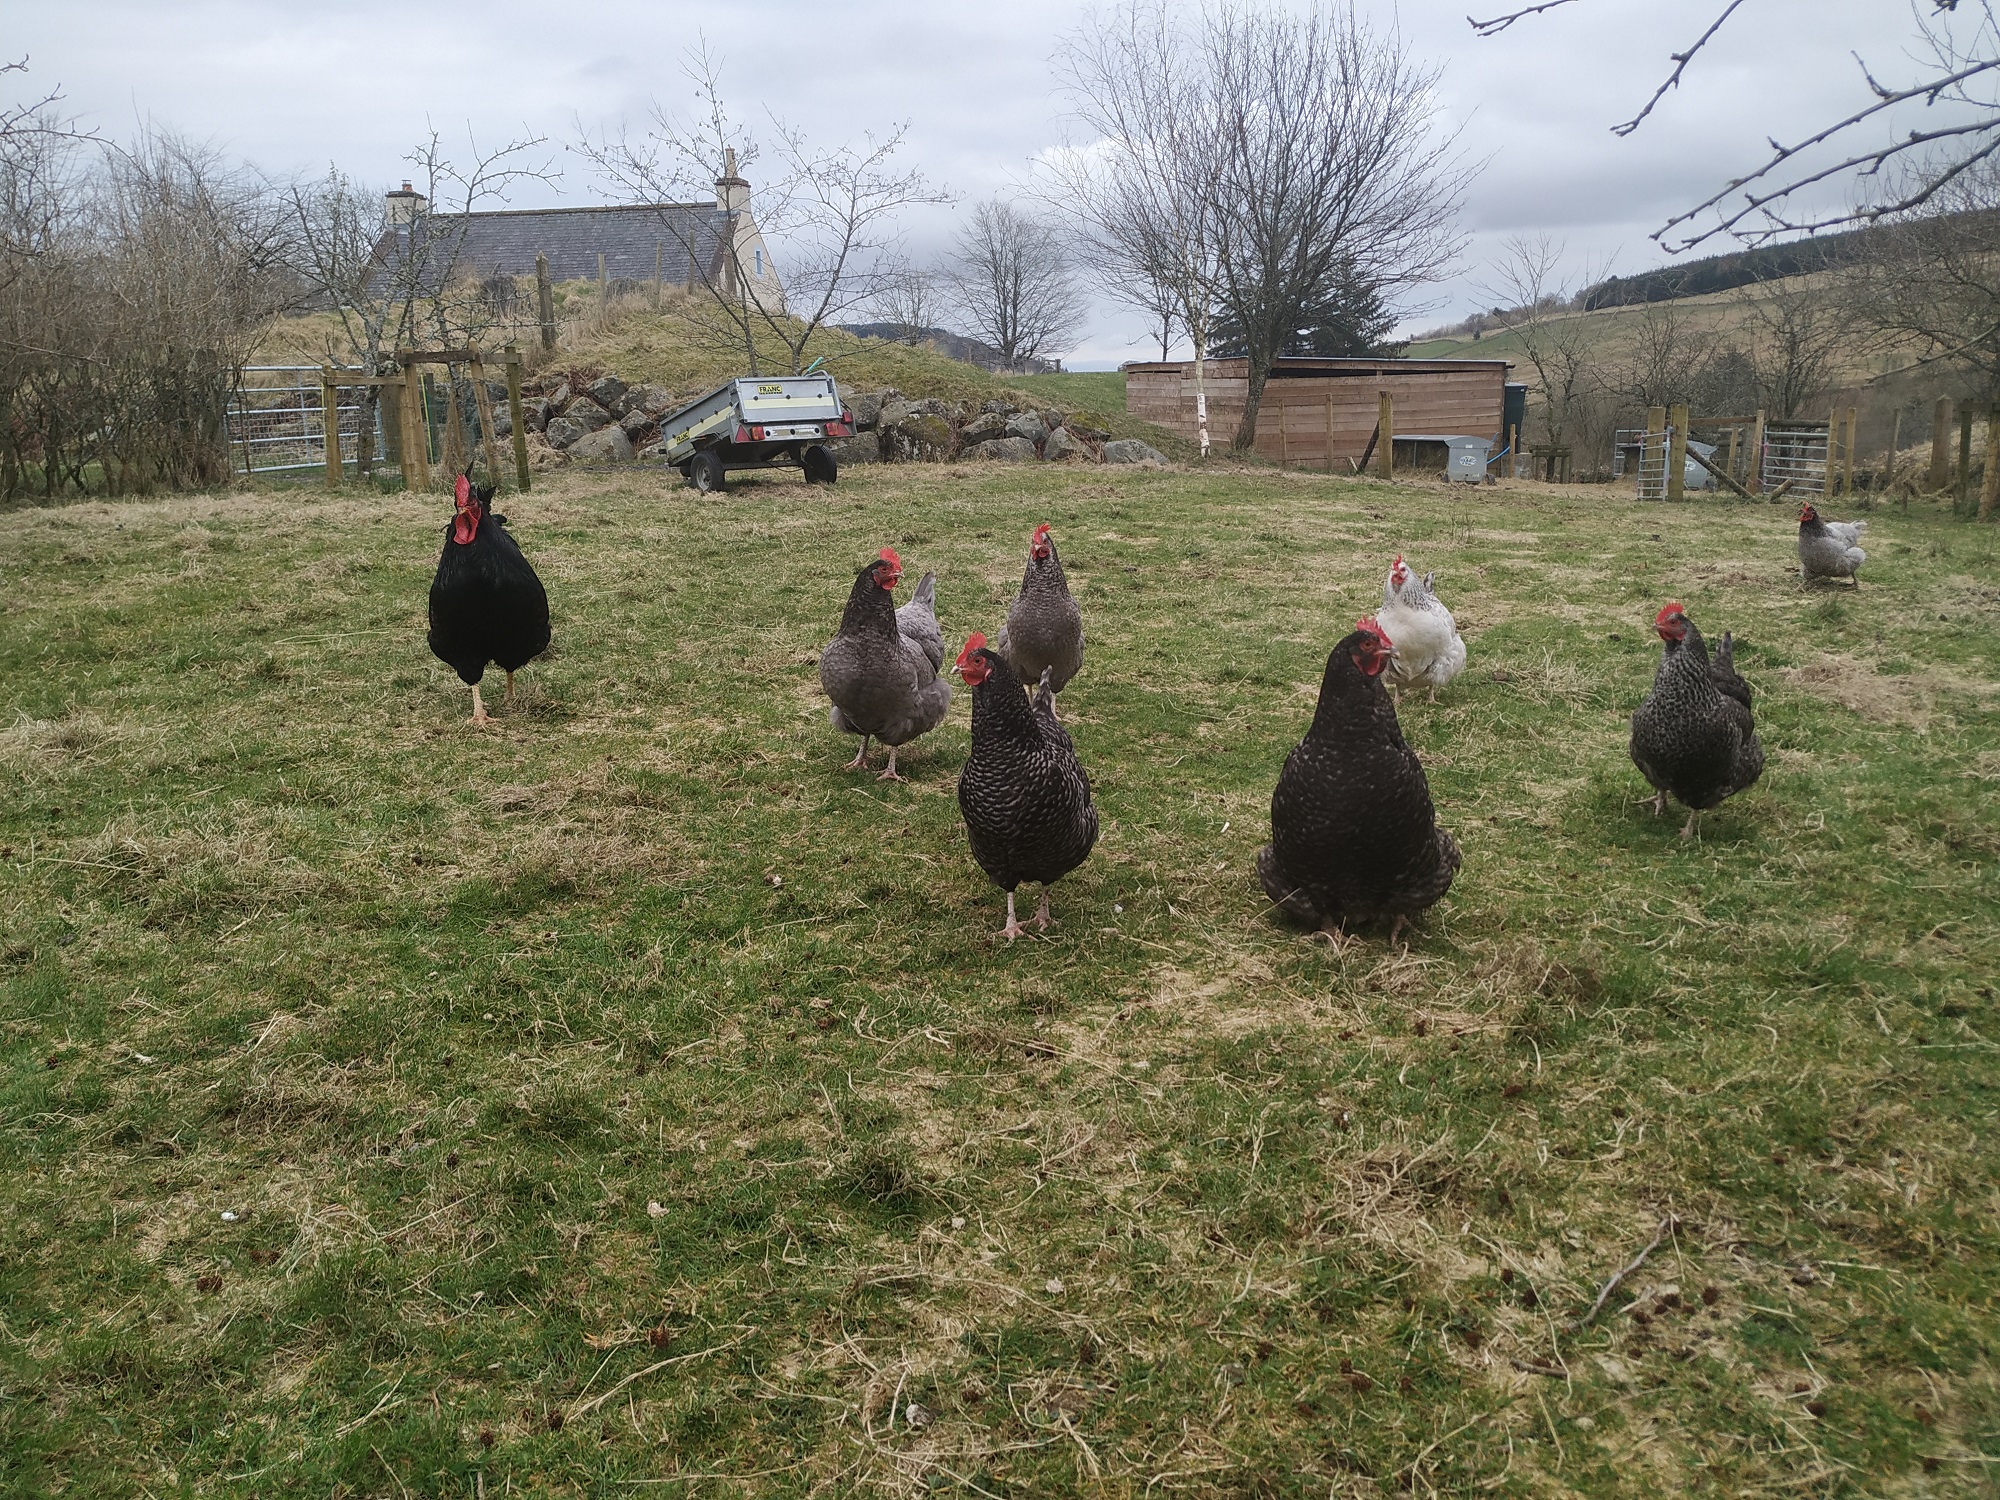
Our chickens have a large area in which they can roam freely. They share it with the sheep as the sheeps’ winter hay and main shelter are located in this paddock. At one end, there is a gate open to the fields. While this has been open for months, the hens rarely venture out. Occasionally, they have been seen just the other side but, as a rule, they are happy in their paddock.
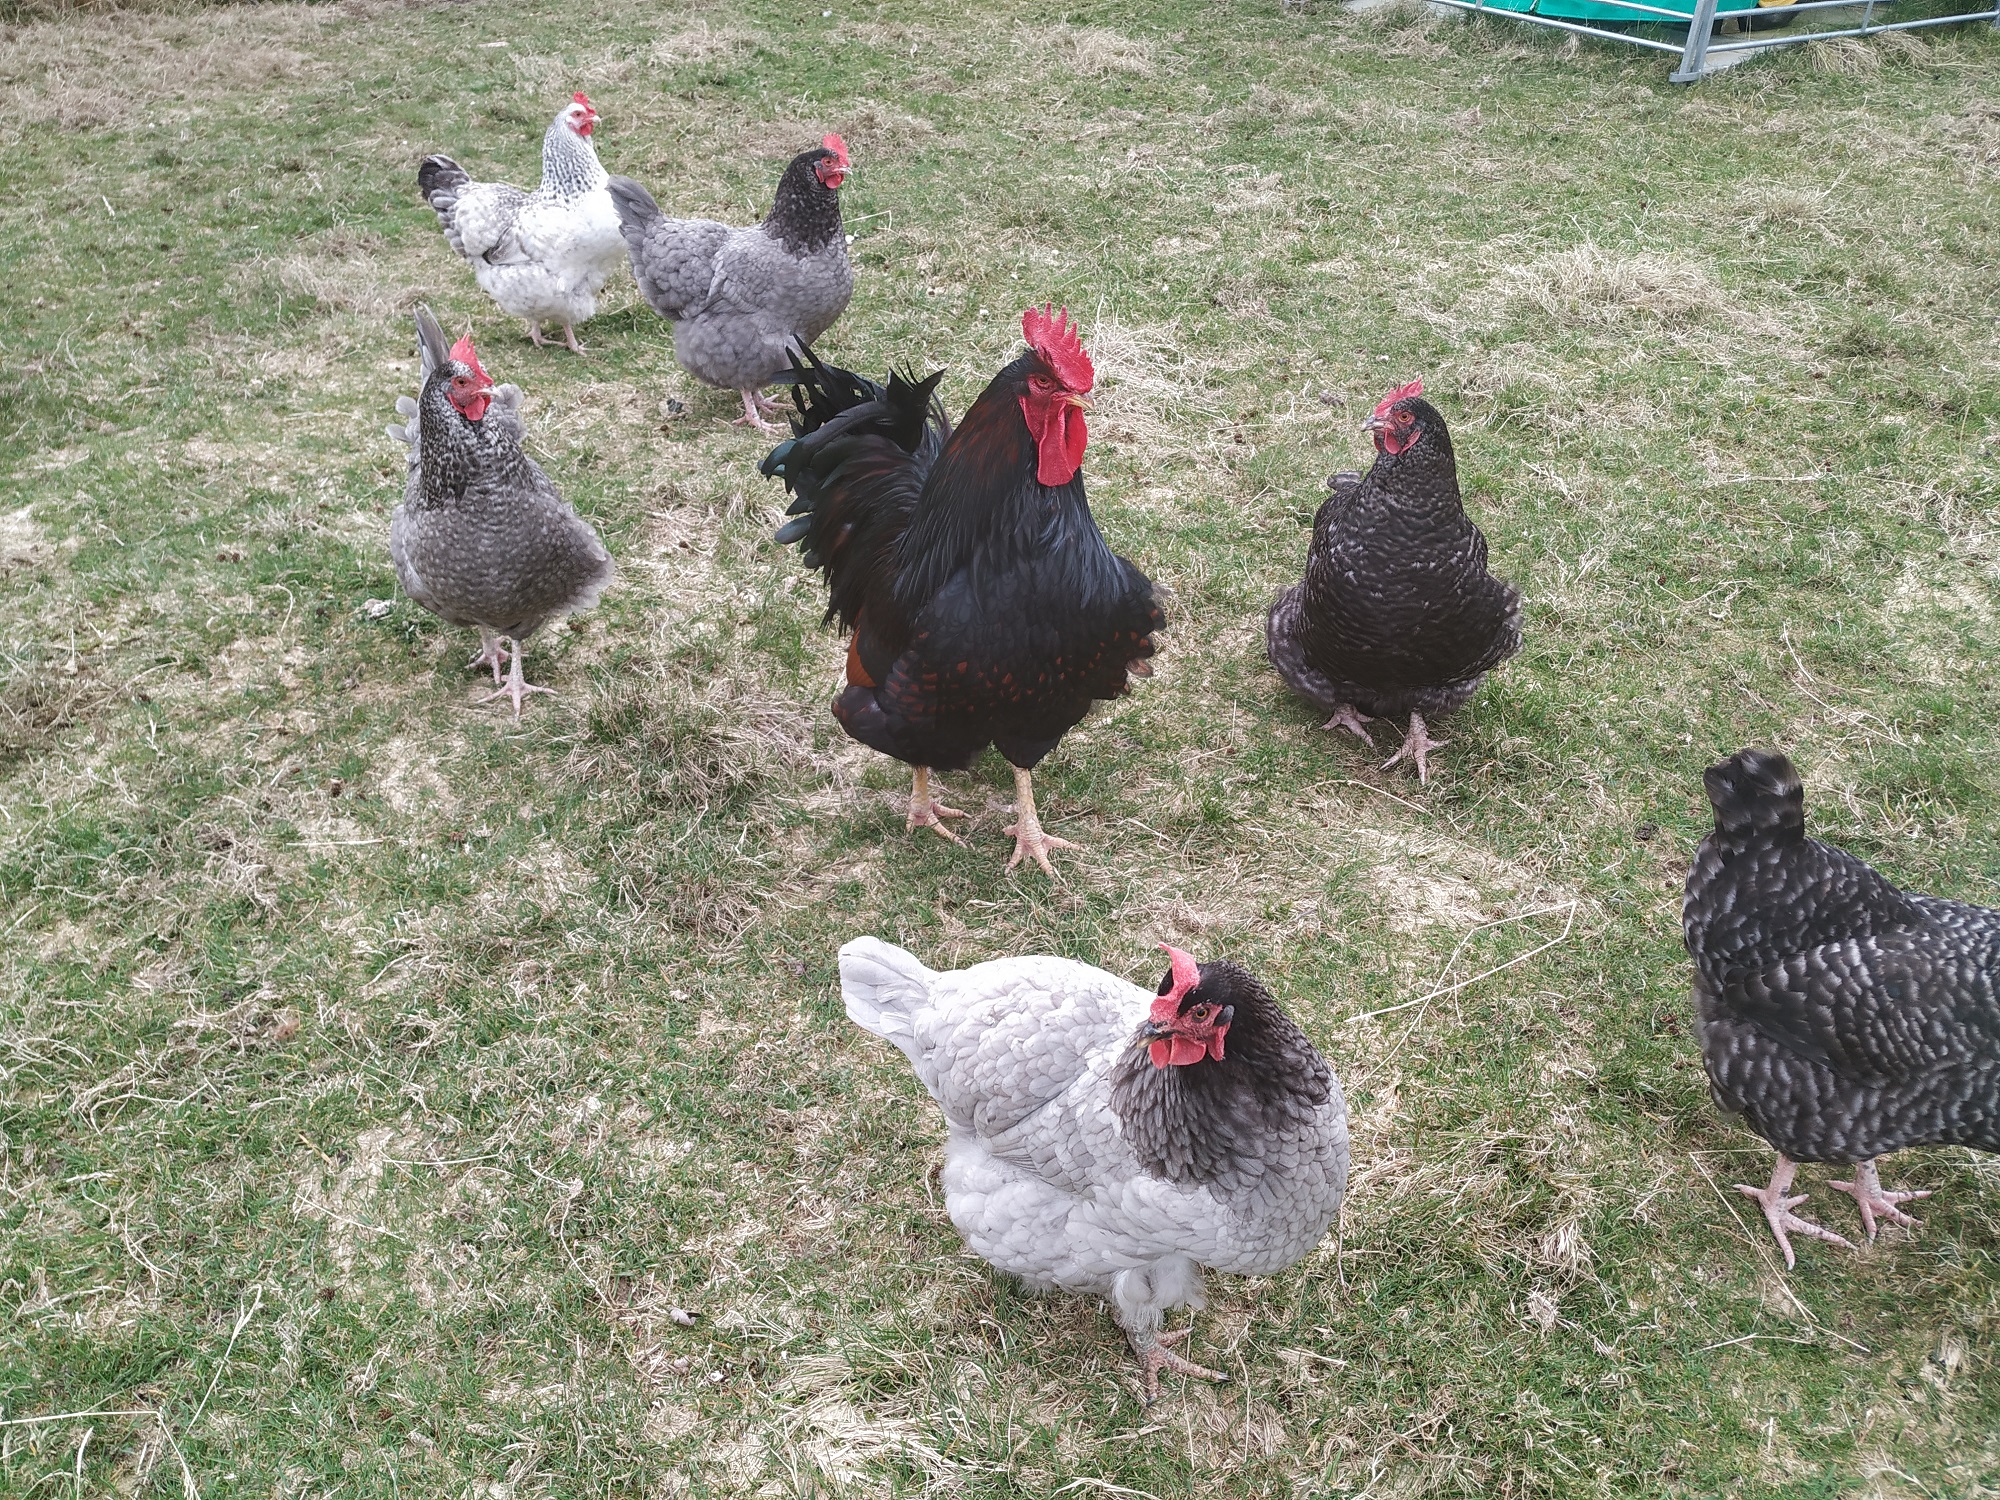
Cherokee (left) and entourage in their large run
That said, today the Cherokee the cockerel decided to go hill walking. He tried to take the hens with him but only two would go, Mrs Mills Junior (MMJ) and Tina Sparkle. The rest decided to stay put.
Off the three went, up the path, over the track and up the hill. They followed the line of the fence right to the top where they found a gate. Well, an open gate is a temptation for most animals and these intrepid three passed through gleefully. They had a lovely time scratching around until one thought it might be a good idea to head back.
Down they came only to find that they had come down the wrong side of the fence. The gate was long forgotten. The three gathered together in the corner of the field looking wistfully at their paddock. However, a 3ft high stock fence stood in their way. Despite have wings and the capability to fly, this fence was deemed impassible. So, they set off along the lower fence of this hill field looking for a way through. When that failed, the worked their way back to the corner.
“I know what do”, said Cherokee , and headed up the hill. Only it was not the gate he sought, but a vantage point. “Cock-a-doodle” he exclaimed at the top of his voice. Tina and MMJ looked at each other with world weary expressions.
However, this “cock-a-doodle-do” was, in fact, heard by myself as I set off to walk the dogs. Not realising it was a cry for help, I simply congratulated Cherokee for his derring do as I walked past.
Nevertheless, knowing animals’ propensity for getting trapped in field corners, I decided to keep an eye on them. Even our dogs can’t figure out what do when they find themselves in that same corner. In fact, only the sheep seem to have the ability to work out how to get around via gates.
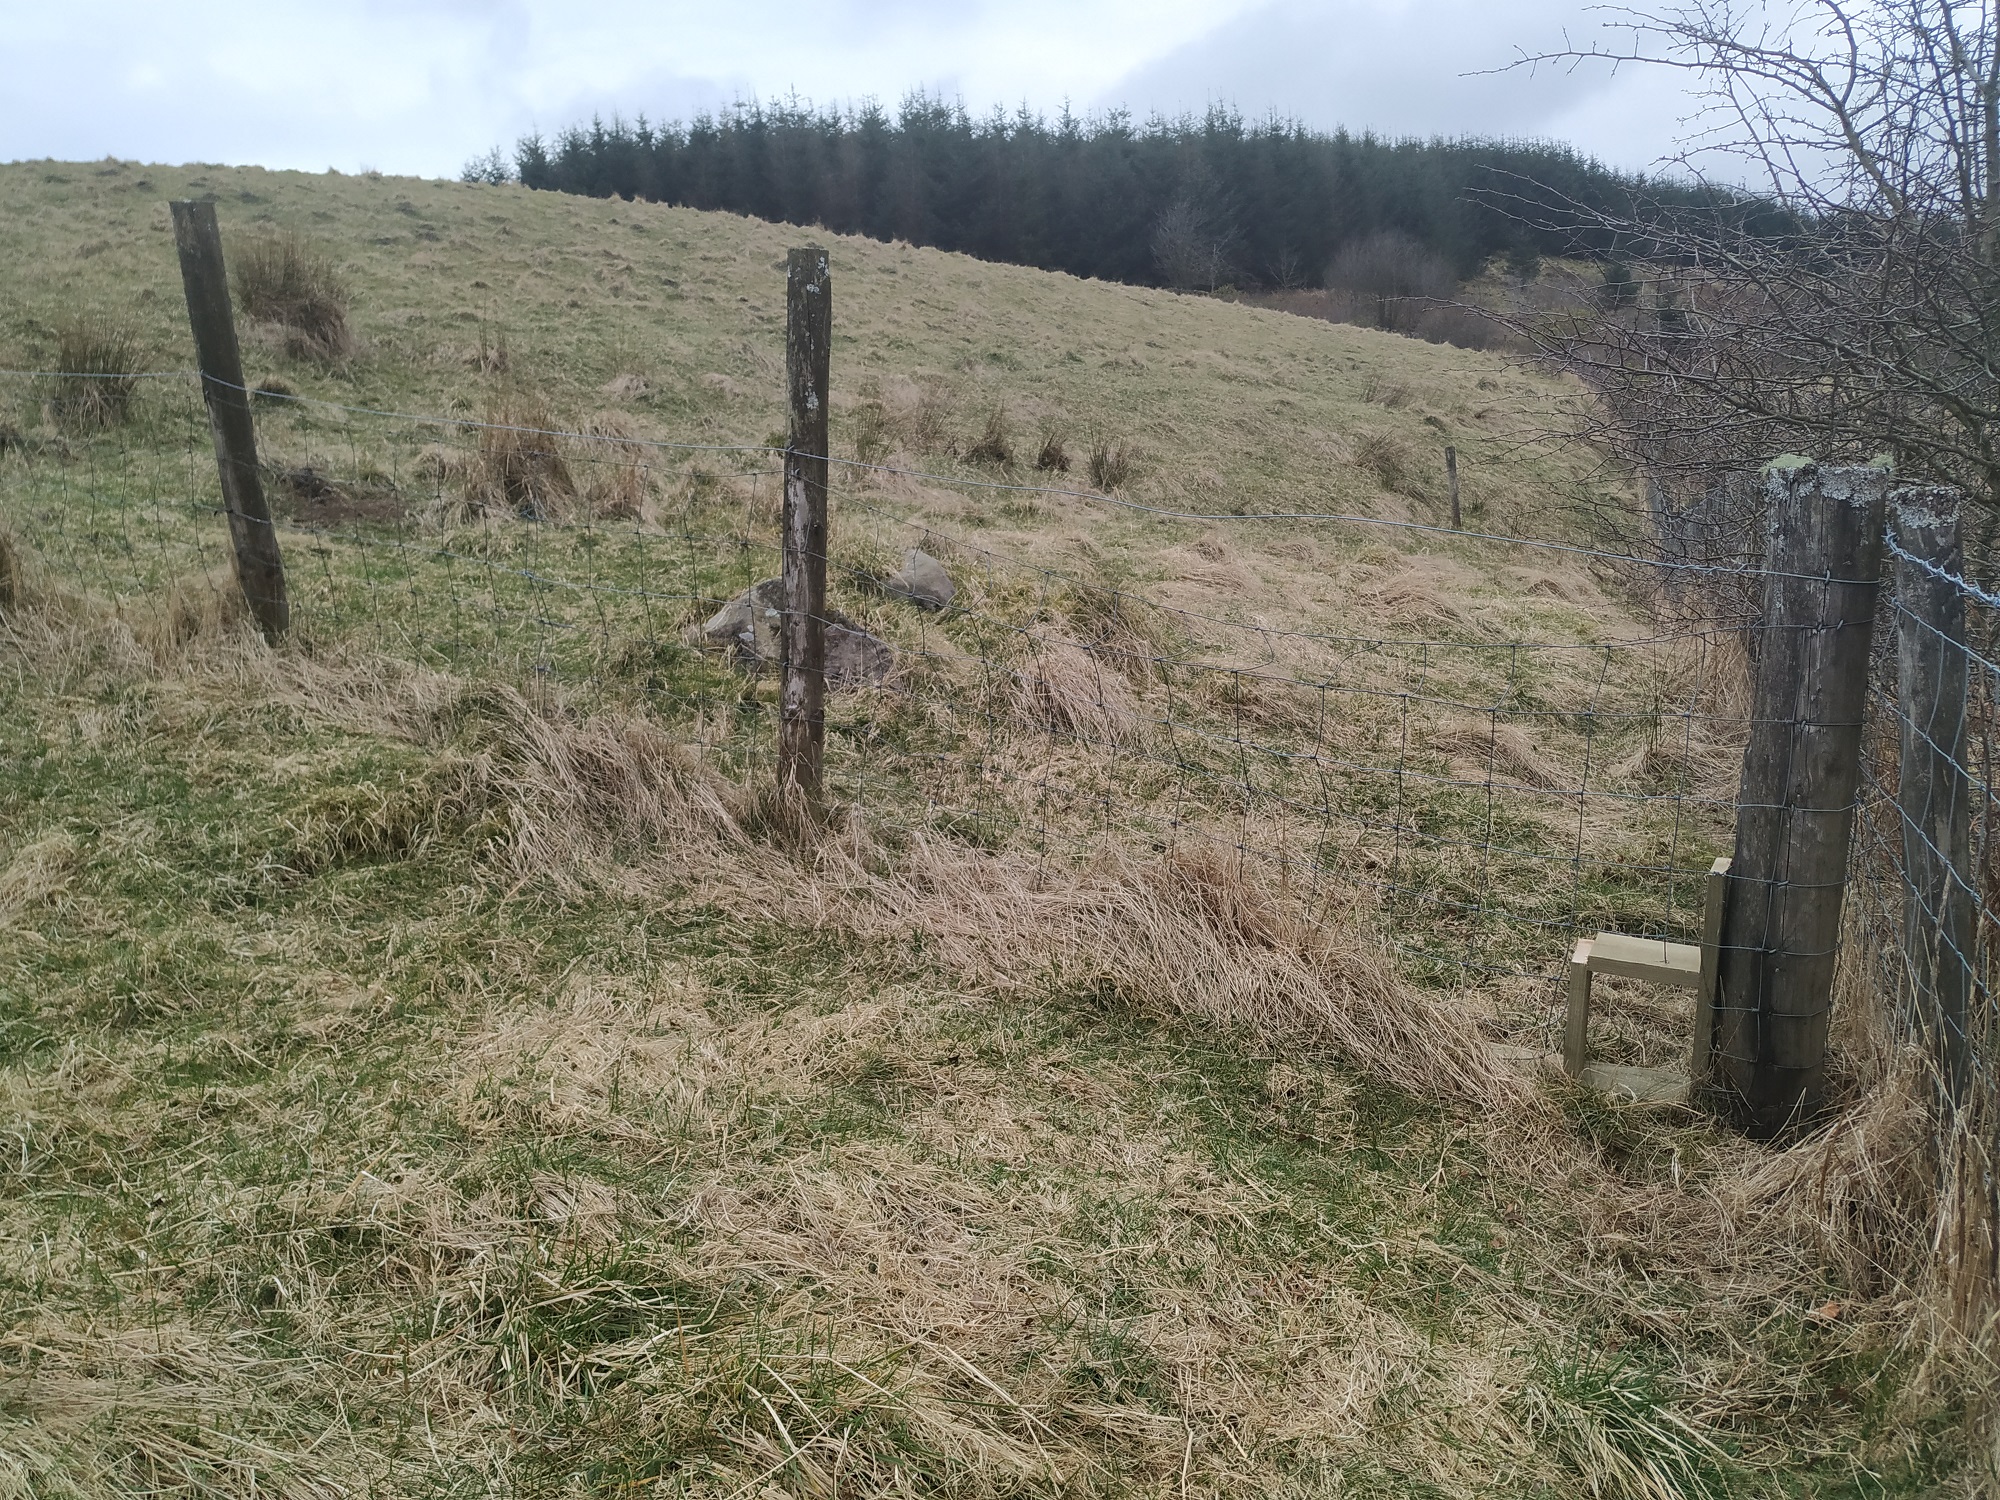
emergency hen gate
I alerted Mrs D and she thought it might be a good idea to lead them back. Off she set with some corn to lead them through the gate. The intrepid trio started to follow but, about half way up the hill, they decided they were going the wrong way and turned back down. They did not realise they were being rescued. MMJ lost patience and, without thinking, flew over the higher fence which was topped with barbed wire into the garden area. Observing this from the kitchen window, I headed out and picked up some tools and some wood. It was time to build an emergency exit. On the way, I shepherded MMJ back into the run via a handy gate. Not a cluck of thanks, mind you.
Arriving at the field corner, I knocked together a chicken door and installed it in the corner of the fence. Now, all they had to do was walk through.
But no, Cherokee decided that standing in front of it was far better. I headed off to make lunch. Mrs D tried to coax them through to no avail. In the end, she returned for a more tempting snack than corn – mealworms. That worked, Tina was straight through but Cherokee took his time before following.
By now the other hens had spotted possible tasty treats being dispensed and were on their way up. Thankfully, Mrs D led them all back to their run and all were able to relax.
Hopefully on future hen walks, they will be able to make use of the hen door.
We try to grow as many of the vegetables we eat as we can. However, in the last couple of years, we have been engaged in a battle of wills with numerous pests. We have managed to outwit the birds and the butterflies with netting, but the slugs still do a significant amount of damage.
Boring out the carrot tubes
Last year, we had to keep replanting. While the kale grew strong enough to cope with some slug damage, the rest of the crops that managed to get beyond seedlings fared badly. In the end, we rescue a few beetroot, a reasonable crop of turnips and some badly mauled carrots. There had to be a better way.
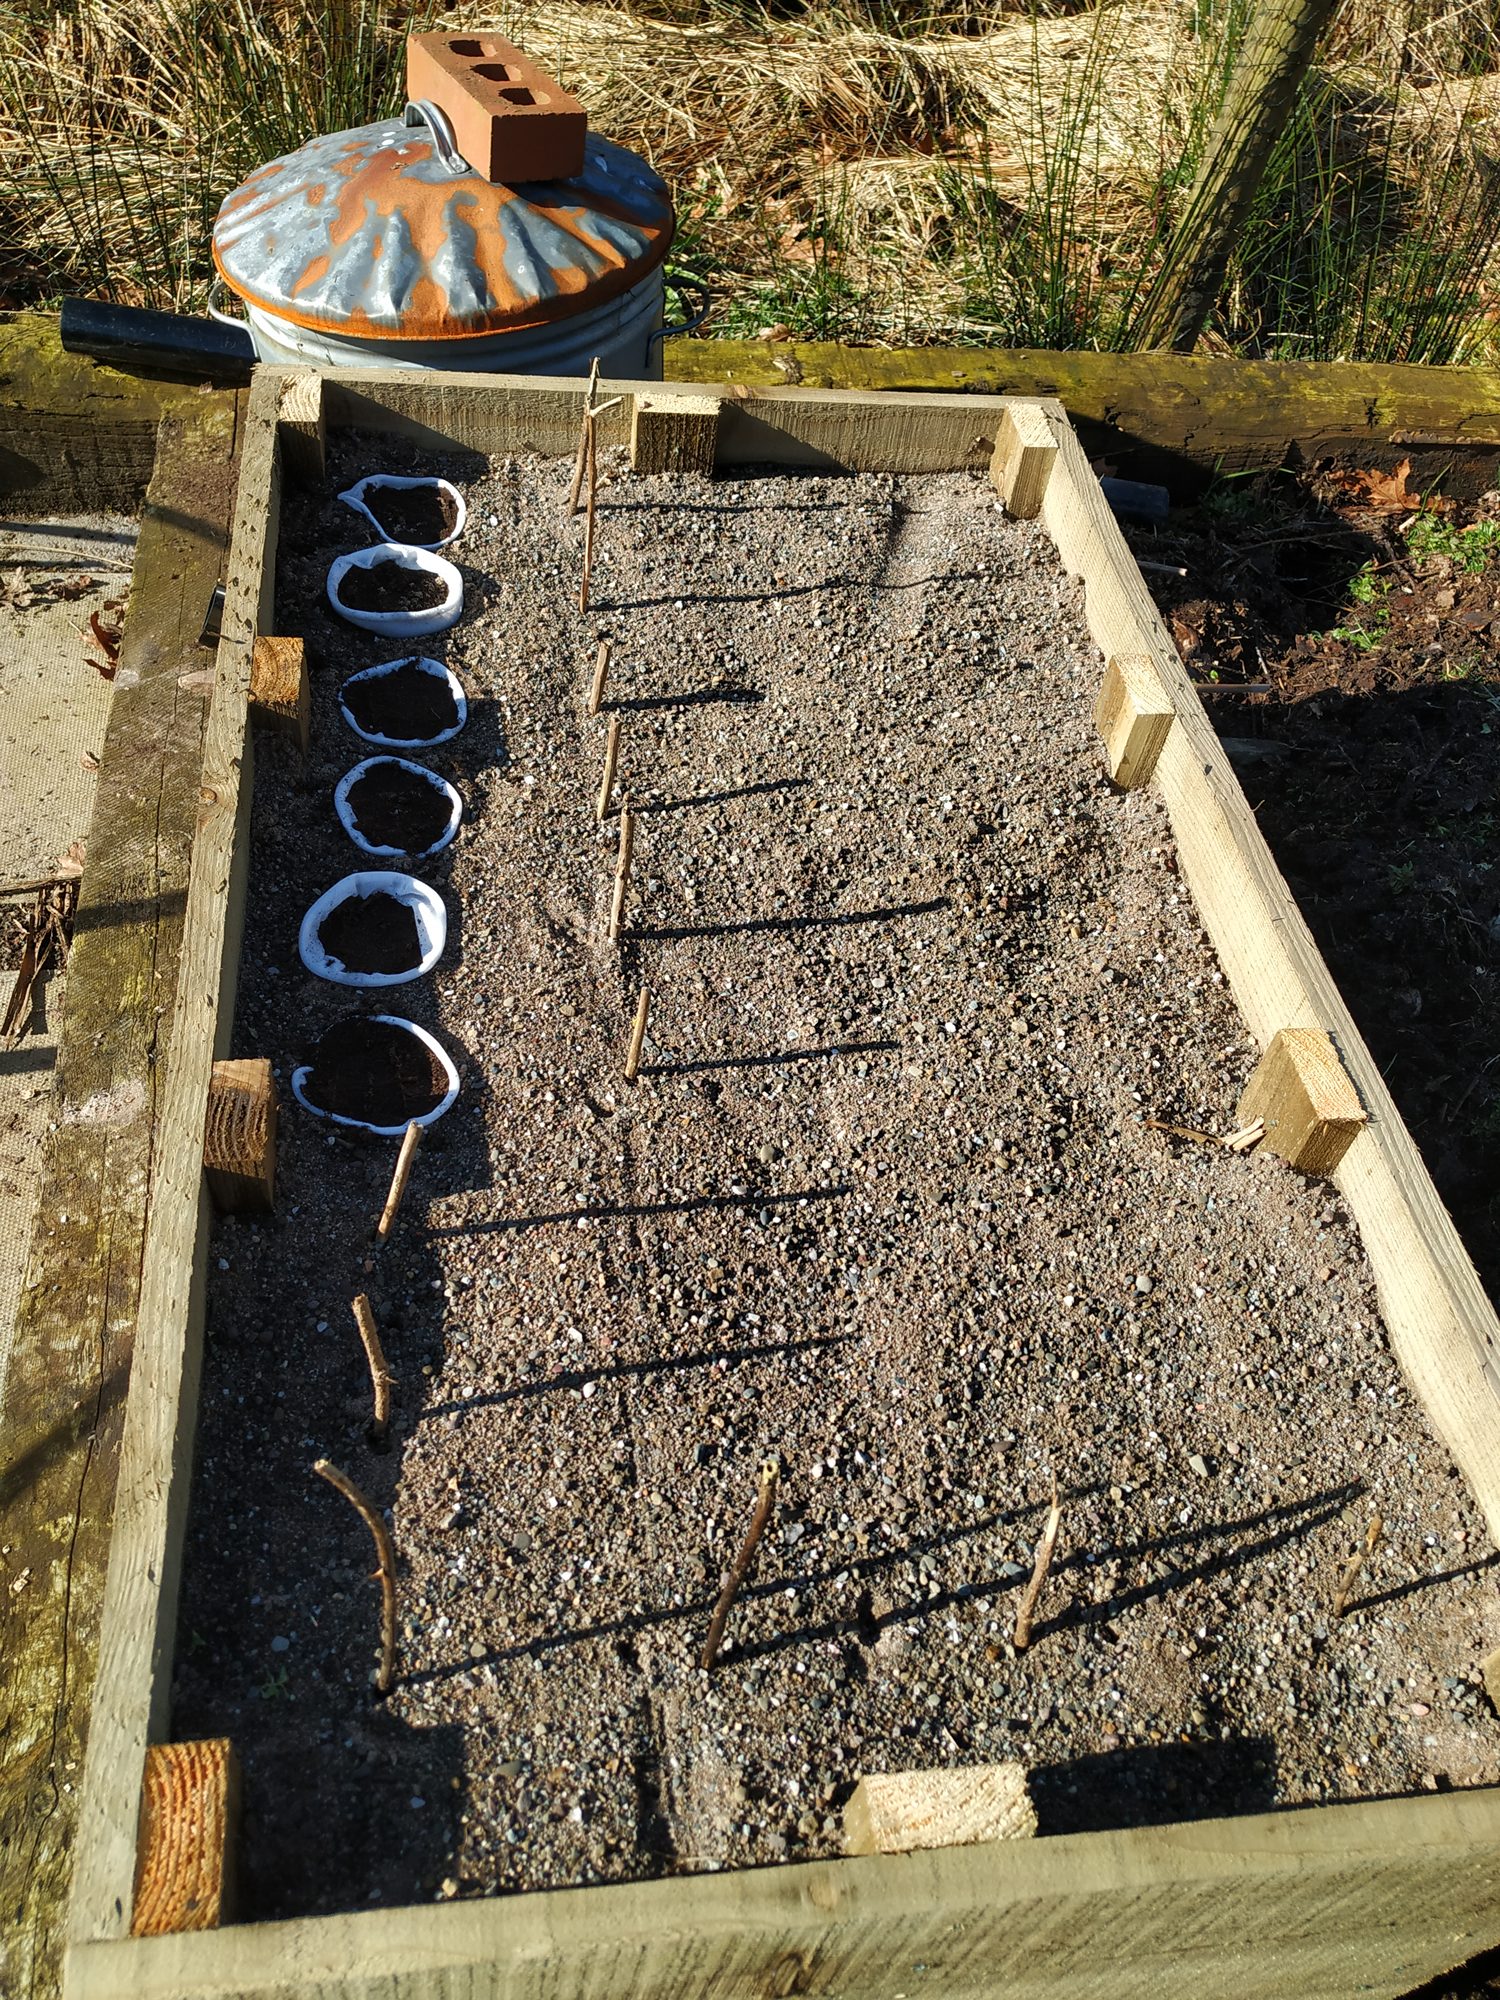
I had seen, on the TV, a programme about allotments in which carrots were grown in tubes. Nicole did some research and found that while this was possible, they could easily overheat on sunny days. The most promising solution was to build a box, fill it with sand and then bore out vertical tubes with a drainpipe. These tubes could be filled with compost. Undersoil slugs and snails would not be able to get through the sand thus the carrots should be safe. The sand would also retain moisture and stay cool on hot days.
The box itself was fairly straightforward to construct (see stopping slugs and snails). However, boring out the sand tubes was a bit more tricky. It was quite hard to get the sand to stay in the tube. Sometimes it worked, sometimes half of the sand fell out back into the tube. It turned into quite an art getting the tube the right depth. One trick was to push the drainpipe in and then pack the sand down inside the pipe. It took time.
Our addition to the design was to make “socks” into which the compost could go. By doing this, we could pull out the old compost each year and replace it with new compost. That’s the plan anyway. We used the sleeves that you can by for underground drainage pipes. These sleeves are built to let water through but not silt – perfect. They will also act as an additional slug barrier.
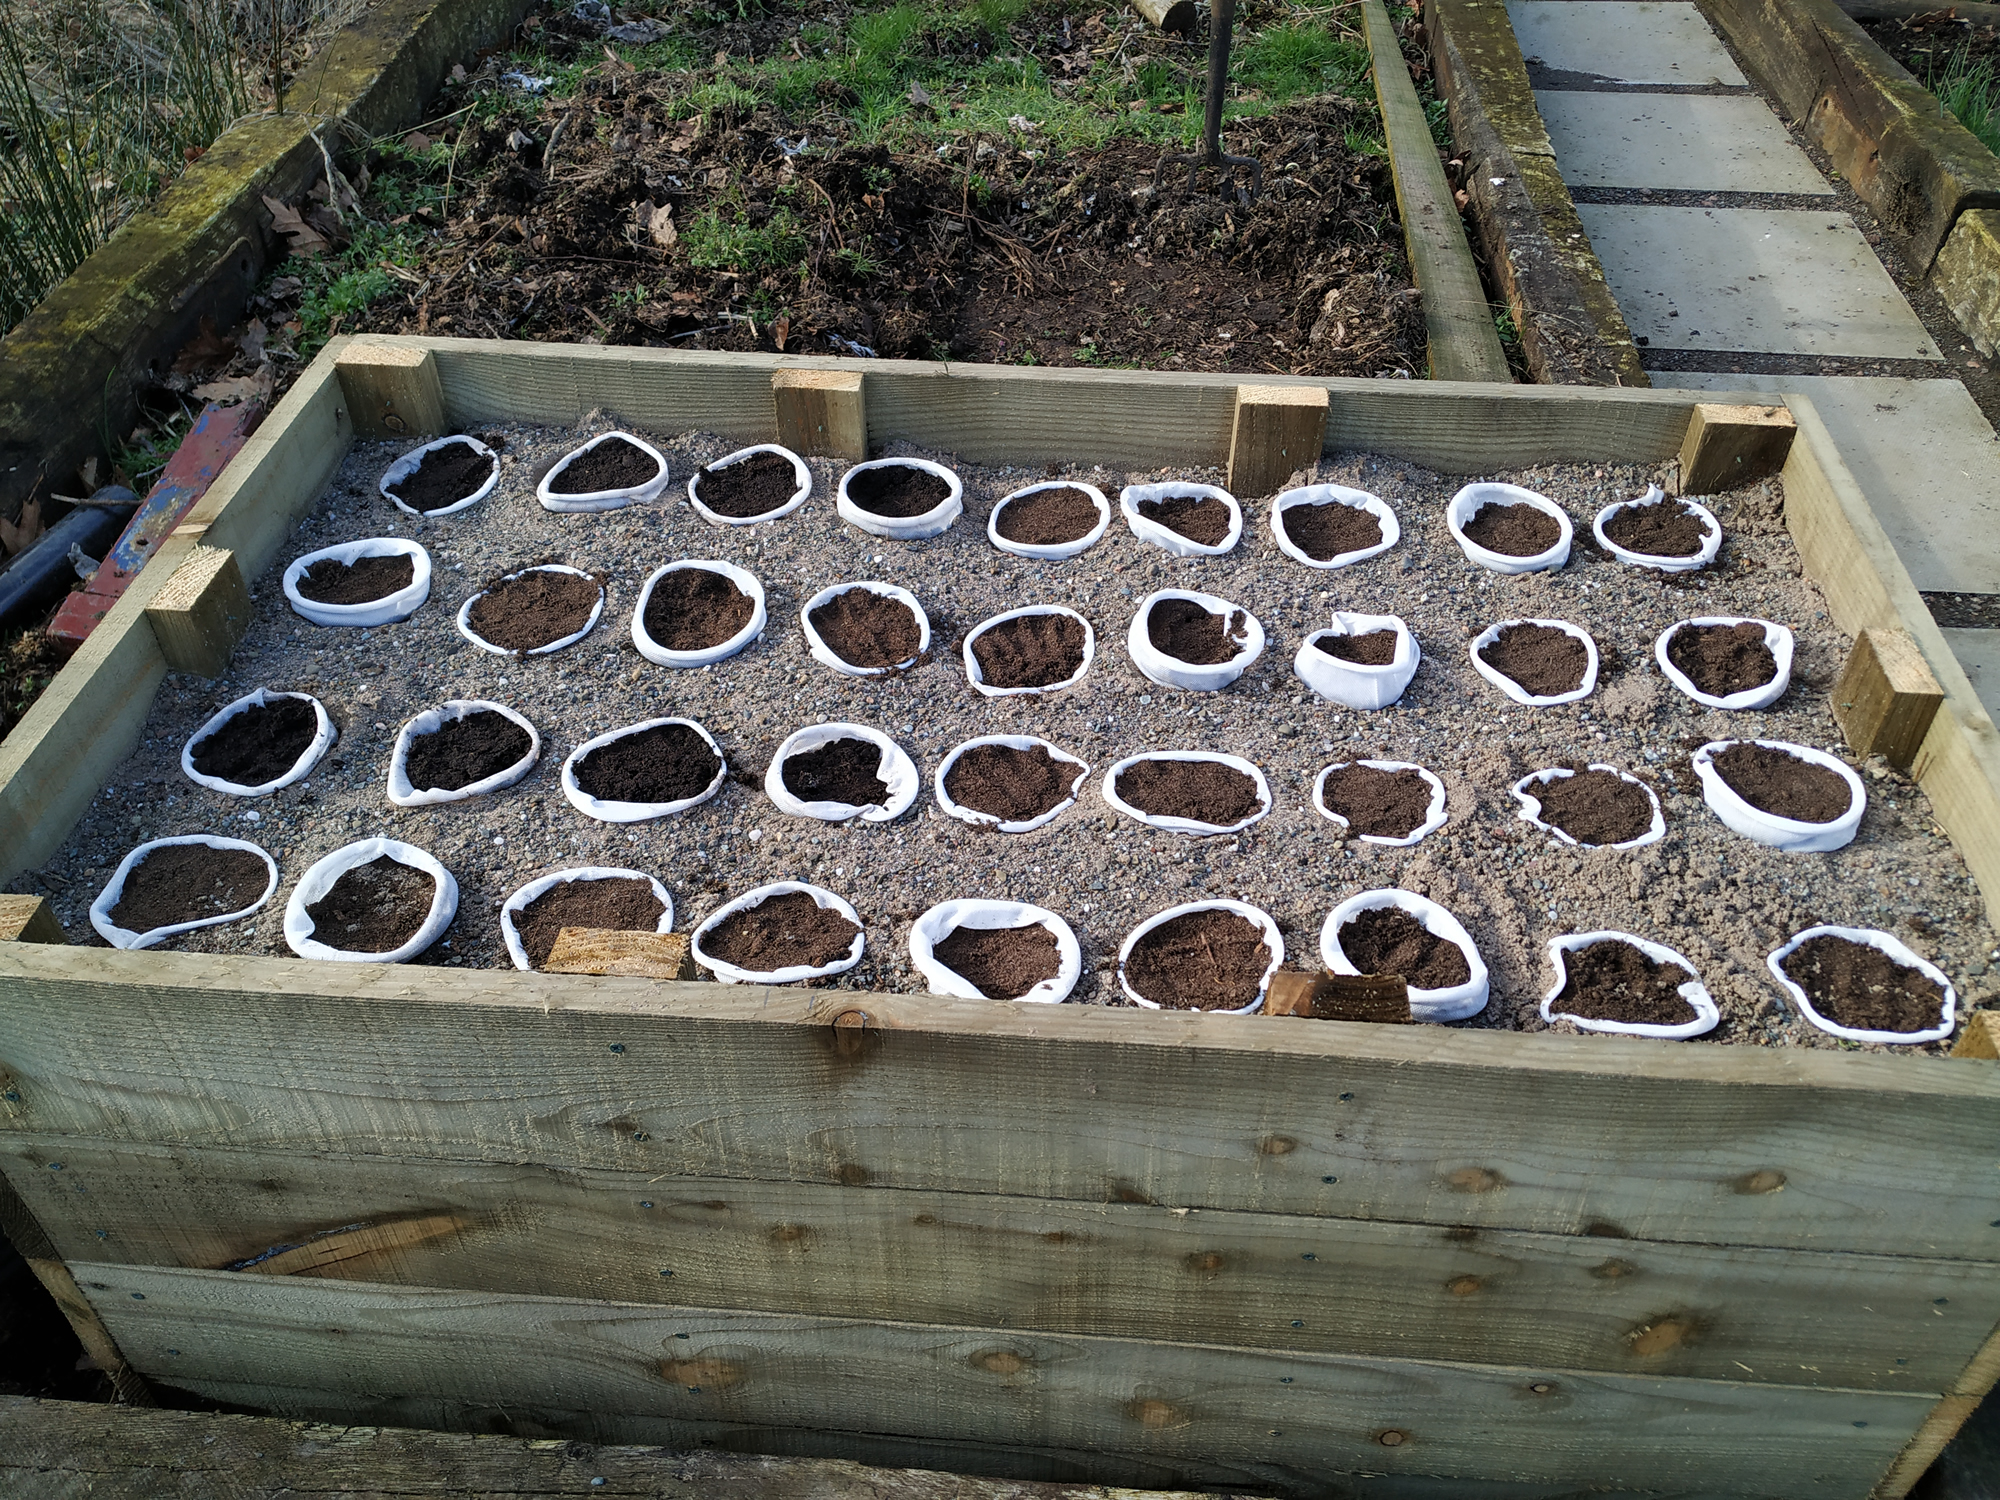
carrot box complete
By putting the sock into a piece of drainpipe, filling it, placing the drainpipe (and compost) into the hole, the pipe could be slid out leaving the compost tube in place. This process worked well but was time consuming. It took hours to do all 36 tubes.
We haven’t planted the actual carrots yet – the weather is a bit frosty right now. We reckon they’ll be planted mid to late April.
Once planted, we’ll tie some carrot netting around the top to keep the more intrepid slugs and snails at bay. Once the carrots are growing, it will be fine to remove the netting. I’ll post updates as the year pans out so that you can follow the progress. Who knows, you may even be inspired to try this approach too.
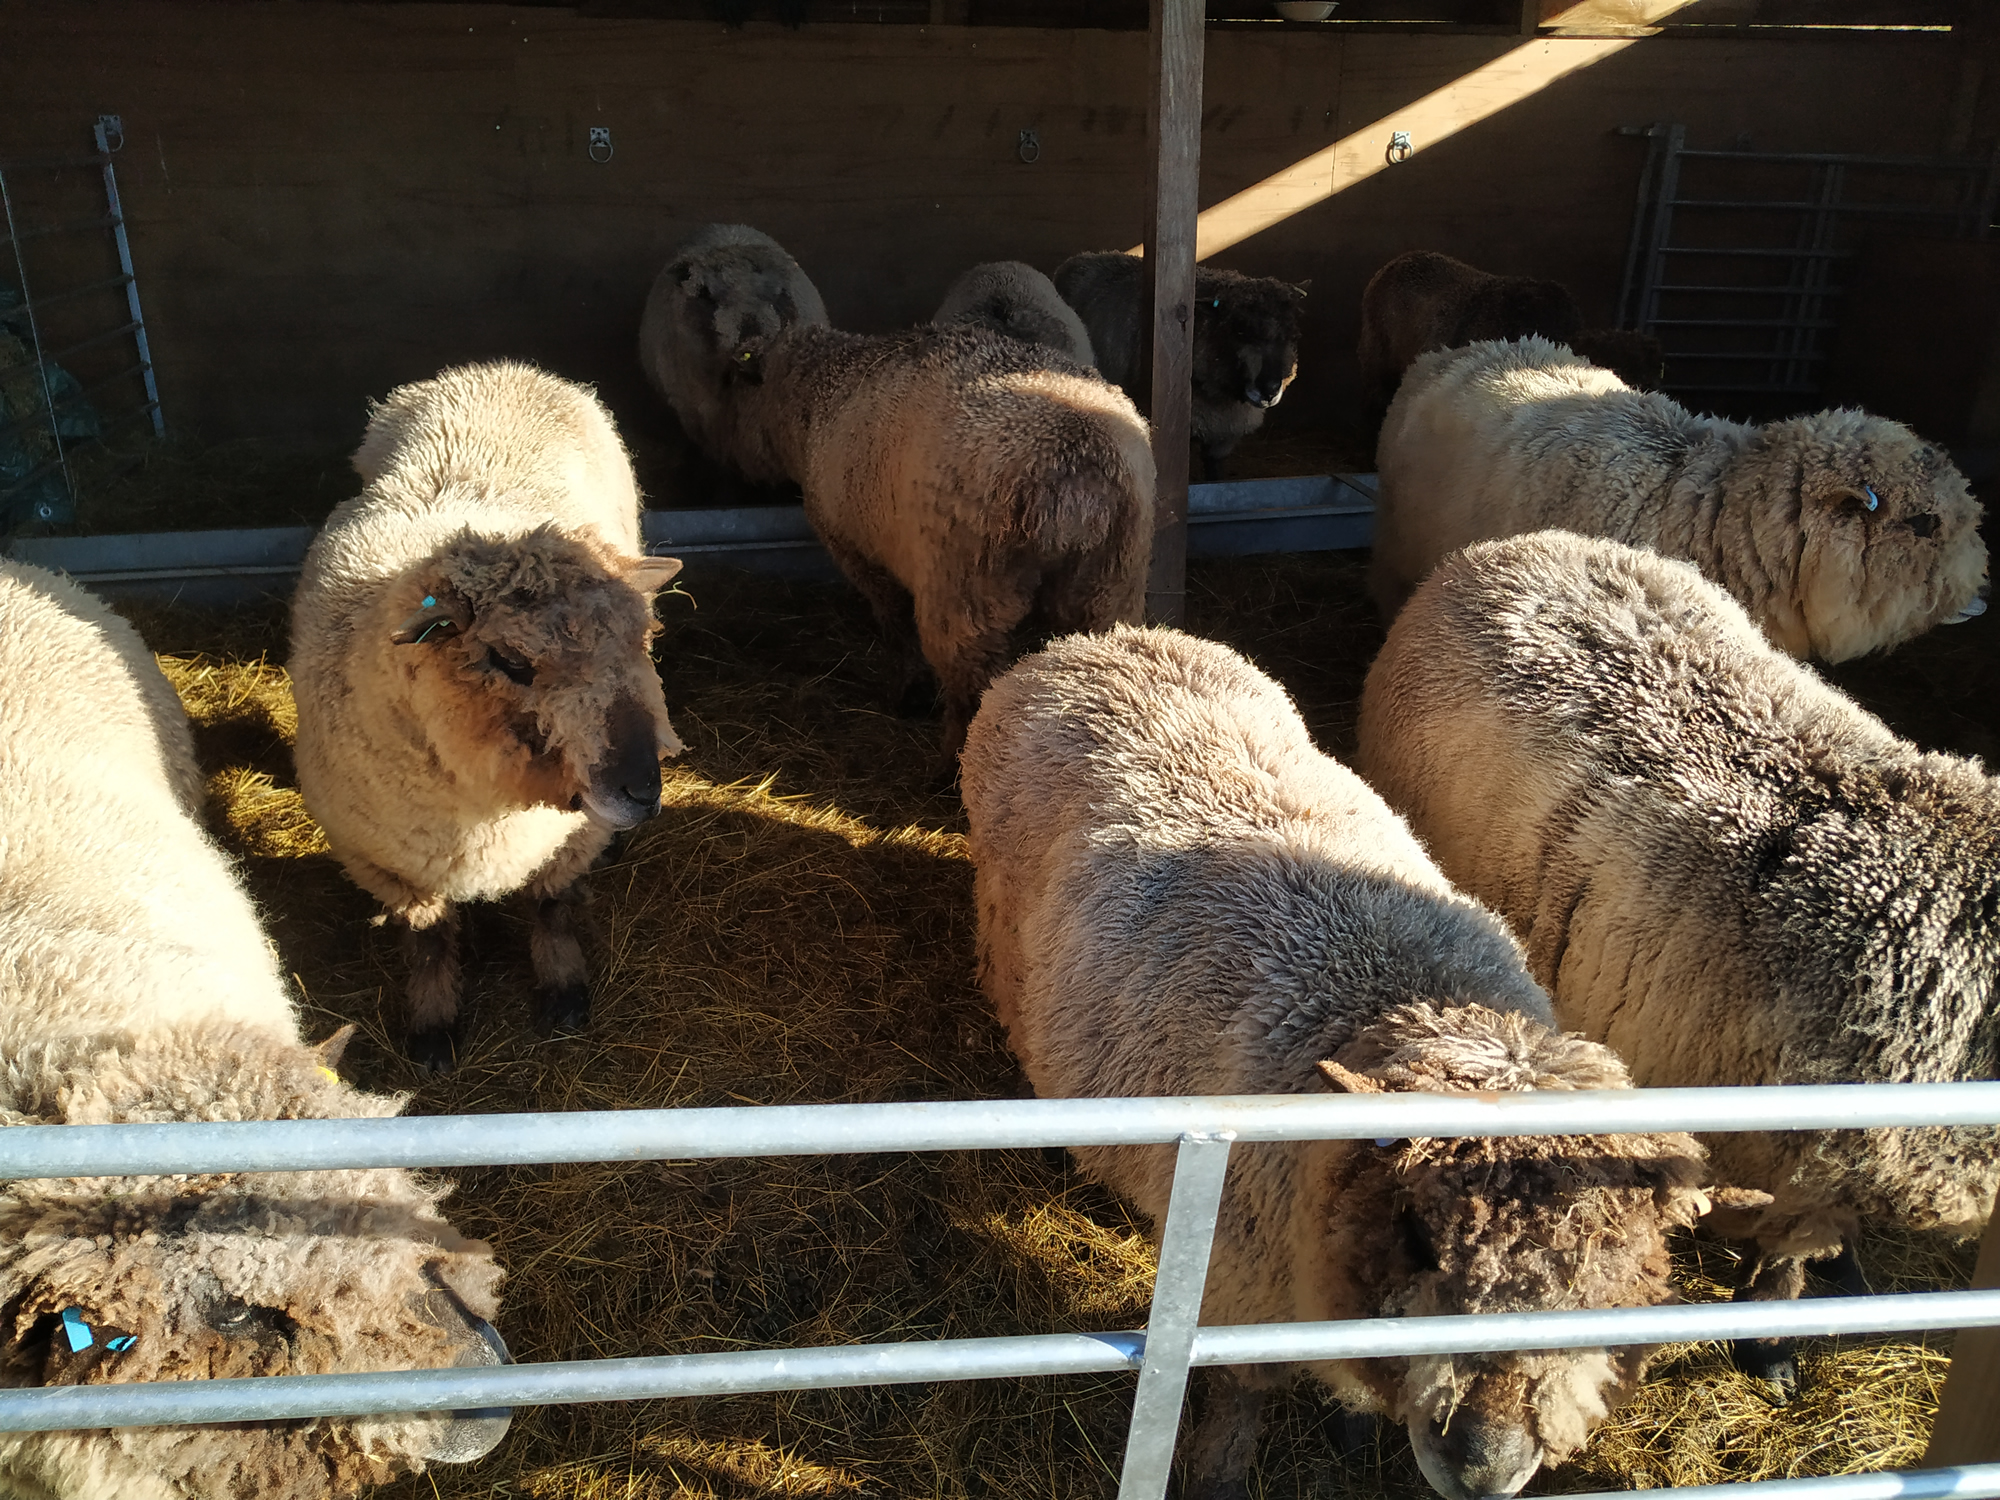
One of the annual responsibilities we have as smallholders is to vaccinate the sheep. Each year, they get an injection of Heptavac. The interesting challenge is how best to do it without getting the sheep overexcited. We have, in the past, used sheep nuts to misidrect them while they are injected, but then the rest of the flock gather round barging each other trying to get in. Last year, in all the argy bargy, Ymogen suffered a broken jaw. This year, we were determined to avoid that kind of accident.
We also had to make sure the wiser of our sheep did not clock what was going on and keep well clear. Bluemli, particularly, can tell when we are up to something and will stay well clear of any pens.
We hatched our plans. First, all the sheep were gathered into the shed. This involved a little bribery in the form of sheep nuts. However, these were in a trough so they were all able to get some.
We built a small pen right outside the shed with a sliding door, well a sheep hurdle we could move out of the way, to let them in. They all lined up to see what we were up to (see picture). On opening the entrance, the first sheep obligingly stepped through. I held them tight while Nicole administered the injection. It went like clockwork. Each time we opened the pen, a sheep wandered in, got their injection and was ushered out into the paddock.
One or two sheep tried to play the bucking bronco card, but all in all it was very peaceful. So peaceful, in fact, that the vaccinated sheep gathered round to watch their colleagues getting injected.
All in all, it took about an hour do vaccinate our 19 sheep. We retired for a cuppa very pleased with ourselves.
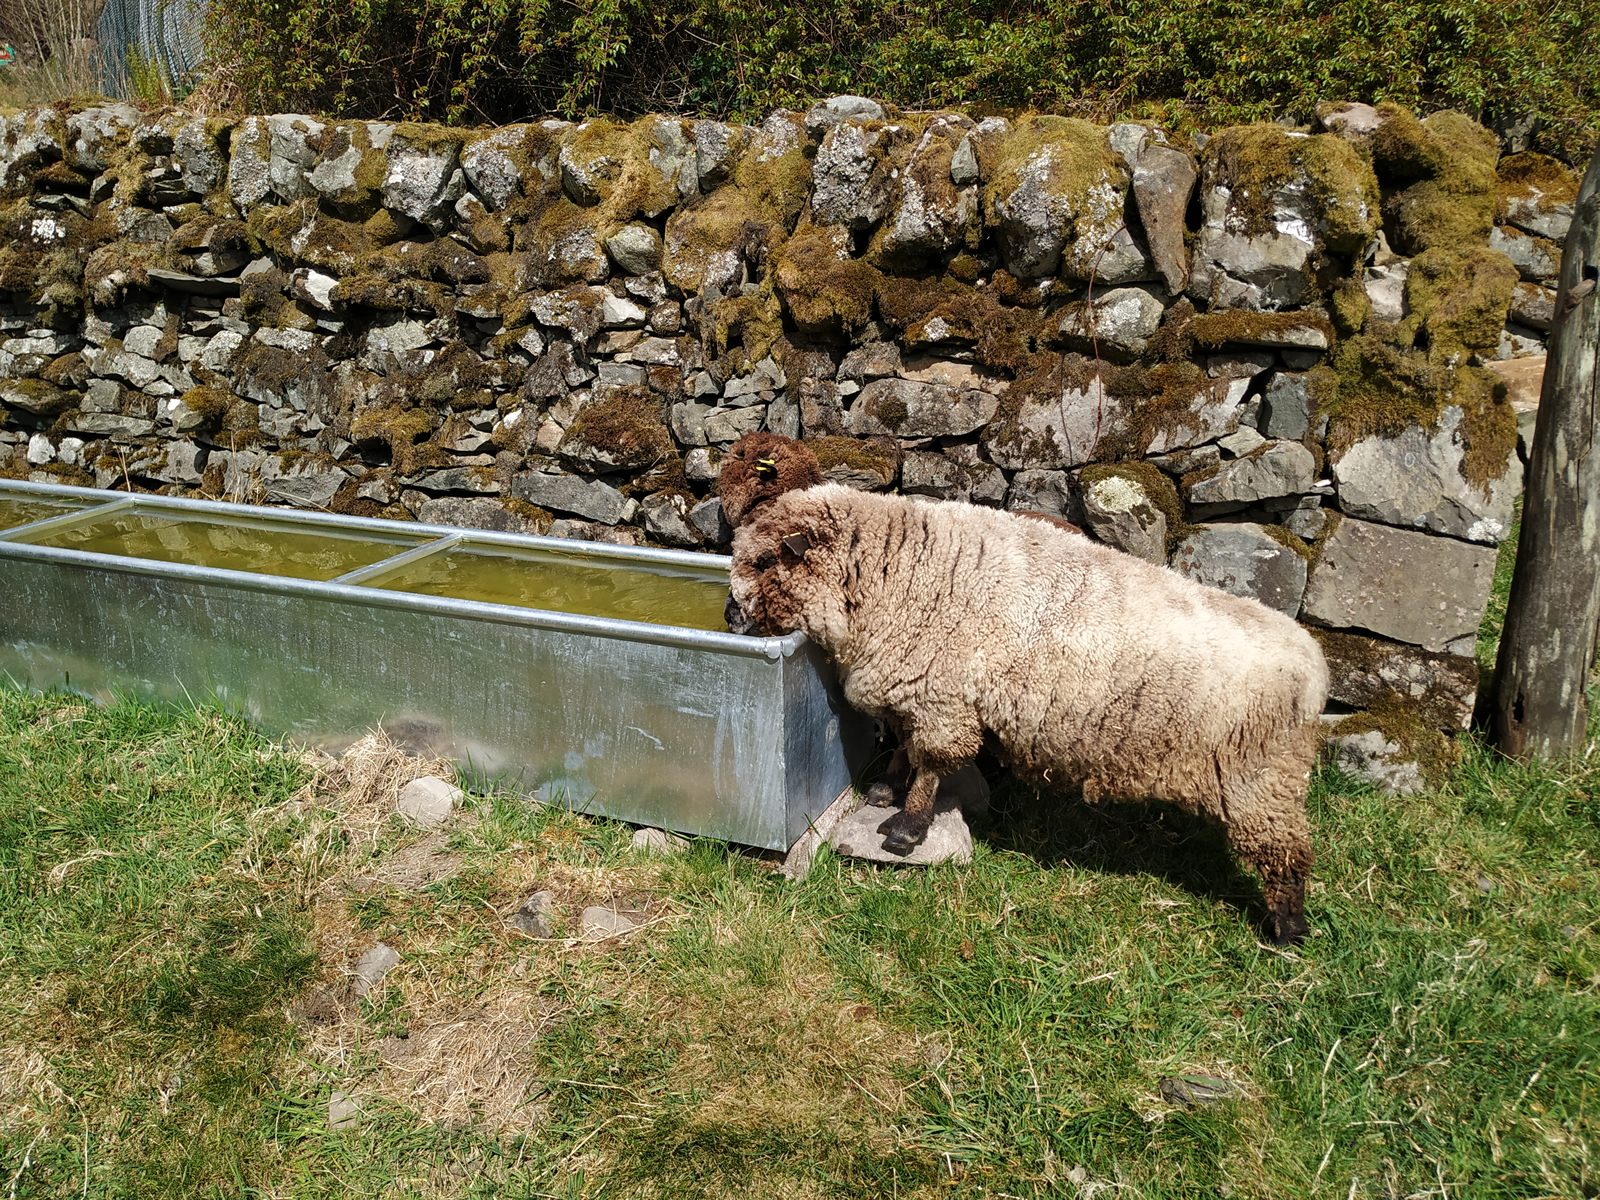
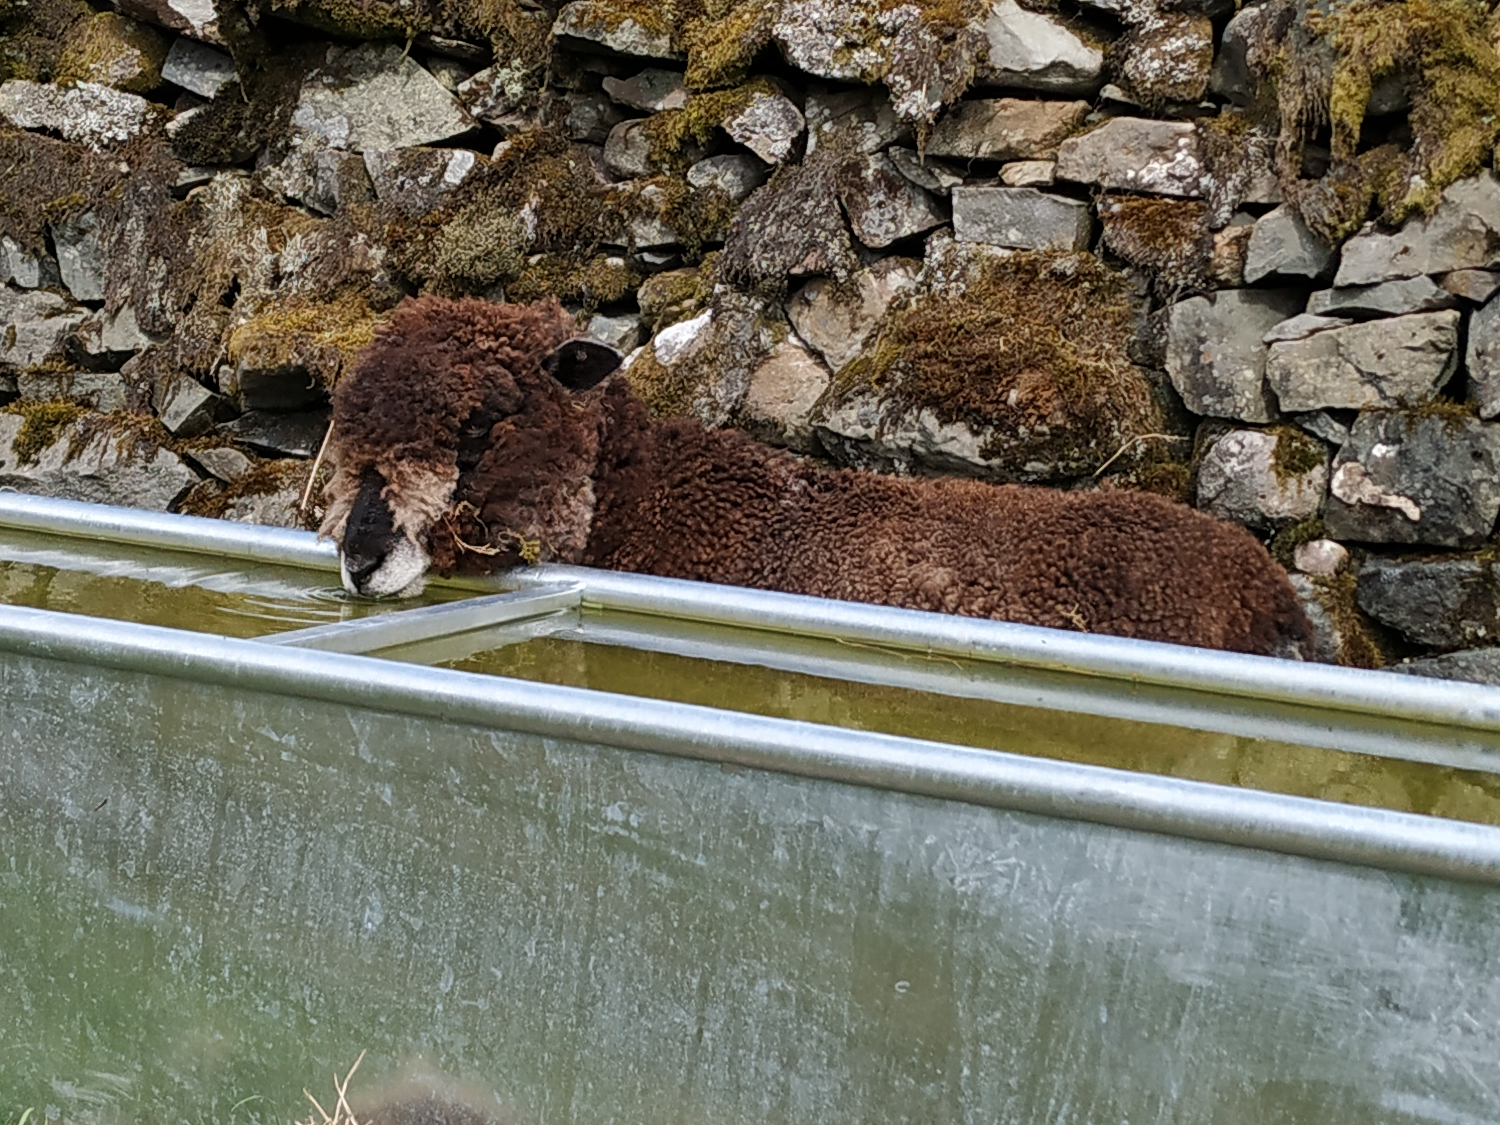 When they first saw it, the sheep were startled; they are not keen on new things appearing unexpectedly. But as the rain stopped and the sun came out, they have found it to be another useful drinking spot.