If there’s one thing sheep are good at, aside from scoffing copious amounts of grass, it’s getting into pickles. These include activities such as getting your head stuck in a fence (more common in the younger members of the flock), going into panic when you realise the rest of the flock have wandered off and left you behind, getting wrapped up in brambles, getting over walls and fences into neighbouring fields, and so on. Also, the tups are quite adept at removing gates from hinges in order to meet the ladies.
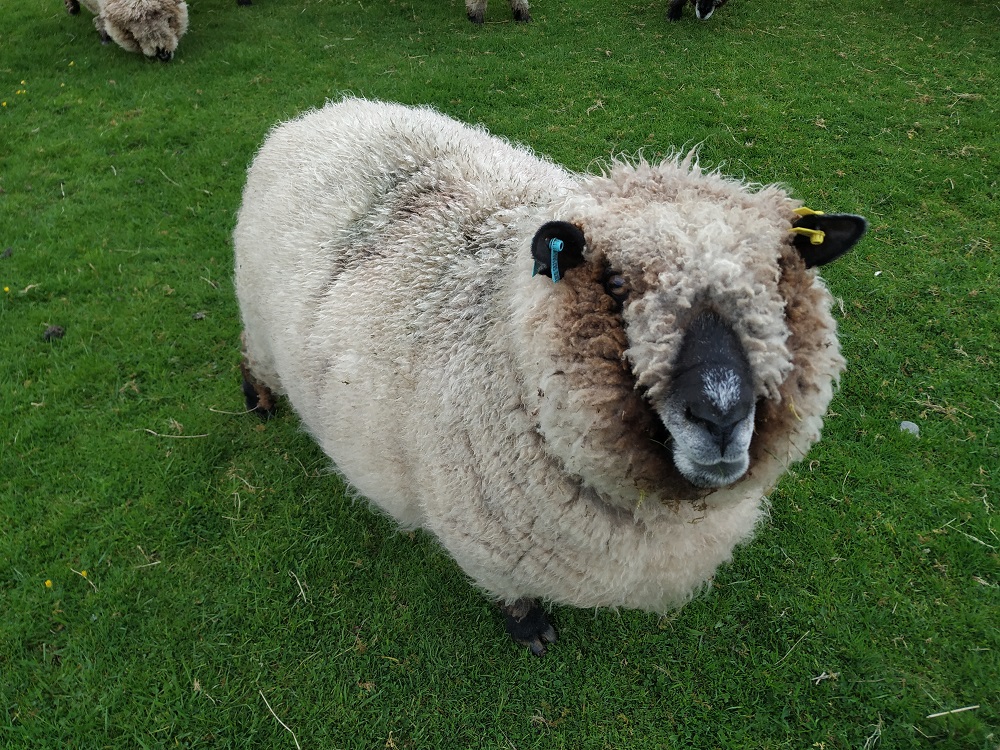
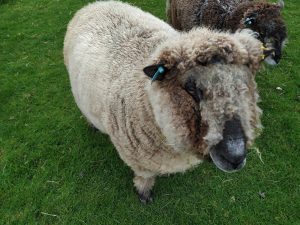
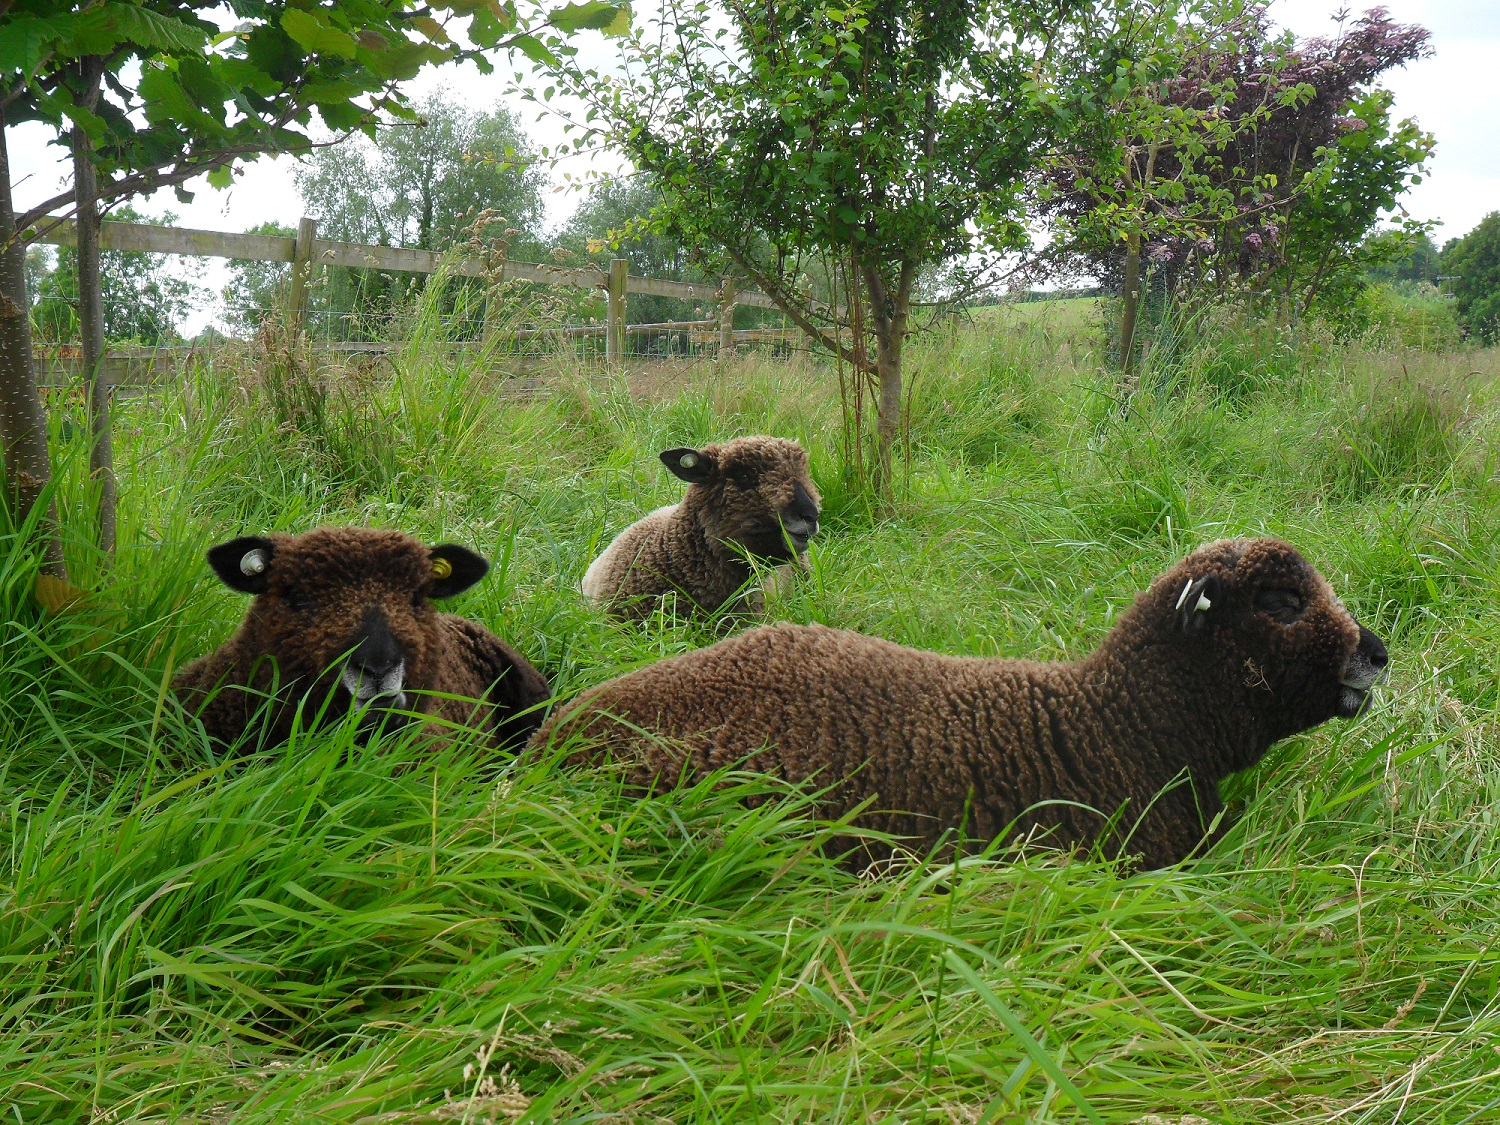
Yndia and Pinkie
Some pickles are related to the time of year and, right now, wet fleeces are problem number one. This is not because a wet fleece is, in itself, cause for concern. If it were, then sheep would never survive the winter. The problem is that at this time of year, pre shearing, the fleeces are big, fluffy and crammed with wool. When they get wet, they get heavy. Again, this is all fine until… …the sheep decides it’s time to do a rolly polly.
Rolly pollies usually occur when a sheep is lying down, cudding or just generally relaxing, and decides to get up. Instead of just standing, it executes a clever roll straight onto its feet. This works well and is quite impressive – until the weight of a heavy fleece stops the roll in its tracks. Once on its back and weighed down by said wet fleece, a sheep can become trapped. The proper term is ‘cast’. This is not a good position for any of us, but it’s particularly uncomfortable for a sheep as now, all its insides are pressing in the wrong places. Not to put too fine a point on it, if they are not found within a few hours, they can die.
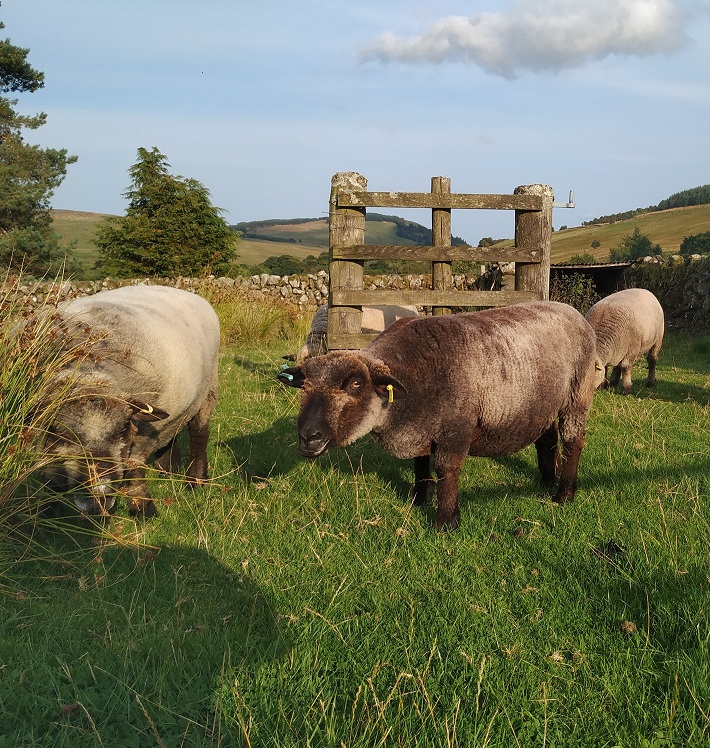
Yarr and his woolly fleece
Our rolly polly commander in chief is Yarr (pictured left). He has a particularly woolly fleece and a penchant for rolly pollies. He much prefers to roll out of a lying position as standing up would not be showy enough. Normally, he gets away with it as he’s pretty strong. But a quick downpour and a wet fleece and he can be in trouble.
So far, this year, he’s only got himself trapped the once and was found pretty quickly. We know this because he showed no signs of distress on being righted, other than a need to blow his nose. In previous years, on being rescued, he has been sometimes been quite shaky. He also displays a remarkable aptitude for looking for the rest of the flock in all the wrong places. In fact, it took me an hour to reunite him and, at one point, involved me running up a hill (to the gate) with a bucket of nuts just in front of his nose. We both had to stop to catch our breath at the top, panting for all we were worth.
For us, this means regular checks throughout the day, usually no more than two hours apart. This is paying off as, so far this year, aside from Yarr only Ynca has managed to get herself cast and she too was found in good time.
We’ll be shearing them soon and that will make the problem go away for another year. But the checks will continue as we move into flystrike and midgie season.
For a while now Adrian and I have been thinking about silvopasture. This is a pasture system where livestock are given controlled access to trees so they can enjoy the benefits of woodland grazing.
Silvopasture has loads of benefits, not only to livestock but also on a grander scale to the planet. The more trees which are introduced to pasture systems the more diverse flora and fauna there is and the less “green deserts” there are (sterile fields). And let’s not forget the biggie; trees are a great way to contribute towards carbon sequestration.
But coming back to livestock and in particular to sheep, as you might have read in previous stories of ours sheep love trees, they use them as scratch posts and enjoy the shelter they provide, but they particularly enjoy eating them! So, when thinking about silvopasture, the fact that livestock are rather partial to tree bark and low growing branches means any woodland grazing needs to be carefully thought about.
Done properly, livestock is given controlled access to woodland grazing, usually in strips, which minimises the risk of tree damage and overgrazing. Not allowing permanent access to woodland allows the all important flora to regenerate and continue providing delicious forage for our livestock friends year upon year.
With this in mind, we thought long and hard about how to create an area of silvopasture for our little flock. All the woodland we have around our fields is young and so not ideal. It is also surrounded by a deer fence and if we gave the sheep access we might accidentally trap a deer within the woodland which would be a problem for both the deer and the young trees.
Then Adrian had a brainwave, we have a copse ideally situated in one of the sheep’s favourite fields. The trees are mature and would provide plenty of shade. It wouldn’t be great grazing, but as an alternative field shelter it would be just the ticket!
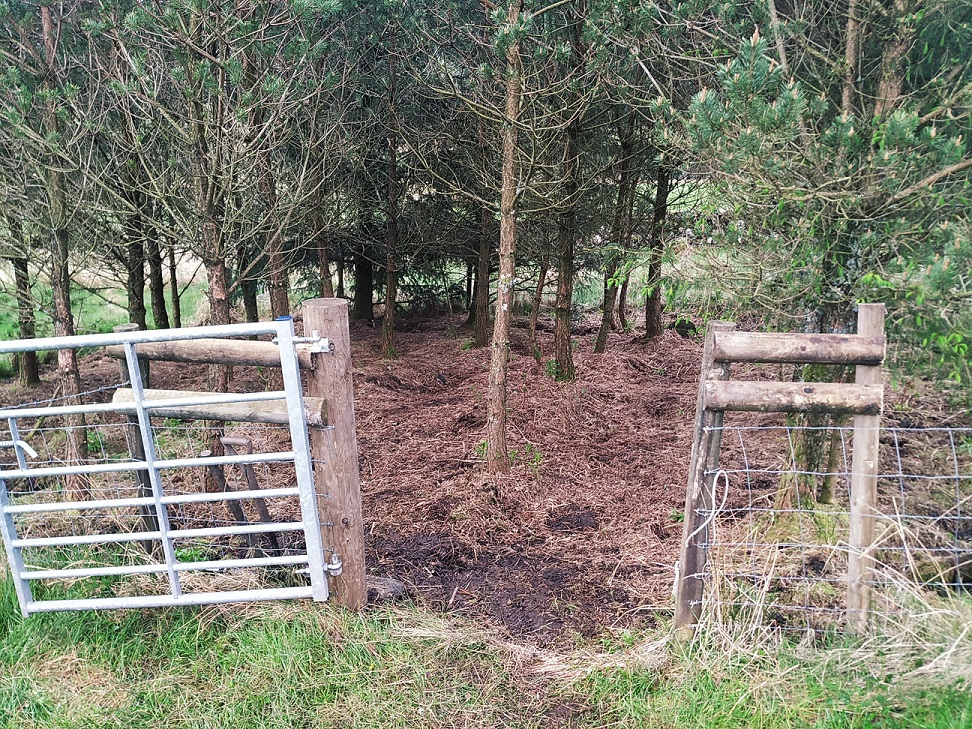
the copse before we started work on it
Currently fenced off, the copse comprises mostly conifers (we would have preferred more of a variety of trees and are already planning interplanting some deciduous trees in amongst the evergreens). But the location of the copse is good so we’re going to work with it.
Now that our main focus would be to give the sheep somewhere shady to go on hot days we would be able to close off the field shelter which is a magnet for flies. Building the shelter seemed like a good idea at the time but looking back we probably wouldn’t have built it now. There is little airflow and although it provides shade and we keep it mucked out, flies are a big problem.
The great thing about silvopasture is that the trees provide shade, but because there is good air flow, there are a lot less flies hanging around than there would be in a field shelter.
As I’ve mentioned in previous stories, flies, especially the Blowfly are bad news for sheep. Flies in general are annoying but the Blowfly can kill. Flies are always a concern for us during the summer but it’s a tricky one because sheep don’t fare well in hot weather and actively seek out shady areas to sit in and chew the cud. But if the air flow isn’t good then flies will be a problem which can be just as stressful, if not more so, than the hot sun.
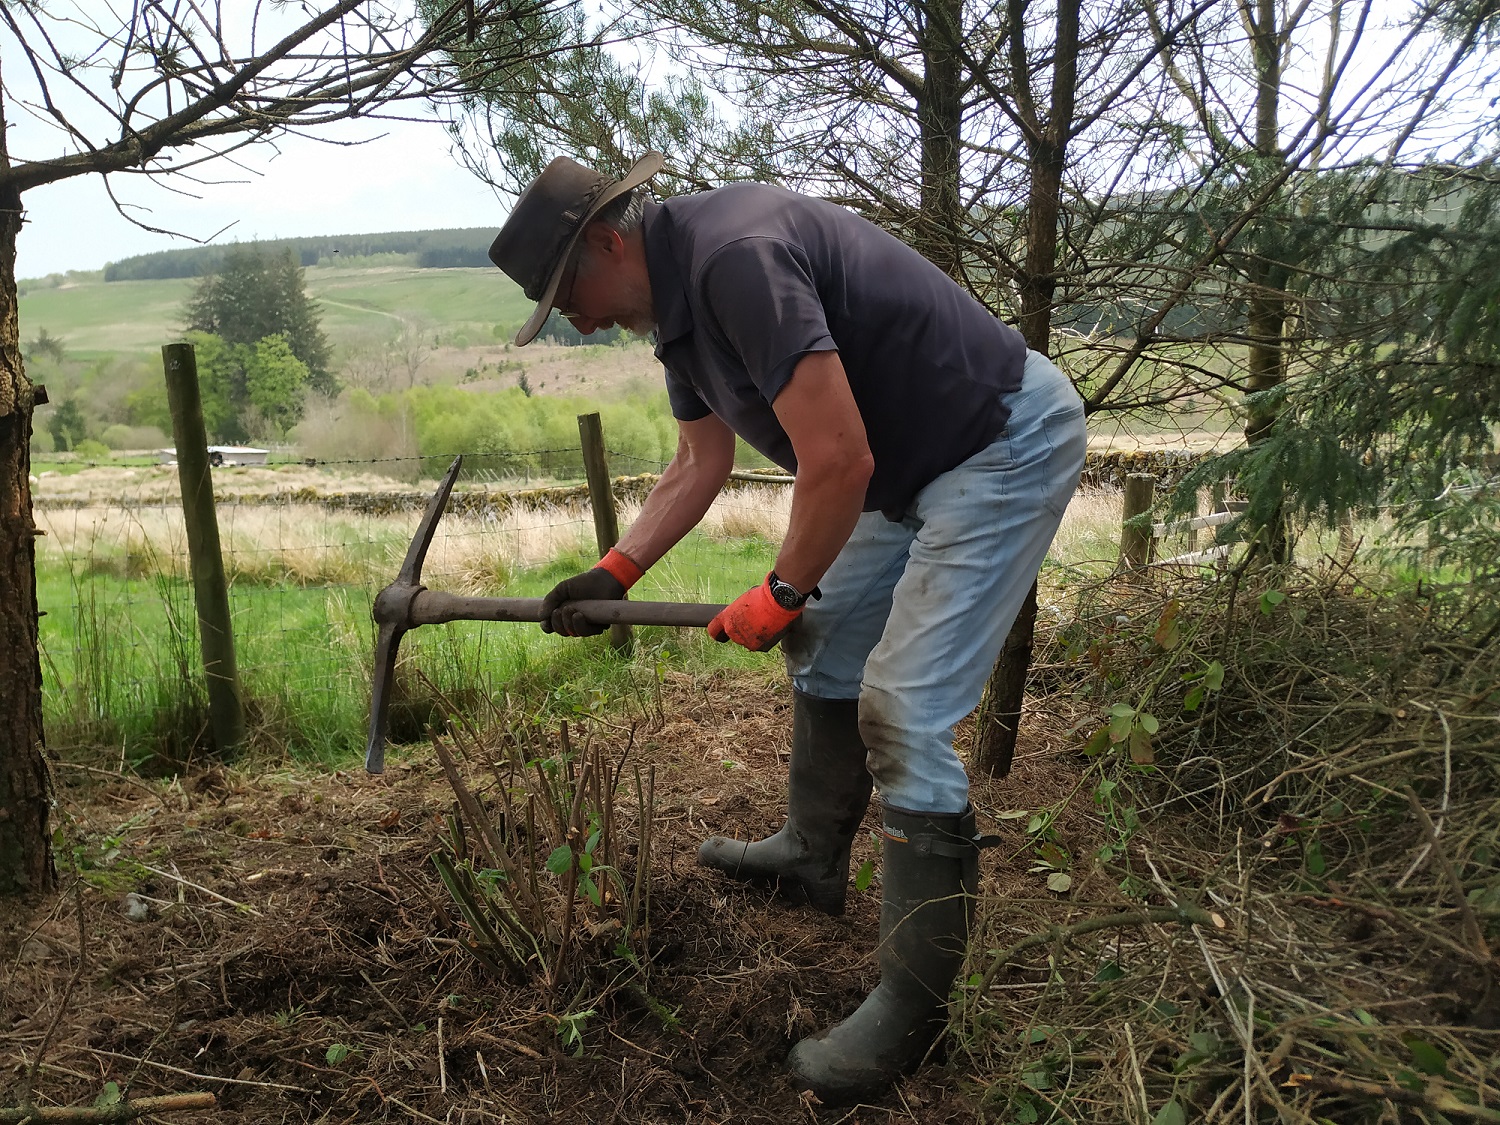
digging out bramble roots
When we made the decision to shut off access to the field shelter last month the sheep were not impressed at all. Despite it being less than ideal, they still love it and go there every day in the hope that they might be allowed in. It’s hard to see them missing their favourite haunt, but we know the new shady area will be a much better environment for them. We did explain this when we shut them out but they weren’t convinced. Sheep are creatures of habit and trundling off to sit in the old field shelter is still firmly part of their daily routine.
Just over two weeks ago we began work on the copse. First of all, Adrian created access to it by way of a wooden gate. This meant banging in a gatepost so we could fix the gate to it.
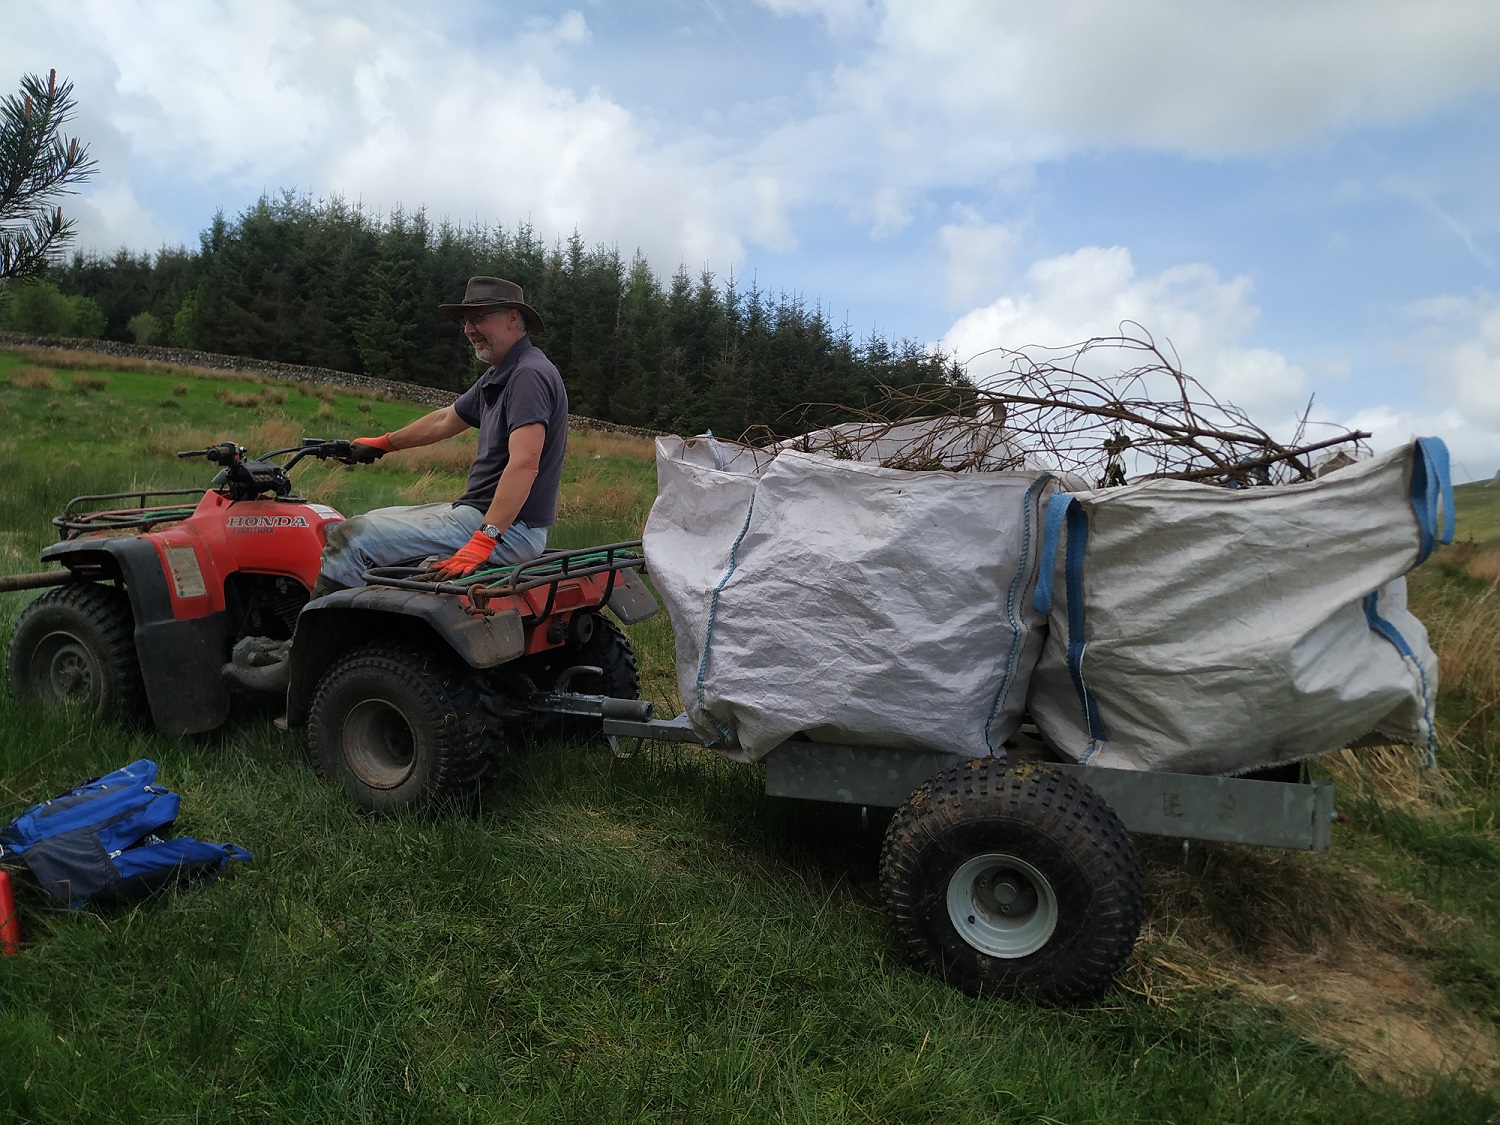
taking away endless bags of brambles
This done, we got our secateurs, loppers and pick axe and began work on the brambles. The copse was absolutely choked with them, they completely carpeted the ground and were halfway up the trees. We really had our work cut out.
We filled 12 big dumpy bags full of bramble branches and roots, we worked for two hours a day and gathered many splinters, so many we lost count.
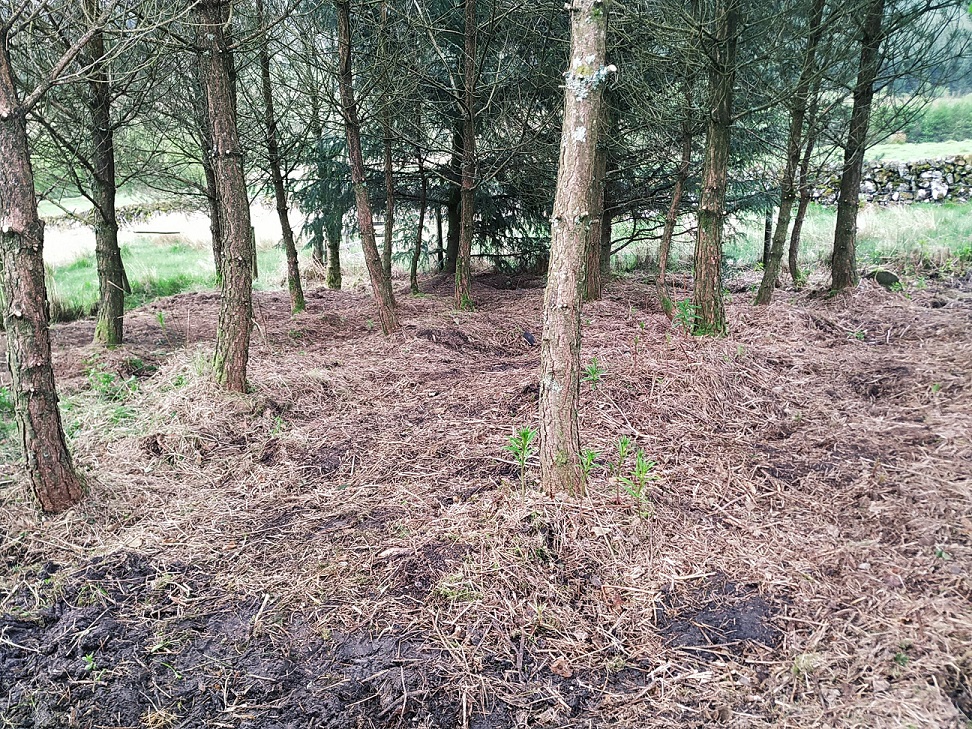
But at long last, yesterday evening we pulled out our last bramble and were able to sit back and admire our work with a much deserved cup of tea and slice of flapjack. It was a very satisfying moment!
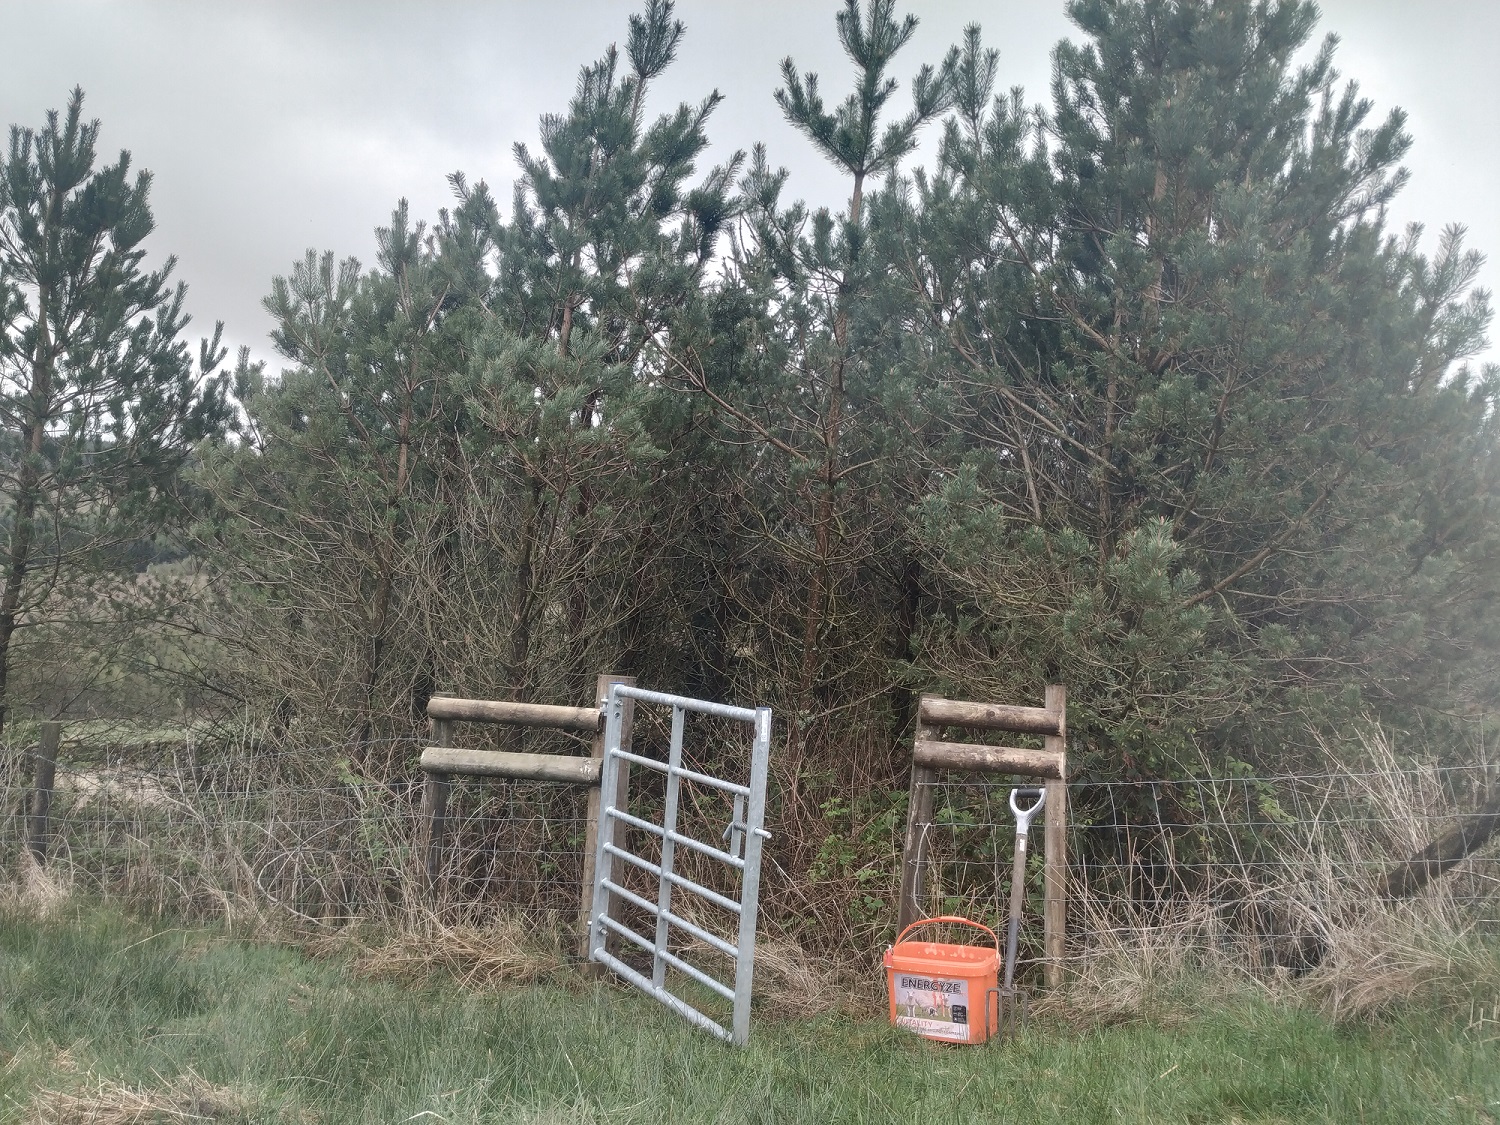
“after”
We will let the dust settle for two weeks and then let the sheep in. They’ll only be allowed in on hot days. We’re hoping that by only giving them occasional access during the summer when there’s plenty of grass about, they won’t be tempted to nibble bark and low growing branches.
There will be another story coming soon about how the sheep react when we let them into their “silvoshelter”, we can’t wait to see their faces when we open the gate for them and let them in to investigate!
A few years ago Adrian and I were a normal couple who had summer holidays and long weekends off, lazy Sundays and spontaneous trips away.
And then we got sheep…
To be honest, we were a little naïve when we acquired our mini flock back in 2014. We wanted to keep the grass down and I fancied doing something with wool.
our first sheep
Little did we know just how much those three innocent looking teddy bears were about to change our lives.
Our first inkling came when we went to the Mole Valley Agricultural store in Bridgewater (in Somerset where we used to live) to buy some sheep equipment. I remember that day well, we were really excited and had a long, carefully researched shopping list containing interesting sounding farmy things like drench guns, hoof shears, hurdles and hay feeders.
After ordering the hurdles, feeders and troughs from the outside bit, we went into the shop to get the rest. We popped hoof shears, a hoof pick, dagging shears, halters, bucket licks and nuts into our trolley. Then we went round to the medicines aisle where we confidently selected a bottle of antiseptic spray.
On our shopping list I’d also written “wormer”, “fluke meds” and “fly spray”. But we weren’t sure which type or brand to buy. There was so much choice! It felt very much like the washing powder aisle in Tesco’s which is somewhere I’d prefer to avoid if at all possible.
So off I went to find someone and to my relief I located the store Sheep Expert. He told us he had sheep himself and was only too happy to help us. He sat us down in a little office where there was a small round table, some chairs, and a life sized model of a sheep. He told us all about parasites; but mainly he told us about flies. He told us flies were the number one concern to sheep farmers and that we would need a fly spray to prevent and to deal with the dreaded Blow Fly. He demonstrated how to spray a sheep correctly using a demo drench gun on his model sheep.
We asked him how flies can kill sheep and soon wished we hadn’t as he went into very graphic detail. He explained that if a sheep is struck by a Blow Fly, she has only days to live. We asked him how to tell if a sheep has been struck, at which point he said, “you have to look for The Signs”. We asked him what these Signs were and he said the main one was the “head turn” where the sheep looks back over her shoulder. “Wild eyes” was another one, “bottom rubbing” and “foot stamping” were other signs, and then finally “any behaviour which is out of character”.
It was at this moment, as we heaved a bottle of Crovect into our trolley we felt the first creeping tendril of Sheep Angst taking hold. What if we didn’t spot one of The Signs? What if we didn’t apply the spray correctly? Actually, how did we even catch our sheep in order to apply the spray? (We’d only had our sheep a few days and were rubbish at rounding them up).
As we drove home, our excitement of a few hours earlier had pretty much disappeared along with a vast amount of money and we were both lost in our own thoughts as we rattled back along the lanes towing our trailer full of shiny new things.
Fast forward a few years and here we are, not exactly old hands and not exactly wiser – but definitely older and more experienced than those early days of sheep keeping.
Unfortunately, we discovered that the “sheep angst” that took hold of us both in the Farmers Store all those years ago doesn’t go away the longer you keep sheep, but you do find ways of managing it.
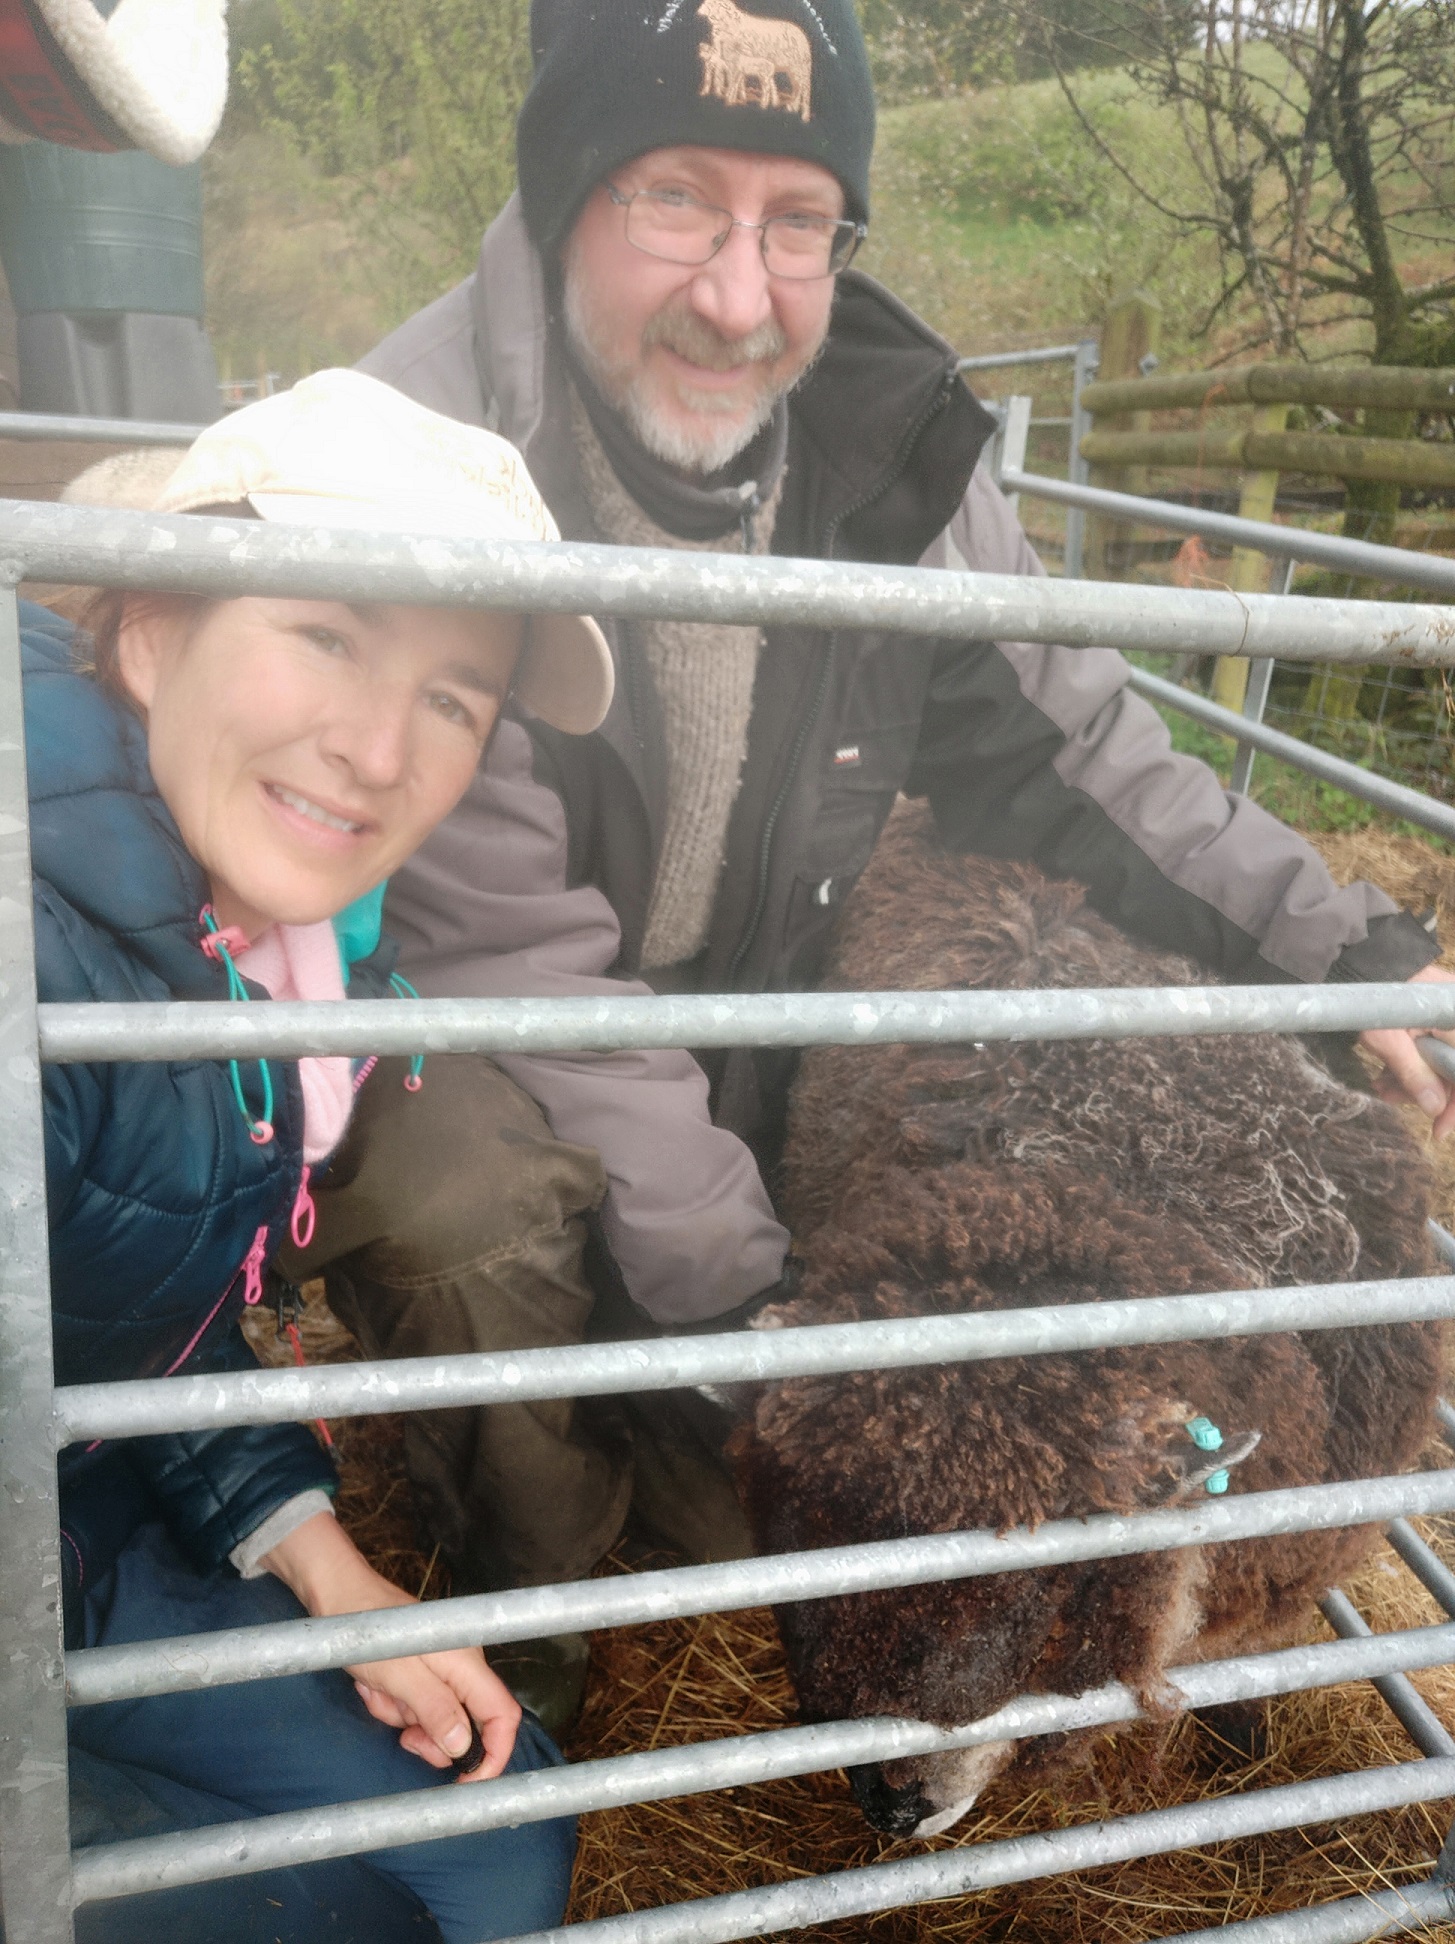
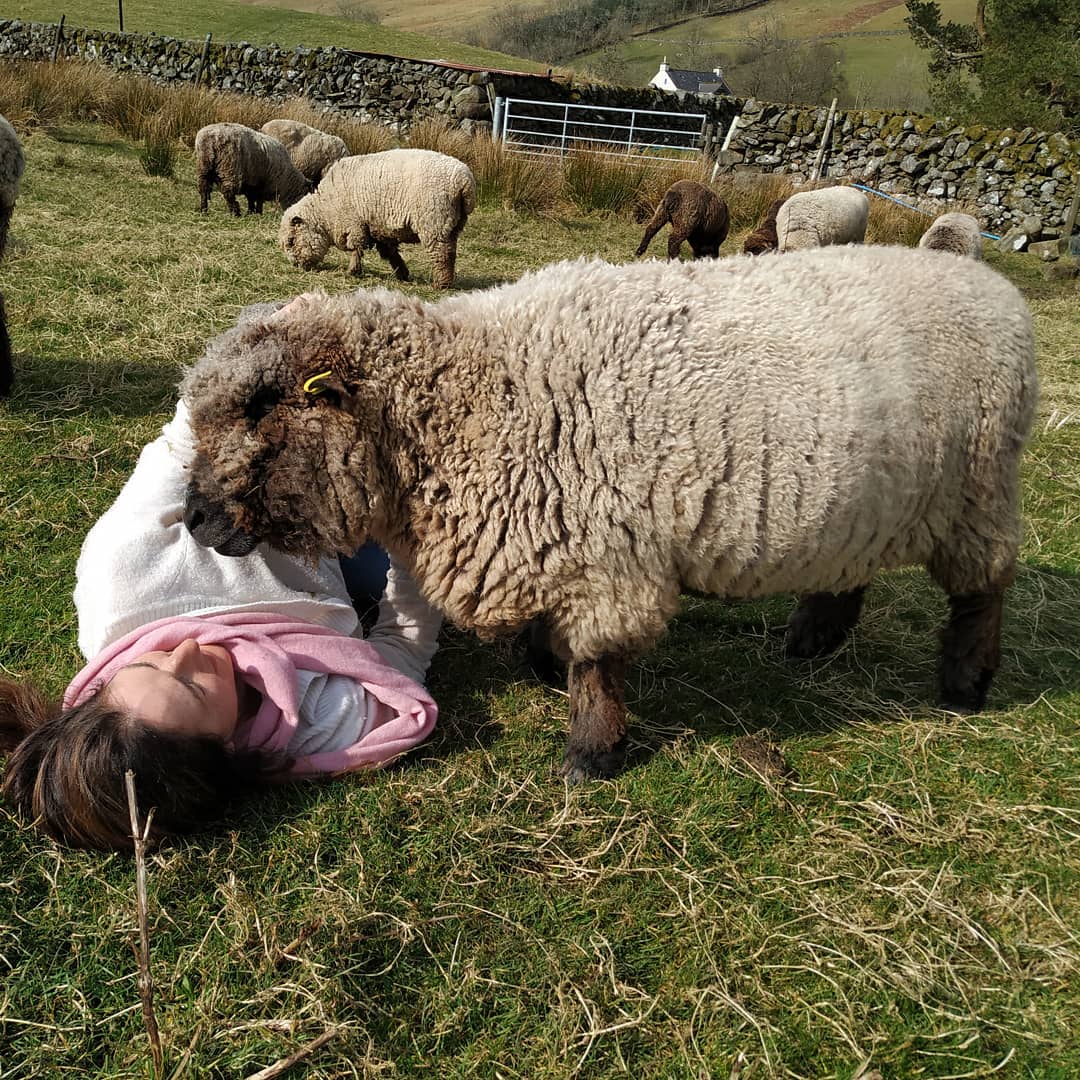
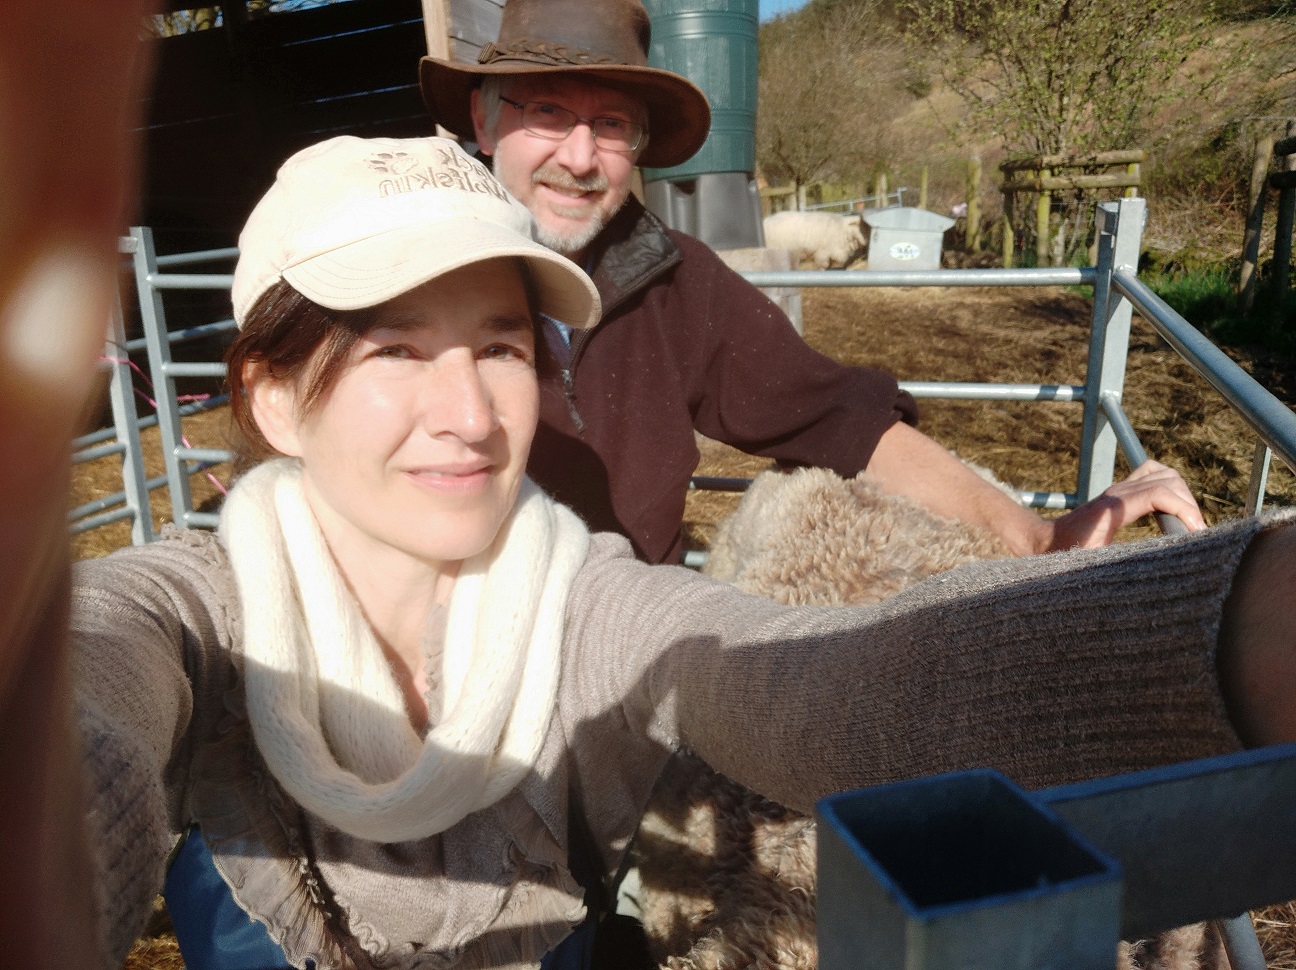
getting to know the flock
The first thing you do is get to know your flock. By observing your sheep you start to learn how they behave and you get familiar with their individual characters. It takes time, but it’s worth it because watching sheep is in itself is actually a lovely activity. There’s nothing quite like lying on your back in the field surrounded by your flock, listening to them cudding in your ear and nibbling your wellies.
The other thing you do is check up on your flock regularly. We check up on ours twice a day, more often if we’re lambing.
We’re very religious about our checks because nowadays we don’t use fly spray. We like to be able to handle our sheep without fear of chemicals transferring onto us. We’ve found that our scrupulous checks and regular bottom trims have paid off, in the few cases of fly strike we’ve had (two cases in four years) we have managed to deal with it very swiftly.
Apart from checking for The Signs, the checks tell you all sorts of other things, you’re mainly scanning the flock to see if anyone’s behaving out of character, you’re counting them to make sure they’re all there, and you’re making sure they’re not in pickles (lame, head stuck in fence, on back with legs in air, stuck in a hedge etc) …
The other thing that happens is, you stop going away as much. Holidays have to be meticulously planned, you book a farm-sitter and you still worry even if your farm-sitter is brilliant as our is. Bye go the lazy Sunday morning lie-ins, and bye go the spontaneous trips away.
On the plus side though, you gain lots of woolly friends and by being around sheep you find yourself learning unexpected things such as the art of patience and how to be calm. You can’t be impatient or in a bad mood with sheep, they sense it and scarper. You have to be able to compose yourself. This is really good training for being a better human. It sounds cliché but sheep have so much to teach us.
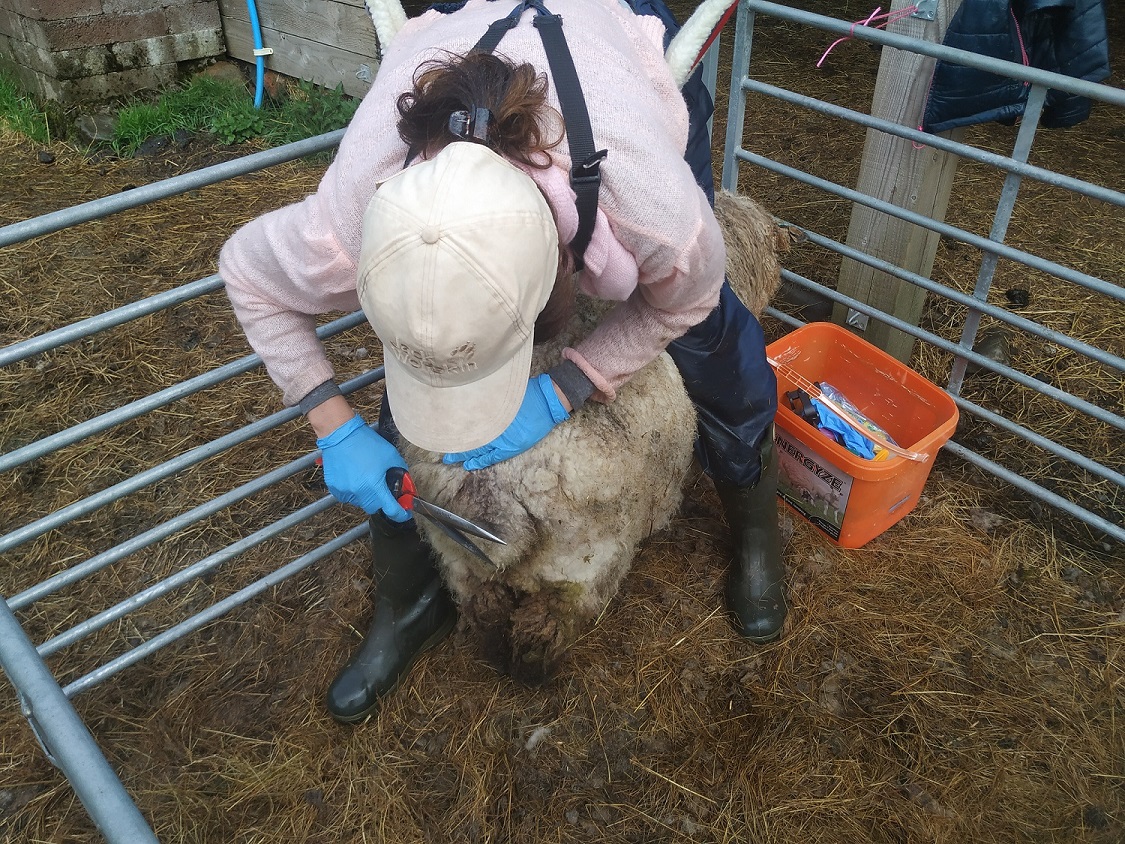
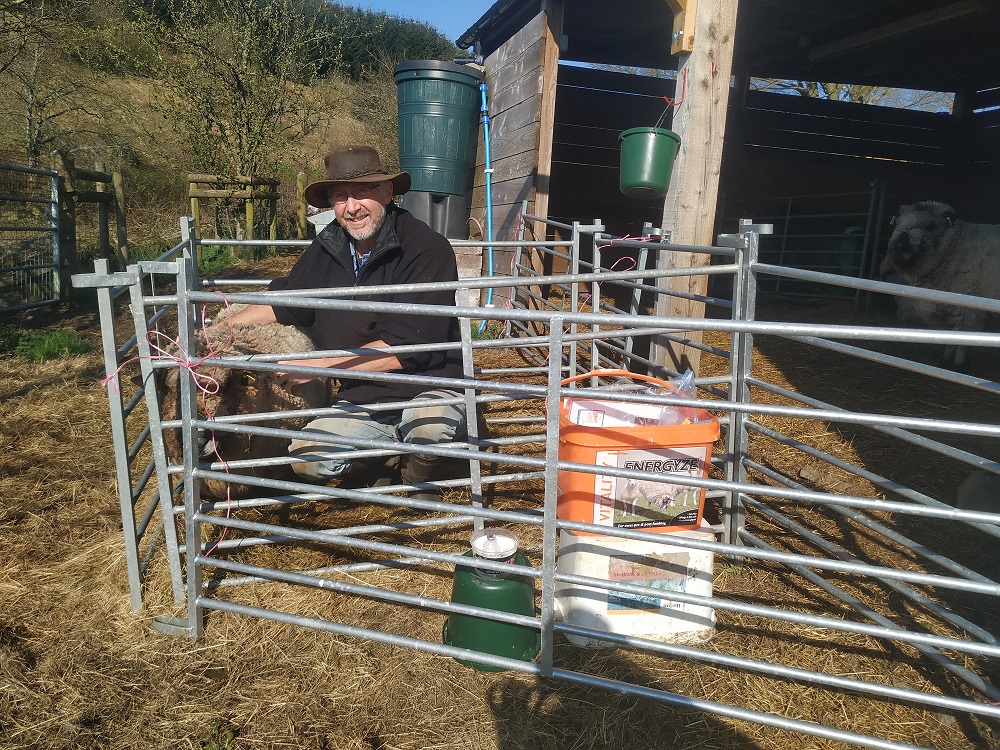
using backeze sling
We’ve also found an easier way to do all those routine things which sheep need regularly such as “crutching out” (bottom trimming), face trims and hoof trimming. We used to bring them in every three months and work through the whole flock. This would take us hours and we’d be fit for nothing afterwards. So this year we decided to bring in three sheep a week and rotate through the flock doing three a week on a continual basis. We thought it would be easier on our backs, and also better for the sheep as they’d have their bottoms and faces trimmed more often and we could catch any hoof problems faster. All in all, so far at least, we’ve found this to be a good system for us.
Yogi with her face trimmed
The other change we’ve made this year is to purchase a “backeze” sling by Longhorn. You can see me using it in the photo. It’s just brilliant! It gives support to your back exactly where you need it but is also springy so you can adjust position easily. It’s made those weekly bottom trims much easier, happy us, happy sheep!
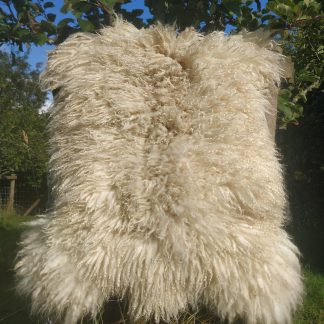
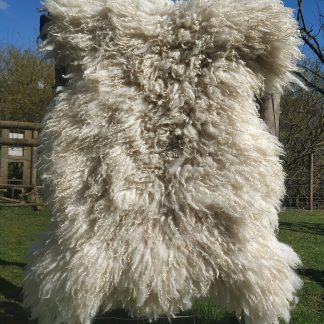
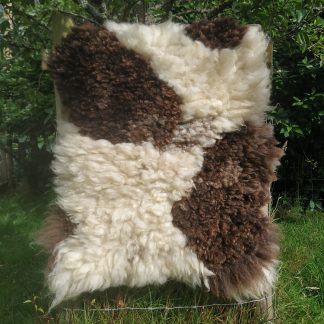
This is the first of a series of articles I’m going to be writing about felting fleeces. As a lot of readers probably already know from visiting our shop, I transform fleeces into sheep-friendly “sheepskin” rugs and cushions by wet felting raw wool, a technique which has been around for many hundreds, if not thousands of years.
When I first started felting fleeces to make into rugs I found it very hard to get information about how to actually do it. There seemed to be a lot of mystery around it and everyone had their own technique and way of doing it. In the end I learned mostly by trial and error.
The hints and tips I’m going to be sharing with you over the coming weeks are the things I’ve gleaned over the years I’ve spent throwing fleeces around in my shed amidst tears and many cups of tea. I’ve had so many disasters and I’m embarrassed to say a lot of fleeces have ended up on the compost heap simply because I lost patience with them. But I’m happy to say there have been more successes than disasters along my woolly journey and so I’m delighted to be able to share some of my favourite tips with you.
Today’s article is about using wool which I’d normally discard to make into something lovely and useful.
I hate waste and one of the reasons I started to make cushions as well as rugs, was so that I could use up leftover wool.
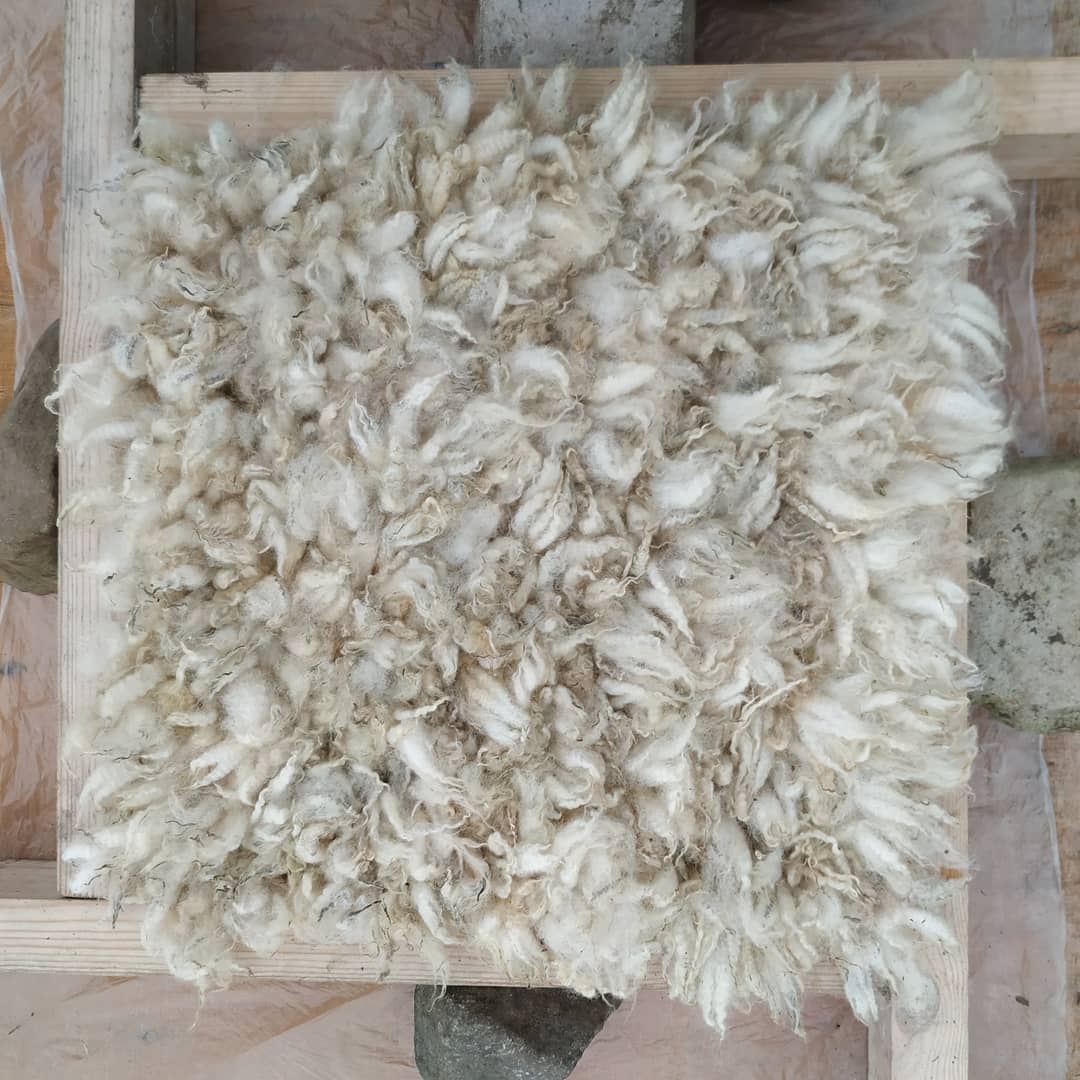
scraps of leftover wool
Recently I made a cushion from scraps of wool I had leftover from a rug that I’d made a few days earlier. The leftover wool was all in bits lying on the floor.
It was really dirty and I was going to scoop it up and chuck it on the compost heap for the birds to use for nesting, when I realised that beneath the grubby exterior the wool was actually lovely quality.
Never judge a book by its cover I said to myself as I piled the scrappy wool onto my work table and got to work separating out the nice quality (albeit very dirty!) wool, from the not so nice quality, matted bits.
I was really careful about keeping only the nicest bits, any wool which was even a tiny bit matted or didn’t feel right I discarded. This was quite tricky because most of the wool was so dirty it was hard to imagine what it would look like clean. I did wonder if perhaps I was being a little over optimistic!
After a couple of hours of sorting I had enough wool to lay out into a cushion shaped frame and was able to felt it into a cushion cover.
It took a lot of washing but I was really pleased with how it turned out. It was a real “before and after” moment!
So, even scraps of wool lying on the floor can be transformed into something lovely, but mytip would be to make sure you use only good quality wool from the scrappy pile. Tempting as it may be to want to rescue all the little bits of wool you can, remember dirt can be washed out, however nothing will remedy matted or bad quality wool, you’re best leaving those bits for the birds to make into cosy nests.
There will be washing tips coming up in subsequent posts, washing raw fleeces is one of my favourite geeky things but I have so many tips that I’m going to split into several posts.
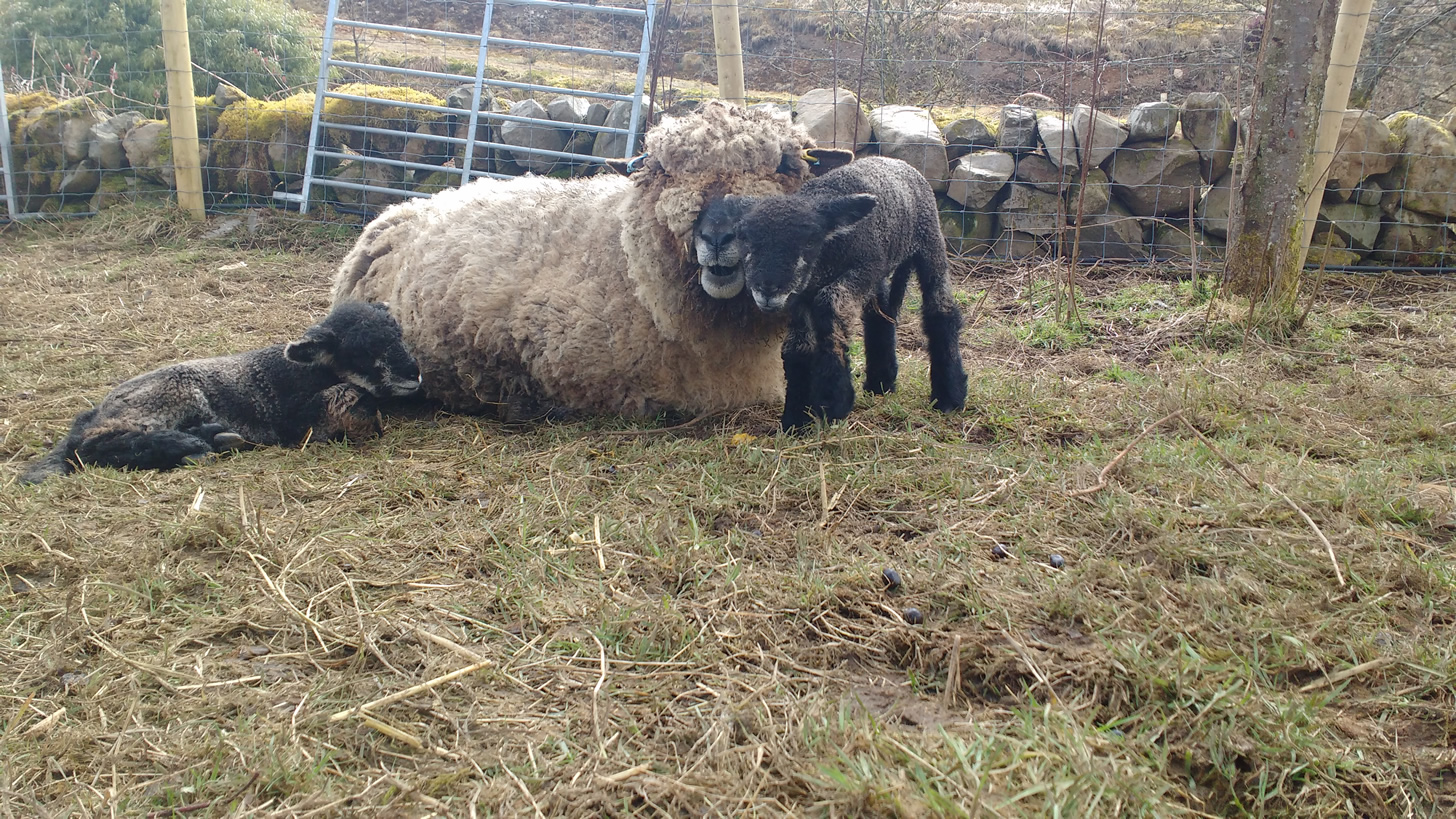
From time to time sheep pick up things and become ill, particularly lambs. Similar to newborn babies, lambs are particularly vulnerable to disease as their immune systems have not yet built up that all important resilience which only develops over time as they mature.
We always joke that lambing is not over once all the lambs are born, it goes on for another 3 months at least, with all the checking and monitoring of the little ones to ensure they’re all healthy and not on their way to the great pasture in the sky.
A couple of years ago we caught Yin on her way skywards thanks to a nasty attack of coccidiosis (parasitic worms). Fortunately we found her in the nick of time and were able to give her life saving medication. Yin is still with us to this day and is a big robust girl.
Not only are parasitic worms a problem for young sheep, but also “clostridial diseases” – for example pulpy kidney, tetanus and bloody scours. In addition, young sheep are also susceptible to “pasteurellosis” (pneumonia).
All of these conditions are serious and so we are very fortunate to have a vaccine called “Heptavac P” which helps prevent these diseases from taking hold.
Every year, approximately four weeks prior to lambing, pregnant ewes are vaccinated with Heptavac. Antibodies develop in the ewes which then cleverly pass through to the lambs via the colostrum.
We’ve Heptavac’d our woolly gang as long as we’ve had sheep and have continued to do it even though we no longer lamb. I’m not sure why the thought struck me this year and not in previous non-lambing years, but it occurred to me that perhaps we didn’t need to vaccinate our sheep. Afterall, they are mature and have developed antibodies. Aside from that, they’re fit and healthy from their stress free existence here on the farm, no lambs to worry about, the most they have to ponder is where to find the tastiest blades of grass and where molehills come from.
I decided to phone our vet and find out, I wanted to know whether mature sheep retained immunity against clostridial diseases and pasteurellosis and whether we would be wasting our time (and money) on vaccinating a non-lambing flock.
I love a bit of science and when the vet gave me the low down I was so excited I had to make myself a cup of tea and sit down for a moment.
I learned that although sheep retain immunity against pasteurellosis, they do not retain immunity against the clostridial pathogens which reside in the soil.
I learned that there’s a different vaccine which we can give our non-breeding flock (and not forgetting wethers) called Covexin. This doesn’t include the pasteurellosis protection which wouldn’t be needed.
As we already had a bottle of Heptavac in the fridge we decided to use that, but next year we’ll probably get Covexin.
So we gathered our sheep in last week and gave them all their jab, they weren’t too impressed, but we reminded them that we had their best interests at heart. They also each got a wee handful of sheep nuts so that they went away post jab with a happy experience in their minds and a sweet taste in their mouths.
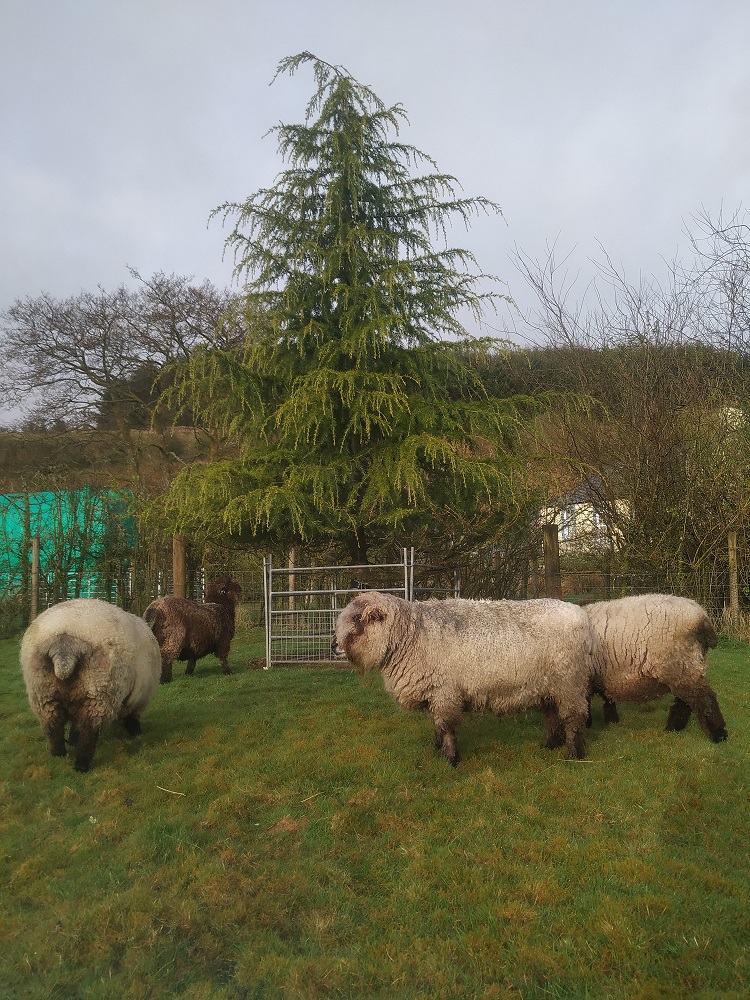
On our smallholding our main focus is making sure our animals have a long and happy life, but we also love plants and if there’s a plant in trouble, we’ll make sure we do our best to save it. This story is about our efforts to rescue a beautiful Himalayan Cedar tree.
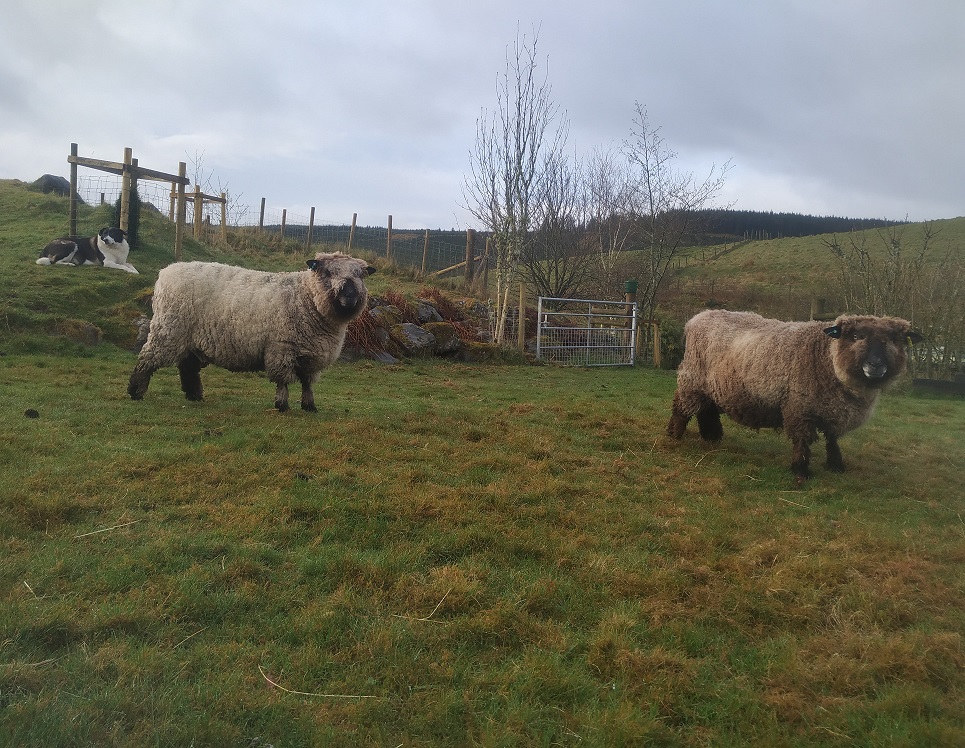
During the winter our sheep spend a lot of time in the orchard where they have access to the shed and hay feeders. They can still trot off to the wider pastures if they choose, but they tend to hang around the orchard for much of the time, especially when the weather’s blowing a gale.
Last year we extended the orchard to include more meadow and give them extra space to mooch about in. During the winter the ground can get really muddy, especially around the hay feeders so we thought the additional space would be much appreciated by the little dears. And it was!! They love the new bit, it includes a hill which they trundle up and down, and also several trees which they like to stand under whilst watching the world go by.
We also love the new bit, it’s great to know we can give the sheep variety, particularly access to trees. Trees give perfect protection against the elements; in the winter they provide wind breaks and in the summer they provide cool places to sit under and chew the cud.
In the orchard we have apple and pear trees which are all neatly protected with tree guards. Sheep love trees but they also love eating them!!
In the new bit, there’s a Himalayan Cedar tree which somehow we forgot to protect. But the sheep didn’t seem that interested in it and so we thought no more about it.
Summer turned into autumn and then winter and the little ones were spending more and more time in the orchard again. Early one December morning we were topping up the hay feeders and discovered a suspicious looking, four legged woolly crowd loitering around the Cedar tree. As we drew nearer we heard scraping and nibbling noises. On closer inspection we discovered a wide, neatly nibbled orange band all around the tree trunk, at exactly sheep head height.
Oh no!!! Our tree had been completely ring barked!
After feeling awful about the fact we forgot to protect our poor tree we quickly got to work. First we put some sheep hurdles around it to prevent further damage, then we googled “what to do”. Now I’m a horticulturalist, RHS trained thank you very much and I do people’s gardens but the truth was, I felt really daft because at that moment, I didn’t have a clue what to do. I had an inkling there was a grafting technique out there for ring barked trees, but I couldn’t remember what the technique was called, let along how to do it.
After multiple searches on google and several cups of tea later I found the info. There was a technique called a “bridge graft”. This entails taking lengths of one year old growth (scions) from the upper canopy and attaching them across the damaged area, like little bridges, so that the sap can continue to flow from the bottom of the tree to the top.
We also had to protect the nibbled bit (which was actually quite a large area!) The RHS website recommended applying damp moss all over the injury and holding it in place with tape. So first we did this, (luckily we have moss aplenty here!) Moss is naturally anti-bacterial so makes the perfect dressing for a wounded tree. We got to work applying the mossy bandage until the whole wound was protected.
Next, Adrian whizzed off to the shed to rummage around for some small non galvanized nails. We would need these to attach the scions to the trunk.
Then, tools at the ready, we got to work. We had to work quickly because it was due to rain later and you can’t get grafts wet or they rot.
It was heart breaking standing on the ladders and snipping lengths of growth from the already damaged tree, I felt like a traitor. But it was the only way we’d be able to save our poor tree so I carried on snipping.
Once I had six healthy scions I took my knife and made little “pockets” into the tree trunk so that I could pop the scions in. Easier said than done! The sheep had nibbled the trunk so far down that the only bark I had access to was rough and not at all pliable. But I persevered, and eventually, lots of grafting wax and nails later we managed to create a circle of grafts all around the trunk.
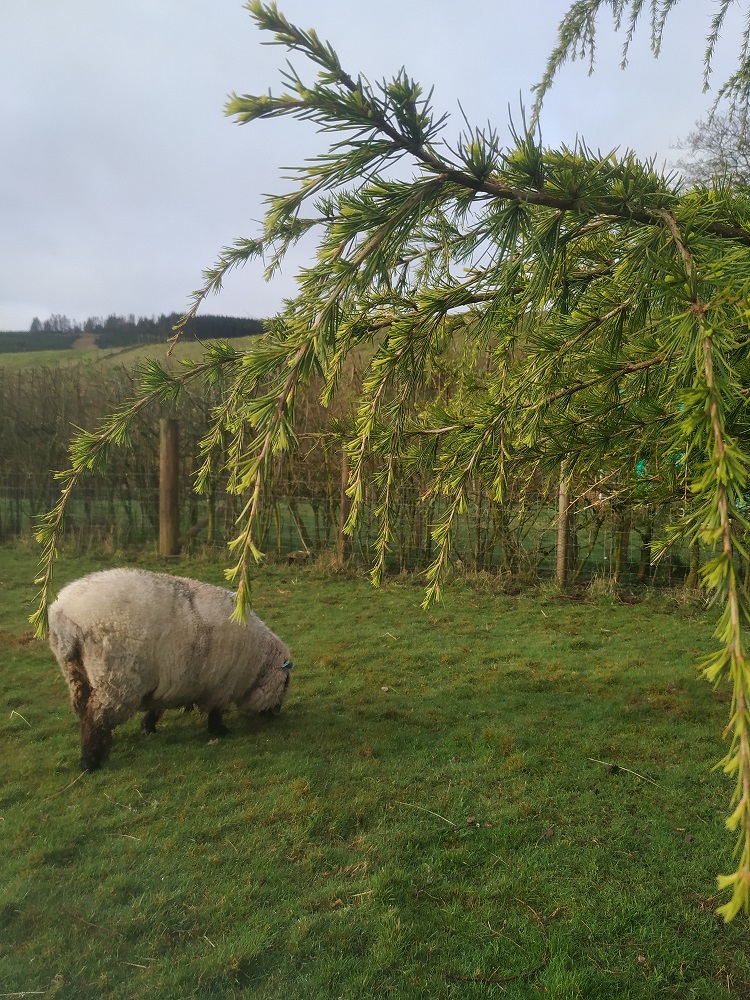
Then we waited until spring … until now in fact, to see if the tree would make it.
We are pleased to report that so far so good! There are fresh shoots and there doesn’t appear to be any signs of die back.
All the grafts except one, survived the winter storms and they appear to be doing their job, transporting nutrients from the bottom of the tree to the top.
We have started a two weekly regime of feeding with juice from our wormery. Plants love wormery juice, it gives them a real boost, even though it’s a bit whiffy.
We’ll leave the mossy bandage on through the summer and remove it in the autumn. It’ll be tricky to remove because of all the little bridges which sit over it, but I’m sure we’ll manage.
Meanwhile, we’re not counting our eggs, but so far so good. And the sheep, well, they spent a few days trying to get to their new favourite snack but the hurdles proved to be a good defence so they gave up. Now that it’s spring they prefer grass to trees anyway.
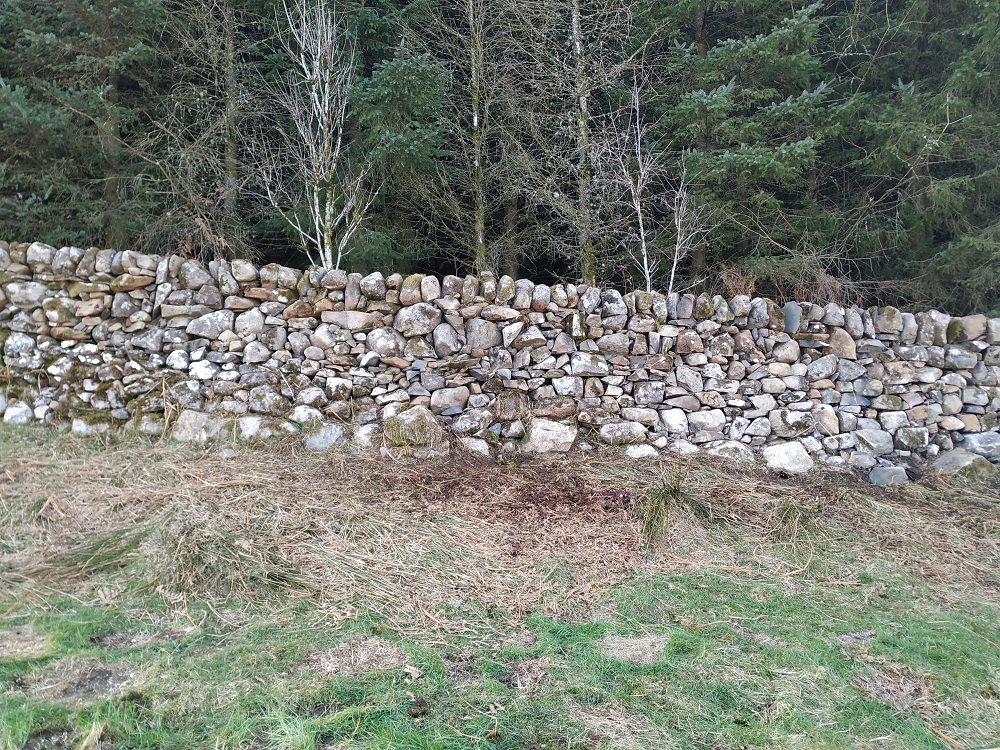
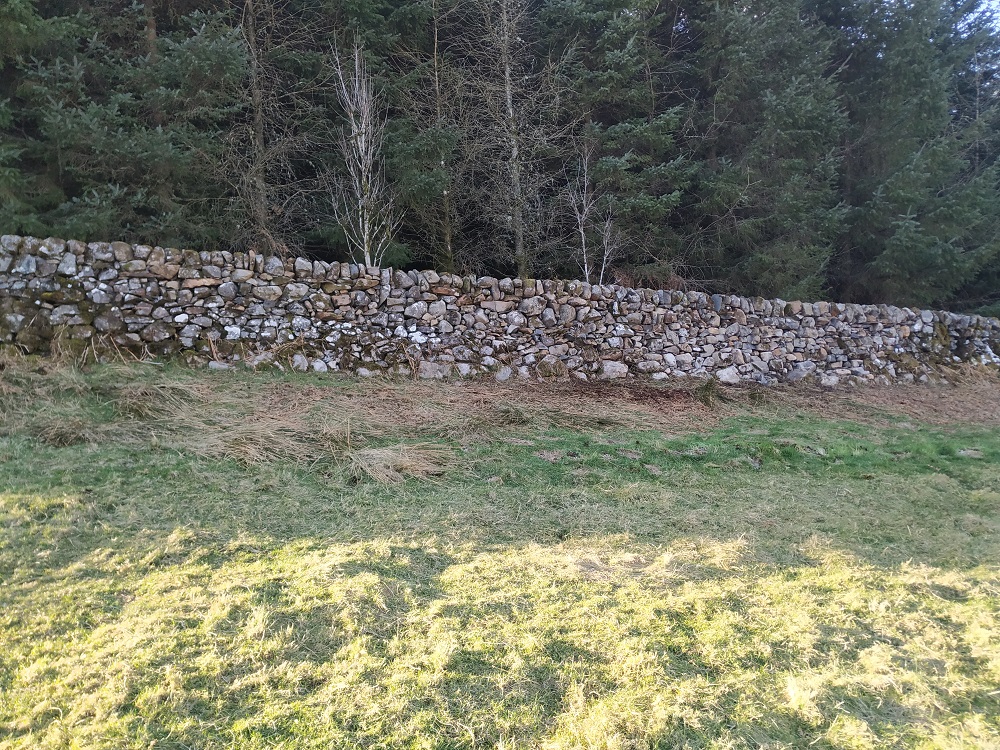
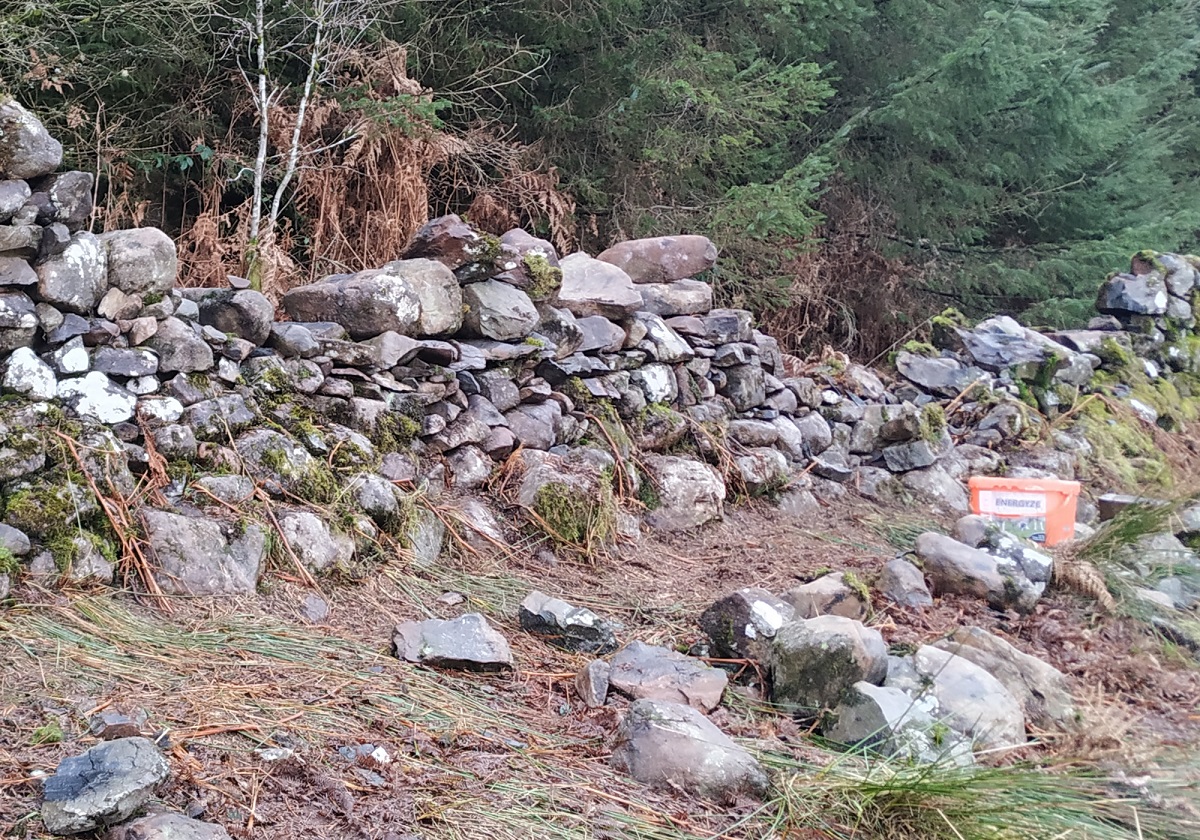
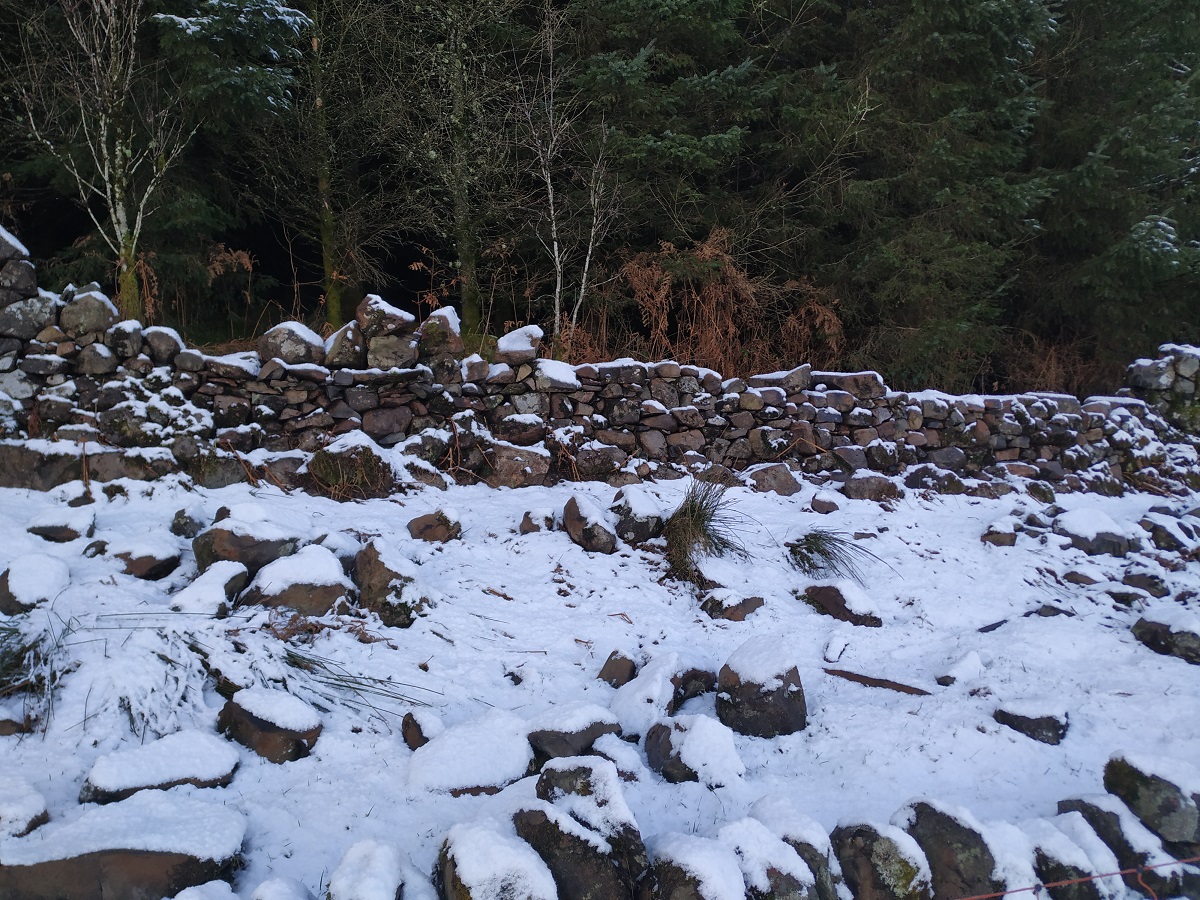
Earlier this year, I wrote about a drystane dyke that had a small gap of fallen stones but was to be a major repair (Major Stone Dyke Repairs After Walker Damage). It has taken a while, but repairs are finally complete. All in all, I had to take down 17 metres of dyke to find two relatively stable upright sections at either end. Indeed, such is the poor state of the wall, I could easily have taken a further 10-15m down. But there’s only one of me and I try not to bite off more than I can chew.
The problem is that the wall is old and there has been settlement along its length. The settlement is uneven and this causes the wall to lean, much like the Leaning Tower of Pisa. However, a drystane dyke leans in both directions and ends up looking like a drunken snake. The top stones, originally held in place by gravity, end up held in place by friction with gravity trying to pull them down. The merest touch can send them tumbling with a cascade effect. Indeed, you have to be careful of mini rock ‘avalanches’ when taking it down.
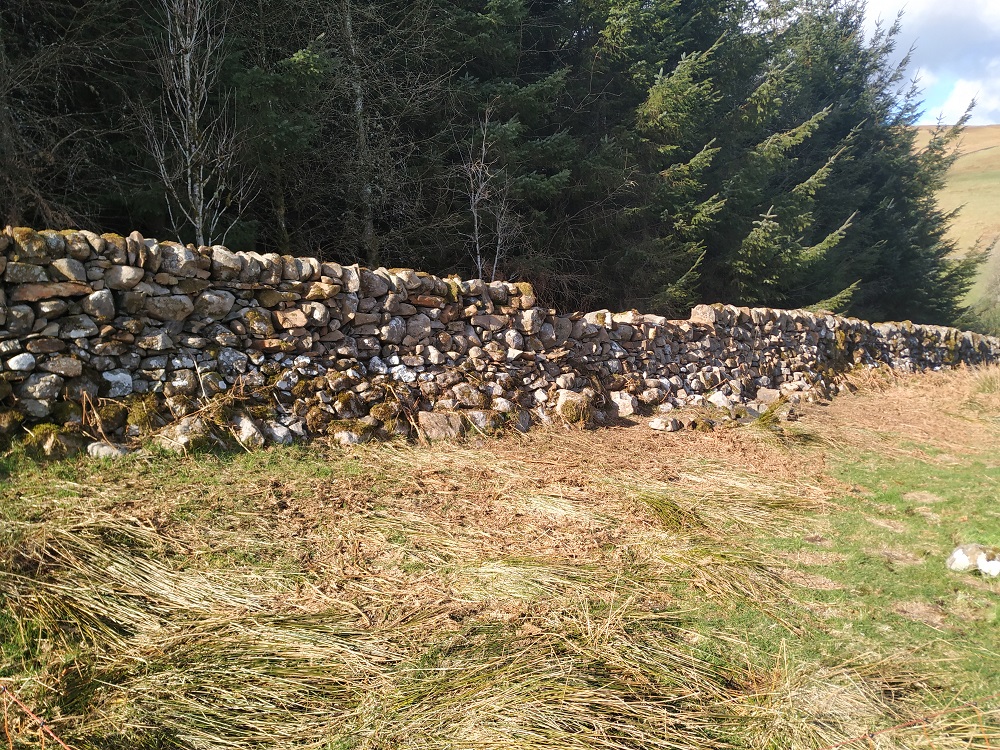
I also had the joy of manipulating some rather large stones, ones that I knew if I put on the ground I’d never get back up again. So I had to repair the bottom half in stages, shuffling these monsters along. Once I had the bottom half complete, I spaced them out and they looked like giant’s teeth.
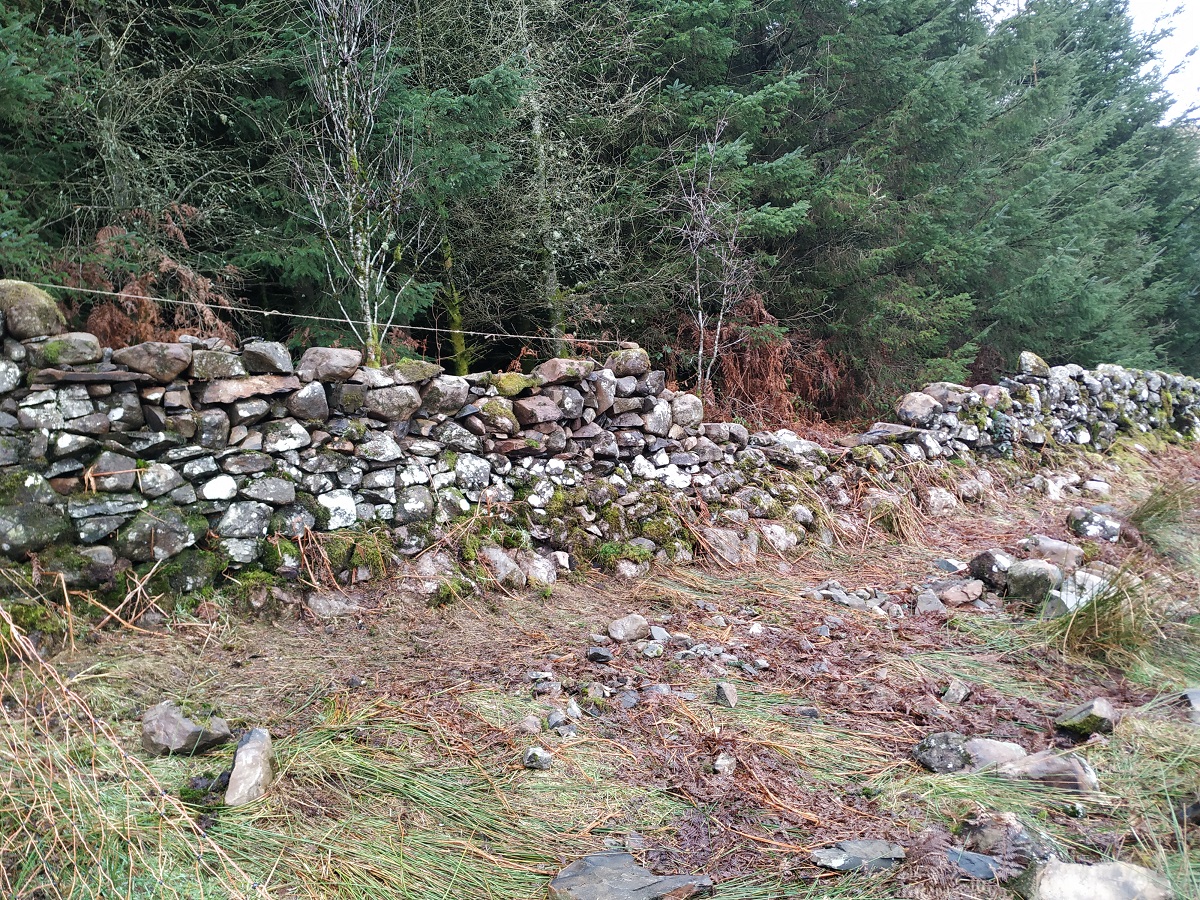
Bit by bit, I rebuilt it until, this week, encouraged by milder weather and the appearance of what was beginning to feel like spring sunshine, I got to the point where I had just the top to do. This can take a while as you can spend a lot of time pondering which stone to use next (not to mention trying to find the tape measure you had in your hand moments ago) – the goal is a straight line at the top, not easy with stones of various shapes and sizes.
As ever, with just a few meters to go, I had to keep going and yesterday, around tea time, I was able to step back and sigh gratefully. My back complained but the pain was trumped by the joy of finally seeing the drystane dyke restored. And, I have to say, I am mucho pleased with how it looks.
The next repair is already beckoning (these dykes have been somewhat neglected), but I have a few other jobs to get on with, not least writing my second novel and getting this year’s veggies planted.
Last year, we extended our paddock area with the addition of what we creatively call the ‘new paddock‘. While it’s great for the sheep (more grass and space), we thought it would be good to add in something for ourselves. We already have a few apple trees but not enough to make cider vinegar, cider and keep a few bye for those winter pot roasts. So we decided to add some apple trees.
This turned out not to be as easy as it sounds.
First, there must have been a run on apple trees last year because we couldn’t find any at our usual suppliers. ‘Out of stock’ loomed large and often across every web site we visited. Eventually we found some at the aptly named ‘Adam’s Apples‘. We bought a pack of ten and sat back to await their delivery. Bare rooted trees need to be planted in the winter months so even when ordered in the summer, they are not shipped till the planting season.
We received our email of impending delivery in January. We smiled in anticipation.
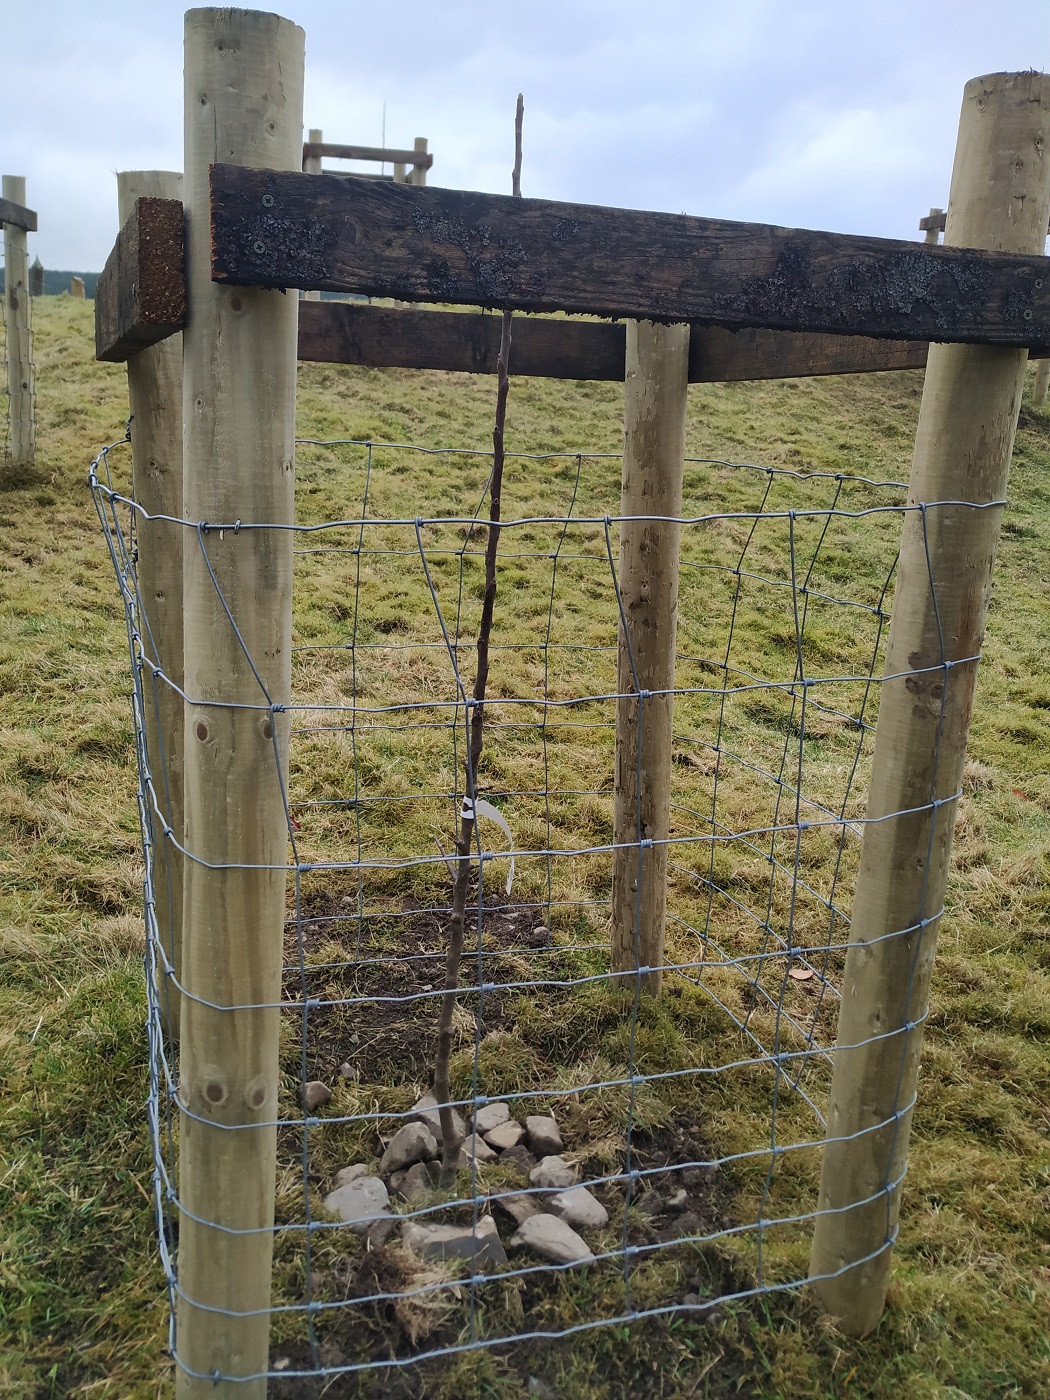
Now, these trees were going in a paddock to which our sheep have access, so they needed protection. Having planned ahead, I had already bashed in the 40 stobs and screwed on the rails. Thinking ahead, I had not added the stock fencing which would have made it hard to dig any holes.
Of course, first the trees had to get here. The courier was one we had not heard of before and that got us to worry level one. New couriers have a track record of going missing in action round here. Sure enough, the courier never showed but the tracking showed our trees as delivered. Worry Level 5. It was a Friday evening with harsh frost forecasted. Worry level 8. If these trees had been left out, they were in peril. I rang the courier company (who shall remain nameless) and was told to contact the shipper. No help there then. I contacted Adam’s Apples only for them to find the courier had downed tools for the weekend. We were now at worry level 10, but there was nothing we could do.
Monday morning and I was up the hill repairing a stone dyke from where I saw a large green van (clue) arrive, execute a fast turn and disappear. When I came down for a tea break, I found the trees leaning against the front door and ‘neatly’ carved up grass verges.
Well, at least the trees had arrived.
I unpacked them and they looked OK so I quickly heeled them in. A couple of days later, Nicole and I set off to plant them. I dig the holes and she does the planting, we make a good team. Digging the holes took a fair amount of effort due to the rather large number of stones I had to dig out. But, with good sized holes, a dash of leaf mould (rich in mycorrhizal fungi), home made compost and feed, the roots will have the best possible start.
After digging the ten holes, I then ran round adding the fencing before the sheep cottoned on to what we were up to. They’d have stripped the bark in seconds.
We are delighted with the results and look forward to a bumper crop. In an amazing fit of organisation, I even made a map of which trees are planted where – they are all different varieties.
Next job, find somewhere to install the apple press. Hmm…
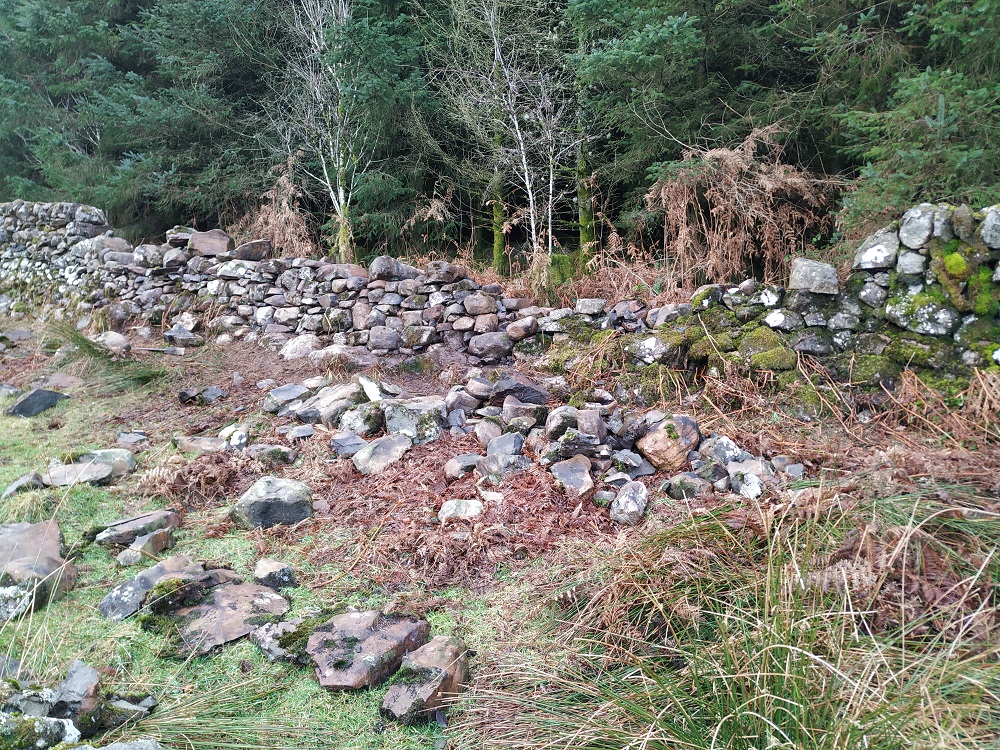
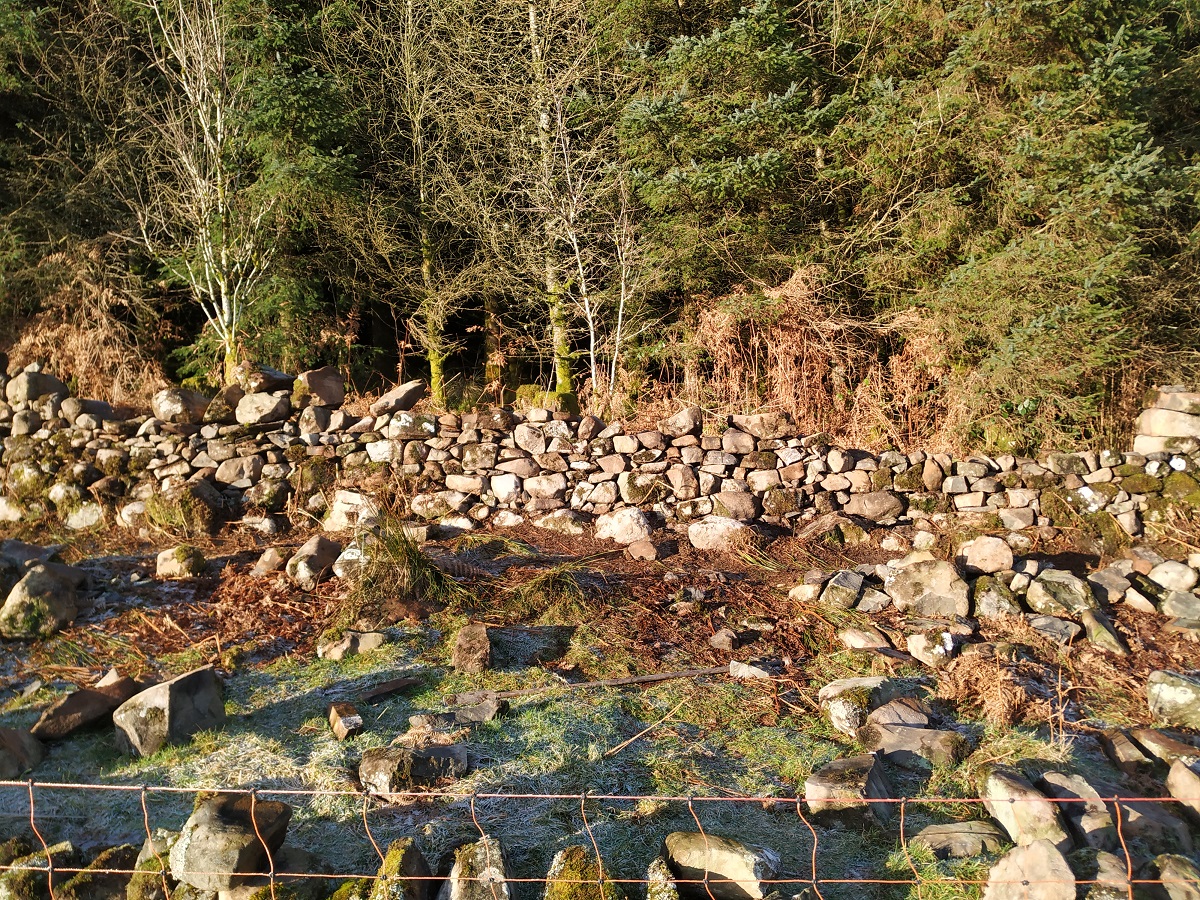
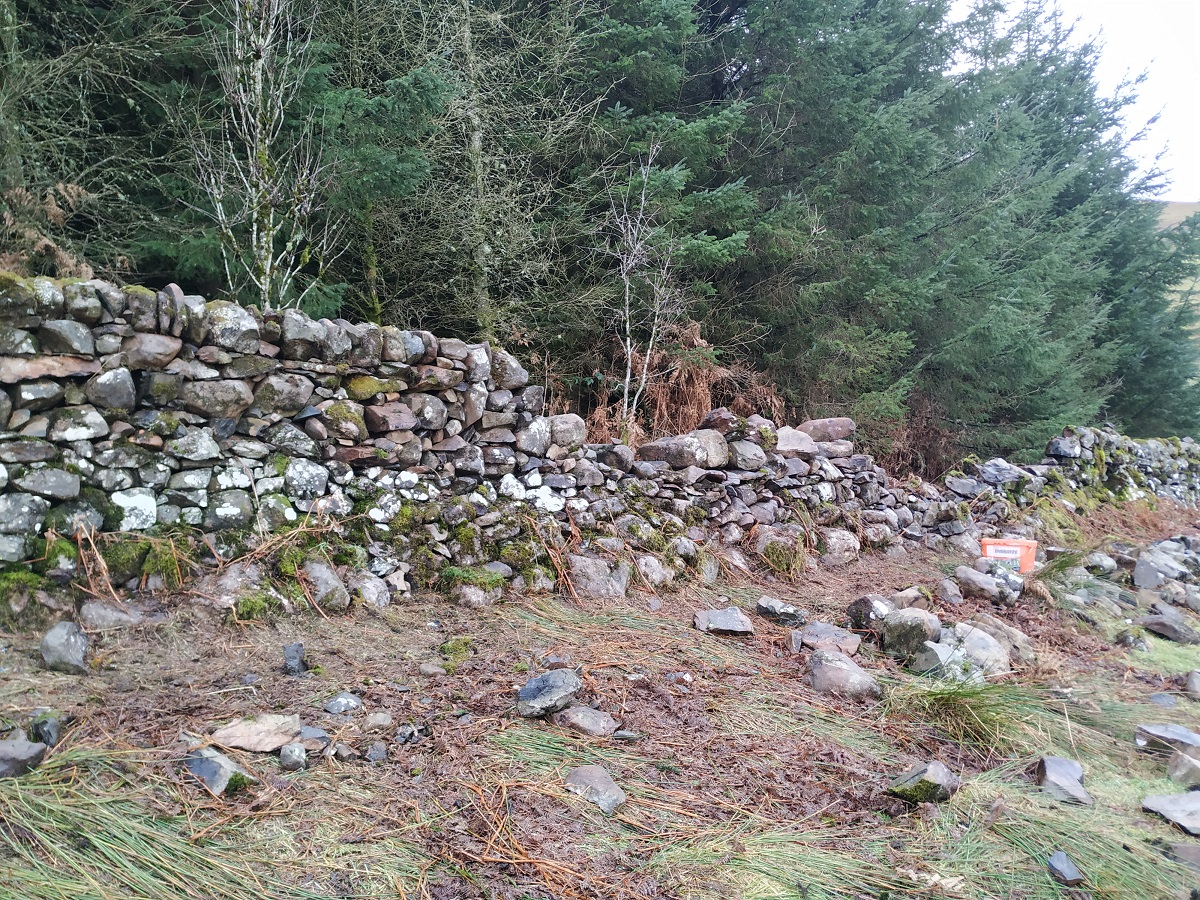
Regular visitors to this blog will know I spend a fair amount of time repairing the dry stone dykes we have here. We inherited some fallen down sections from the previous owners and a couple of storms did some damage as well. However, the latest repair is down to what can best be described as inconsiderate behaviour by walkers who clambered over one of the most fragile sections of wall, loosening and dislodging a few stones in the process.
At first glance, it seems like nothing. You can see the small gap in the photo to the right. You might ask why I didn’t just replace the fallen stones. The answer is that it’s not that simple. What the photo doesn’t capture is that the wall is leaning quite markedly away as you look at the photo. So, the seating for the stones is not level and in any attempt to replace them, gravity would simply pull them back to the ground. Even if you could get them to stay there, it would only be a matter of time before they fell off again.
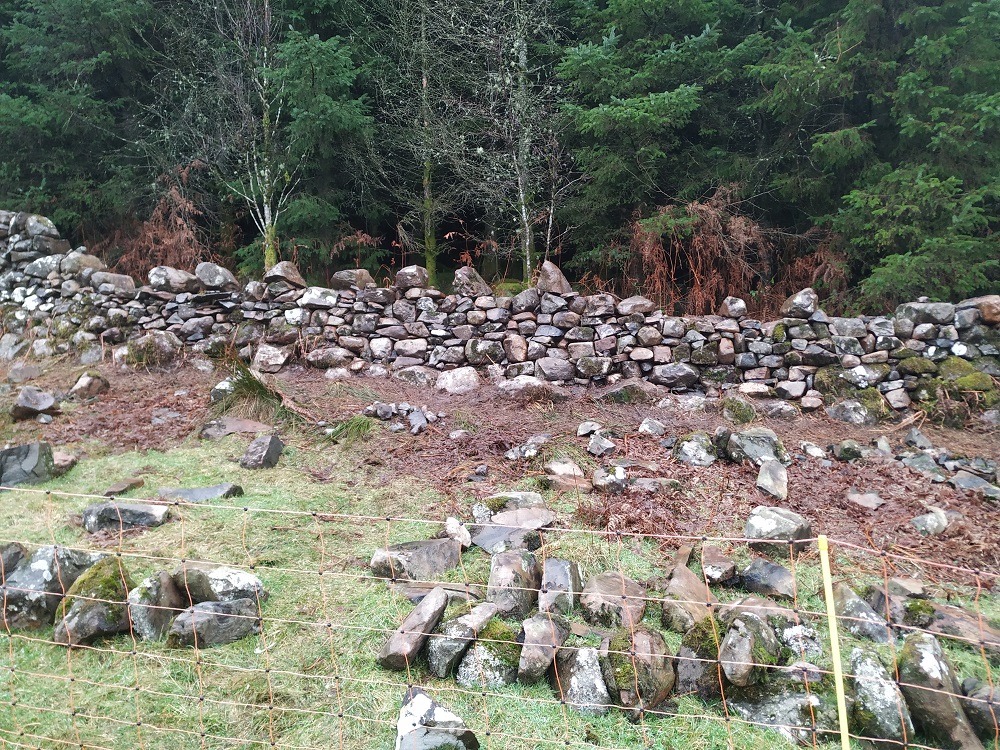
The wall is important to us as it keeps the sheep from wandering off into the forest next door. So, the first thing we did was put an emergency sheep fence up.
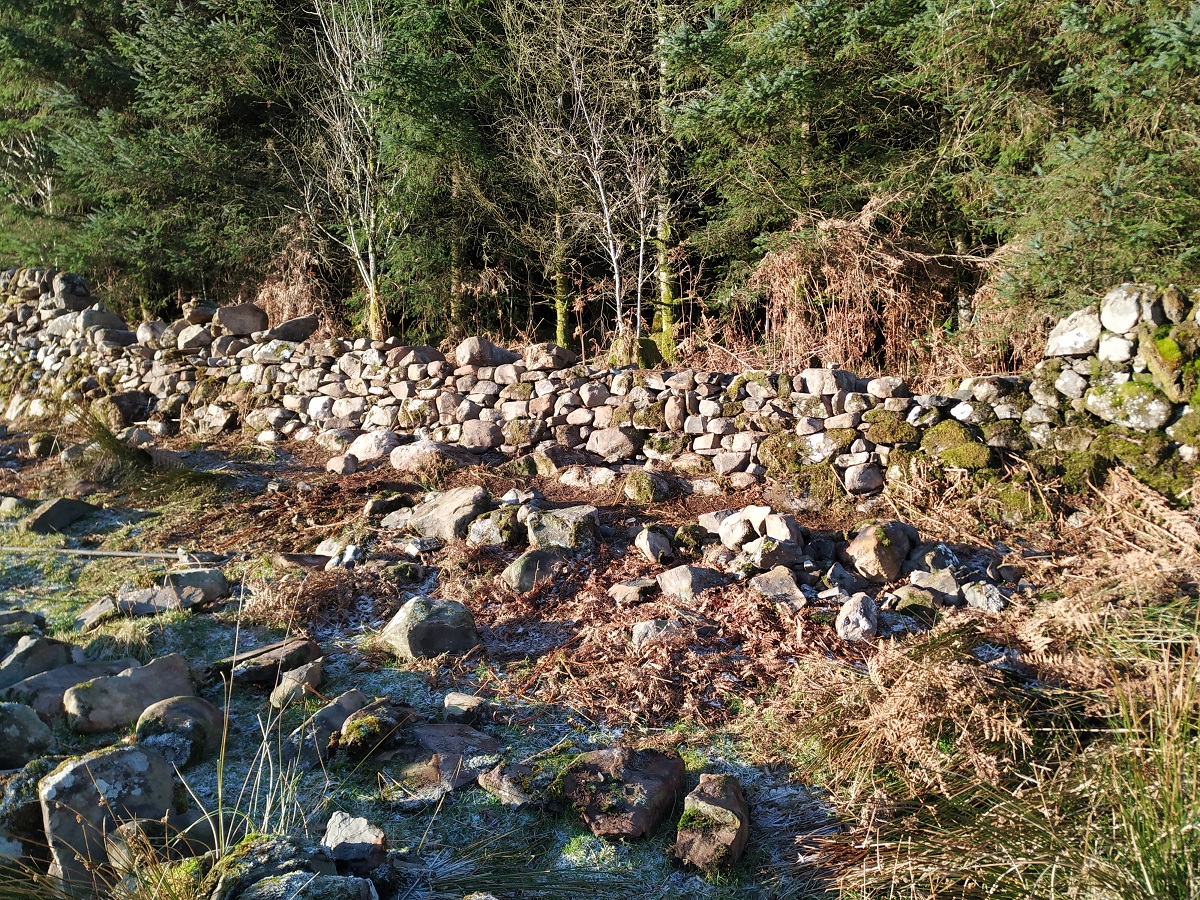
large stones sitting on wall
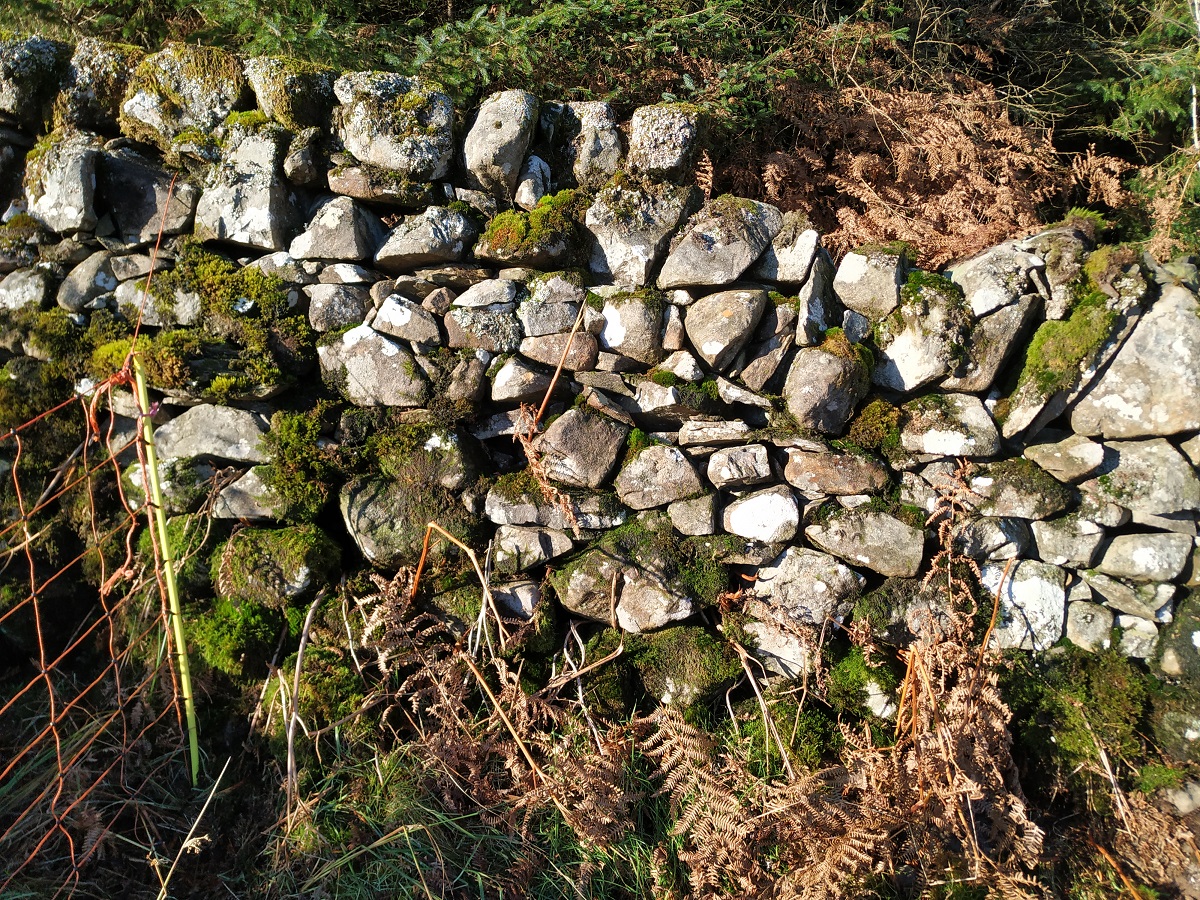
The problem with old dry stone dykes is, in a word, settlement. A dry stone dyke comprises essentially of two walls built in parallel. Between the walls are placed what we call filling stones and these keep the walls upright. Half way up, large stones are laid across the two walls to hold them together. These are called through stones and they give the wall its strength. Then two more walls are built on top of the through stones and these are capped with a neat line of coping stones. Sometimes, if the stones are large, the top half is a single wall. This is called a Galloway March style and is common here.
In fact, some of the upper stones were so large I did not want to put them on the ground as I worried I’d never get them back up again. This meant I had to repair the wall in stages, building it up to the half way point, then rolling the large stones along – you can see this in the photo to the left.
Over time, some of the filling stones settle causing the stones in the lower walls to collapse inwards. Also, the two walls settle differently meaning that one ends up higher than the other. The through stones are pulled away from being level. Now, the top wall is sitting on a slope and leaning. Instead of gravity holding the wall together, it’s now pulling it down. The wall is now in a fragile state.
Looking at these photos, you might be wondering why so much wall is missing for such a small repair. The problem is that this wall is old and is leaning in both directions for much of its length. If you look down it, it weaves back and forth like a drunken snake. To make a neat repair, you need to find two upright and stable sections and repair the entire portion inbetween. For this particular damaged section, the nearest stable section to the left of the damaged section was about 1m away. However, to the right at weaved back and forth for around 16m before it had a short upright section. These walkers probably had no idea how much work they were creating for me.
The photo to the right does not even show the whole picture. The original area of damage is to the left end of the string, where the brown bit of bush can be seen.
I took down around 8m and repaired the first 4m (where the string is), leaving a further 2-3m of stable half built wal on which I could store the large stones from the right hand side. Soon after this photo was taken, I took down another 8m, pretty much all the wall shown in the picture.
To the left, you can see the repaired bit (it has less moss and lichen) along with a burgeoning collection of large stones sitting on the half built section.
A few weeks and much work later, I have finally got past the half way stage. I have now completed the first lift, the lower two walls capped with through stones. I now have a stable lower section of wall. I just have to fill in some gaps between the the through stones and I can maneouvre the large stones into place. After that, I can build it up to its full height.
Progress has been interrupted by the arrival of some apple trees that need planting along with some snow. It’s not the cold that stops me working on the wall, more the danger of heavy snow covered stones slipping out of my hands onto my feet. There’s a limit to the protection offered by steel toecaps. Also, little patches of snow can get wedged inbetween the rocks making them feel stable, however, when the snow melts the rocks will suddenly be loose.
There’s still a fair amount of work to be done plus a few heavy stones to lift back into place (some of them did fall to the ground). But the end is in sight. That said, there are a few further sections crying out for my attention, so 2022 could be the year of dry stone dyke repairs. It’s a good job I quite enjoy repairing dry stone dyke, it’s hard work, but also very creative.
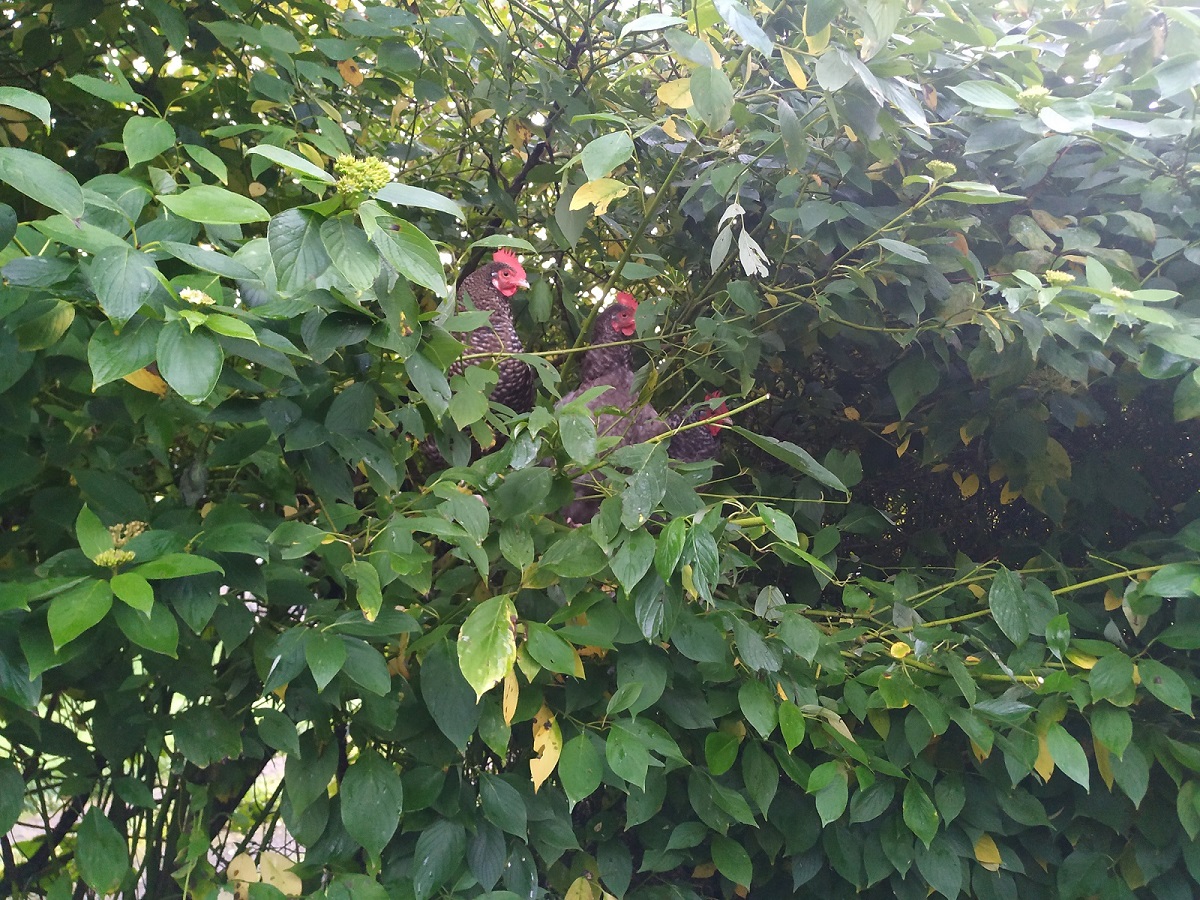
Our hens have all the creature comforts we can provide. There are three state of the art plastic hen houses with automatic door openers that open and close at dawn and dusk. Inside, there are purpose built roosting bars or individual boxes packed with fresh sawdust. Each hen can choose its own sleeping arrangements to its personal taste. These are kept clean and mite free and provide protection from wind, rain, snow and all the varieties of weather that South West Scotland can throw at them.
However, this is not good enough for Clippy, Mrs Mills Junior (MMJ) and Salt. They have decided it’s far more comfortable, or exciting, or both, to sleep rough. Clippy started it all. She has always been borderline feral, much prefers the great outdoors. She’s also the current matriarch and has been sleeping out on and off for a while now. MMJ and Salt have recently joined her. Poor old Cherokee (the cockerel) must be wondering where they all go at bed time.
We shall keep an eye on them and expect that, as in previous years, once the cold, wet weather sets in and all the leaf cover has gone, they may decide the warm, dry shelter of a hen coop is the best bet.