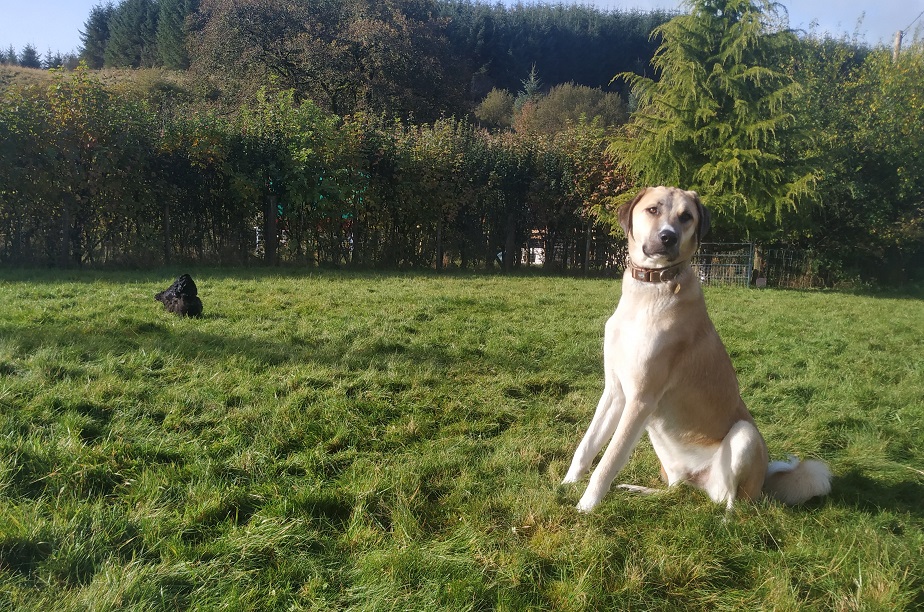
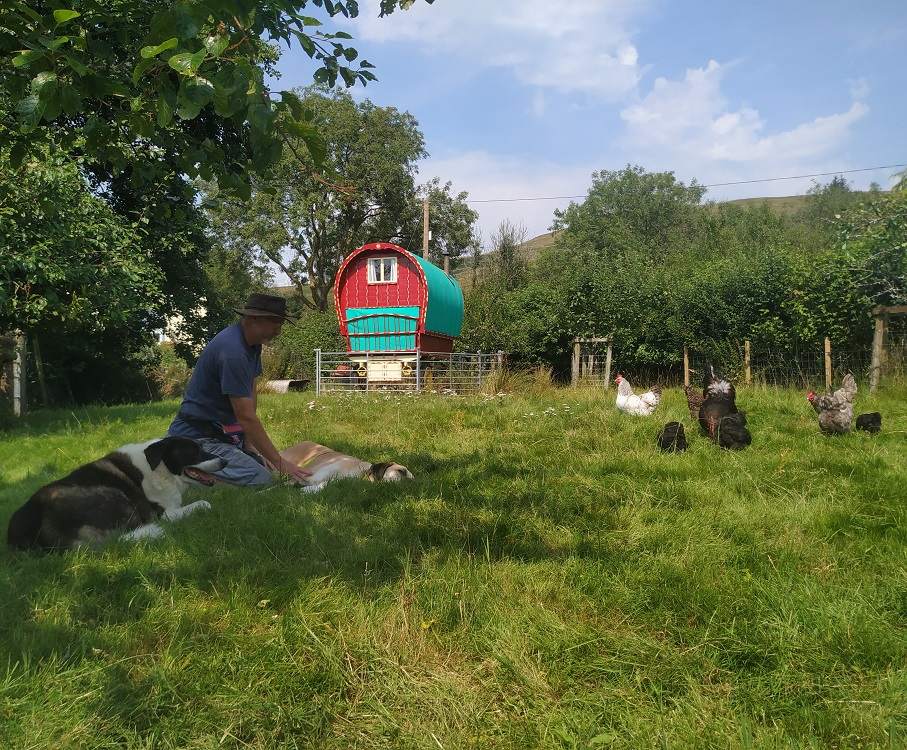
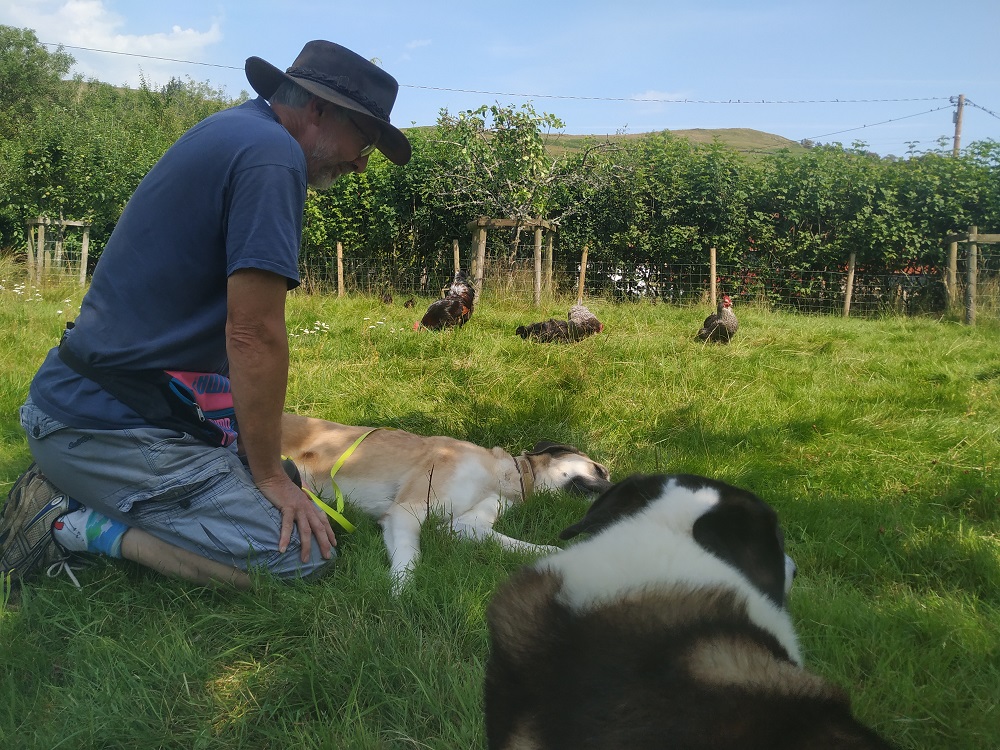
After three months of slowly introducing Elliot to the hens, yesterday was a big day for our Anatolian rescue dog from Turkey. Elliot was ready to be let off lead amongst the hens!
Elliot and the chicks
We took lots of time with the “hen training” because Elliot didn’t get off to a good start with our feathered friends. He had Clippy in her mouth during his first week here so both the hens and Elliot had to re-learn how to be with each other. Elliot showed a little too much of the wrong kind of interest in the hens and the hens were nervous and panicky when he was around. Not handled correctly, the training could go badly wrong. We knew it would take time but by the same token we were hopeful it would be possible. The truth was, we didn’t have much choice as with winter approaching we would soon have our hands full with feeding the sheep their daily hay. The hay feeders are situated in the orchard where the hens are and we wouldn’t be able to have Elliot on his lead whilst sorting out the hay. There’s too much to do so Elliot would need to be ready to roam free with the flock by the end of October.
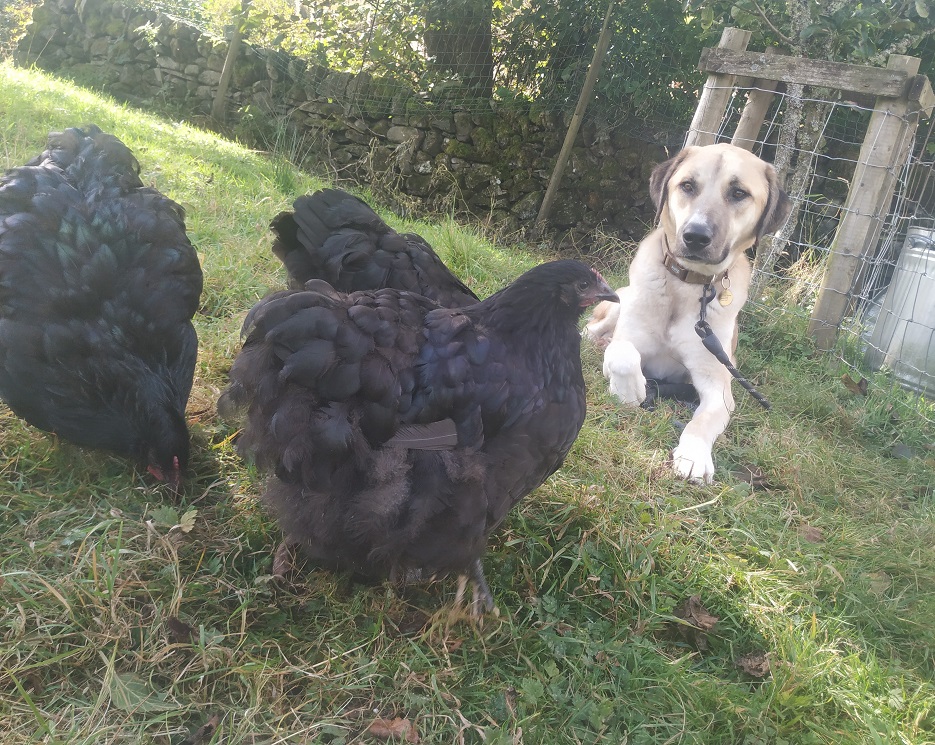
just hanging out with my new pals
The training itself was quite tedious, you can read more about it here. This said, the hens loved it because they got extra corn. Most of the time George (our other dog) was visibly bored by our daily trips to the orchard. He made a point of sitting by the gate so he could make a swift exit when the training was over. Happily, despite his reluctance to get involved, his presence still had an effect and Elliot learned to relax more and “just be” with the hens with each passing day. Animals learn best from each other and so far George has been a good teacher to him (even if some of his lessons are not necessarily to our benefit, ie, on hearing the recall command, decide in your own time whether it’s worth going back or not) …
Although Elliot can now be around the hens off lead, we will continue to keep a close eye on him over the next few weeks. If anything were to trigger either the hens, the sheep or the dogs into an excited state, (ie a cat appearing out of nowhere), then we’d need to make sure he would be able to handle this and not get caught up in the high energy.
We will see how he goes over the next few weeks but so far so good, well done Elliot!
Today’s blog story is to tell you about my rug-making teaching adventures over the summer and about the new downloadable instructions I’ve created on how to make felted fleece rugs.
I’ve been thinking about running rug-making workshops here on our smallholding for a few years now. Then Covid happened and my plans went on hold. Truth be told, I didn’t mind too much as the thought of all the spiders I would have to face while clearing out the shed was quite daunting.
relaxation area
I would need a lot of room, particularly as part of my vision was to include an area for a table and chairs for participants to relax and enjoy tea, coffee and biscuits in between felting – very important for any workshop, especially a whole-day one involving loads of physical effort. All the room I would need would take a huge effort and reorganization of tools and equipment.
I’m happy to say I managed it! (Admittedly with a lot of help from Adrian, my personal “Chief (humane) Spider Remover”). And this summer the workshops became a reality.
The shed was transformed into a teaching room complete with large tables for felting and shelves for wool, towels, bars of soap and hot water urns. The spiders moved next door, they said they weren’t keen the disturbance and preferred the peace and quiet of the hay shed.
Over the last few months, as well as teaching here on site and meeting some really inspiring and creative people, I’ve also updated my original (face up method) “downloadable rug making instructions”.
You’d be right in thinking I’m on a mission to spread the love of wool 😊
For those of you who know a little bit about making felted fleece rugs, you’ll probably be aware there are two ways to make them. There is the “face up method” which is brilliant if you’re new to rug making as it’s slow and methodical. It’s also ideal if you have a fleece which is in bits but you still want to use the wool. It’s a time-consuming method but a lovely, meditative way to work.
Then there’s the “face down method” which is a little quicker than the above method, but you need a fleece which holds itself together well and isn’t likely to fall apart at the slightest puff of wind. This method can be somewhat daunting if you’re new to rug making as you’re working upside down. (Not you, the fleece).
If you’re interested in making your own rugs and creating something unique and beautiful for your own home, I can’t recommend it enough, just dive in and give it a go! You can buy raw fleeces from ebay and etsy or better still, direct from a farm. Click on the links below to find out more about learning this wonderful craft:
The harvest rush has been on in the last week. We already had collected what was left of the beetroot (see beetroot bother), but other fruit and veg were ready and needed picked before the pesky slugs had those too. The only things that seem to be safe are the tomatoes (polytunnel too dry for them) and the carrots (special anti-slug box works a treat).
In the last week, we’ve harvested the apples, onions and cabbage. That leaves the sprouts (what’s left of them), broccoli (which will be ready next year) and turnips (haven’t dared look).
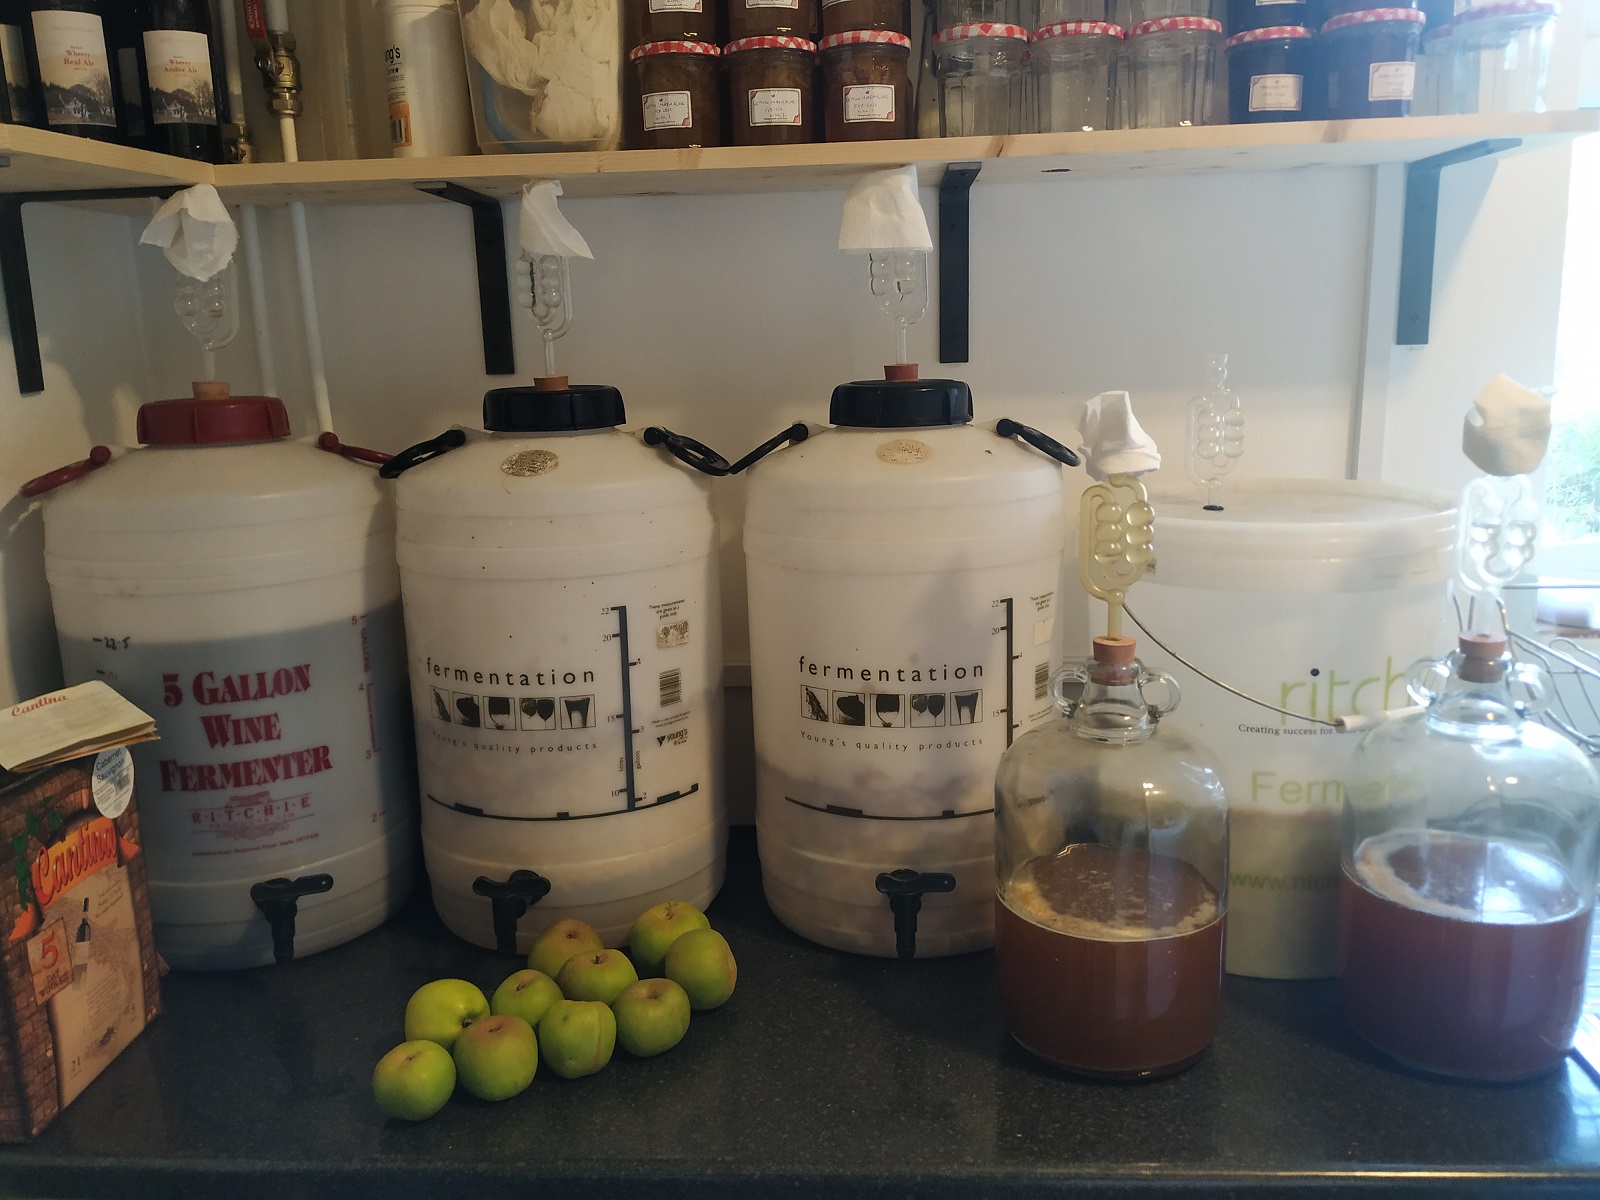
Left to right – red wine, cider vinegar (x2), sauerkraut behind 2 x cider
We got a good harvest of apples this year. The best have been set aside for eating, the rest converted into cider vinegar, cider and frozen apples for winter roasts. We got the cider press up and running this year (only taken 5 years), so got some apple juice. We got 5 litres to be exact and all is being made into cider. The eagle eyed among you might be wondering why I have split it across 2 x five litre demijohns. Well, it did all fit into one, but in my experience, wild fruit can be pretty vigorous in the fermentation process and has been known to spray the walls. Of course, nothing has happened yet as the temperature has dropped a bit and the yeast is shivering rather than getting on with it.
There are still a few late developing apples on the trees. Hopefully, they’ll be fine for eating as they come.
We also harvested all the cabbage. That, in itself, removed an army of slugs from the veggie patch. All leaves were examined carefully and any wildlife removed before the cabbage was shredded. Salt was added, massaged in and now that is also fermenting quietly. Should be ready in 3 or 4 weeks.
All takes time, but very satisfying once it’s done.
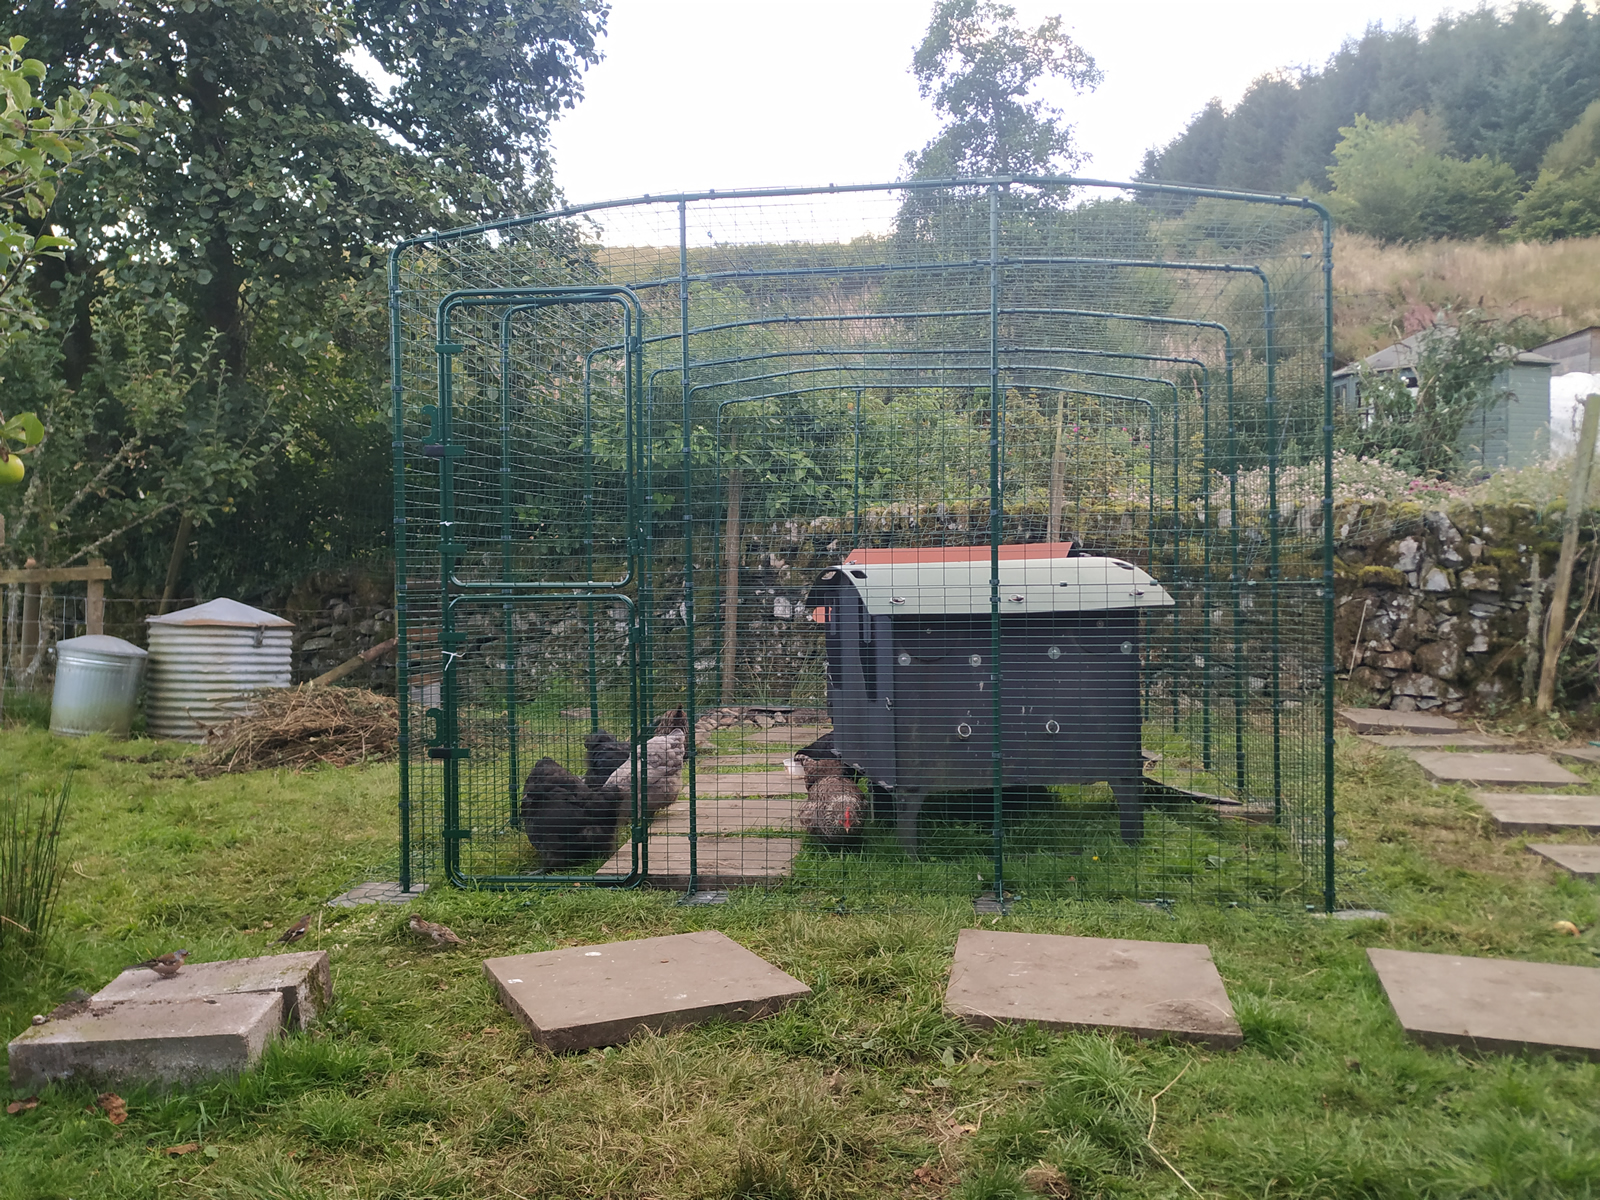
Carrying on from last week’s story, Moving the Hens, we have both been busy installing and preparing the new area for the chicken coops. We call this ‘Hen Central’ because it’s where they eat, drink, sleep and lay their eggs. The big jobs this week were to install two new fences and put up a walk in run.
hen central – old gate, new stob already in place
The first new fence is where the old entrance used to be. There was a fence there, but it was only chicken wire. Given it was along the track, this is where the biggest threat from unsupervised dogs was to be found. The gate was removed and proper stock fencing put up. Not 100% dog proof, but far stronger.
The second new fence is in the orchard which doubles as the hen run. It is needed not to keep the hens in, but the sheep out. Sheep have a penchant for scratching themselves on any available object, so they could do a lot of damage. They also are partial to corn, so would be tempted to get into the feed bins. Plus, the hens need somewhere where they can have a bit of peace and quiet.
Also, if a hen goes broody, we need to be able to set aside a space for the nursery run and an area for them to wander out and about, free from the danger of sheep’s hooves.
The walk in run is more to deter night time threats and also, prevent wild camping. The plan is, at roosting time, to tempt them into the run and shut the door. That way, the hens’ only option is to sleep in the safe chicken coops.
bye bye electric fence
We ordered the Omlet Walk-in Run and it was earmarked for delivery on Tuesday. So, I got started on the deconstruction of the old hen central. First to go was the anti-badger electric fence. It had done it’s job, but was no longer needed. It would also no longer be a trap for the unwary, easy to trip over.
Next was the first of the two fences. That was fairly straightforward as most of the stobs were already in place.
Come Tuesday, no delivery date was available from DHL so I got on with the second fence. That was soon up complete with purpose built hen flaps.
hen central – new gate and fence
Wednesday came and still no run or delivery date. I attempted to decipher the jumbled misinformation on the DHL tracking service and worked out that 13 of 14 parcels had been forwarded from the Glasgow depot to the local delivery agent. One was missing. Of course, modern customer service comprises the above misinformation and a chatbot that is worse than useless. We contacted Omlet to see if they could find out any more. They, too, struggled to get any meaningful information from DHL.
hen central – boxes opened
Anyway, Thursday arrived and Nicole and I carried on and got as much of the new run ready as we could. The fences and new gate were in and all the shelters and feeders were laid out in their new locations. Thursday afternoon, still no news from DHL. Without warning, a van pulled up and disgorged 14 packages. It had arrived! DHL were kind enough to send an email to let us know it had been delivered.
hen central – level one underway
Friday, our day off, so to speak. Normally we take the dogs and a picnic and head off somewhere for a break. Not today. I got started on the new run. First off, I had to build a small bank as, at one corner, the land slipped away quite steeply. This meant transporting a fair few stones and some road scalpings. No sooner had I finished that than Mrs Mills Junior began to dismantle it. I gently persuaded her to move on and retired to ponder the Omlet instructions. An hour later, I felt ready to begin.
I have built a few Omlet runs in the past so was aware of the clip system they use. However, nothing had prepared me for the new ‘double-clip’ used in certain places. It needed about 20 tons of pressure to close it. I have to confess to employing some choice language. Finally, I worked out a technique I could use.
hen central – omlet walk in run complete
It’s not a one person job. Nicole pitched in to help and we worked non-stop till we had it built. We were both loudly cursing the Omlet plastic clip on by the end of it. We were both completely shattered when we finished some time around 6pm. We were delighted with the result, the run looked excellent. Cherokee, the cockerel was already hovering as he likes to get to bed early. But, he’s pretty cool and waited patiently. The moment we stepped out of the run, he stepped in and went to bed.
Seizing our opportunity, Nicole threw some rice and corn into the new run. All but two hens rushed in. Pepper and one of the youngsters (still to be named) decided to run round the outside instead. With deft care and precision, I coaxed them round to the front where Nicole was managing the door. To our relief, they crossed the threshold and we shut the door behind them. The hens were safe and happy. We had turned a two hour vigil into a five minute gathering. Wine and beer called, it was time for a celebration.
Then we counted them.
One short – who else but Mrs Mills Junior? Nicole arranged the search party and located her at the far end of the paddock having a dust bath. Gently, she was persuaded all the way back and, in another dance of co-ordinated movements, she was herded through the door.
Now we could celebrate.
Later on, when they were all tucked up in bed and the doors to their coops closed, Nicole opened the door to the run so they could get out in the morning. My next job will be to install an automatic door. We have the door motor, I just have to build a panel. Once that’s in place, we can leave the run securely closed at night and the door will open automatically for them in the morning.
Over the coming days, the goal is to train them to go into the run just before bed time. Hopefully, in time, they’ll forget about sleeping in the bushes.
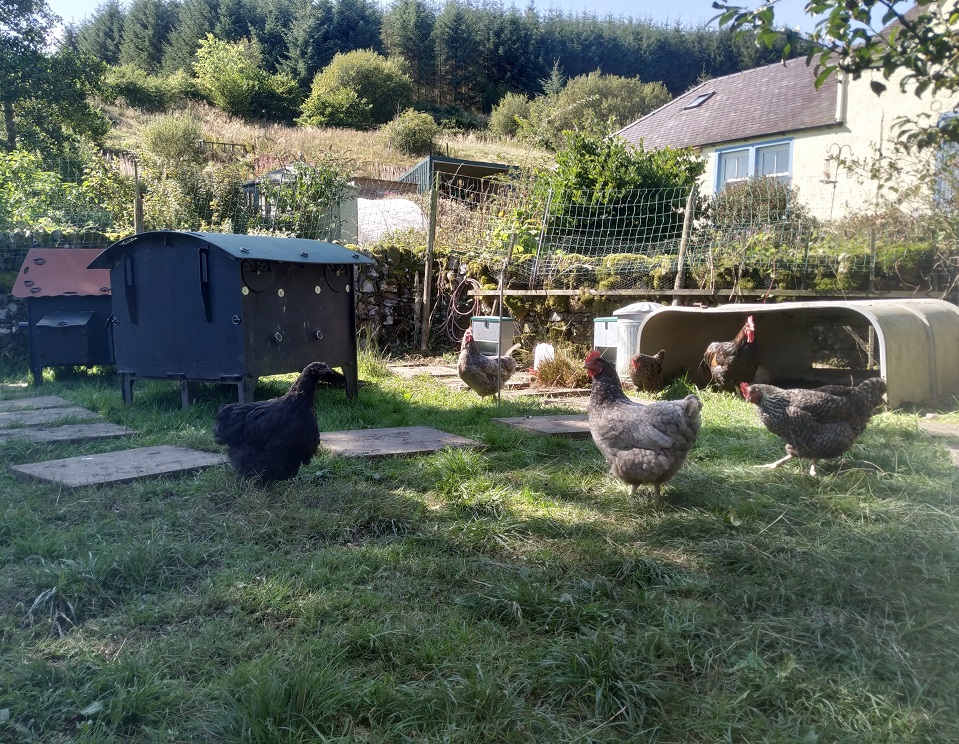
This week we have been very busy moving the hen coops to a new part of the orchard. This has been prompted by several things, but mainly it is down to Clippy.
Clippy (the flock matriarch) has always been on the feral side. She prefers to lay her eggs in a clump of grass rather than in the nest boxes, she prefers to sleep in the bushes than in the hen coops and she’s the one likely to be found on the wrong side of the fence, sometimes to her detriment.
We wouldn’t mind Clippy doing her own thing if it wasn’t for the fact that as flock leader, she naturally sets an example to the other hens. As a result, the flock is becoming noticeably more feral. Over time we have discovered not just Clippy sleeping rough, but often two or three accomplices in neighbouring trees. It’s not only at bed time that the hens are doing their own thing, over the summer we had hardly any eggs, or so we thought, until yesterday when Adrian stumbled across a huge pile nestled in a clump of sedge grass.
where the coops used to be
Things came to a head recently when one warm summer’s evening, MMJ (mother of the chicks) decided to sleep in the tree tops alongside her pals Clippy, Salt and Pepper. MMJ didn’t seem to realise that her chicks were too little to follow her, and perched high up upon her branch, merrily called them to follow her into the trees. Fortunately we were in the garden frying sausages on the barbeque and heard the commotion. With a little strategic shaking of branches we encouraged MMJ to abandon her camping expedition and go to bed in the coop with her little ones safely tucked under her wings.
Unfortunately MMJ going wild camping with her feathered pals didn’t prove to be a one off. This has meant that every evening for the past couple of months, we have been on “hen watch” at dusk. This has meant creeping around the orchard to see what MMJ gets up to.
We’ve tried blocking the bushes and launch pads but to no avail. Clippy gets past all barriers and is often accompanied by one or two others.
newly situated coops
There’s another reason we don’t want the hens sleeping wild, it’s disruptive to our evenings and many a dinner has been reduced to burnt morsels while we pad around the orchard looking for hens and it’s a huge worry that the chicks lives could be in danger. But on the other side of the bushes is our farm track leading to neighbouring houses. If the hens decide to fly down from the trees on the other side, they could end up on the wrong side of the fence unable to get back in. More than once we’ve found hens wandering around in the morning looking to get back into the orchard for their breakfast.
Again, this wouldn’t be a problem in itself if it wasn’t for the fact that sometimes visitors to our neighbours have dogs and unfortunately seem to forget they’re in farming country and let the dogs wander around off lead. As smallholders, loose dogs around livestock is a huge concern.
So, having had one too many evenings disrupted, the thought of hens getting into trouble or the whole flock ending up feral, we decided to take action.
We’ve moved the hen coops away from the trees, into a part of the orchard where we can keep an eye on them from the kitchen window. We’ve blocked off the wooded area where the hen coops used to be.
clearing nettles from the new hen area
Also, in preparation for winter and prowling badgers, we have ordered a large walk-in run from Omlet. This company has predator proof runs with a “skirt” running around the bottom making it impossible for anything to burrow its way in. The mesh is strong and nibble proof so will provide an added layer of protection for the flock at night. It will make things easy for us to encourage the flock to roost in the safety of the hen coops at night. Once the run is up, we’ll throw some corn in, shut the outer door and let the hens re-aquaint themselves with the coops. We also plan to install an automatic door on the run that shuts at dusk and opens at dawn so the hens can wander off into the orchard as they please during the day, but at night they’ll be safely tucked up. This arrives later today so we’ll be busy building that for the rest of the week.
building the frame for auto-opening door for new hen run
Meanwhile, we’ve already moved the coops and have spent the last three evenings in a mild state of stress watching the hens sorting out who sleeps where while they go “in, out, in, out, in out” of the coops for what feels like hours . The most painful part has been monitoring Clippy and the chicks. She has sent them skidaddling from the coop with a sharp peck on several occasions and the first time this happened we had to intervene as the chicks ran all the way down to the lambing shed at the far end of the orchard and it was getting dark. We put Clippy into a different coop that evening and the chicks came back with a little encouragement. However we don’t want to be intervening like this every time, Ideally the hens should sort it out for themselves and Clippy needs to learn that the chicks are part of her flock. It’s a tricky one knowing when to intervene and when not to.
The last two evenings haven’t gone too badly, still a lot of to-ing and fro-ing but Clippy has been more tolerant of the chicks which has been a big relief.
We’re really looking forward to having the hen run installed and our flock becoming more domesticated. We’re also looking forward to being able to cook dinner without any disruptions.
As we move into September, our thoughts turn to harvesting. Over the next few weeks, we’ll be collecting apples, tomatoes, carrots, cabbage and onions. We already have a nice crop of garlic drying in the kitchen.
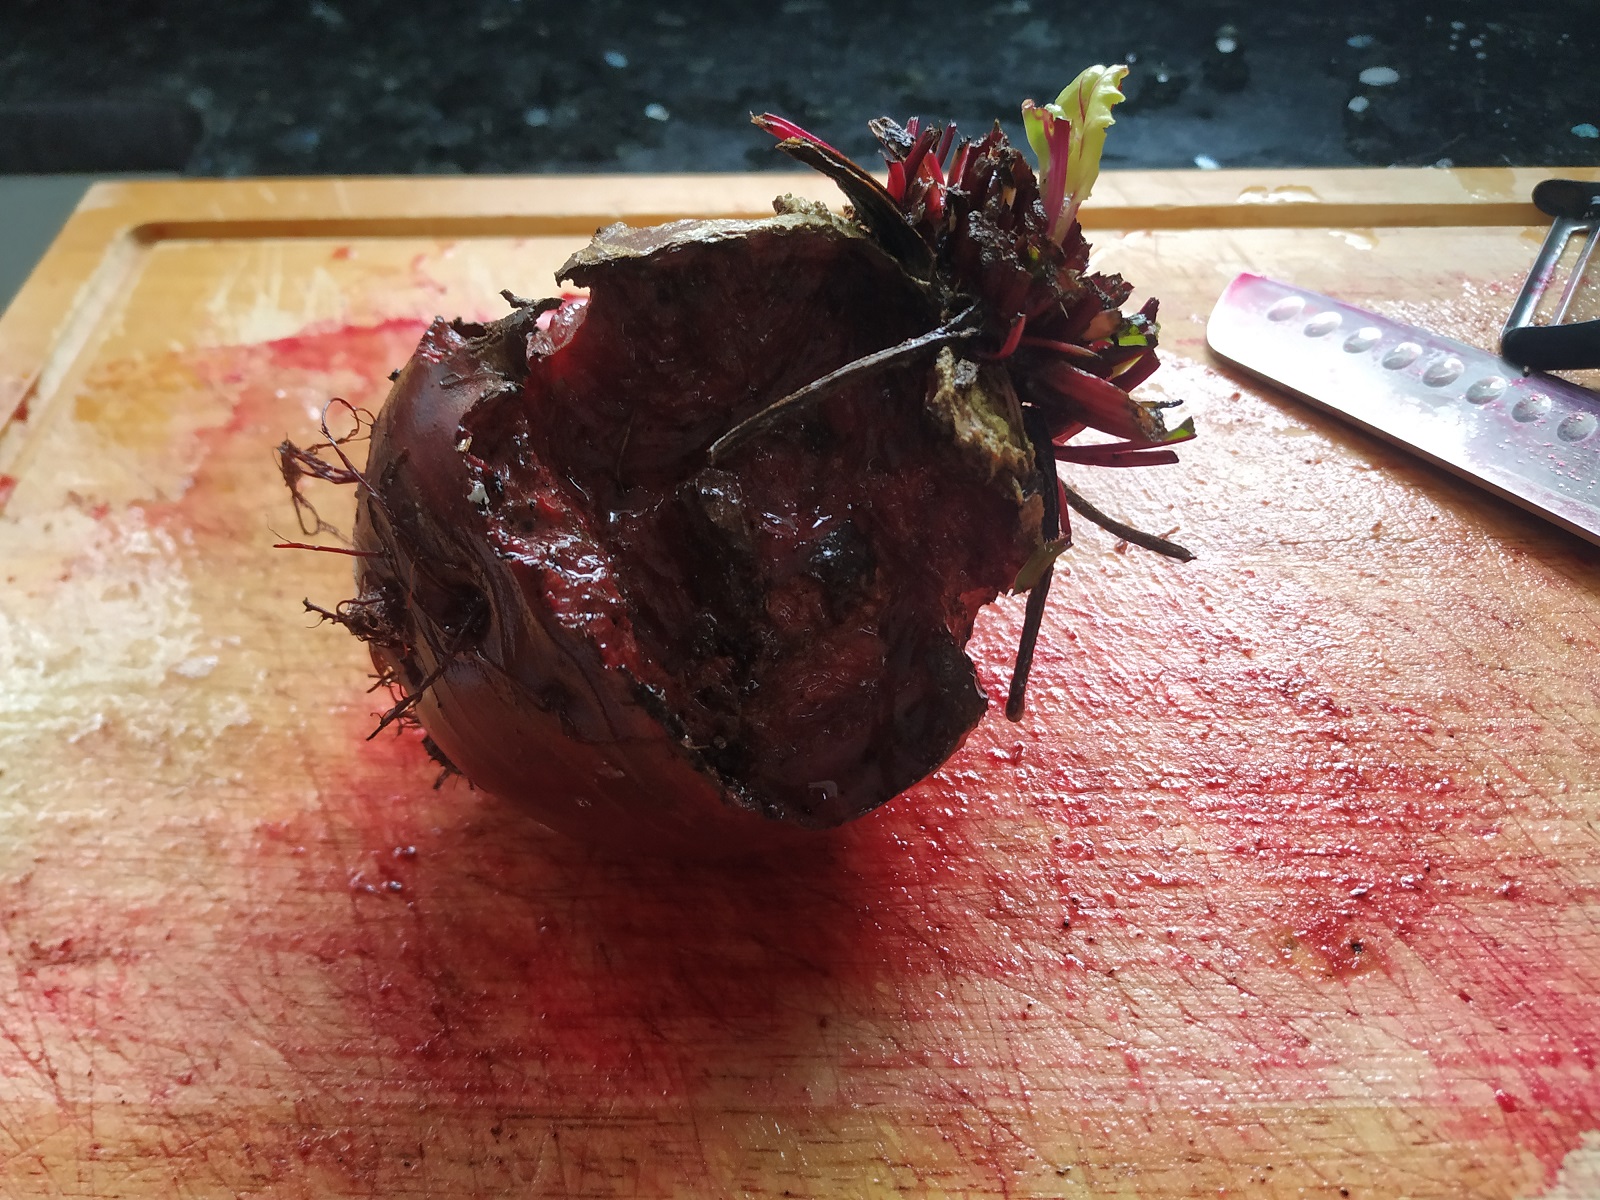
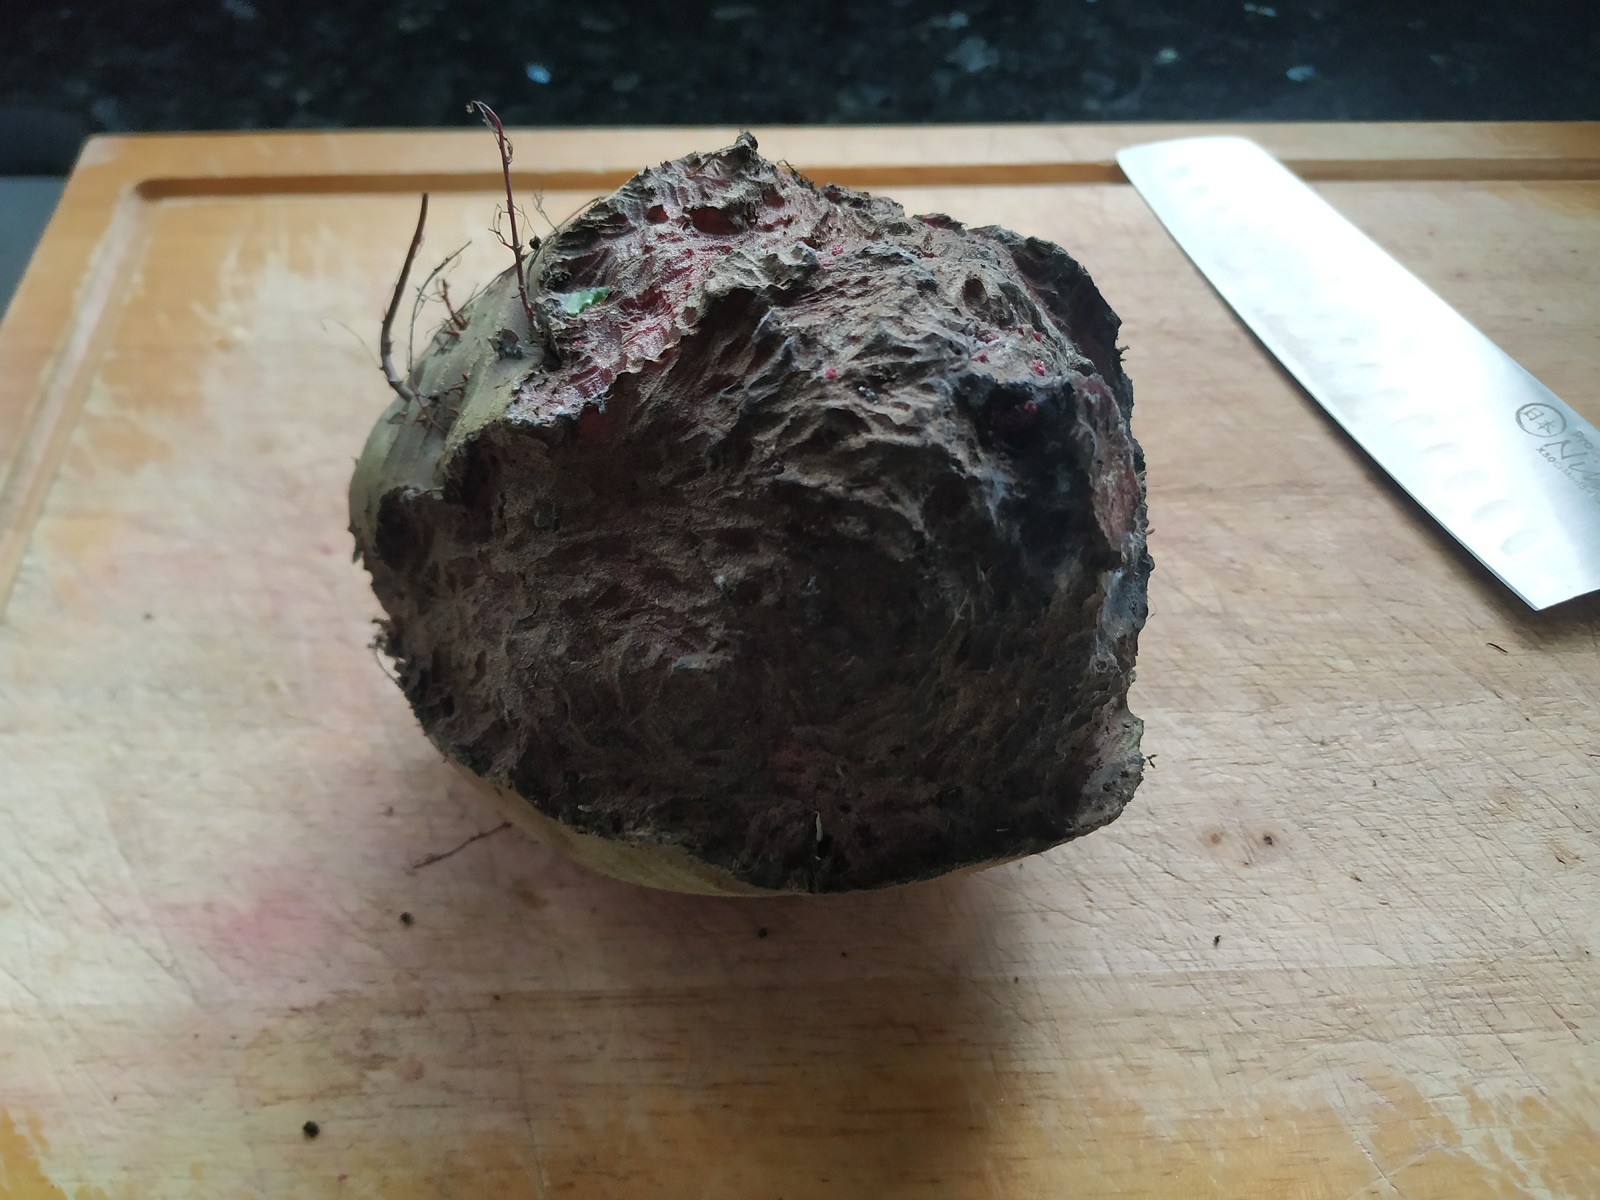
beetroot nibbled
Normally, we leave the root crops, mainly turnip (swede outside Scotland) and beetroot in the ground and harvest them as we need it. However, this year has been a battle with the veggie patch pests. On inspection, we found every beetroot had been nibbled, some almost to nothing. Slugs, mice or voles? Who knows. We had to act.
The weather was dry and warm so I spent the day gathering the beetroot into a box. The veggie patch was then covered in cardboard ready to be mulched. I did wonder whether the pesky beetroot nibblers would be out scratching their heads that evening.
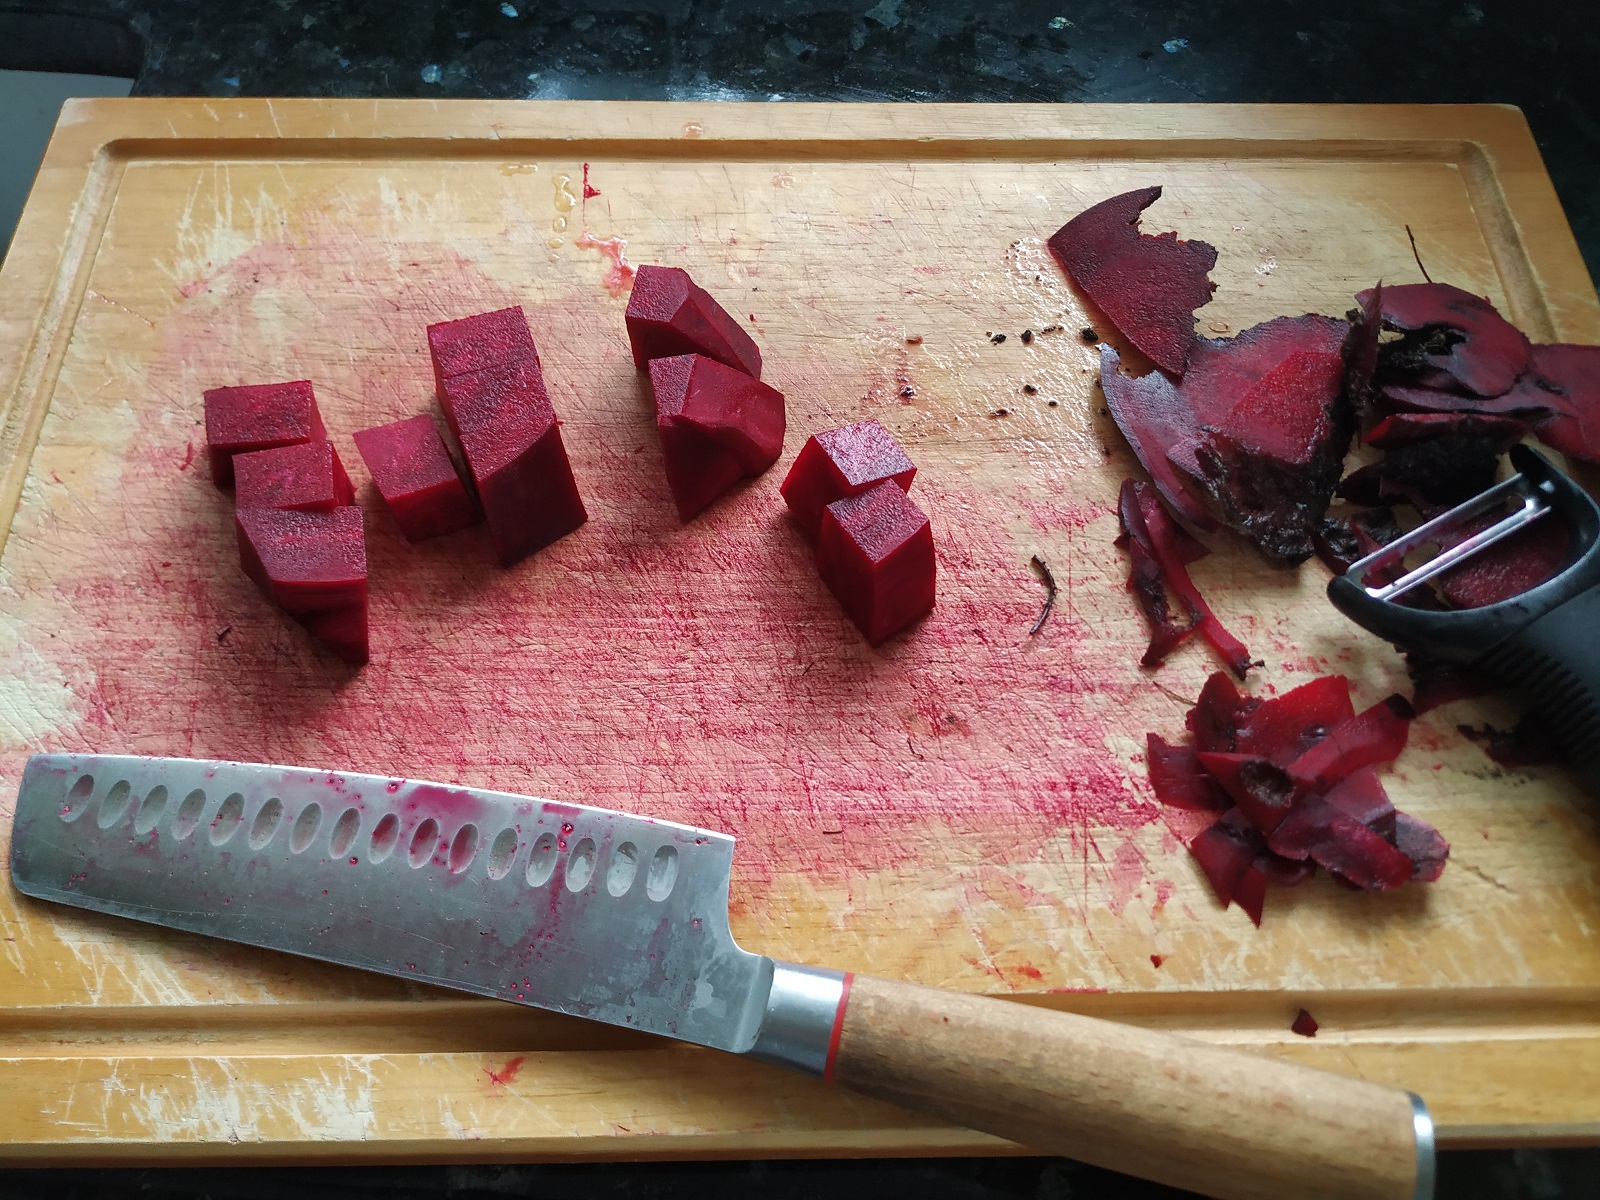
beetroot chopped
We decided to turn some of it into soup and freeze the rest. That meant a lot of chopping. It also meant a lot of time spent chopping as each beetroot had been nibbled in different ways. Each had to be carefully trimmed. There were a lot of trimmings heading for the compost bin.
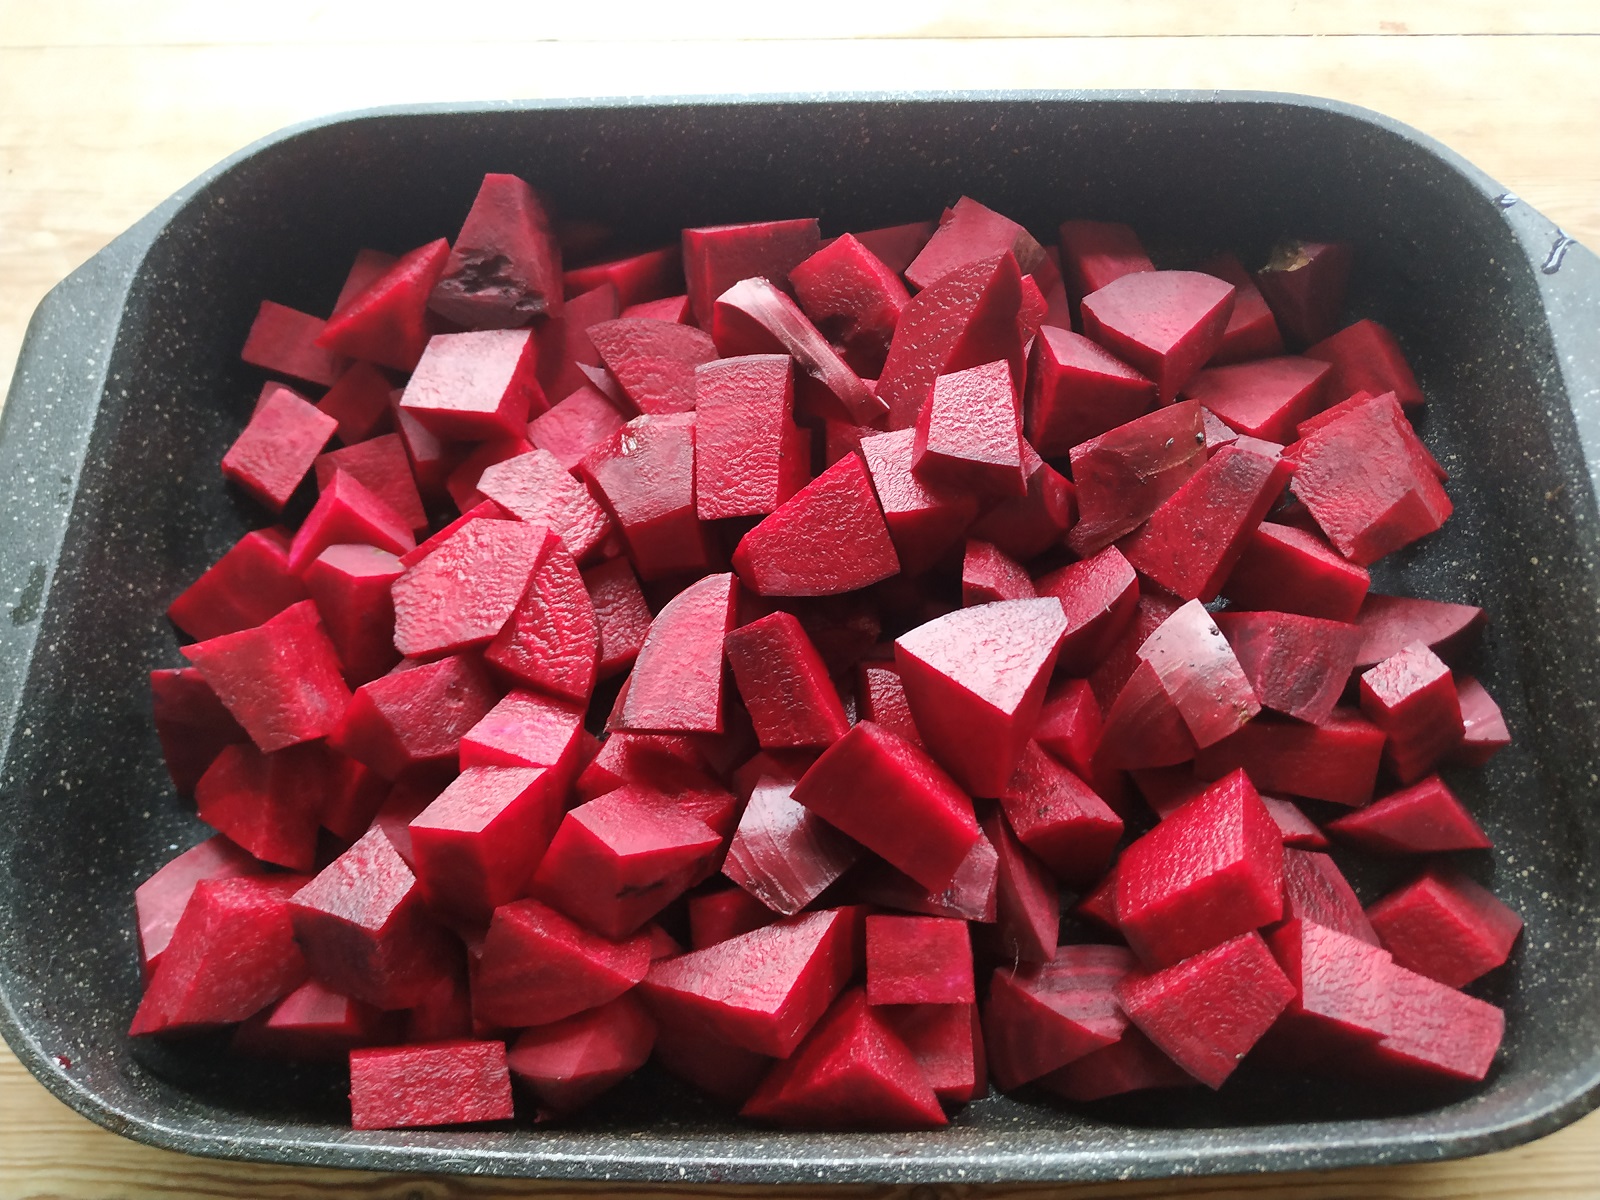
beetroot ready for baking
The first batch went into soup, as did the next three. That involved filling a baking tray, sprinkling the beetroot with oil, honey and pepper, and roasting it for half an hour. That was added to fried onions along with water, potoates, garlic and stock.
All in all, I must have made about 18 jugs of soup, around 15 litres or so. It’s very tasty indeed. Most of that is in the freezer ready for lunch on those cold winter days.
trays of beetroot for freezing.
The rest was frozen. This was chopped and laid out on baking trays. Those were put in the freezer. Once it had frozen, it was scraped off with a fish slice and bagged up. Some advised that the pieces of beetroot should not touch. Too much effort I thought. The risk paid off and all the pieces separated quite happily.
Other perceived wisdom was to blanch it all. Well, I suspect whover suggested that didn’t have 8Kg of beetroot and had plenty of time on their hands. Ours went straight in the freezer. Most of it will end up in soup anyway.
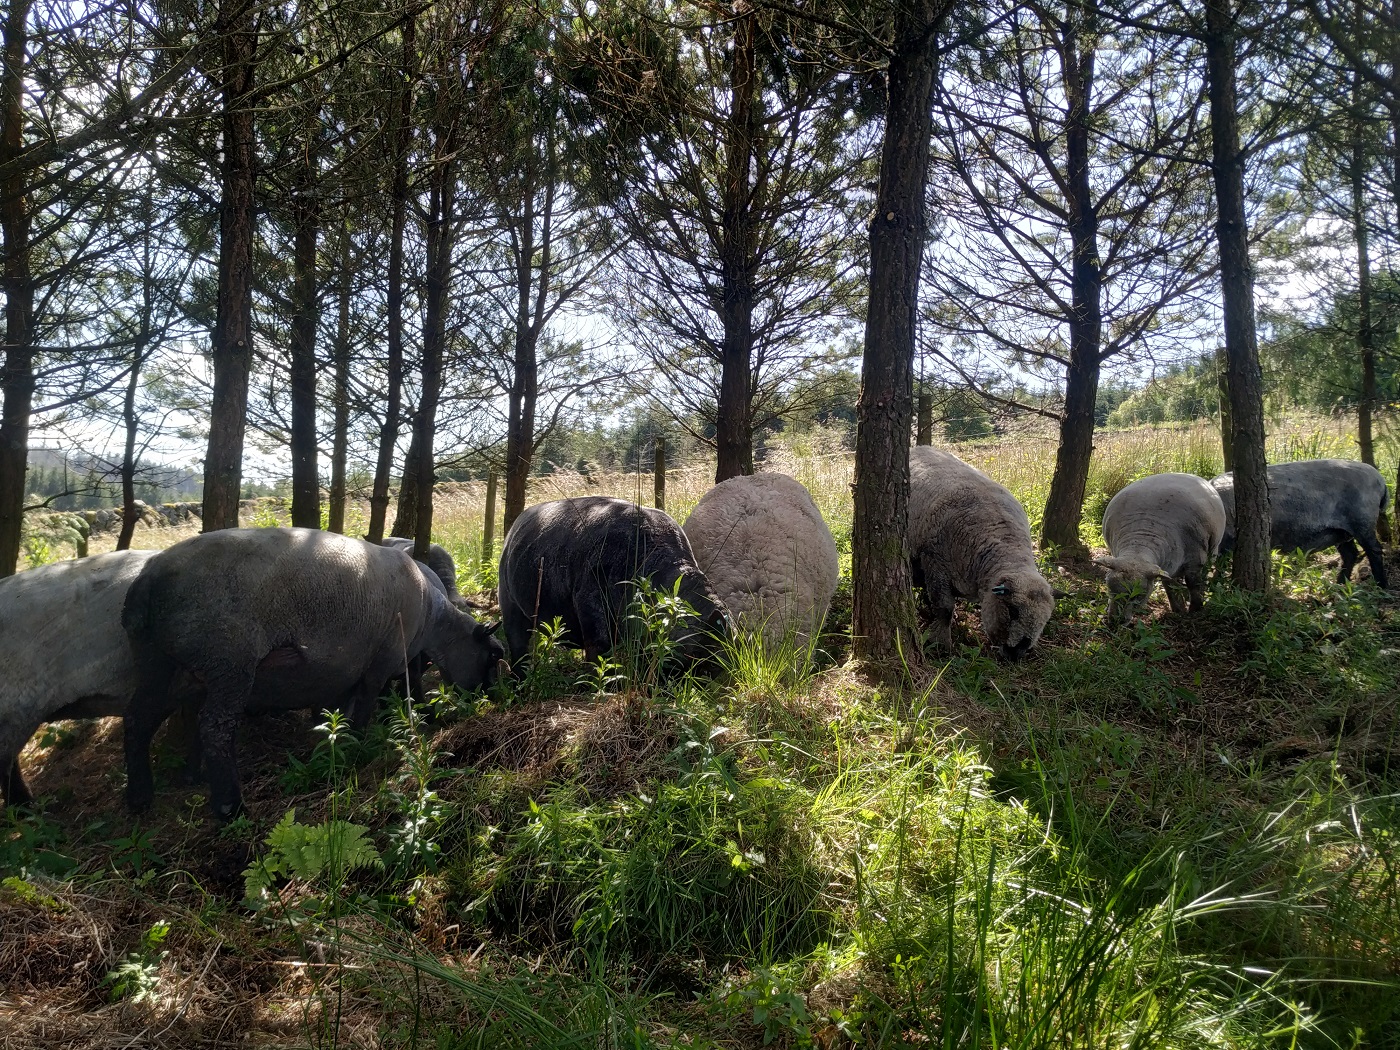
Two weeks ago I wrote about how we’d started Elliot’s “hen training“. Well it’s still going on, we’re taking things slowly because while Elliot is a natural livestock guardian and he’s great around the sheep, we weren’t sure how he’d behave around the hens. Being a rescue dog it’s possible he’s had to scavenge small animals including birds during his early months on the streets. Rushing the hen training just wouldn’t be the right thing to do in his case. And anyway, building his “hen friendly neural pathways” takes time. We also wanted the hens to get used to Elliot as these things work both ways. If Elliot and the hens are to get along, they both need to be used to each other’s presence.
It’s four weeks into the training, ten minutes a day of bringing him into the orchard, throwing corn down for the hens and bringing them a tiny bit closer each time.
This week the hens are about one meter away from Elliot which is good progress. The atmosphere remains calm and relaxed. Elliot continues to show the right kind of interest, not fixating, just looking. He’s showing all the right signs of being a good hen friend, but we’re going to keep going with the training until we can have the hens running right up and around him while he remains calm and relaxed. The hens must always be higher status than Elliot, even if they’re in his space, Elliot must respect them.
If there’s one thing we have come to realise about our sheep over the years, it’s that they like their shelters. Their favourite is one we knocked up just after we moved here. It kind of resembles a low rise mass built bungalow and so has been nicknamed Brookside, after an old tv soap opera.
Brookside sheep shelter
The sheep spend much of there waking lives in it. If it’s sunny, the sheep head for Brookside. If there’s the merest hint of rain, the sheep head for Brookside. If there’s a mist rolling in, the sheep head for Brookside. In fact, it has almost become an addiction, a comfort blanket in which they wrap themselves at the merest hint of discomfort. This is not a problem in the winter when they have access to the larger lambing shed which has a raised, hardcore base. However, in the summer it’s a different story.
There probably would not be a problem but for the fact that, unlike pigs, sheep tend to pee and defecate where they happen to be. So, it only takes a few hours for the floor to be covered. Daily cleanouts help, but in wet weather, the pee has nowhere to go and the floor can tend towards the unhygienic. We installed drainage, but while that has been helpful in eliminating puddles, the floor can become muddy and wet. Basically, it’s on a flat spot and water gathers there on its way down the hill.
Again, copious amounts of scented sawdust helps, but this merely serves to make the place more attractive. On top of that, the low roof leads to aching backs and bumped heads during cleaning.
During the hot days, we noticed that it was like an oven in there. All in all, there had to be a better way. So, we decided to open up some of the woodland for them. This comes with risks as sheep are partial to bark. They can bark an adult tree in minutes when the mood takes them. Nevertheless, there was a small copse of evergreens that were fully grown and, also, sheep tend to be more interested in eating bark in the winter months.
sheep pondering “silvo shelter”
So, we cleared the copse of brambles, added a gate and waited for a hot day. These are more plentiful in SW Scotland than they used to be and we did not have to wait long. To give Brookside a chance to recover, we’d closed access to the field where it is located. The sun was out, the air was warm and the sheep were gathered in a tightly knit group at the gate, gazing longingly at their favourite shed. We led them up the hill, reluctantly (lots of sheep nuts were involved), and showed them their new ‘shelter’.
first sheep enters “silvo shelter”
Despite the plentiful willow herb at their disposal, their reluctance to try anything new was stronger and hesitancy prevailed. Eventually, Yarr’s curiousity trumped his caution. Even then, he took his time. It was an excellent test of our patience.
more sheep entering “silvo shelter”
Slowly, the rest followed. Well, most of them anyway. Some got to the gate and veered right, tasty morsels of grass seemingly more attractive.
Those that did enter inched forward until their eyes fell upon the young willow herb. That was all it needed and they were soon tucking in, those at the back now trying to push through.
sheep find the willow herb growing amongst the trees
Soon, they settled and were grazing happily. Inside the woodland, the canopy of needles and branches provided plenty of shade and a gentle breeze made it feel cool and fresh. Compared with the oven that was Brookside, there was no contest. Job done, or so we thought.
We left them to it.
Twenty minutes later, they were back at the gate gazing mournfully at their favourite shed.
sheep grazing “silvo shelter”
This has been the pattern for most of the summer. We have even cut back more of the fencing so that they don’t feel boxed in. But, on hot days, they gather at the gate and gaze. We lead them up and watch them relax into the cool and refreshing area under the trees. We step back and watch. After a short period, one of them, usually Selene (the flock matriarch) suddenly remembers their favourite shelter and makes off towards it. The rest follow.
On some days, particularly stormy or heavy rain days, we open up the lambing shed for them and they appreciate that. But, on hot days, walls, tin roofs, stifling heat and oven conditions seem preferable to cool, leafy shade and refreshing breezes. That’s sheep for you.
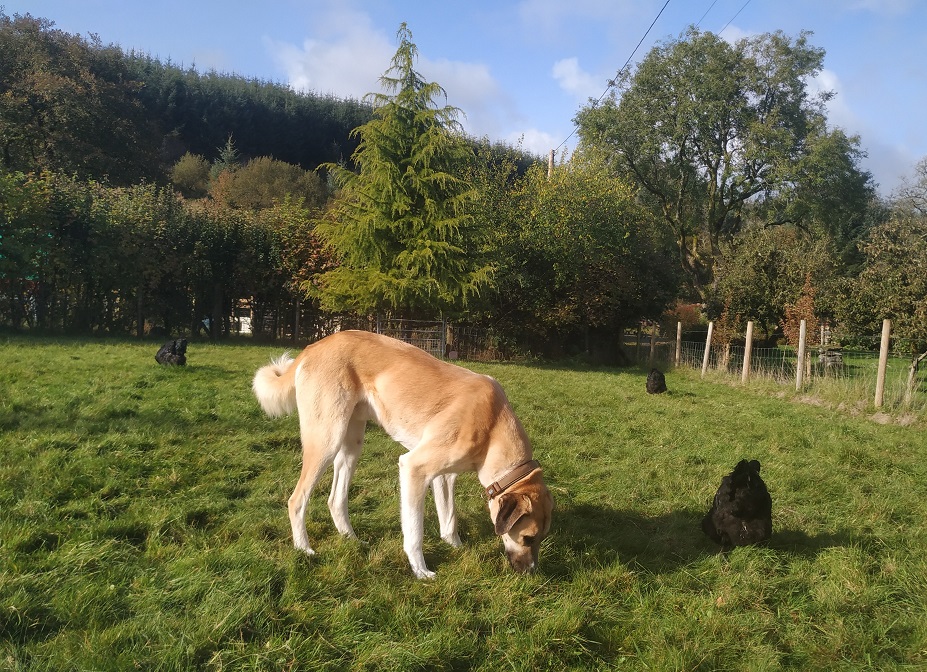
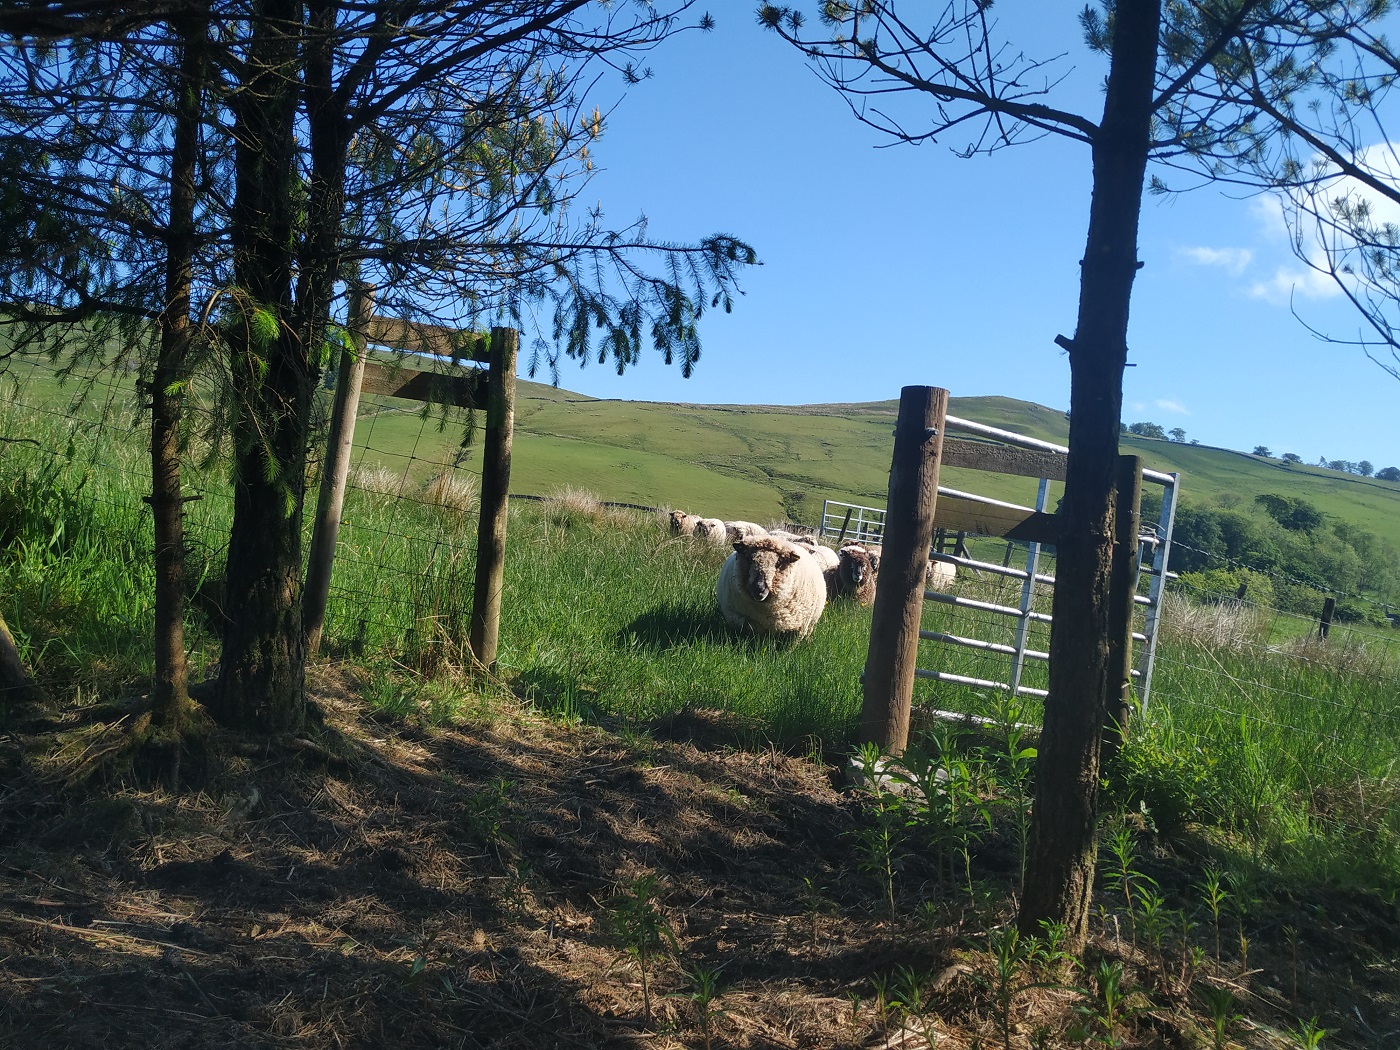
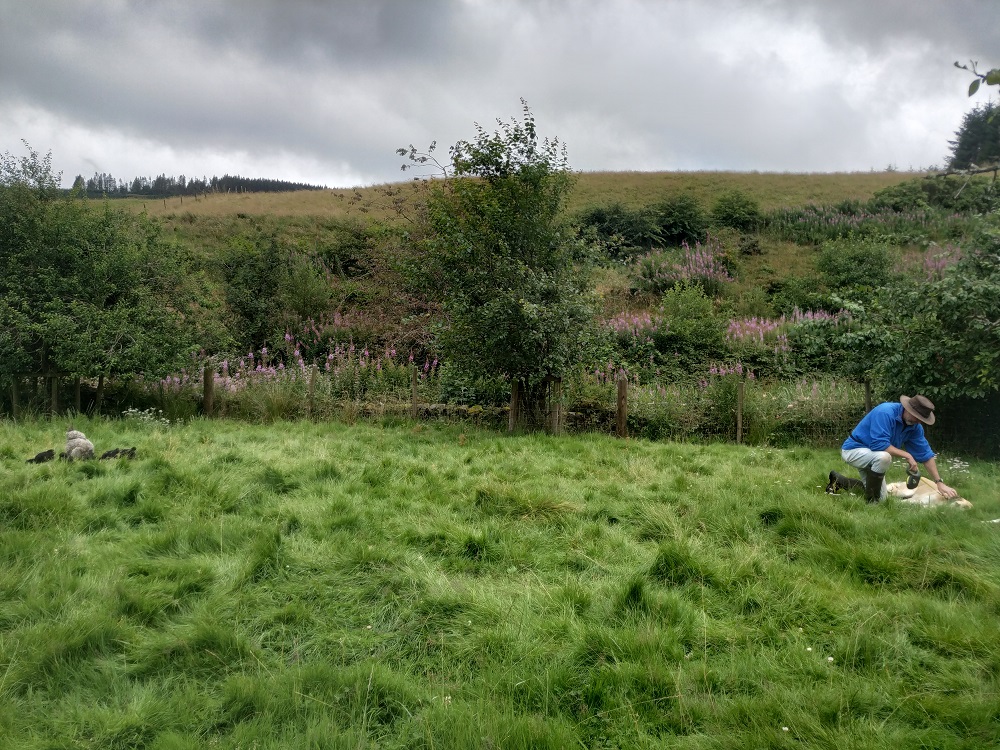
Now that the sheep have accepted Elliot and he can join us off-lead in amongst them, we have turned our attention to teaching him how to be around our hens. The hens wander around freely in the orchard and up until now Elliot’s not been allowed into the orchard because of this. The orchard is the hens’ domain but we’d like to be able to extend Elliot’s freedom and allow him into the orchard too, so it’s important he learns how to behave around the hens. As with the sheep training, George (our other rescue Anatolian) will be the main teacher, we’ll just be there to guide him.
So, a couple of weeks ago or so, we began “Operation Hen Training”. The training itself is simple but has to be repeated every day and preferably with Elliot in a relaxed mood. With this in mind we thought a good time to do it would be directly after his mid-morning walk.
The idea is we take Elliot into the orchard, lie him down in the “relax” position and then bring the hens in, not too close, but not too far. Both the hens and Elliot will need to be aware of each other’s presence but not be spooked by it.
week one
Elliot isn’t allowed to look at the hens, not at first. After a bit he’s allowed to look, but not fixate. If he fixates, we distract him.
We repeat this for a few minutes every day and bit by bit we bring the hens in a little closer. Eventually we’d like to have the hens running all around Elliot and both hens and Elliot calm in each other’s presence.
A small side note, we’ve had to approach the hen training cautiously because during Elliot’s first weeks with us, Clippy (top hen), accidentally found herself in Elliot’s play paddock. We were throwing a ball for Elliot and he was running after it when out of the blue, Clippy popped out from under a hedge. Elliot thought a hen much more fun than a tennis ball and ran after her at full pelt and Clippy ended up between his jaws. Fortunately we managed to dive in and rescue her and the story ended well.
However, Clippy remained wary of Elliot and whenever she spotted him walking past she sounded the alarm (very loud squawking).
We’ve not forgotten the incident and nor has Clippy or Elliot, but we’re hoping that with the right approach we can still go ahead and get Elliot to the point where he behaves respectfully around the hens.
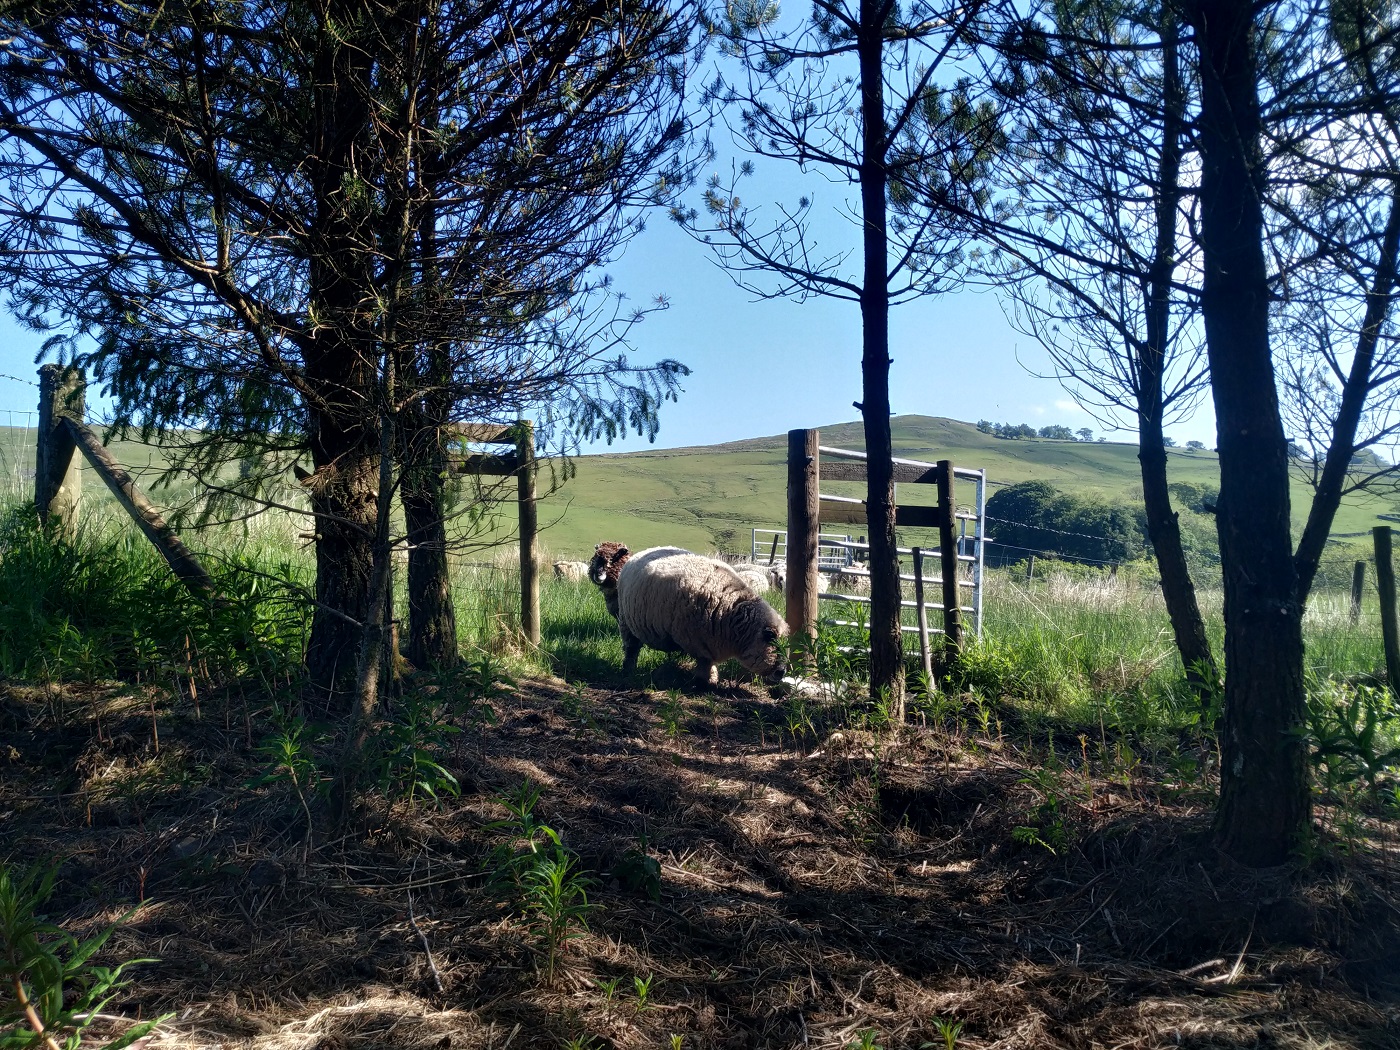
week two
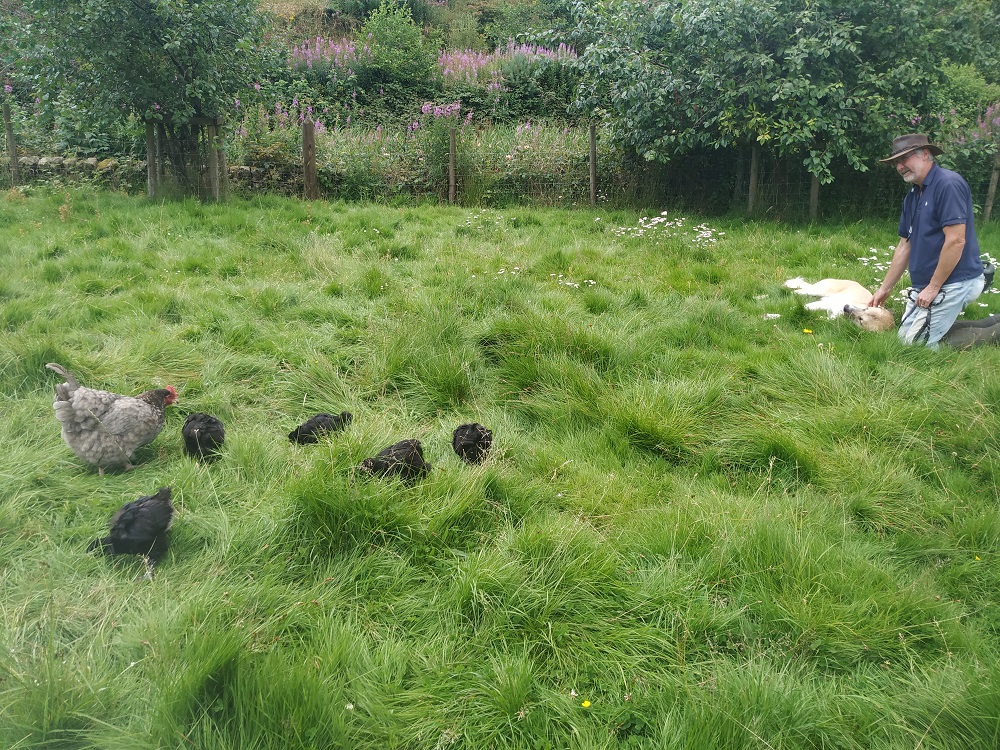
So for the last two weeks or so we’ve been going into the orchard every day along with George. Adrian puts Elliot into his relaxed position and watches his body language and where he looks. I scatter corn nearby and the hens come in and peck away at the corn, all the while with Elliot lying just a few meters away.
On the first day we did this, Clippy was very cautious and stayed much further away than the other hens. When we got up to go, the sight of Elliot standing up was too much for her and she squawked for all she was worth.
On the second day Clippy decided Elliot was less of threat and the call of the corn was too strong. She followed the other hens in, and although she kept her distance, she didn’t sound the alarm and everything remained calm.
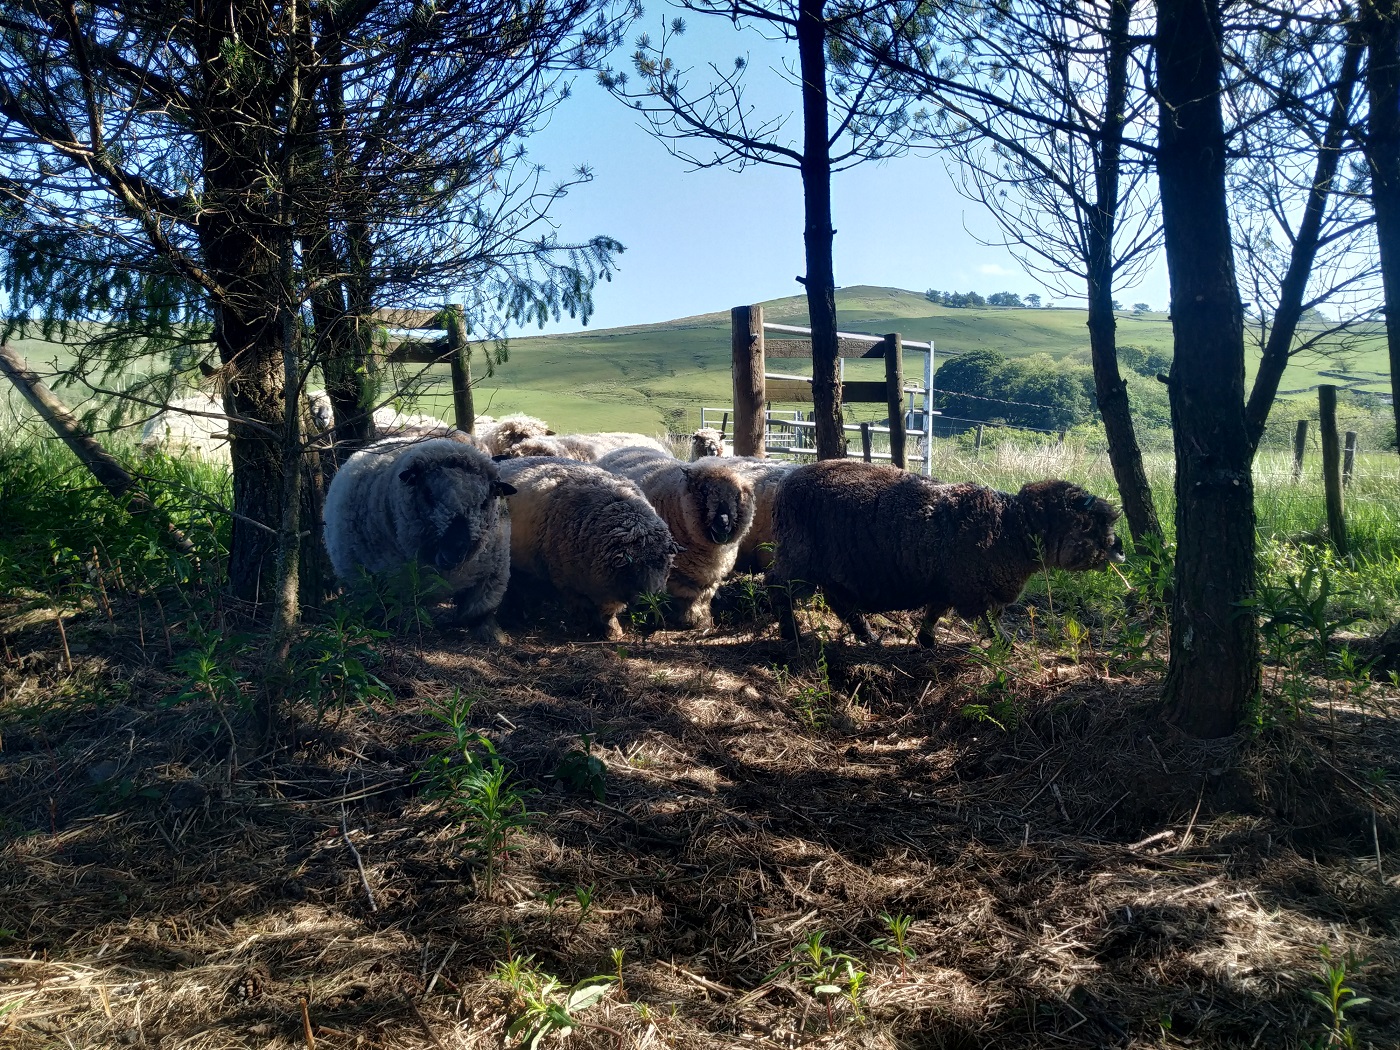
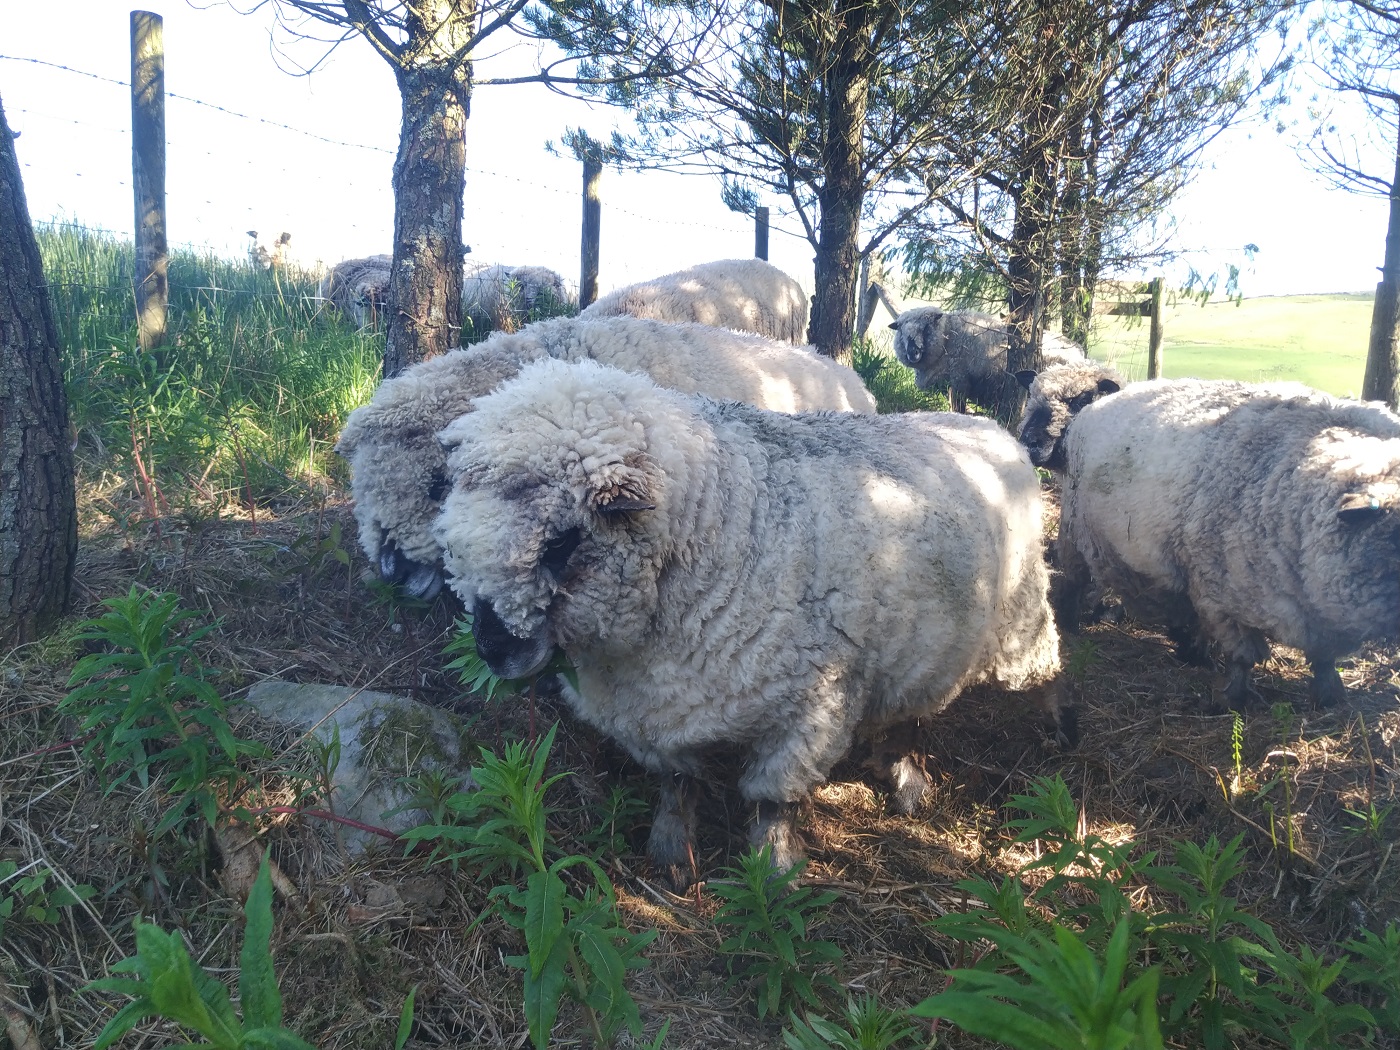
The chicks are the bravest, they come in quite close albeit under the watchful eye of their mum. The chicks haven’t learnt about danger yet so we’re keeping our eye on them too. There is a lot at stake so we’re taking the hen training slowly and carefully.
We’ve been repeating this daily and each day we’ve been able to bring the hens in a tiny bit closer.
week three
It’s slower progress than the sheep training, but we’re confident we’ll get there. So far Elliot has been calm and not shown the wrong kind of interest in the hens. And the hens have been learning that Elliot isn’t a threat.
We’ll write another blog post with a progress update soon.
I often get asked how I get my white rugs so clean so I thought it might be helpful to all you woolly crafters out there, if I shared my hints and tips with you.
Most of the rugs I make come from Scotch Mule fleeces. The Scotch Mule is traditionally creamy-white in colour with long, silky curls. I’m a real sucker for a soft, white cloud of a rug so my fleece shed is unsurprisingly full of delicious, creamy, curly locked fleeces. Unfortunately, as with most fun things in life there’s a drawback, lighter coloured fleeces take a lot of work to clean up. Every speck of dirt shows and I don’t have an industrial set up here, it’s just me, soap and water.
fleece shed
While the natural look is a huge part of the beauty of these rugs, I like to strike a balance between keeping the wool looking as natural as possible while at the same time encouraging it to look its very best. The look I prefer is a mixture between natural beauty and “just stepped out of the salon”.
Happily, having made a lot of white rugs over the years I’m pleased to say that I’ve learned a few tips along the way which I can’t wait to share with you. Read on to find out about how to clean up a white fleece and get your rug looking absolutely gorgeous.
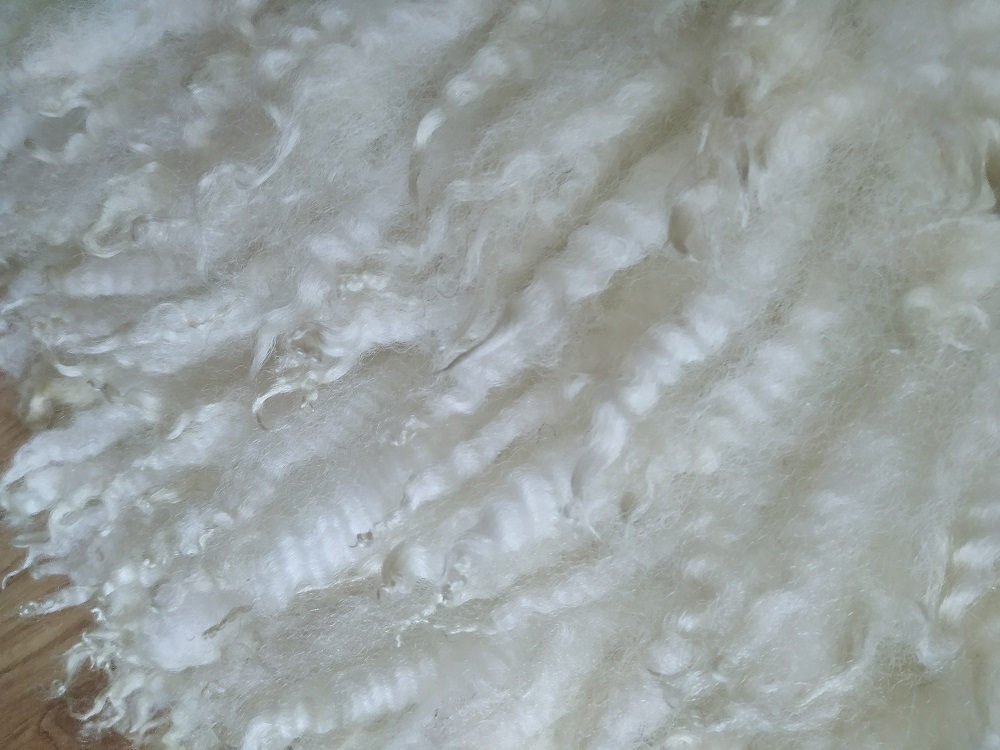
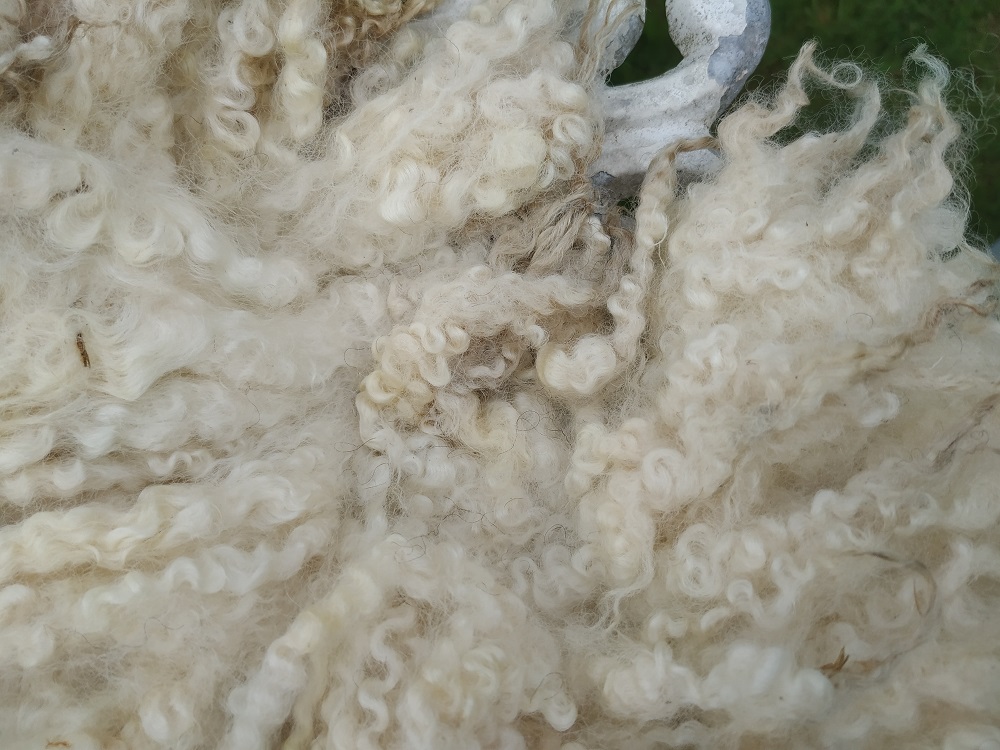
First and foremost, how the rug turns out depends largely on the quality of the wool that you start out with.
But let’s imagine you have a decent fleece. It’s raw and lovely, full of lanolin and has that yummy sheepy smell about it. There are dags here and there and some matted wool around the edges, but you can see it has lots of potential and would make an amazing rug.
raw fleece
Now let’s imagine you’ve skirted the fleece and removed the matted and daggy wool. You’ve picked out a lot of the vegetable matter (moss, seeds, straw etc). You’ve felted it and made it into a rug.
It’s time to sit down and put your feet up.
Sorry, what I meant to say was, it’s time to roll your sleeves up and do some more work 😉
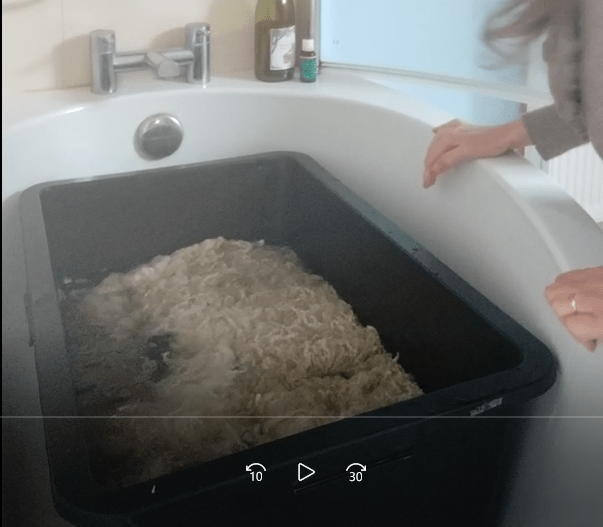
Firstly, you’re going to remove the lanolin by a process called scouring. A lot of lanolin will have come out in the felting, but there will still be lots left. It’s important to remove it because it attracts moths and you wouldn’t want moths gobbling up your rug after all that hard work.
Scouring
Put the rug to soak in very hot water (at least 60’c) with a normal laundry detergent, not a wool one yet, this comes later. You’ll want a detergent which is slightly alkaline to open the wool fibres and get them clean. Don’t agitate the rug, just leave it to soak for 20 minutes. The main purpose of the hot wash is to remove the lanolin and to kill any moth eggs that might be lurking in the wool. Hint, it’s important to take the fleece out of the hot water after 20 minutes and no later. If you leave it in any longer, the water will start to cool down and the lanolin will harden up and stick to the fleece again. Repeat the hot soak if necessary, (once, twice, three times … use your discretion depending on how much dirt and lanolin there is in the wool). The rug is ready for the next stage once the run-off water starts looking clearer. The run-off won’t be crystal clear at this point, but neither will it be a dark murky brown as it was earlier on.
Wool wash
Next, fill your bathtub with lukewarm water (no hotter than 30’c), add a squirt of wool/silk laundry detergent, lay your rug in the water face down and allow to soak for an hour or so. Feel free to swish the rug around a little to loosen up any bits of dirt. Rinse in cool water with a slosh of cider vinegar (or white vinegar) until the water runs clear. Add some drops of lavender oil to the final rinse water as a moth deterrent. Alternatively, put the rug into the washing machine on the wool cycle at 30’c. Make sure you use a wool/silk laundry detergent and never use fabric conditioner/softener. Instead, pour some vinegar (about 15mls) into the rinse drawer with a few drops of lavender oil. Wool really loves a vinegar rinse, it helps to get rid of soap residue and it brings the pH back to wool’s preferred state which is slightly acidic.
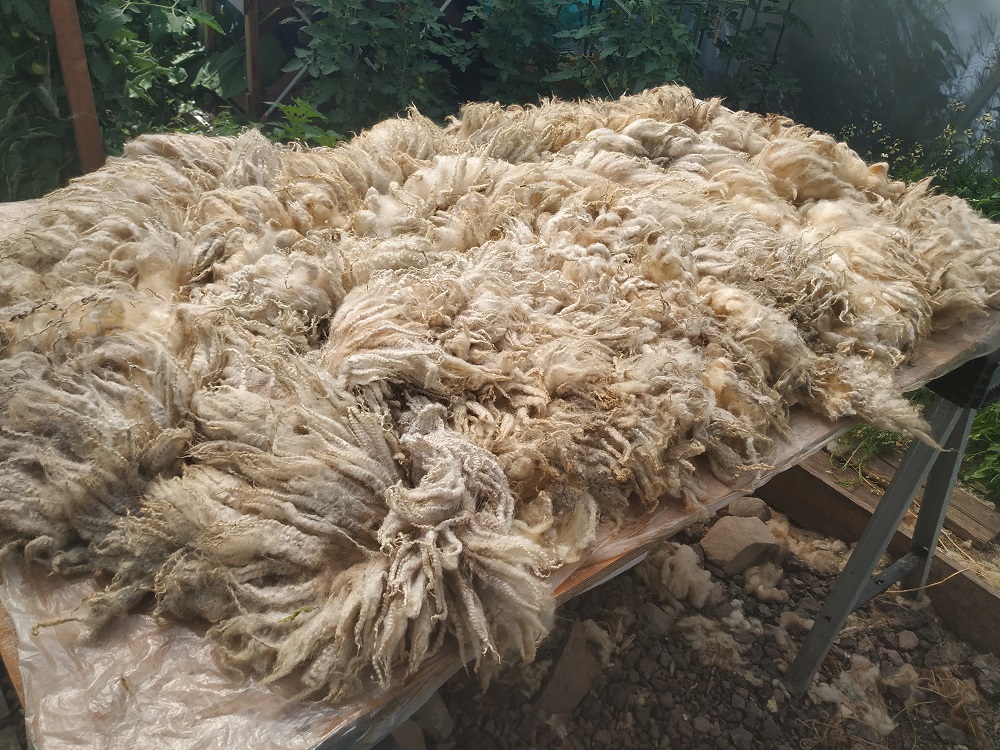
Once the rug is washed and rinsed, lay it flat to dry, curls facing upwards.
rug drying in the sun – pre quality control & beautifying
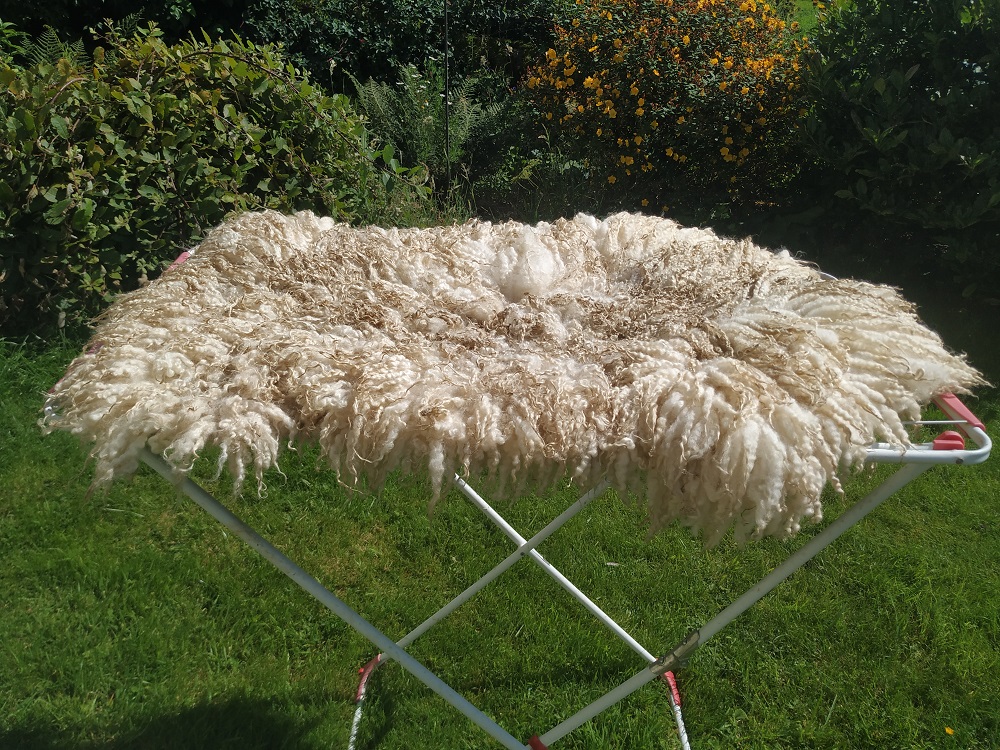
Beautifying
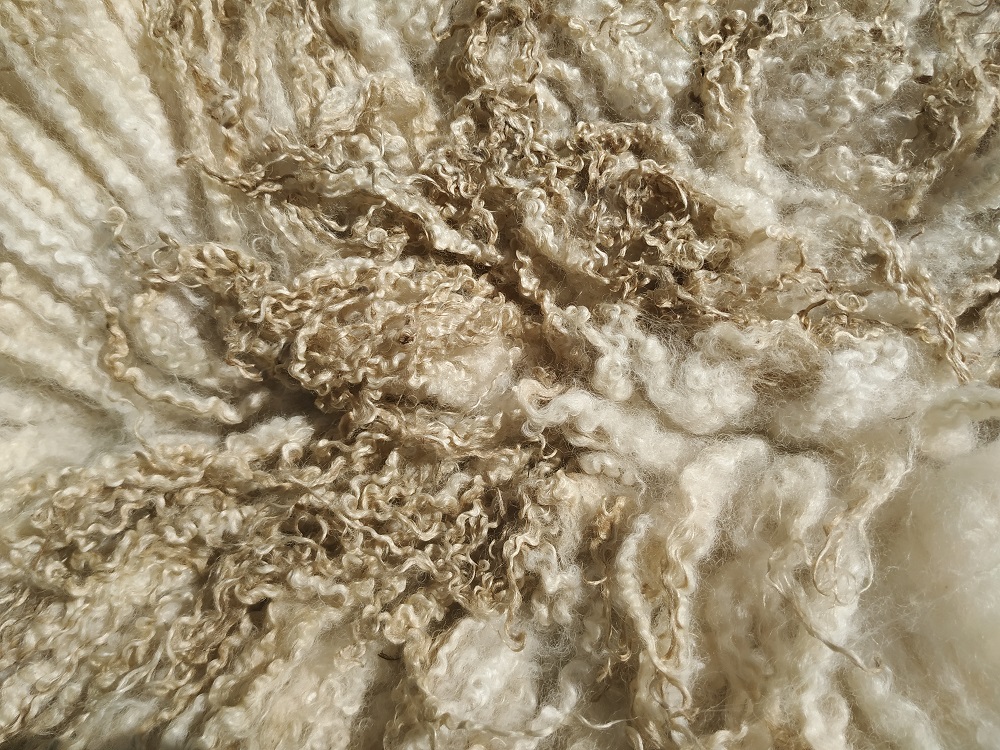
Once the rug is dry it’s time to check it over, make sure everything’s in place and remove any remaining bits of moss, seeds etc. You may be wondering at this point why your rug doesn’t appear as clean and fluffy as you had imagined it would be after all that washing. You might even think it looks a little grubby and seems a little sorry for itself.
Welcome to “the ugly duckling stage”. 🐣
Fortunately there is a simple explanation for this and a beautiful swan will emerge very soon. The wool is actually much cleaner than you think, but because the lanolin has been washed out it is lighter in colour now. This means that any dirt lingering in the tips of the curls (which is where it likes to linger), is very noticeable in comparison with the rest of the wool.
The other thing that you’ll notice is that a lot of the wool is flattened down. This is perfectly normal and nothing that can’t be fixed.
So, what can be done about those grubby tips and those squashed down locks?
Well first of all it depends on what type of fleece you have.
If for you have a fine woolled fleece, like my favourite Scotch Mule for example, the wool will need very different treatment to a coarser woolled fleece, like say a Herdwick or a Welsh Mountain.
I will leave courser wools for another day, but for fine wools read on to find out how to get your rug looking fabulous:
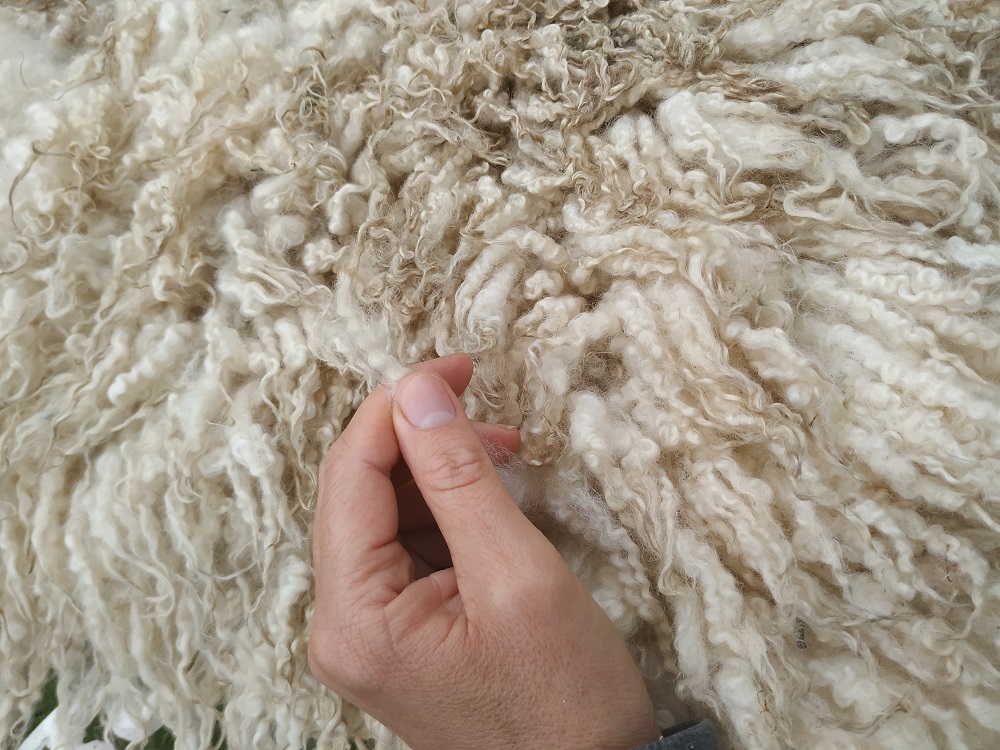
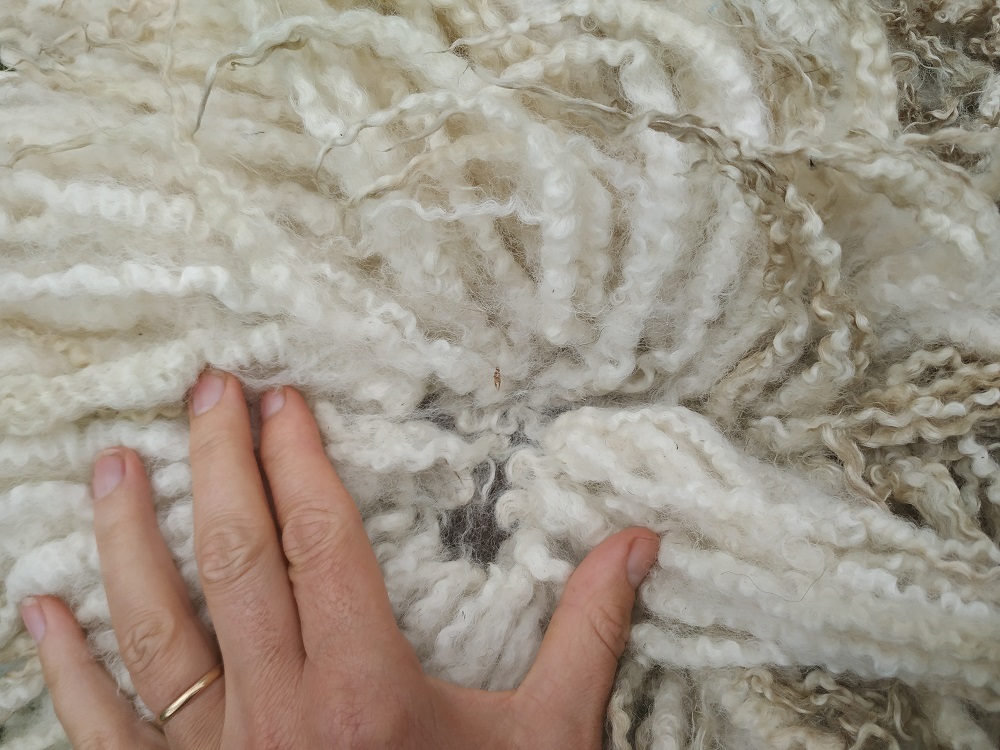
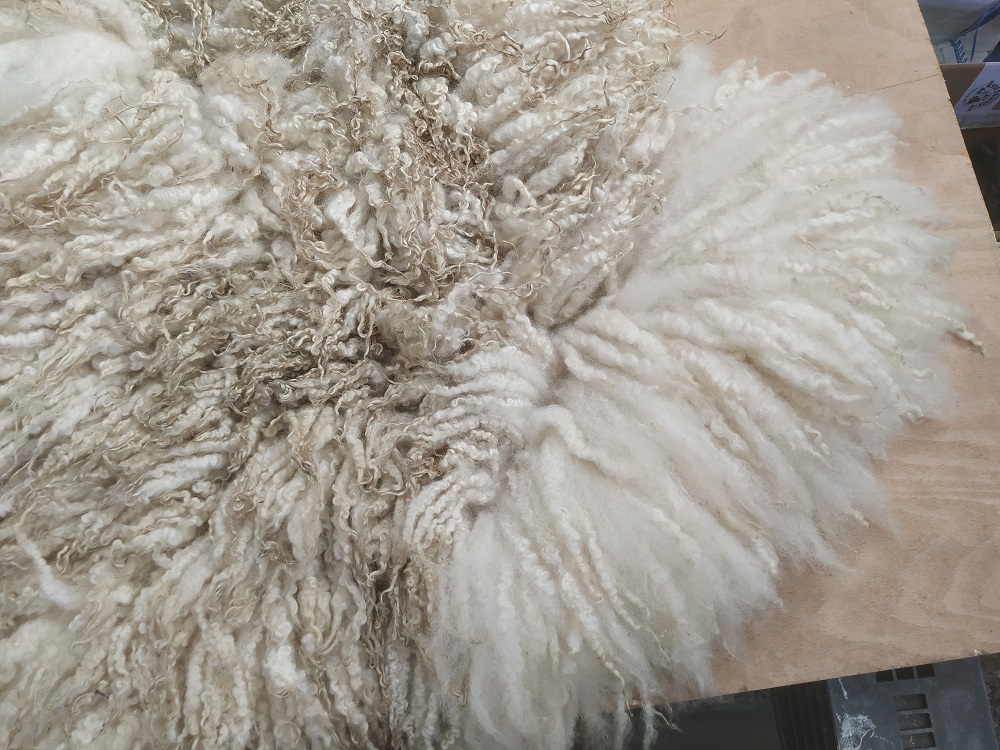
Make sure the rug is completely dry, set aside several hours, and start to work through the wool methodically. I call this process “preening”.
going through and checking the curls little by little
Take a little curl and run it between your finger and thumb from the base to the tip. This serves several purposes:
You’re making sure that each and every curl has felted in properly and there are no bald spots. If you find curls which haven’t taken or a bald spot, this can be remedied using a needle felting tool and popping the curl back into place.
You’re making sure each curl is standing upright and not squashed flat. If you find any flattened down curls, simply tease them up again.
some curls will be squashed flat
You’re checking that the curls aren’t getting over friendly with their neighbours. In the felting and washing process the curls can bunch up a bit so just separate out any clumps you come across.
some curls might be clumped togetheryou might find a bald spot which will need fixing
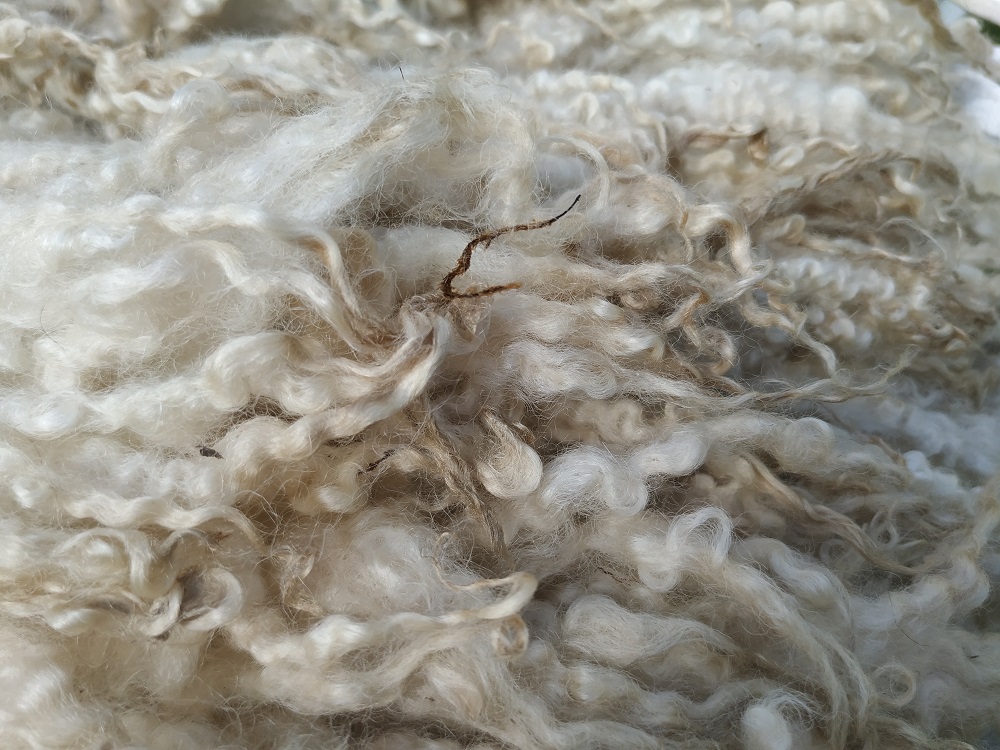
You’re removing crispy tips. Sometimes, depending on the fleece you’ll come across crispy tips, (exactly like dry ends on hair). Afterall, the fleece has been on the sheep for a whole year so it’s not surprising there may be a little patch of dry and damaged wool here and there. These crispy tips are dead wool so can be easily pulled off.
some curls might have crispy tips
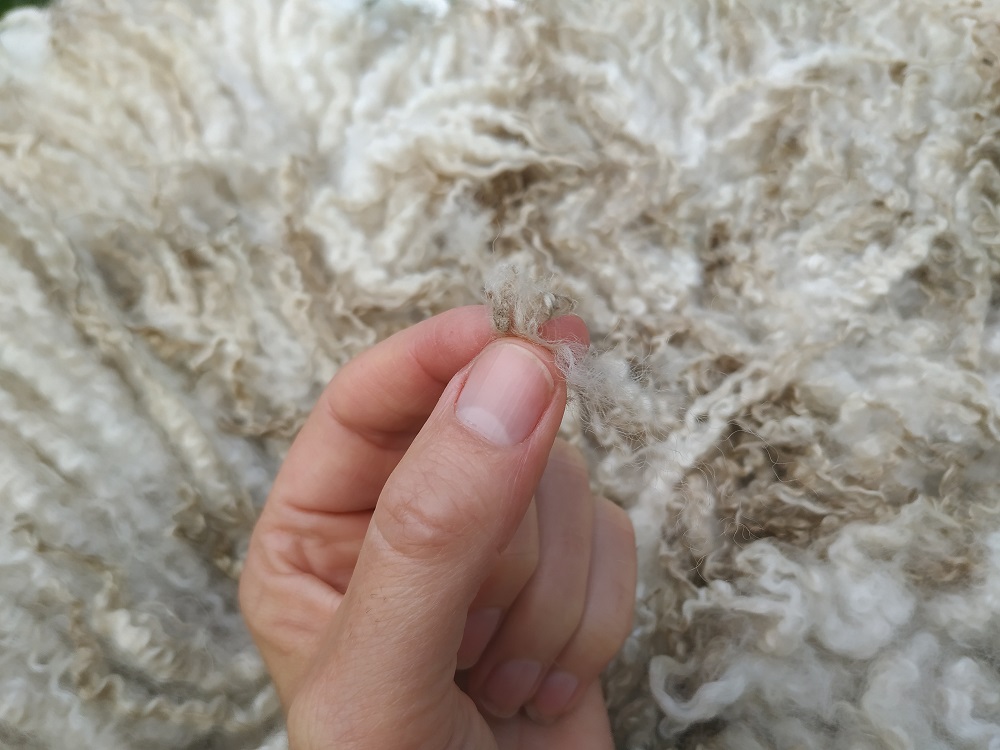
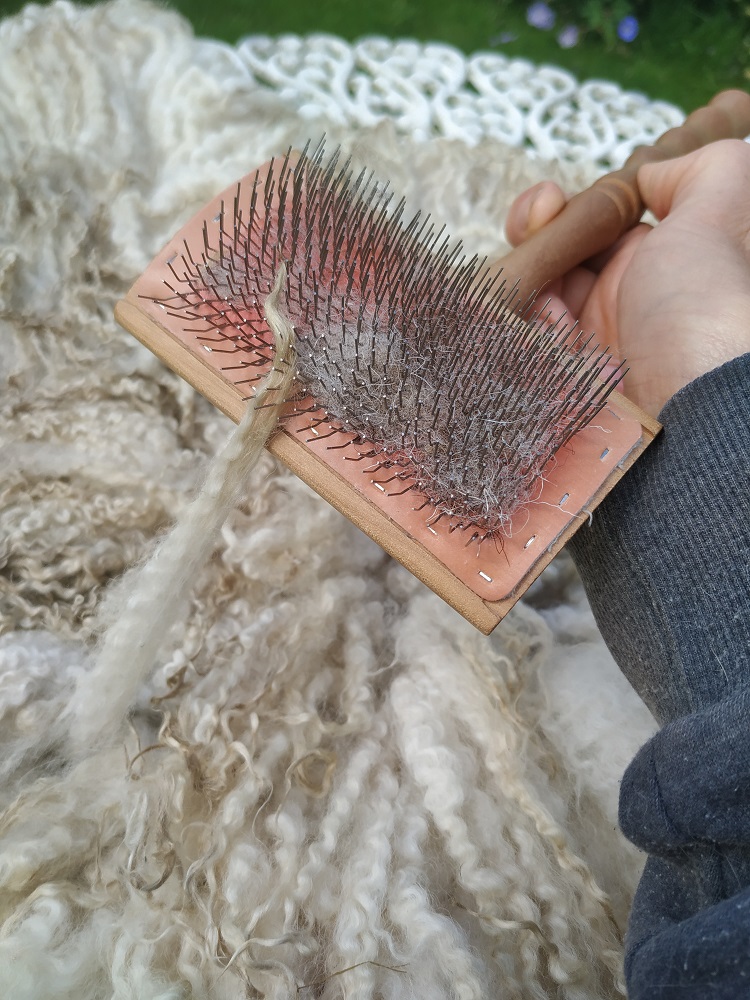
You’re teasing out dirt from the tips. Dirt tends to linger in the tips and no amount of washing seems to remove it. It needs to be manually removed with your fingers. Gently separate the strands of wool at the tips and then “rake” out the dirt with your finger and thumb. You could brush out the tips if you prefer but be sure to only brush the very tip, not the whole curl. You want to keep the curl intact and brushing would destroy it.
pulling off a crispy tip
You’re removing any remaining bits of vegetable matter. You’ll find that even after all that felting, washing and rinsing there will be little bits of grass, seeds and moss hiding away in the wool fibres. Part of the beautifying process is removing these remaining bits of meadow sprinklings.
brushing the tip to remove dirt
bit of moss hanging on even after being washed
All this takes several hours but as you work through the fleece and see the wool transform before your eyes you’ll see how satisfying it is.
making progress
Optional stage – second wash
Sometimes the preening can dislodge bits of dirt and you might feel the rug would benefit from another wash. If this is the case, pop it back in the bath or the washing machine (wool cycle) as before. If you handwash it, don’t forget the vinegar rinse.
Optional stage – Hair conditioning soak
Sometimes the preening can leave the wool a little fluffy. Or you might just decide to give your rug a special treat. Either way, a soak in hair conditioner really brings up wool looking and feeling its best. Here’s what to do: Fill your bathtub with lukewarm water, add a generous dollop of SLS and paraben free hair conditioner. Leave it to soak for an hour or so. Rinse in cool water (with a dash of vinegar and some drops of lavender oil) as before. Do not wring, gently squeeze out the water and leave flat to air dry curls facing upwards.
soaking in hair conditioner
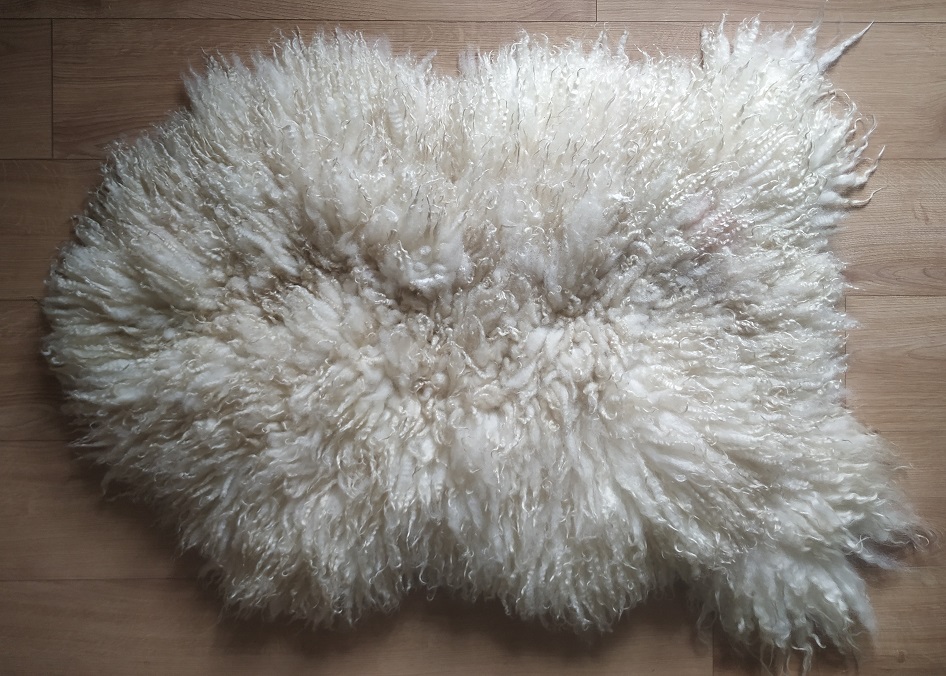
The moment you’ve been waiting for …
After a couple of days or so depending on the time of year, your rug should be dry and you can do that thing that you’ve been wanting to do ever since you first washed it. You can shake it out like hair in a shampoo ad and admire it and feel proud of yourself for putting in all those hours of work beautifying the wool. “Ta daa!”